Transform Data
Today, we're diving into the Transform Data node, a versatile tool for reshaping information between different parts of your workflow. We'll cover its three core modes: Auto Detect, JSON Parse, and Custom Code, each designed to efficiently clean and normalize your data.
Transform Data Demo Overview
Let's walk through the Transform Data node, which offers a clear interface for managing your data transformations. At the top, you'll find the Input Source field, where you specify the variable you intend to transform. Below this, three distinct buttons—Auto Detect, JSON Parse, and Custom Code—allow you to select the appropriate transformation mode. The form dynamically adjusts based on your selection, and each mode includes an Output Preview tab, enabling you to visualize the resulting data structure before finalizing your changes.
Introducing the Transform Data Node
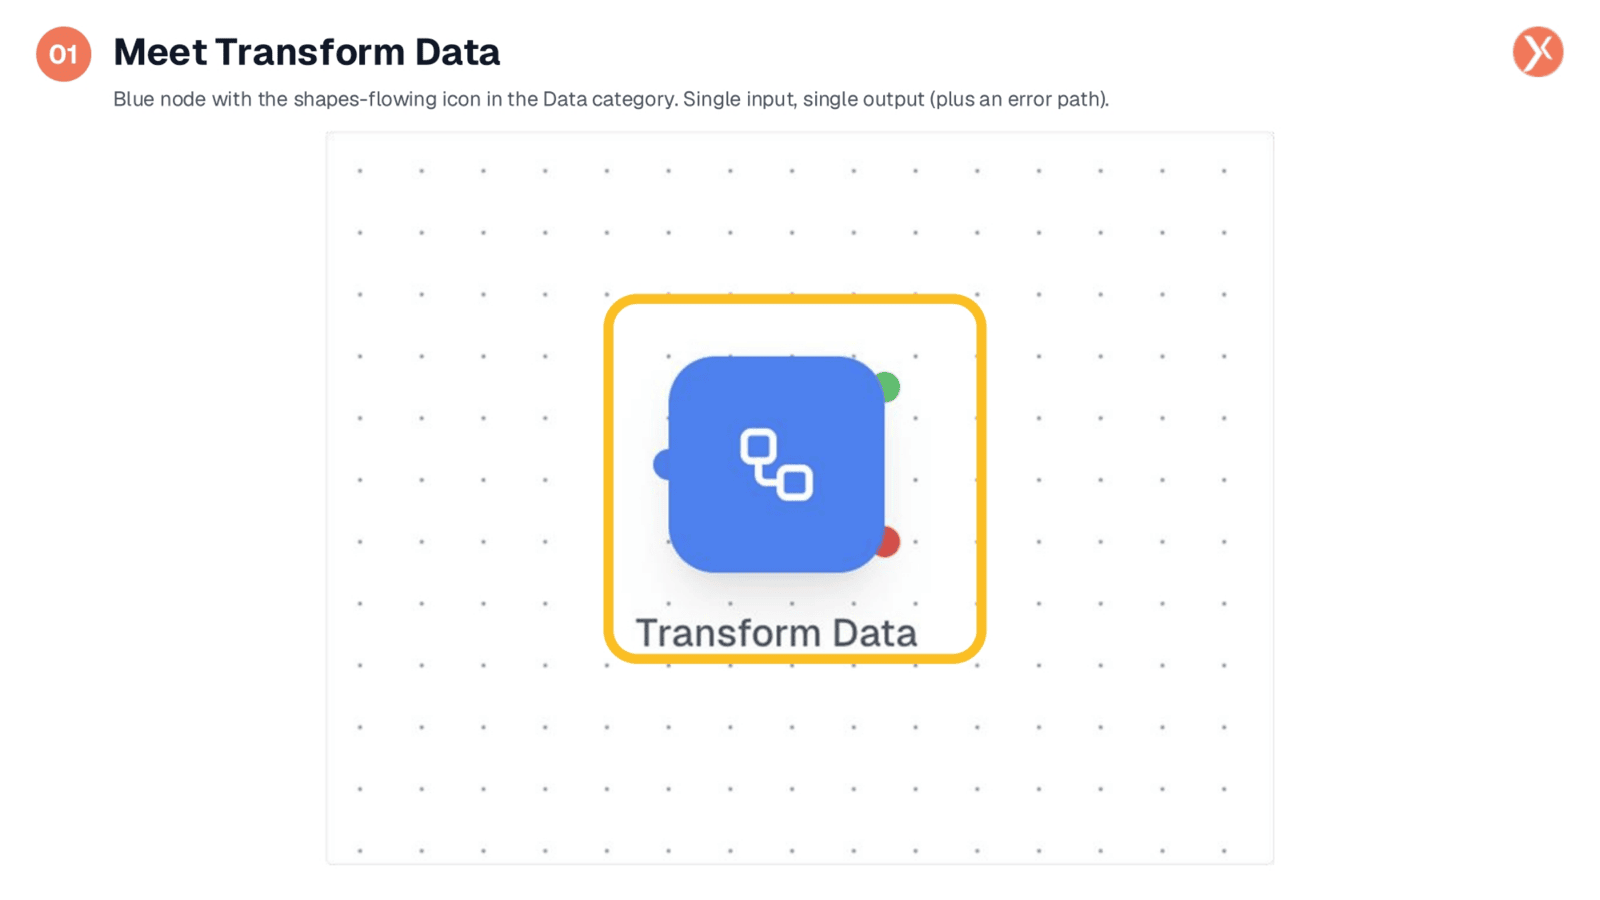
The Transform Data node is easily identifiable by its blue color and shapes-flowing icon, placing it within the Data category of the Node Palette. It features a single input and output, along with an automatic error path for robust handling. This node is ideal for placement after any component that generates raw or unformatted data, such as a database query, an LLM response, or an API call. It acts as essential plumbing, ensuring data is cleaned and correctly shaped before being consumed by subsequent nodes in your workflow.
Exploring Transform Data Modes
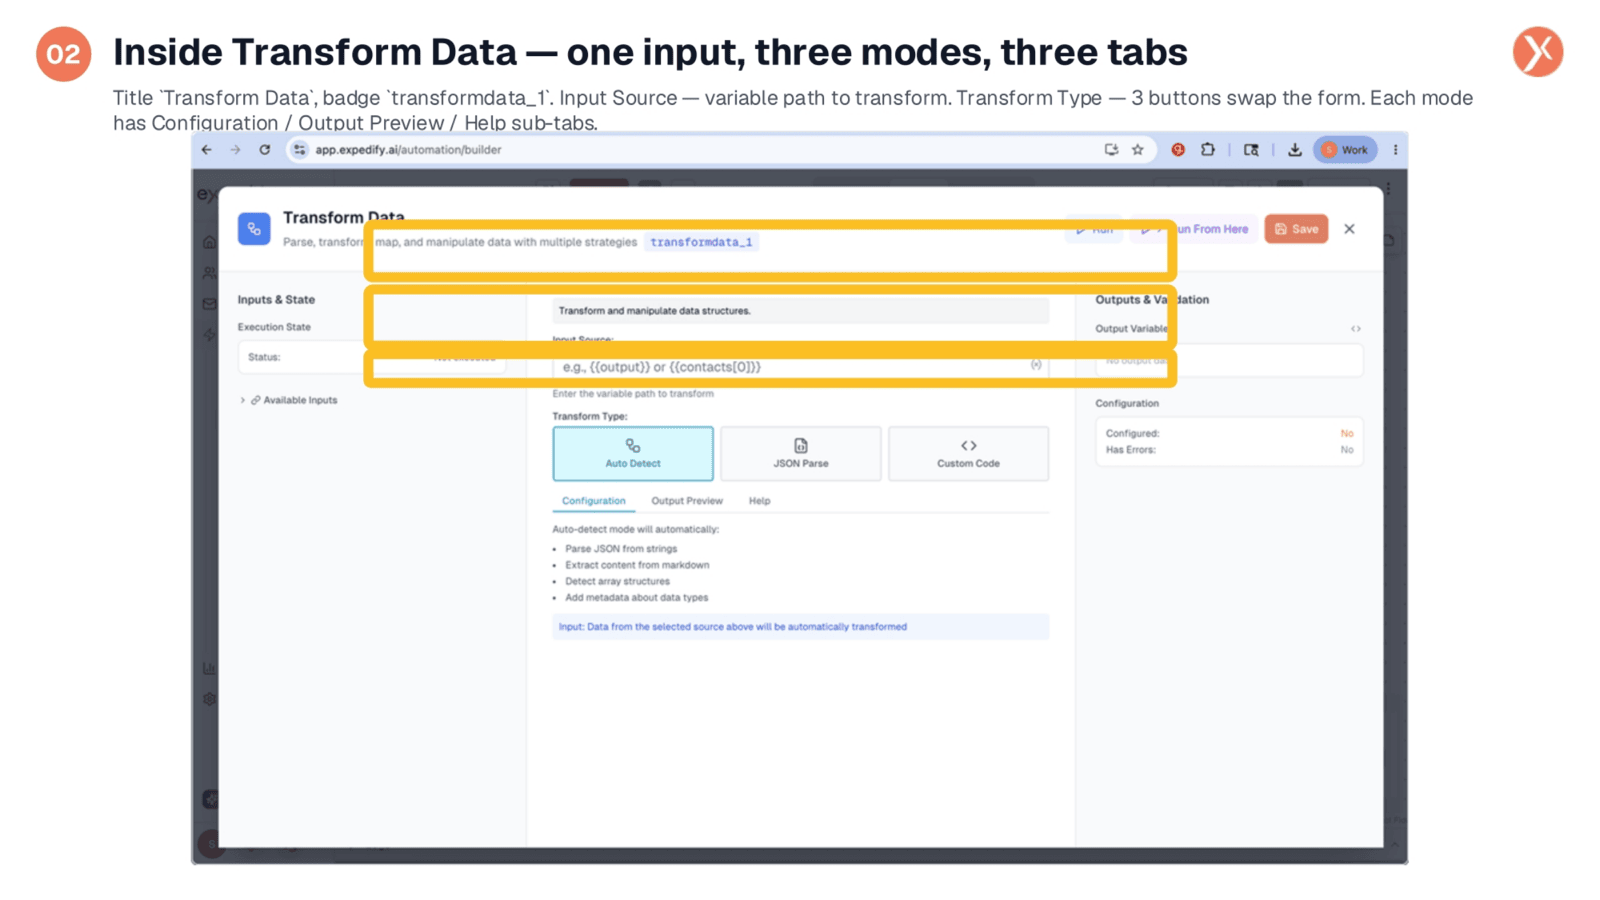
Upon opening the Transform Data node, you'll see its title and the transformdata_1 badge, which defines its namespace. The panel is structured with three key areas. At the top, the Input Source field allows you to specify the variable for transformation using a template syntax. Below this, three prominent mode buttons—Auto Detect, JSON Parse, and Custom Code—enable you to select your desired transformation method, dynamically updating the form. Each mode also includes Configuration, Output Preview, and Help sub-tabs, providing comprehensive control and guidance.
Defining the Input Source
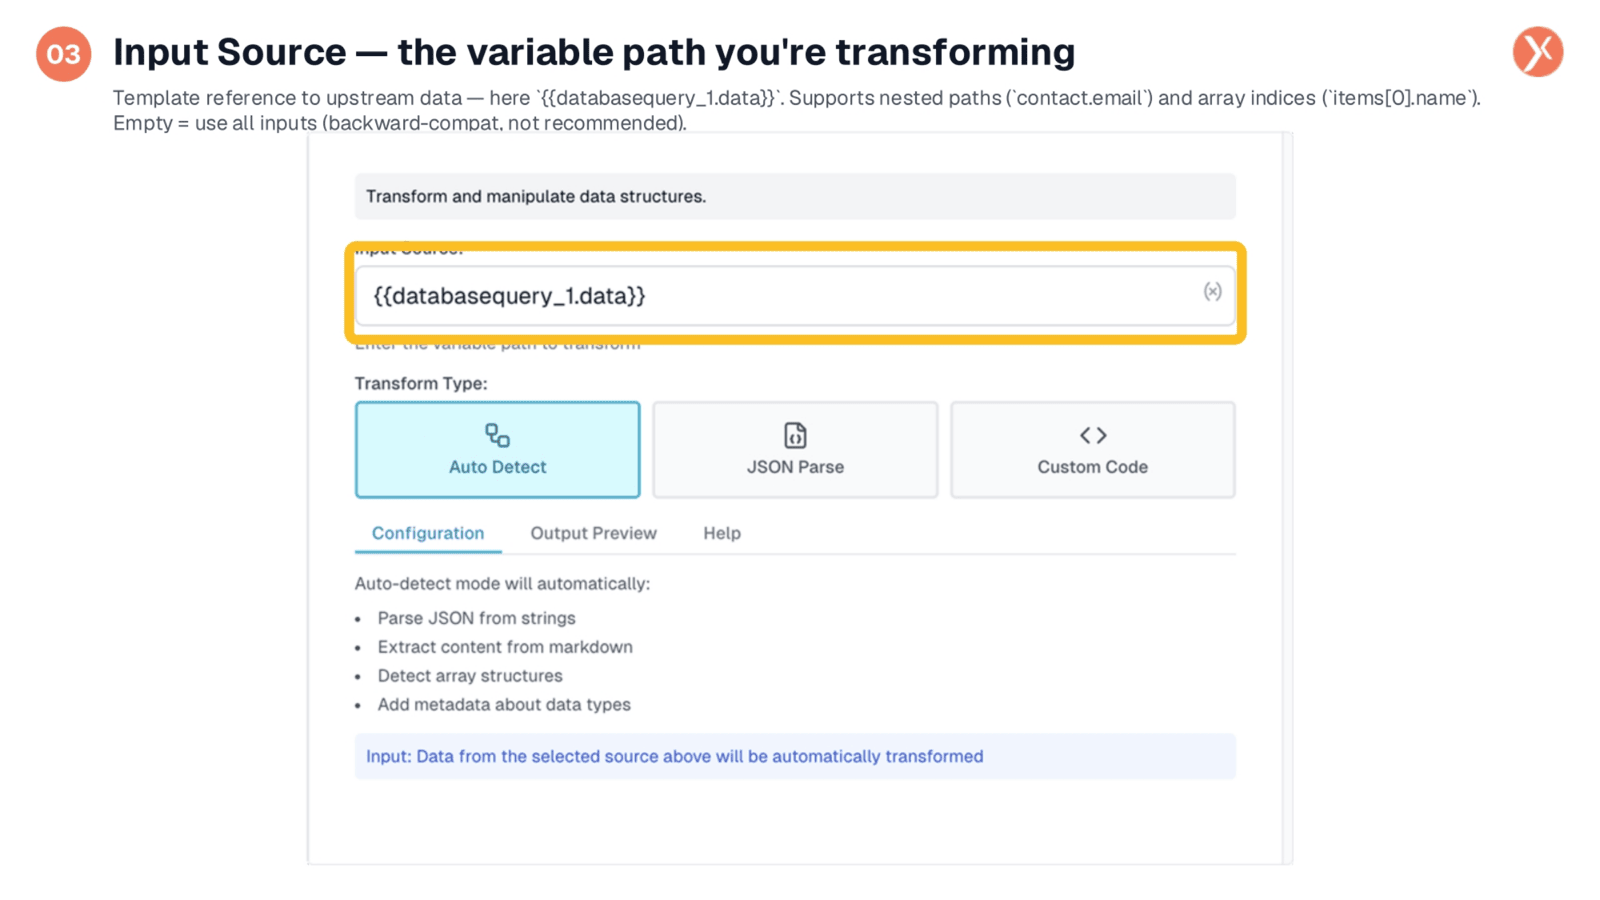
The Input Source field is where you define the specific variable path you intend to transform. This typically uses a template reference, such as databasequery_1.data, consistent with the syntax used throughout the builder. It supports complex references, including nested paths like contact.email and array indices such as items[0].name. While leaving it empty attempts to transform all upstream inputs, it's strongly recommended to be explicit and point to one specific item. A clear input source directly contributes to a cleaner and more predictable output.
Auto Detect: Smart Parsing on Autopilot
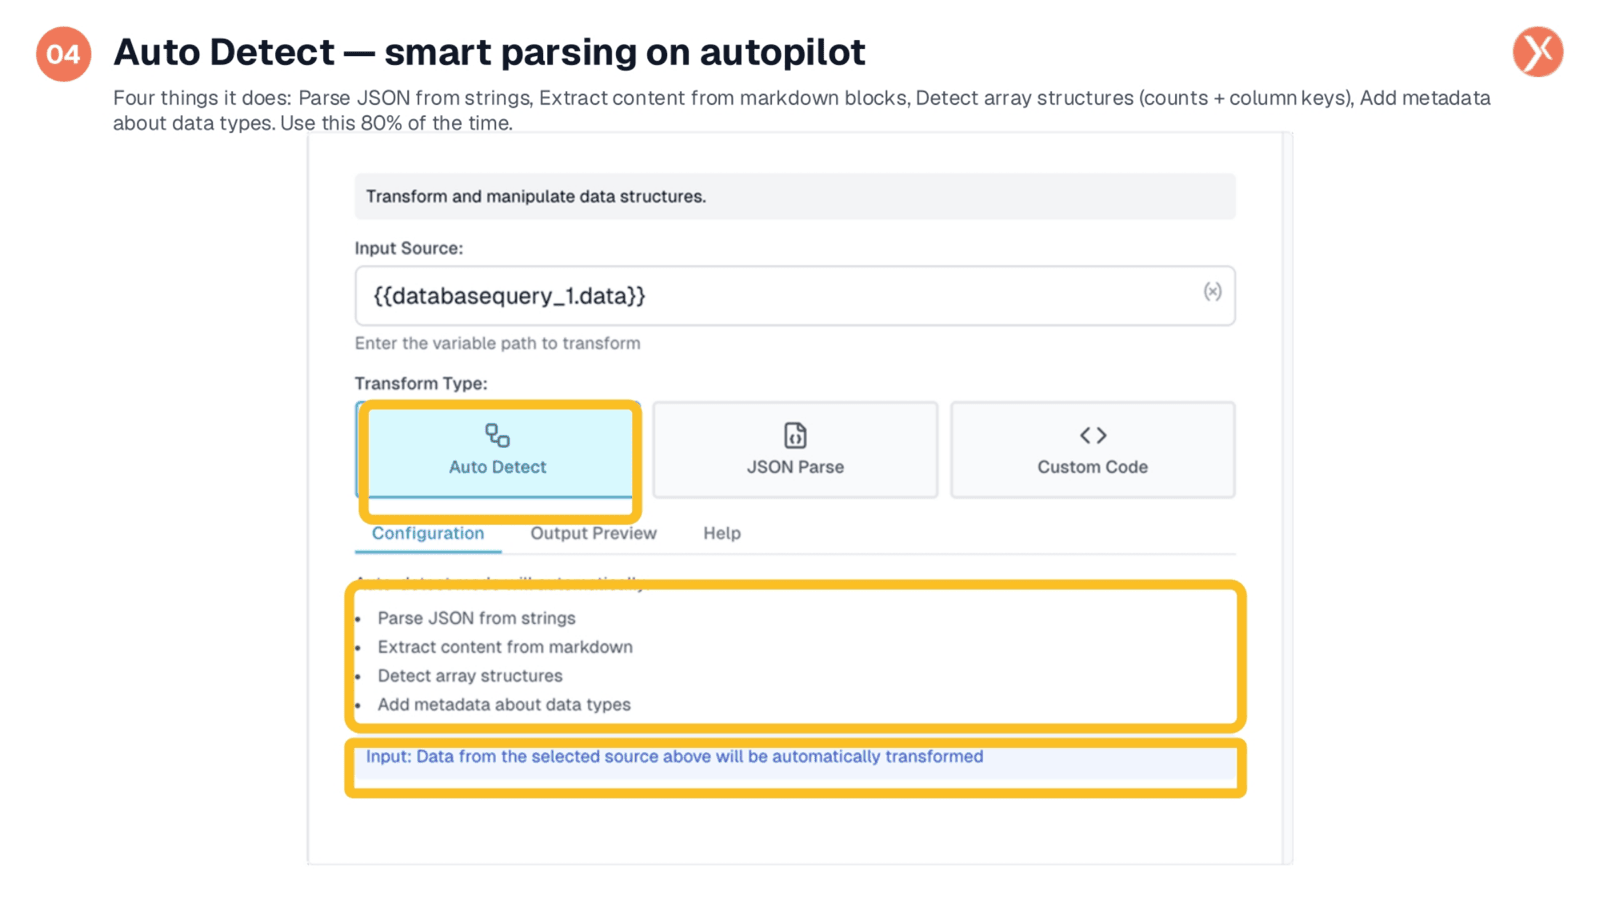
Auto Detect is the default and most frequently used mode, offering smart parsing on autopilot. It automatically performs four key functions: parsing JSON from strings if the input resembles a JSON object or array, extracting content from markdown blocks, detecting array structures by counting rows and listing accessible column keys, and adding metadata about data types to each field. This provides rich, structured output without requiring manual configuration, making it highly efficient for common transformation needs.
Switching to JSON Parse Mode
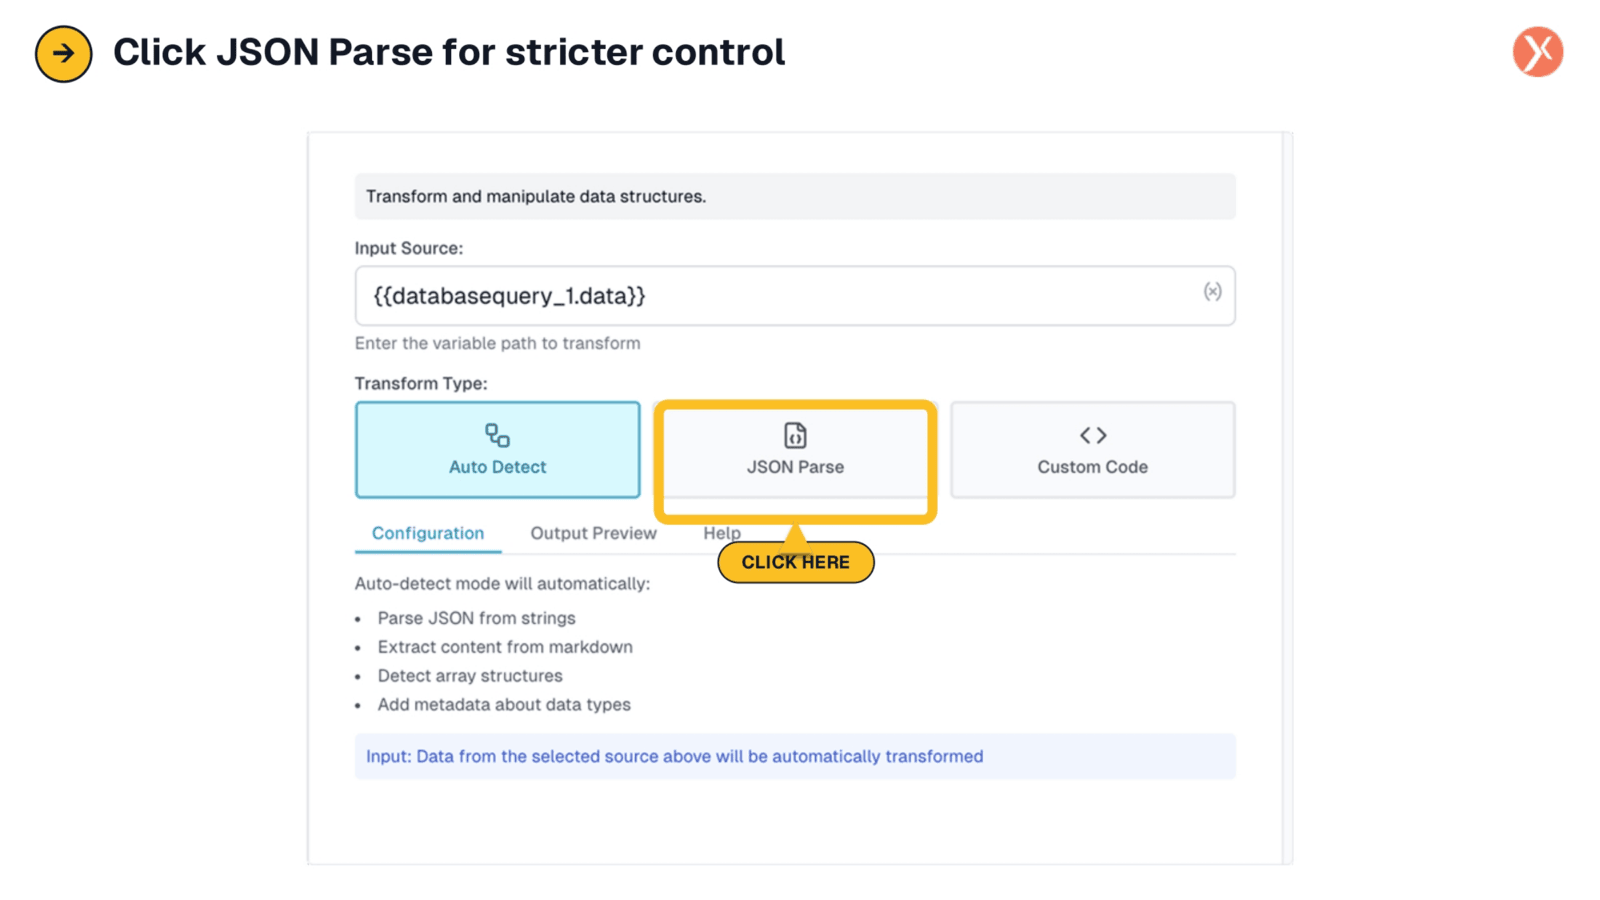
When your data requires more precise and explicit JSON parsing, you can switch to the JSON Parse mode. This option provides stricter control over how JSON structures are interpreted and processed. It's particularly useful for scenarios where you need to ensure data integrity and consistency, especially with inputs that might be less predictable or require specific handling beyond what Auto Detect offers.
JSON Parse: Robust LLM JSON Unwrapping
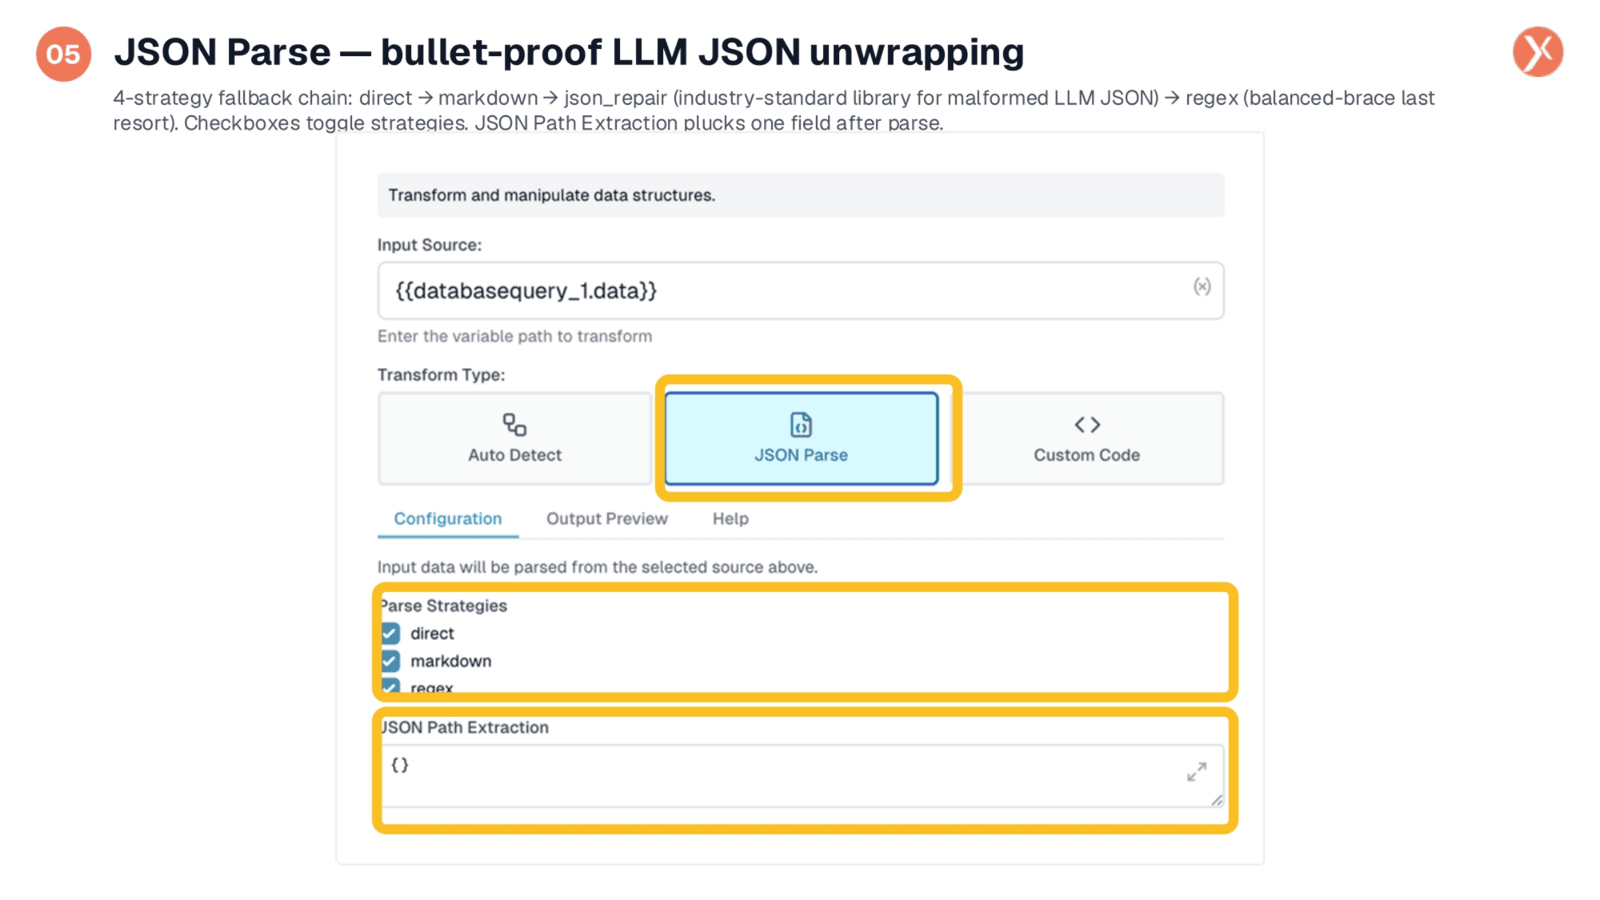
JSON Parse mode is designed for bullet-proof JSON unwrapping, especially crucial for handling messy LLM responses. It employs a four-strategy fallback chain: first, a direct parse for clean JSON; then, markdown extraction for JSON within code blocks; followed by json_repair, an industry-standard library for correcting common LLM errors like missing quotes or trailing commas. As a last resort, it uses regex for balanced-brace extraction. You can toggle these strategies with checkboxes, and JSON Path Extraction allows you to pluck a specific field from the parsed result.
Output Preview: Visualize Your Data Shape
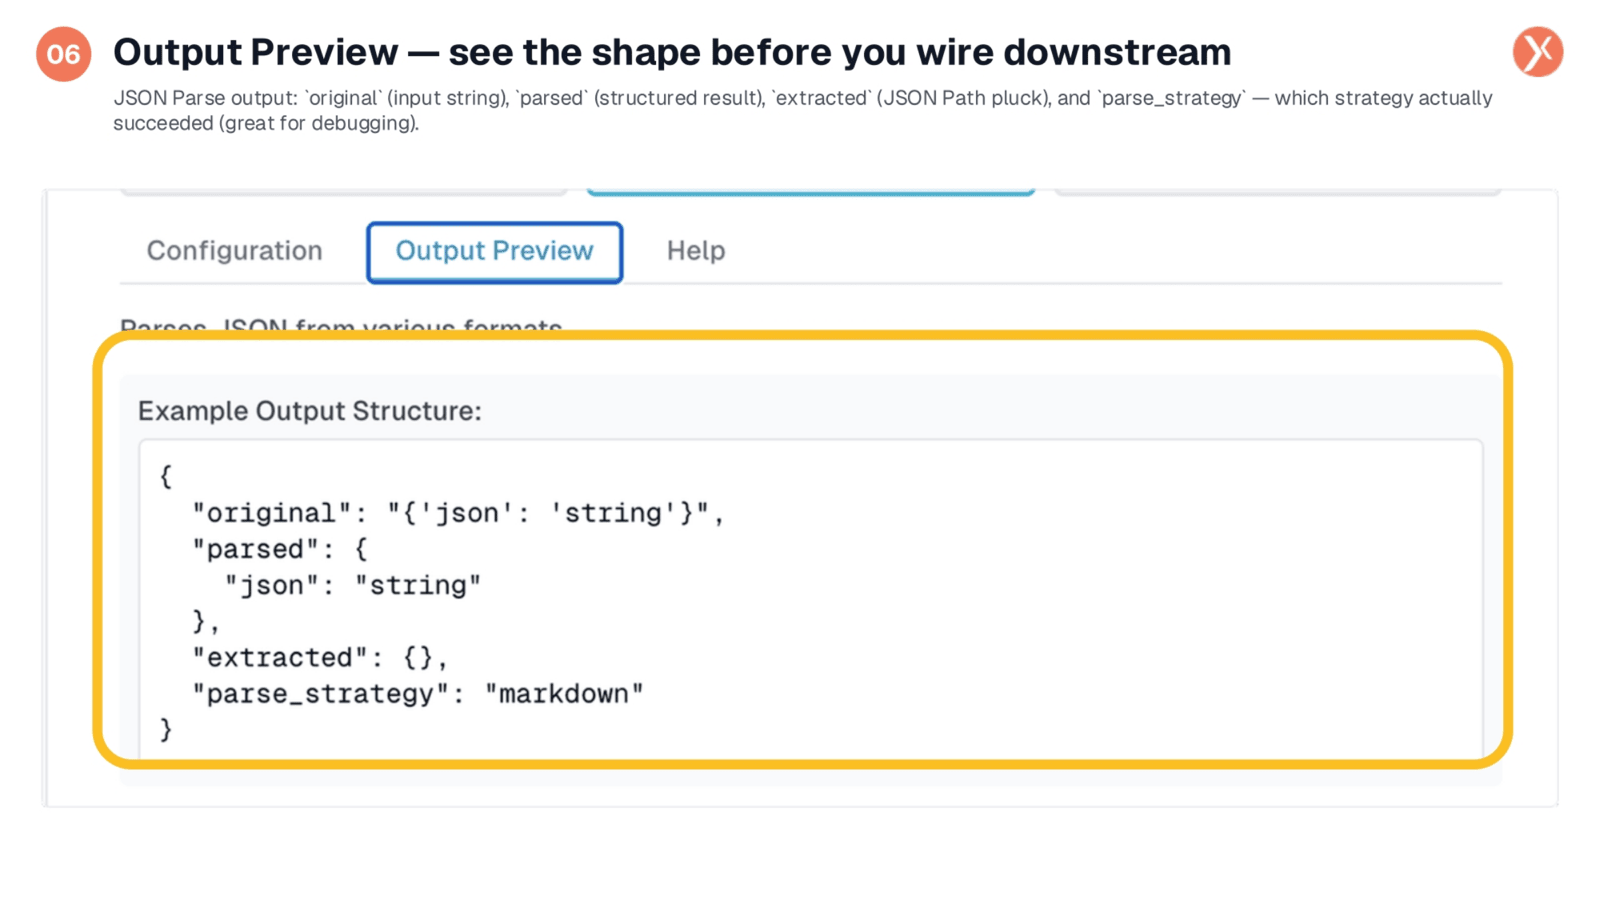
The Output Preview tab, available in every mode, is essential for visualizing the data's shape before wiring it downstream. For JSON Parse, it displays the original input string, the parsed structured result, and any extracted data if JSON Path was used. Crucially, it includes parse_strategy, indicating which of the four parsing methods successfully processed the data. This is invaluable for debugging; if regex appears frequently, it suggests your upstream input might need cleaning. Always review the Output Preview before saving your configuration.
When to Use Custom Code
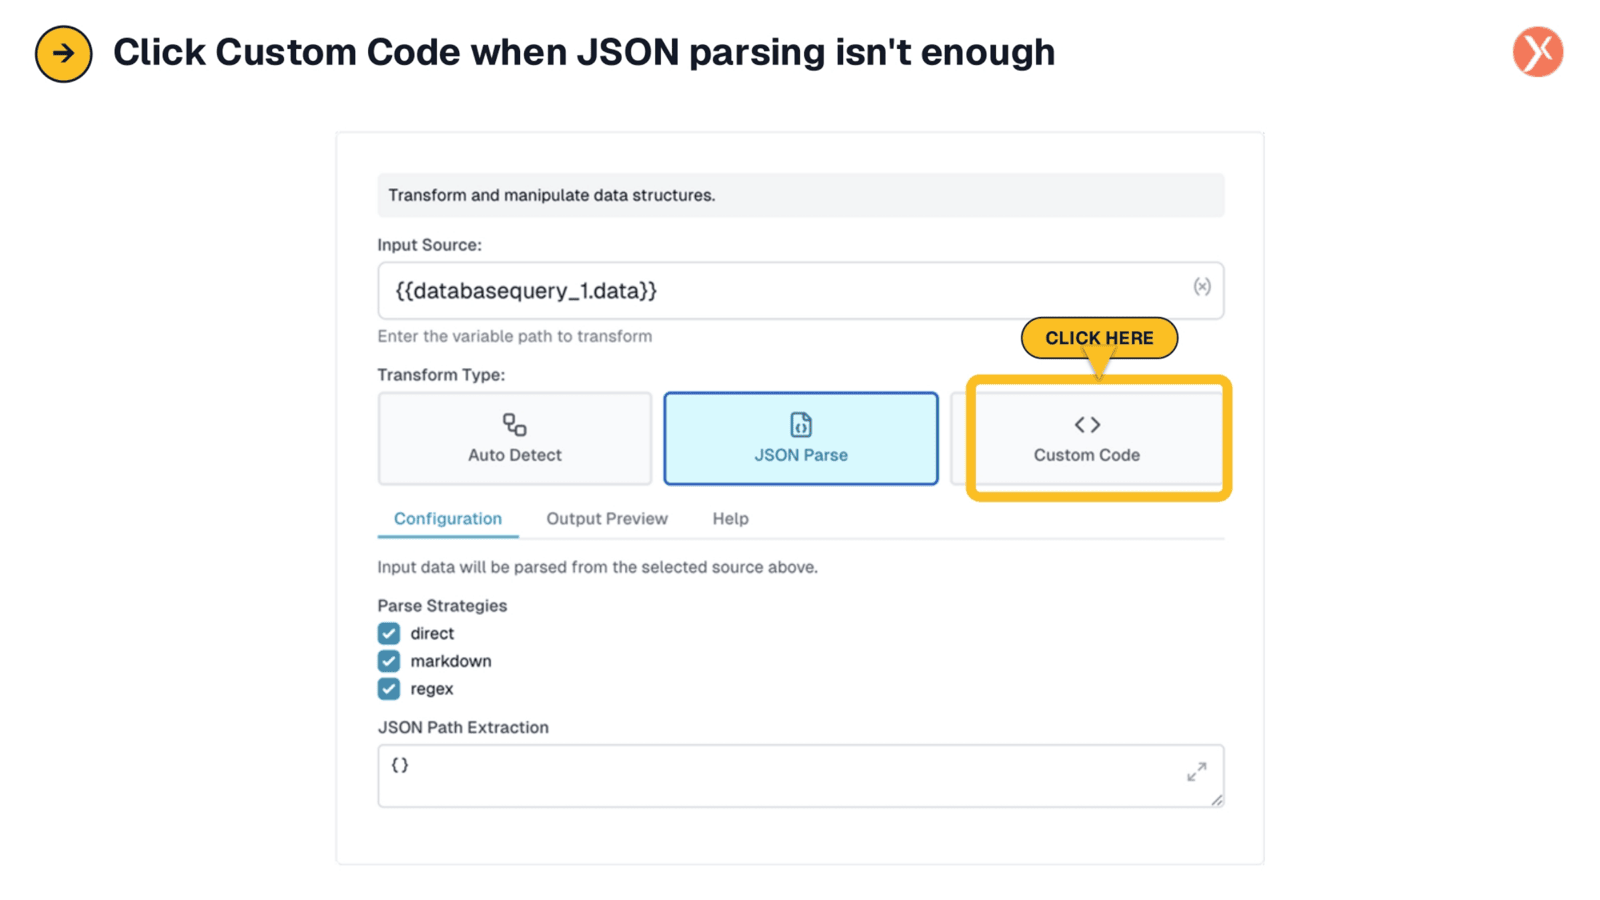
When the built-in JSON parsing capabilities aren't sufficient for your specific data transformation needs, you can switch to the Custom Code mode. This option provides the flexibility to implement arbitrary Python transforms, allowing you to handle complex logic or unique data structures that require custom scripting. It's your go-to solution for scenarios where standard parsing methods fall short, giving you complete control over the data manipulation process.
Custom Code: Python In-Place
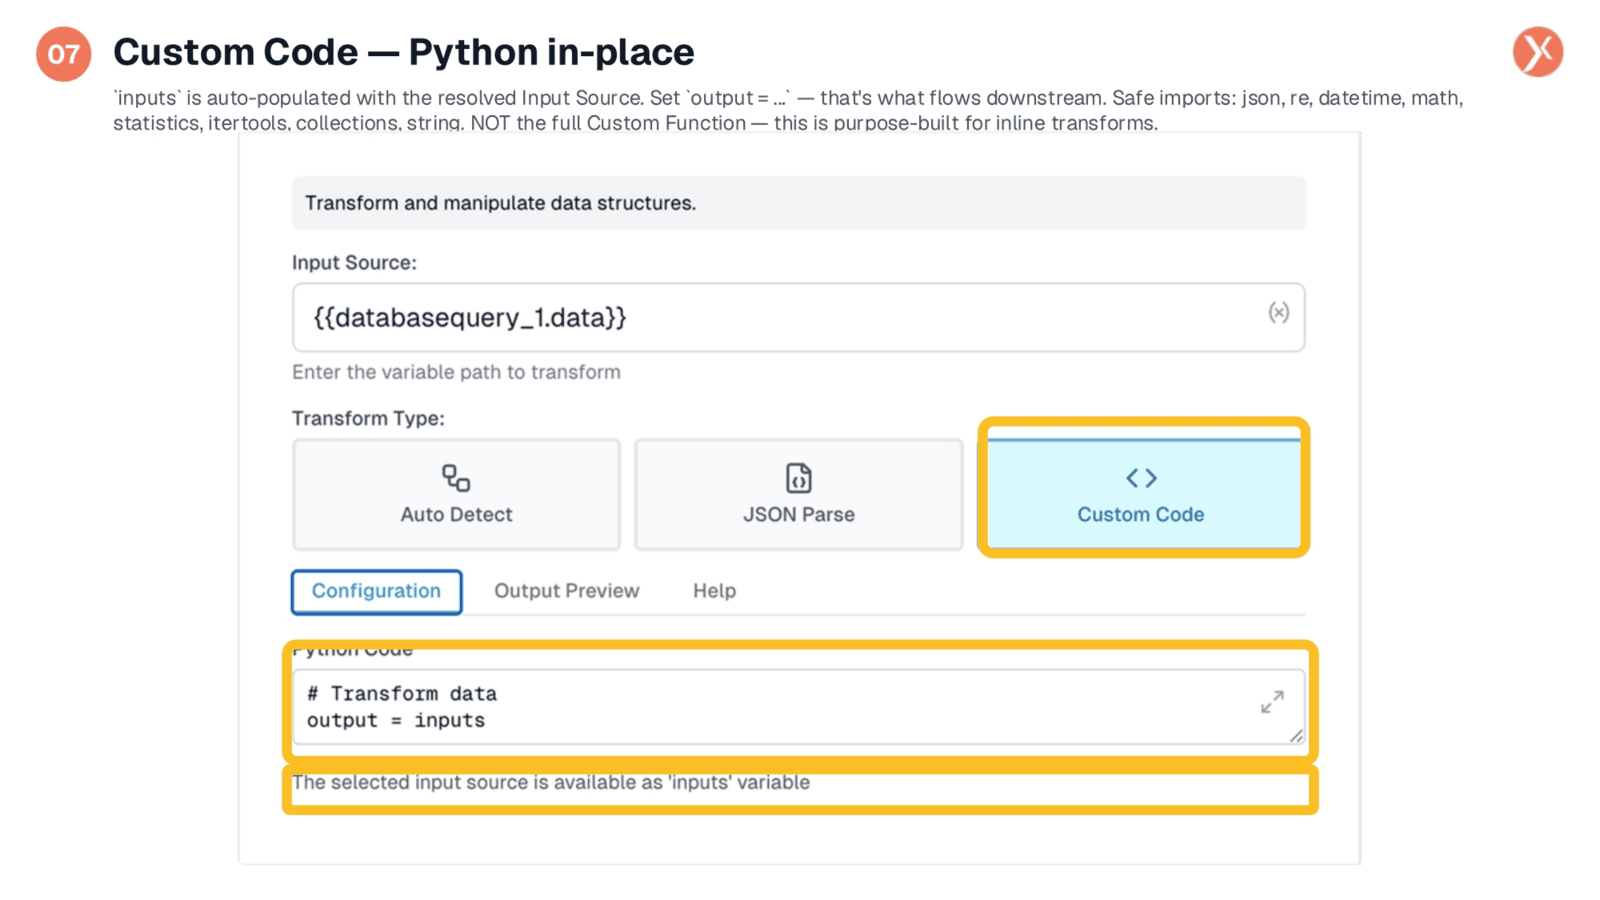
In Custom Code mode, you'll find a compact Python editor where the inputs variable is automatically populated with your resolved Input Source. You define an output variable, and its value is what flows downstream. This mode supports essential standard libraries like json, re, datetime, math, statistics, itertools, collections, and string. It's important to note that this is a lighter, in-place transform, distinct from the full Custom Function node. For more advanced needs like pip-installed packages or AI code generation, the dedicated Custom Function node should be used. This mode is ideal for quick, inline data reshapes.
Custom Code Output: Your Contract
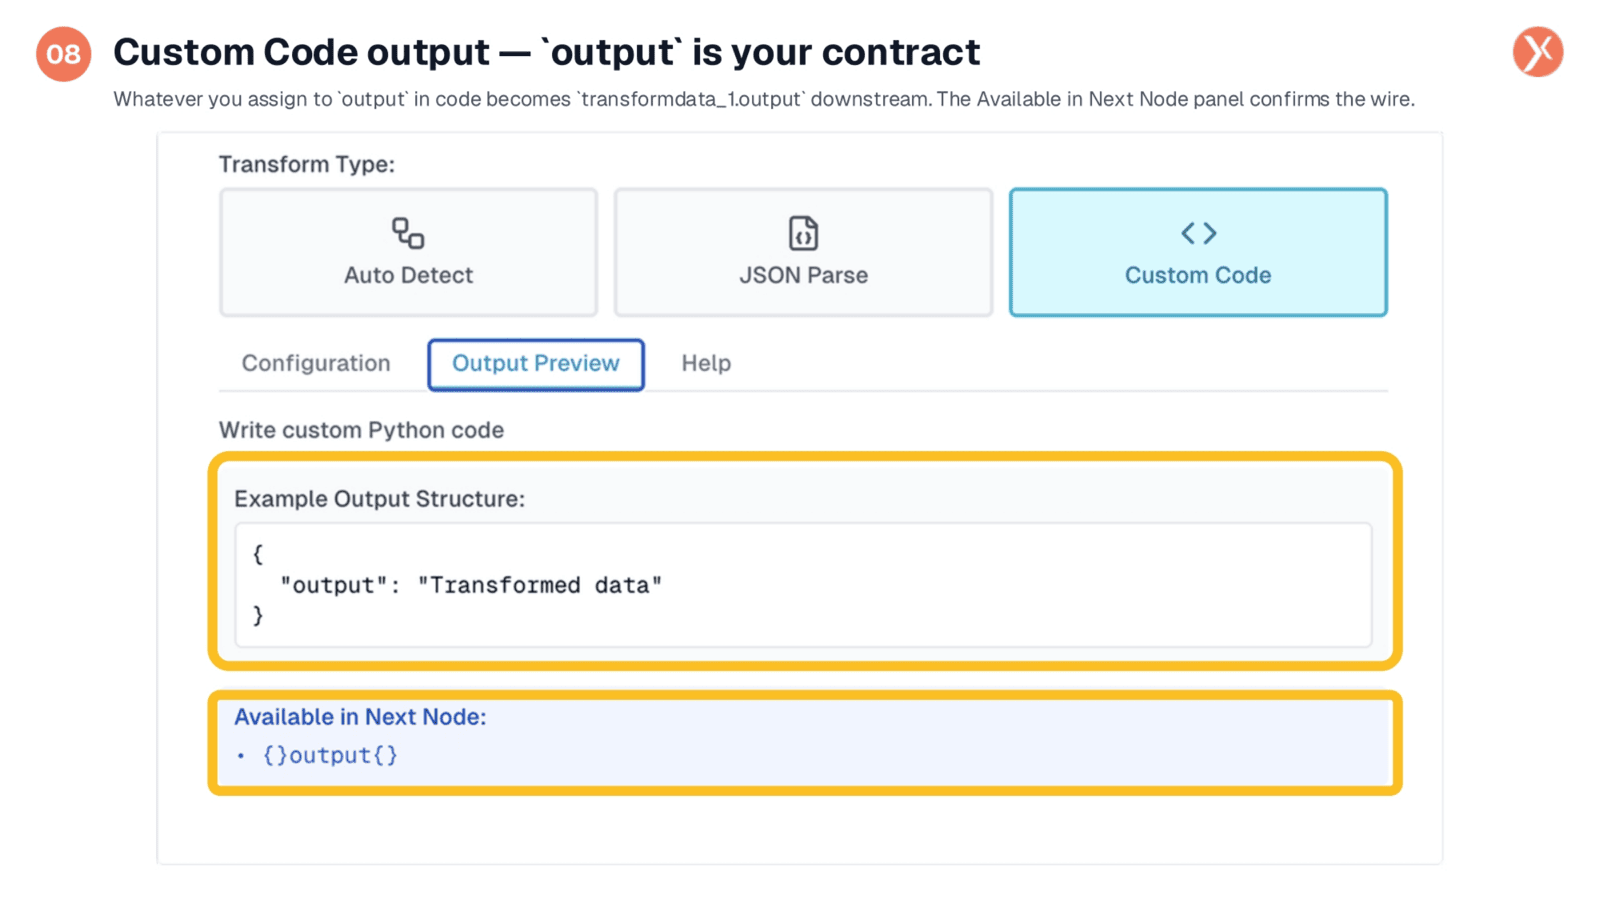
With Custom Code, the output variable serves as your contract for downstream data flow. Whatever value you assign to output within your Python code will become transformdata_1.output for subsequent nodes. The 'Available in Next Node' panel clearly confirms this wiring, showing exactly how your transformed data will be accessible. For instance, if your code sets output to a dictionary with a 'score' key, the next node can directly access transformdata_1.output.score. This streamlined process allows for a tight loop of coding, previewing, and saving, ensuring clean data is consistently passed through your workflow.
Understanding Transform Data Outputs
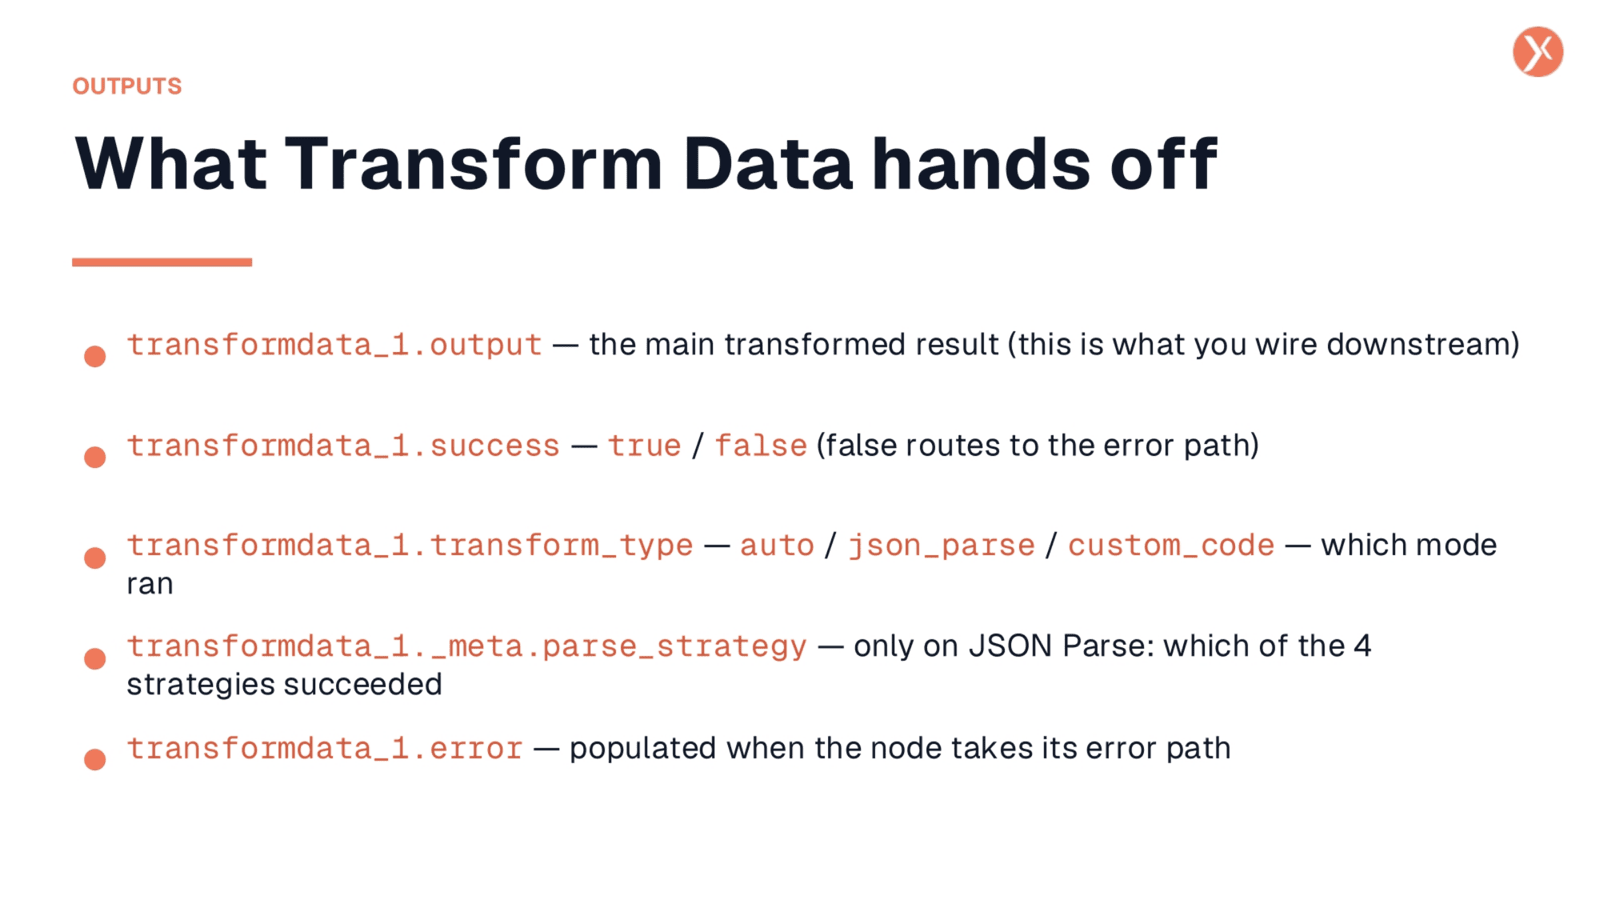
The Transform Data node provides several key outputs. transformdata_1.output is the primary transformed result, which you'll wire downstream to other nodes. transformdata_1.success indicates whether the transformation completed successfully or if the node took its error path. transformdata_1.transform_type specifies which mode—auto, JSON parse, or custom code—was executed, which is helpful when managing multiple Transform Data nodes. For debugging, transformdata_1._meta.parse_strategy, available only in JSON Parse mode, reveals which of the four parsing strategies succeeded. If regex_extract appears often, it signals potential issues with your upstream data source.
Recap: That's Transform Data
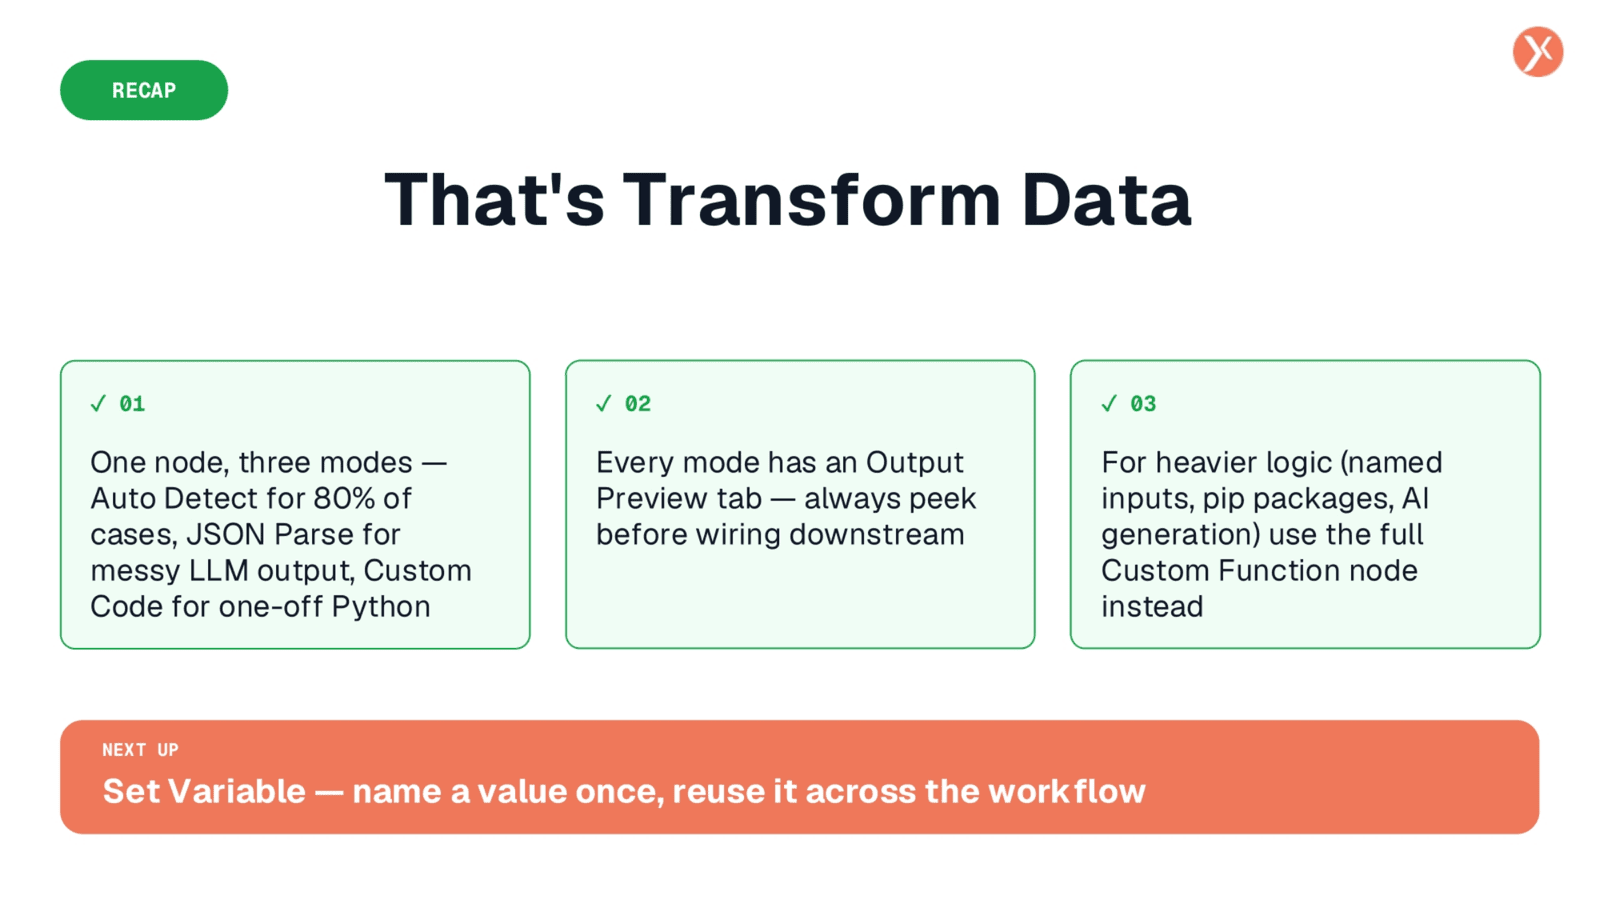
In summary, Transform Data is an essential node for cleaning and reshaping data. It offers Auto Detect for common cases, JSON Parse for complex LLM outputs, and Custom Code for custom Python logic. Always utilize the Output Preview before finalizing your transformations.