The Canvas
Today, we'll walk through the four key zones of the Expedify Workflow Builder. We'll begin by opening a fresh canvas, then explore the Node Palette. Next, we'll demonstrate how to drop and connect two nodes, and finally, we'll open the central Node Configuration Panel. This session aims to provide you with a clear mental map of where everything is located within the builder.
The Workflow Builder Canvas Demo
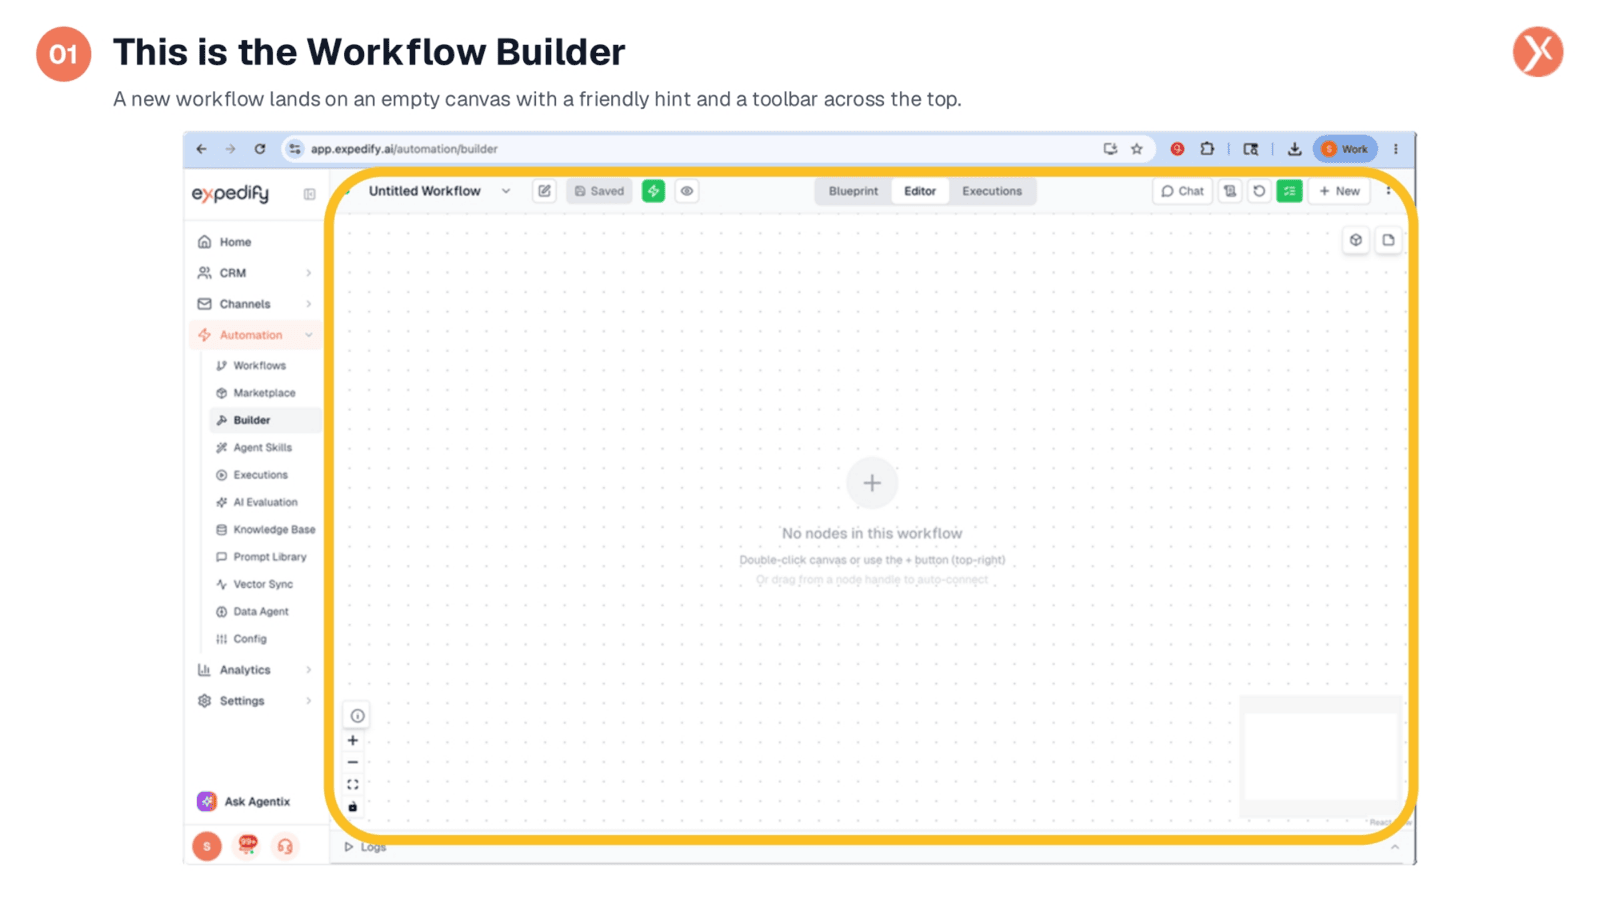
Let's begin with a fresh workflow. The expansive grid in the center is the canvas, the primary area where all your automation nodes will reside. Expedify provides a helpful hint: you can add your first node by either double-clicking anywhere on the canvas or by using the plus button located at the top right. Above the canvas, the toolbar manages essential functions like saving and activating your workflows, which we'll explore in more detail shortly.
Introducing the Workflow Builder
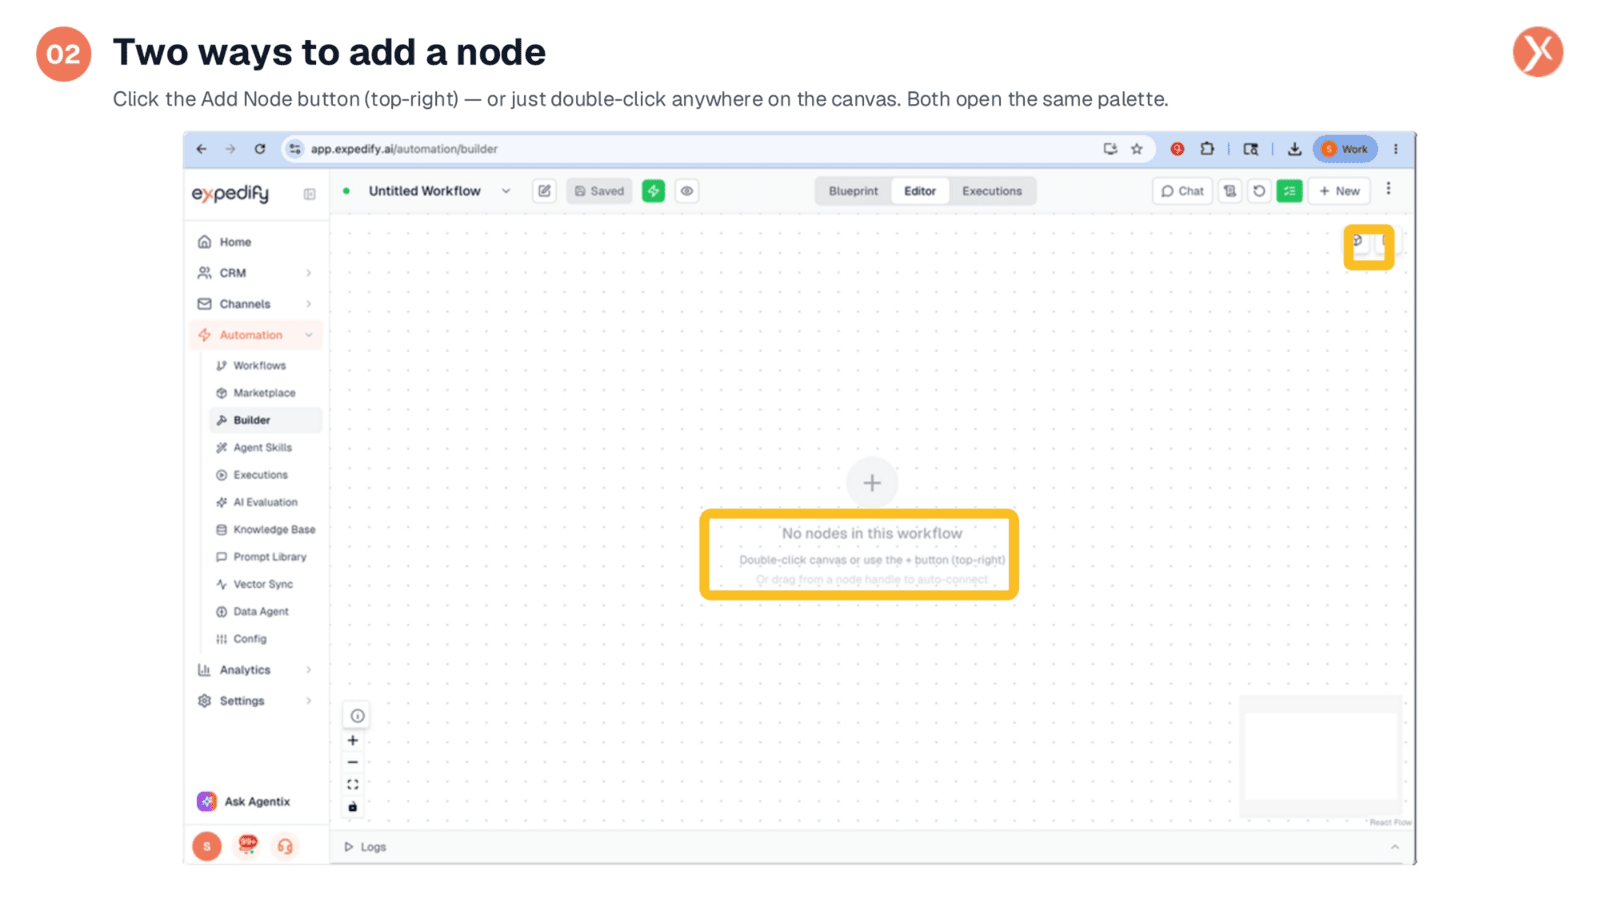
Before we add any elements, it's helpful to know there are two convenient ways to open the Node Palette. As indicated by the empty-state hint, you can either click the 'Add Node' button located in the top-right corner of the screen, or simply double-click anywhere on the canvas itself. Both actions will open the exact same palette, allowing you to choose the method that feels most efficient for your workflow. For this demonstration, we'll use the dedicated button.
Two Ways to Add a Node
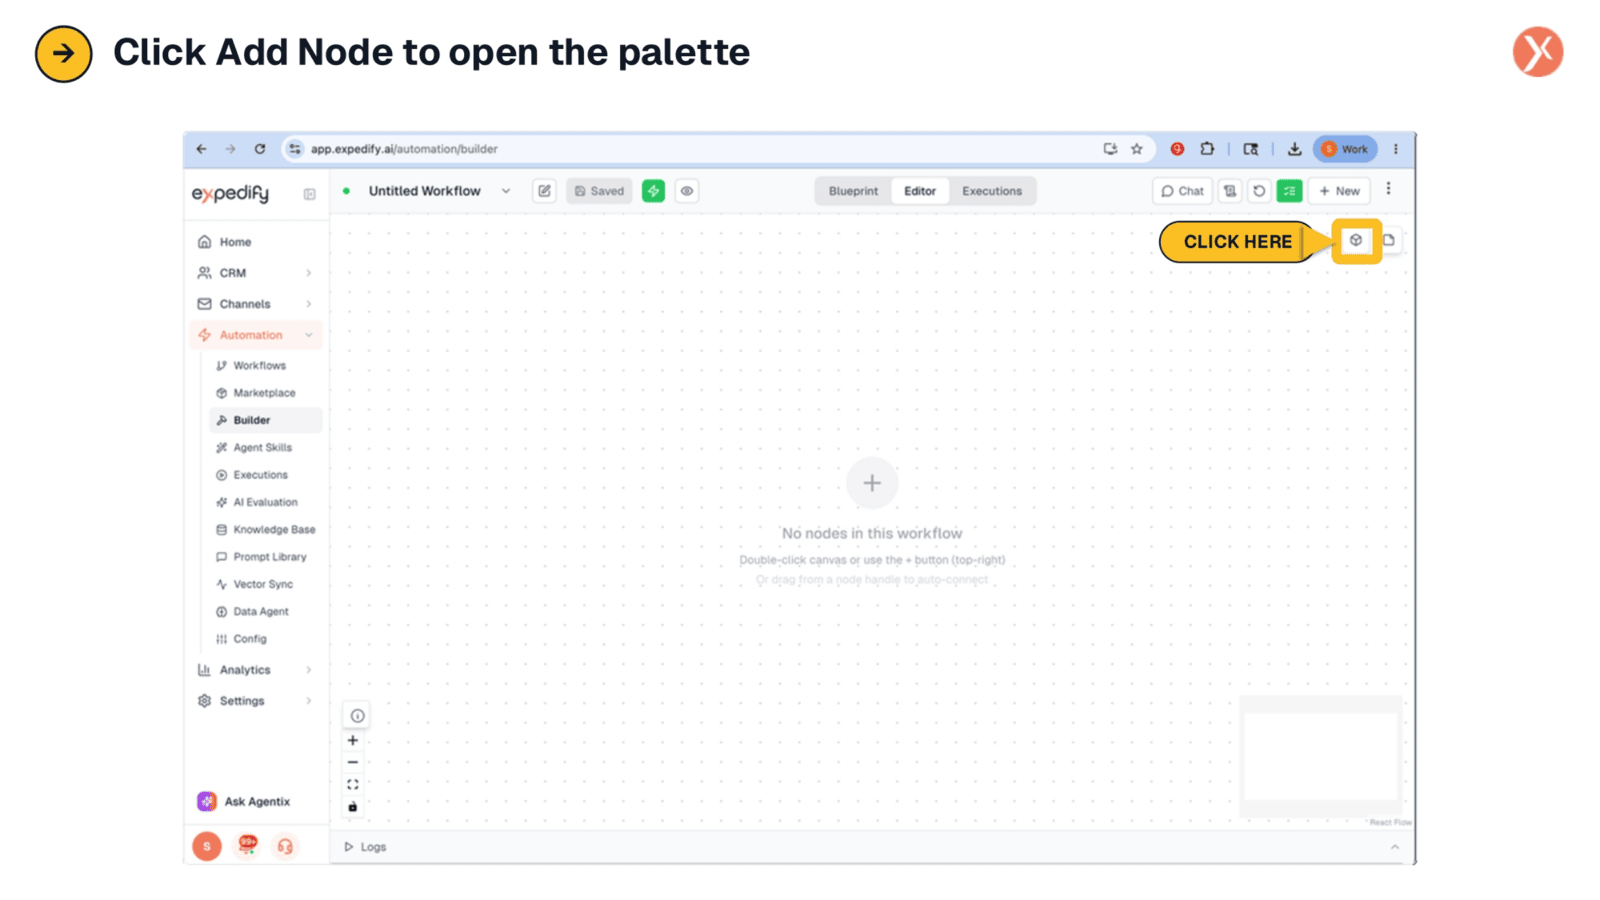
To initiate adding a node, you have two straightforward options. You can either click the 'Add Node' button, prominently displayed in the top-right corner of the interface, or simply double-click anywhere on the canvas. Both methods will seamlessly open the Node Palette, providing access to all available workflow components. Let's proceed by clicking the 'Add Node' button now.
Opening the Node Palette
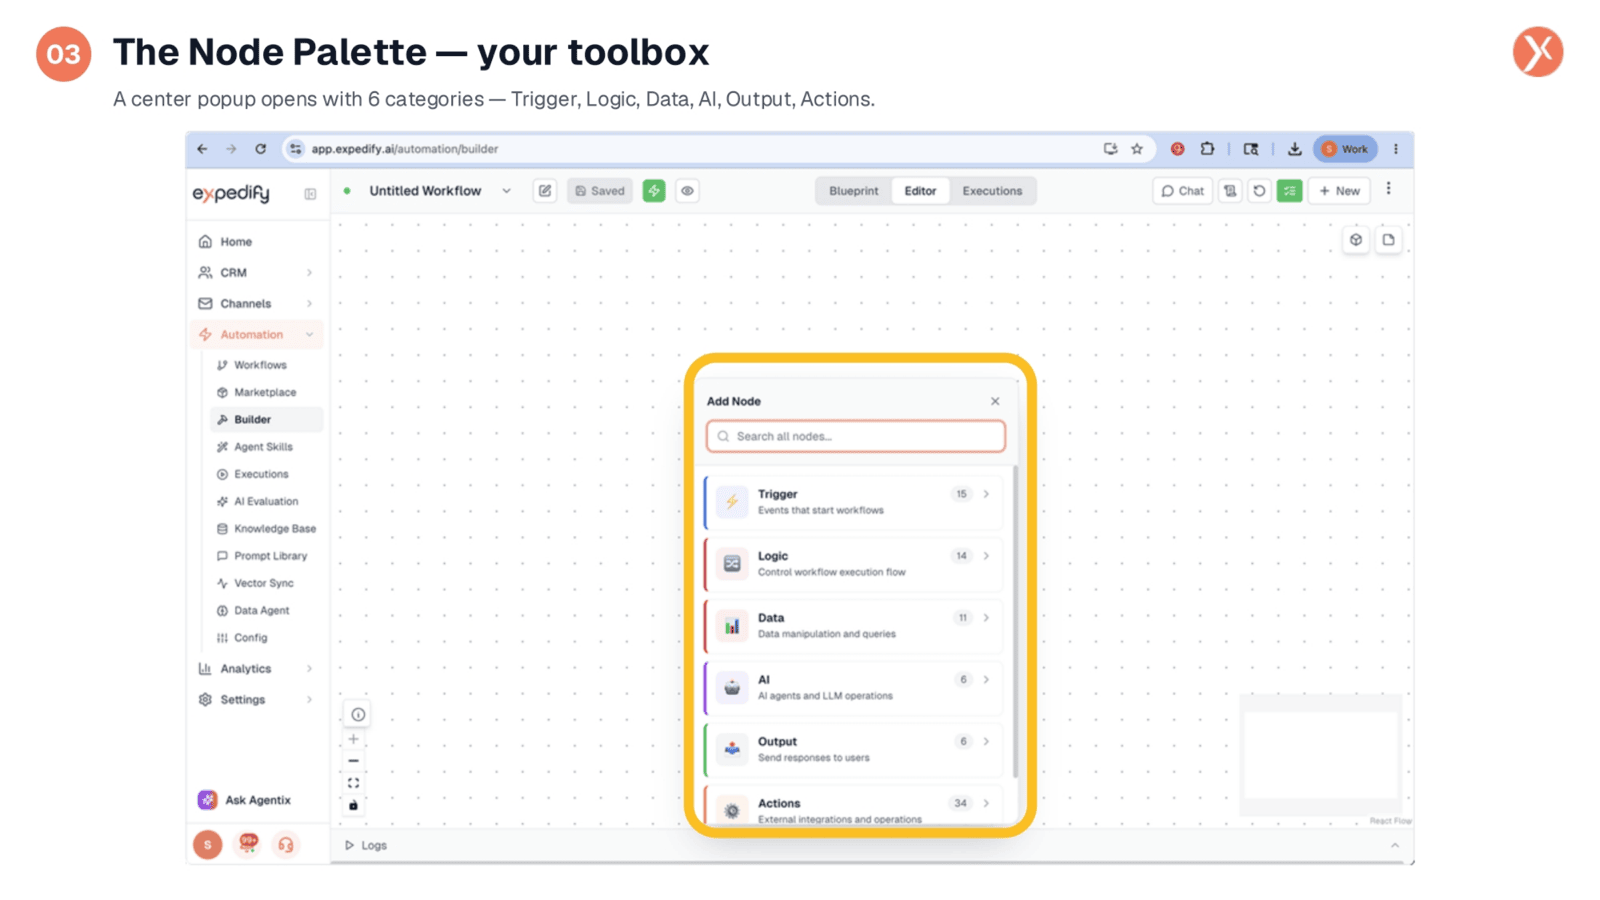
Upon clicking 'Add Node', the Node Palette instantly appears in the center of your canvas. Consider this your comprehensive toolbox for building automations. All Expedify nodes are logically organized into six distinct categories: Trigger, Logic, Data, AI, Output, and Actions. This structured approach is not arbitrary; it mirrors the organization of this entire course, as we will delve into each category module by module.
The Node Palette: Your Toolbox
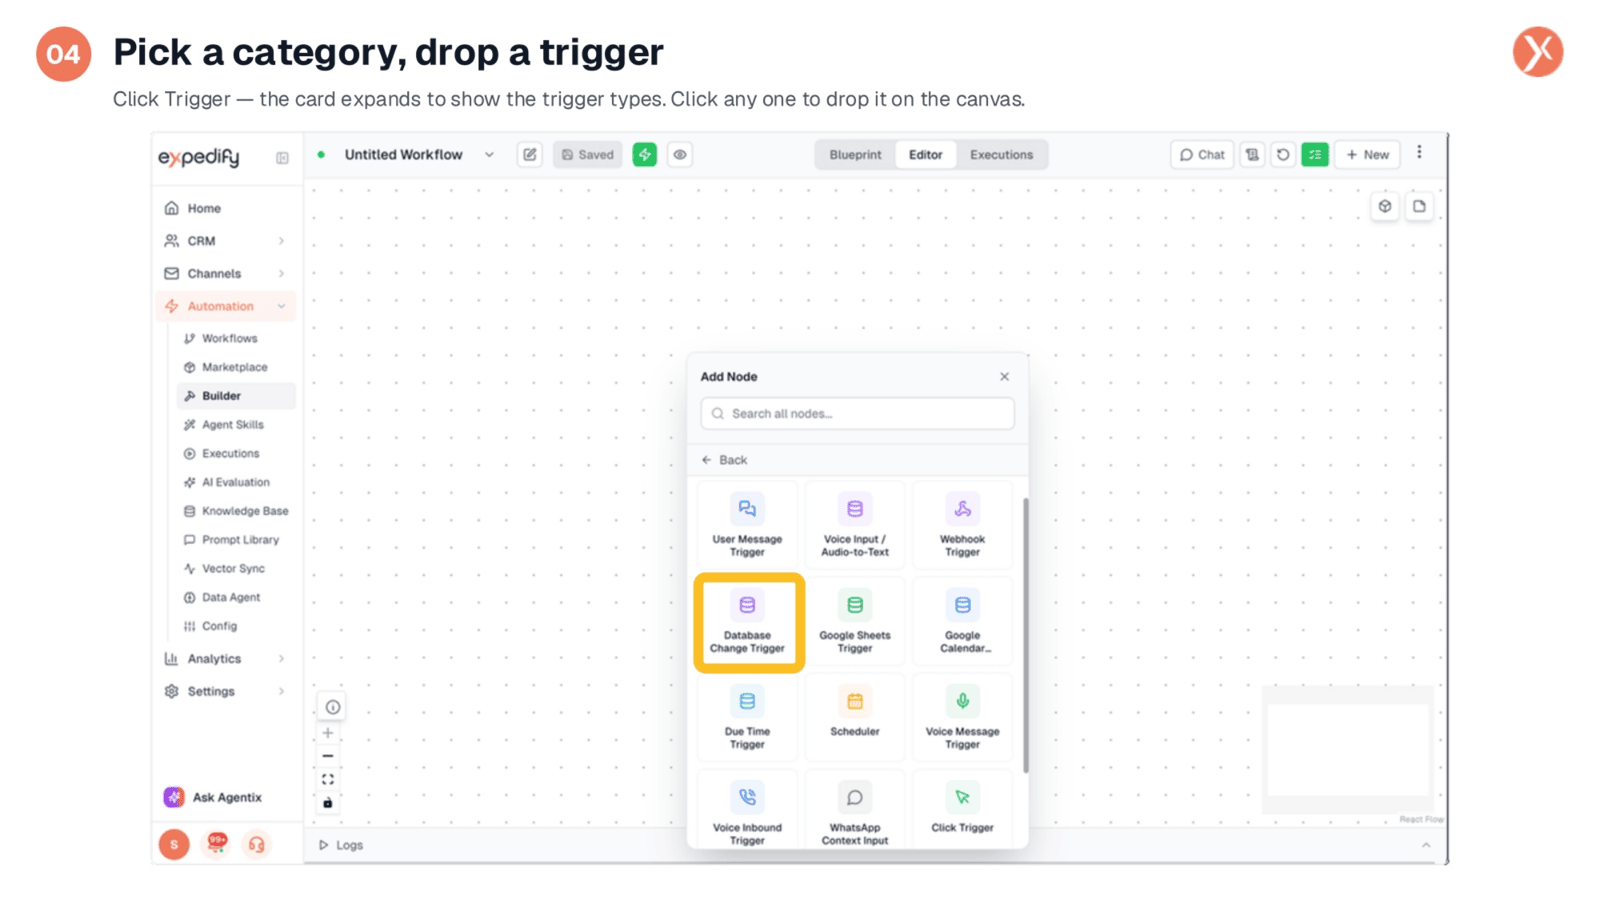
Within the Node Palette, selecting a category card, such as 'Trigger', will expand it to reveal all available trigger types. Simply click on the desired trigger, and it will be placed directly onto your canvas. Triggers are fundamental; they define how a workflow is initiated, essentially 'waking it up' when a specific event occurs. For this example, we'll add a 'Database Change Trigger', similar to the one demonstrated in our previous lesson for the lifecycle email automation.
Picking a Category and Dropping a Trigger
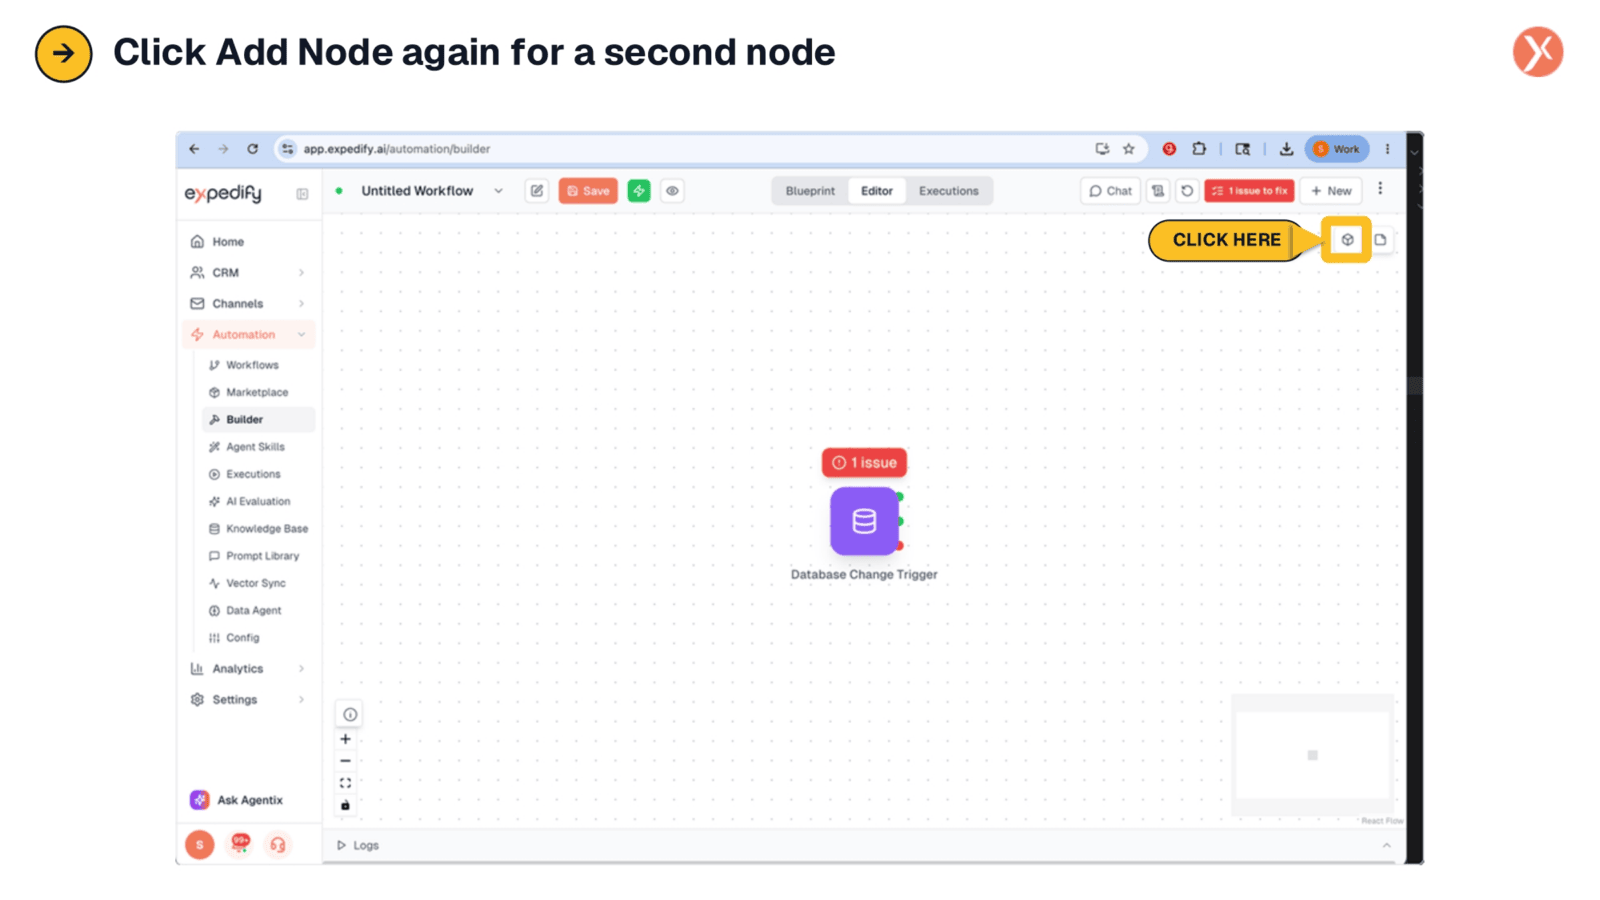
Having placed our first node, we'll now add a second one to continue building our workflow. To do this, we'll once again access the Node Palette. This allows us to select another component that will interact with our initial trigger, forming a sequence of automated actions. Let's proceed by clicking 'Add Node' to bring up the palette again.
Adding a Second Node
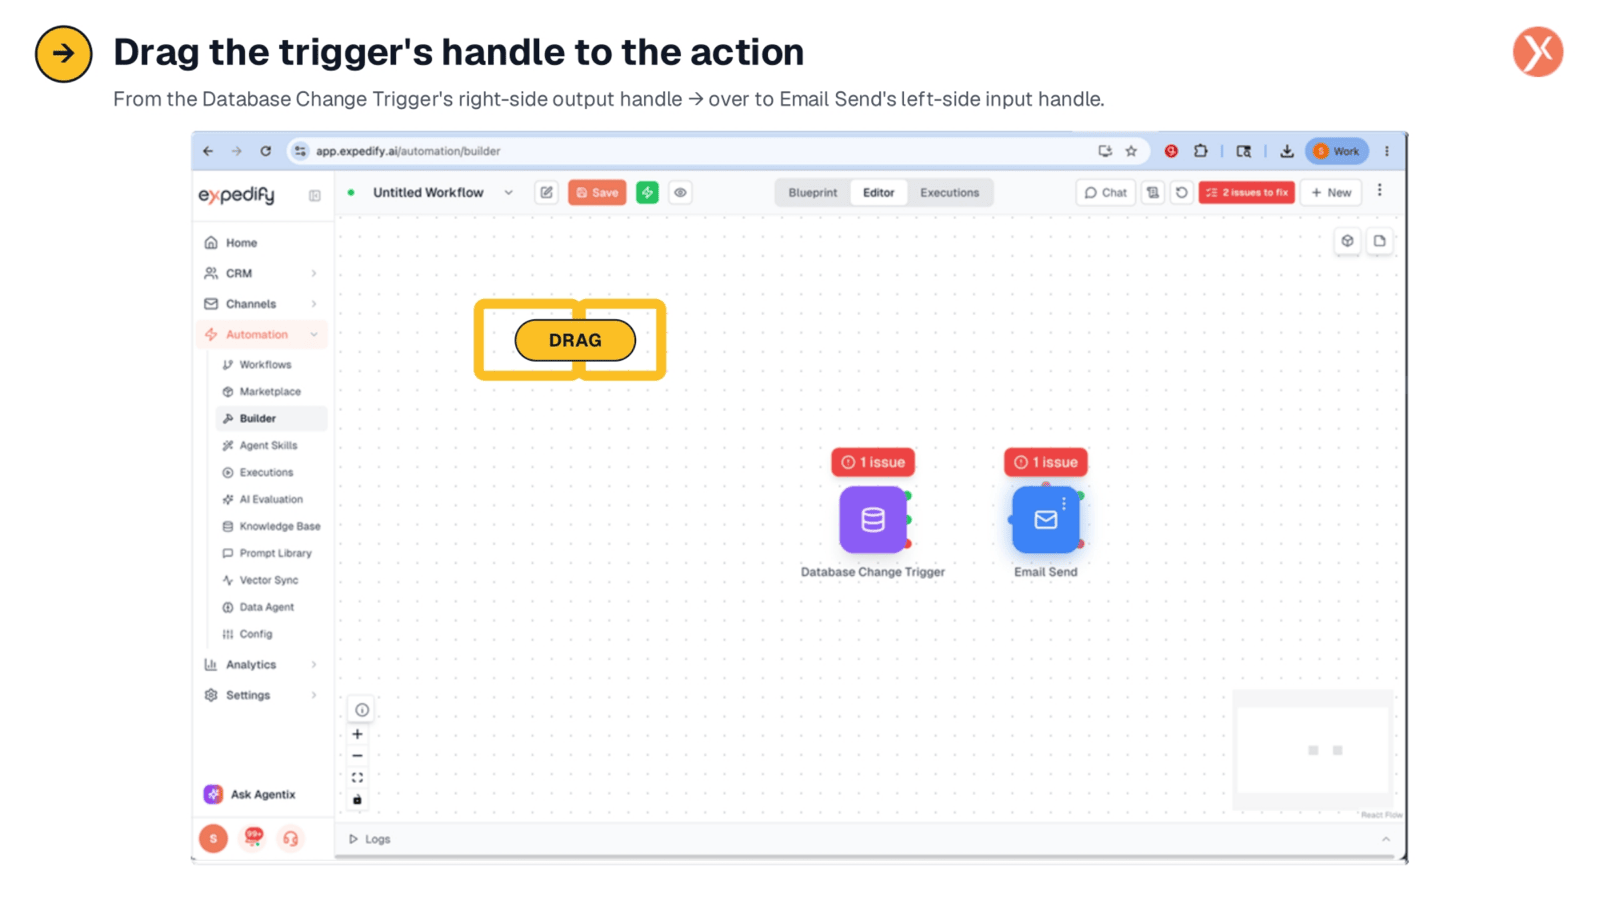
For our second node, navigate to the 'Actions' category, then select 'Email', and finally choose 'Email Send'. This node will appear on the canvas, positioned conveniently next to our existing trigger. To establish the workflow's sequence, simply drag the output handle from the 'Database Change Trigger' and connect it to the input handle of the 'Email Send' action. This action effectively wires the two nodes together.
Connecting Nodes for Workflow Flow
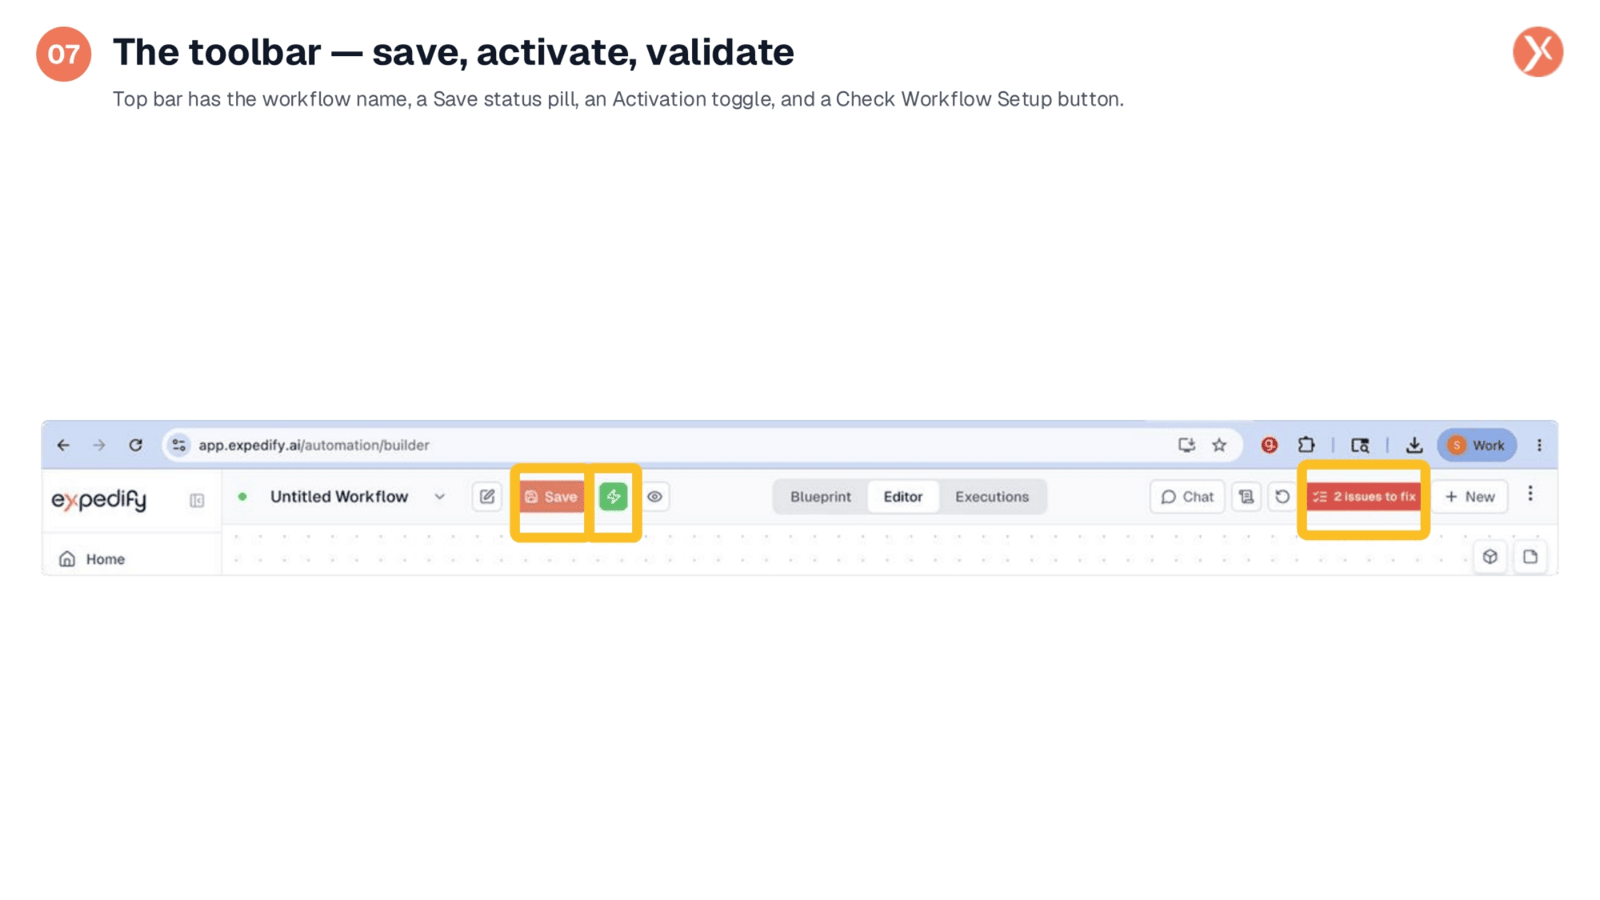
With the nodes now connected, a line visually represents this crucial link. This connection signifies a direct instruction: once the preceding node completes its task, the workflow will automatically proceed to execute the next connected node. Workflows consistently follow these connections, flowing from left to right. This setup, with just two nodes and a single connection, illustrates the most fundamental and smallest possible workflow you can build.
Understanding Node Connections
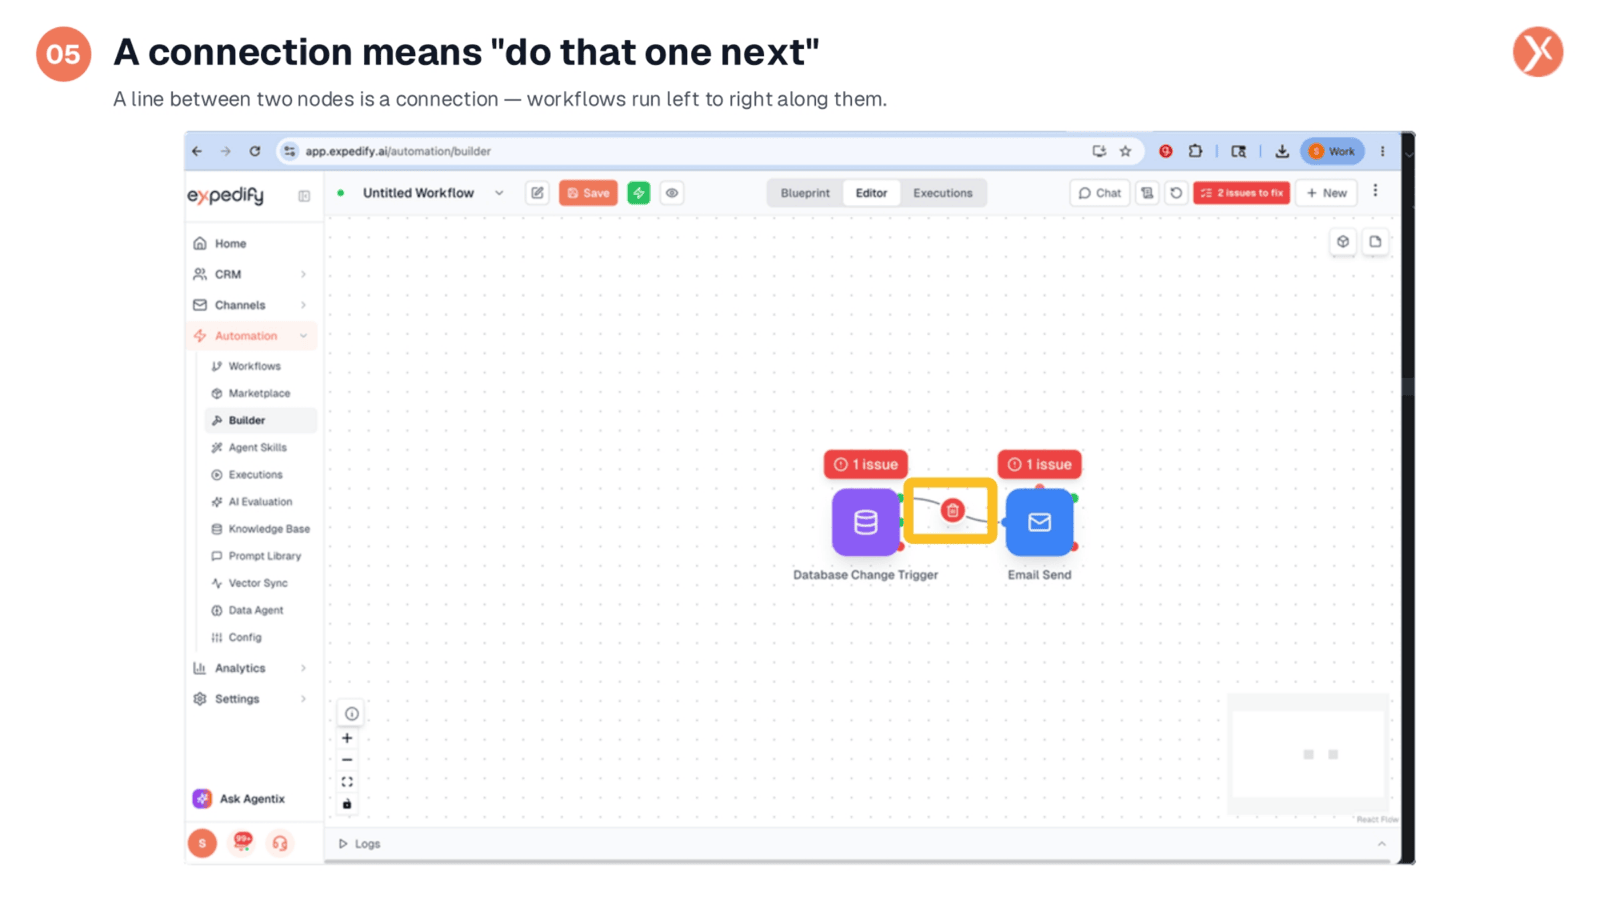
Now that our nodes are connected, the next step is to configure the 'Email Send' node to specify its exact behavior. This involves defining details such as the recipient, subject, and body of the email. To access these settings, we will simply double-click on the 'Email Send' node. This action will open the dedicated configuration panel, allowing us to customize its parameters.
Configuring the Email Send Node
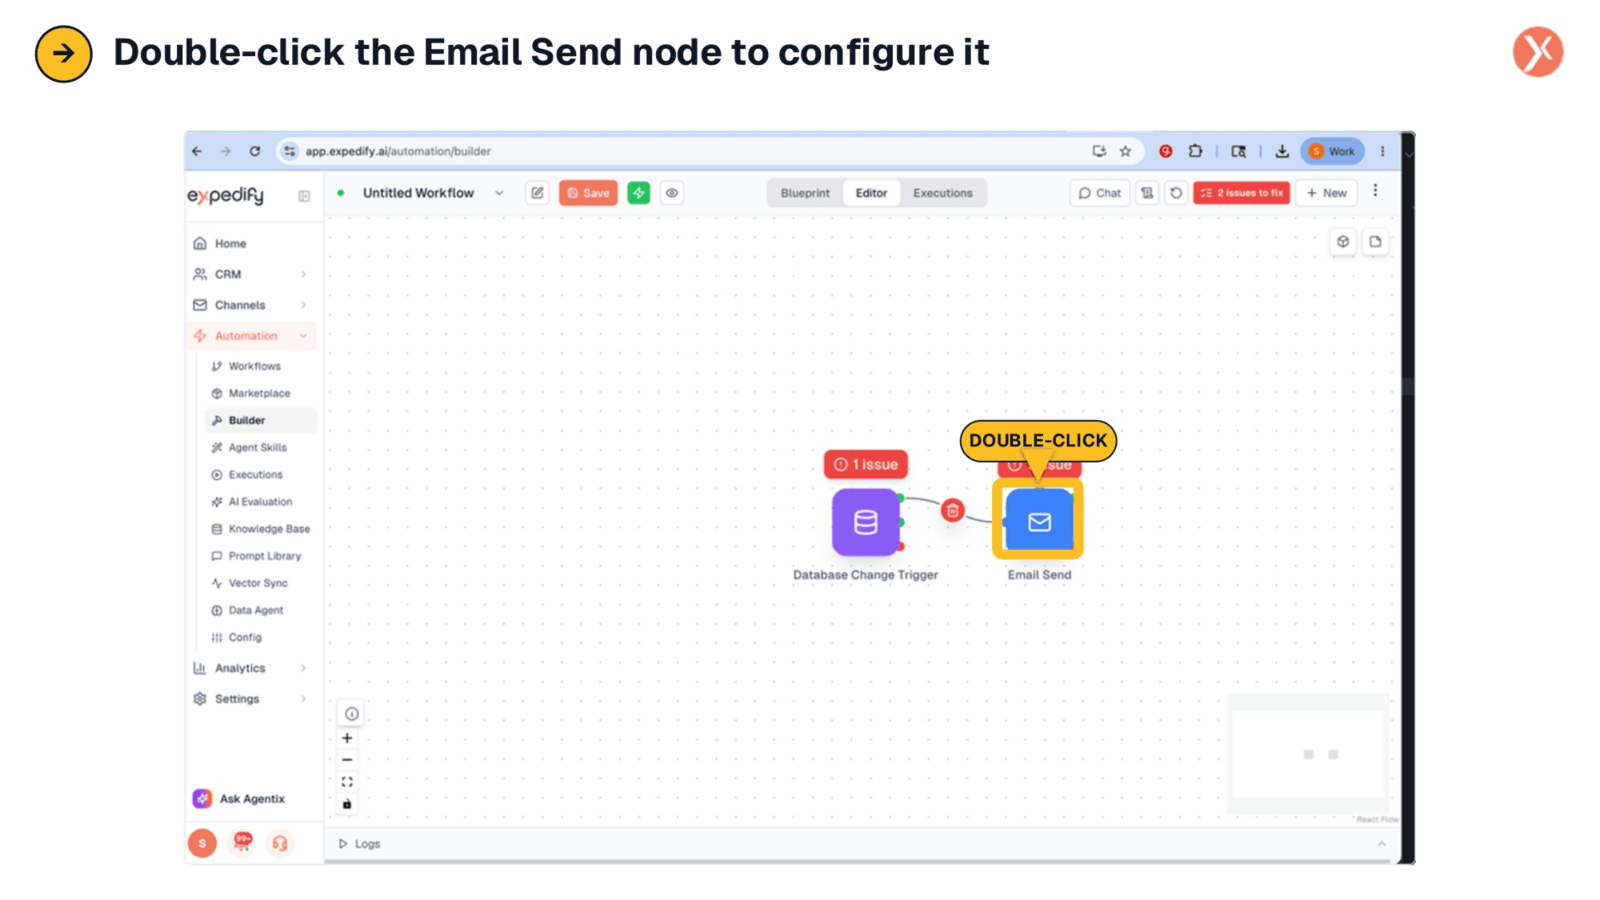
Upon double-clicking, the Node Configuration Panel takes over the entire screen, highlighting its importance. This panel is structured into three distinct columns. On the left, you'll find the inputs and current state of the node. The central column presents the configuration form, which dynamically adapts based on the specific node you're working with. To the right, you'll see the outputs and a validation status, indicating if the node is correctly configured. At the top, options like 'Run', 'Run From Here', and 'Save' are available, as this panel will be central to your workflow building.
The Node Configuration Panel
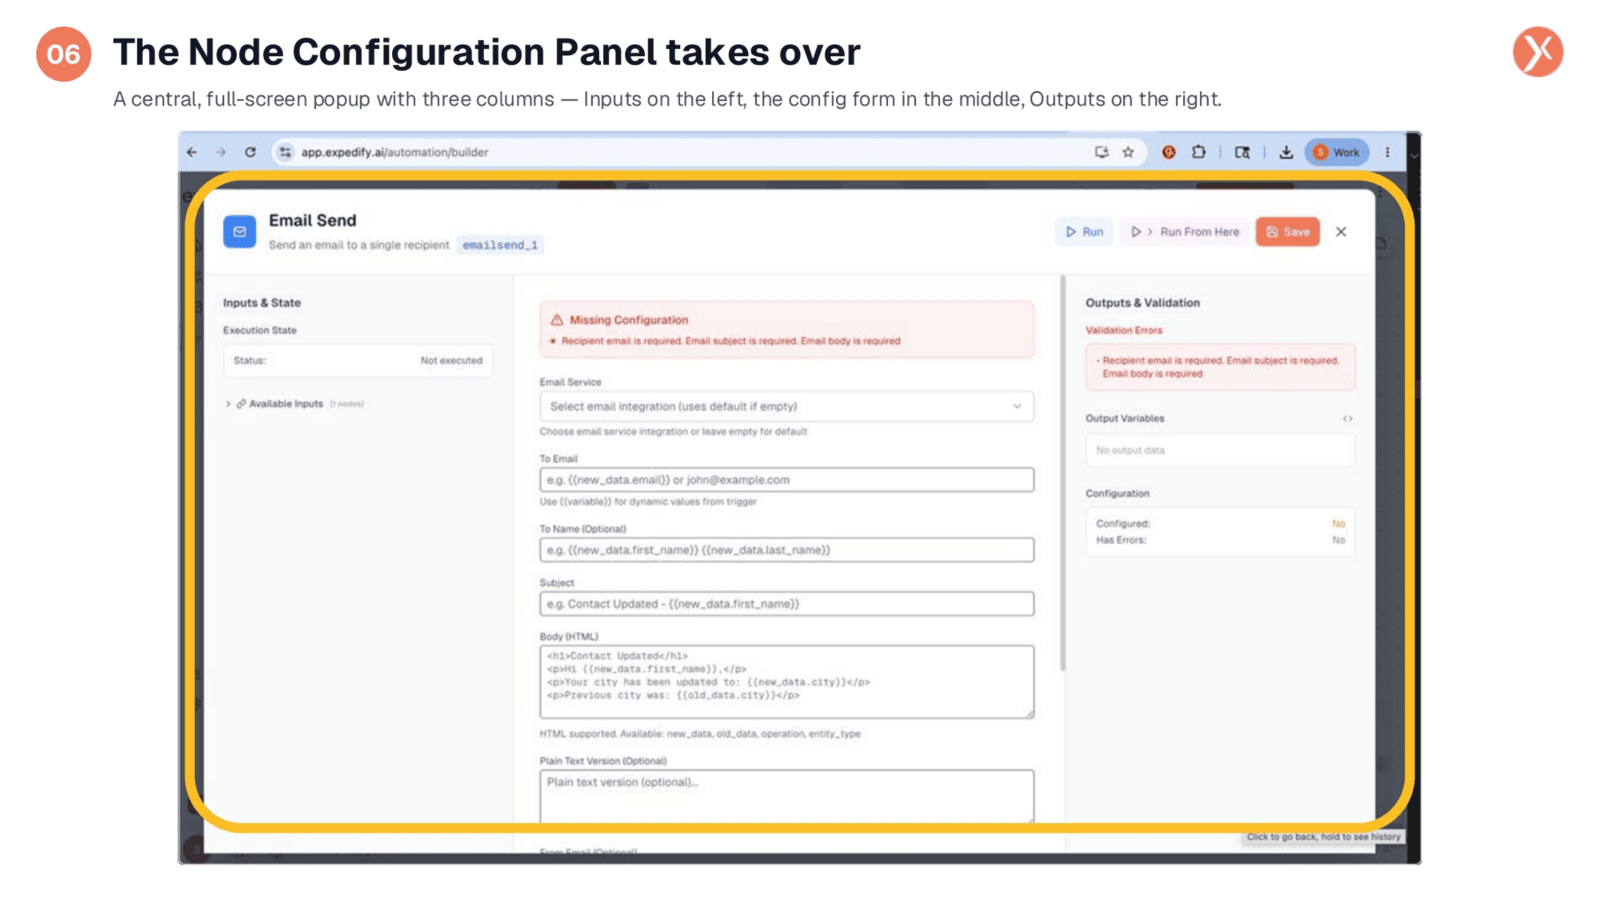
At the very top of the interface, you'll find the toolbar, which provides essential controls for your workflow. The 'Save' indicator confirms whether your recent changes have been stored. The 'Active/Inactive' toggle serves as your go-live switch, allowing you to enable or disable the workflow. Additionally, the 'Check Workflow Setup' button launches a wizard that thoroughly validates every node, ensuring all necessary configurations are complete before deployment. This sequence of saving, activating, and validating forms the core loop of building, checking, and launching your automations.
The Toolbar: Save, Activate, Validate
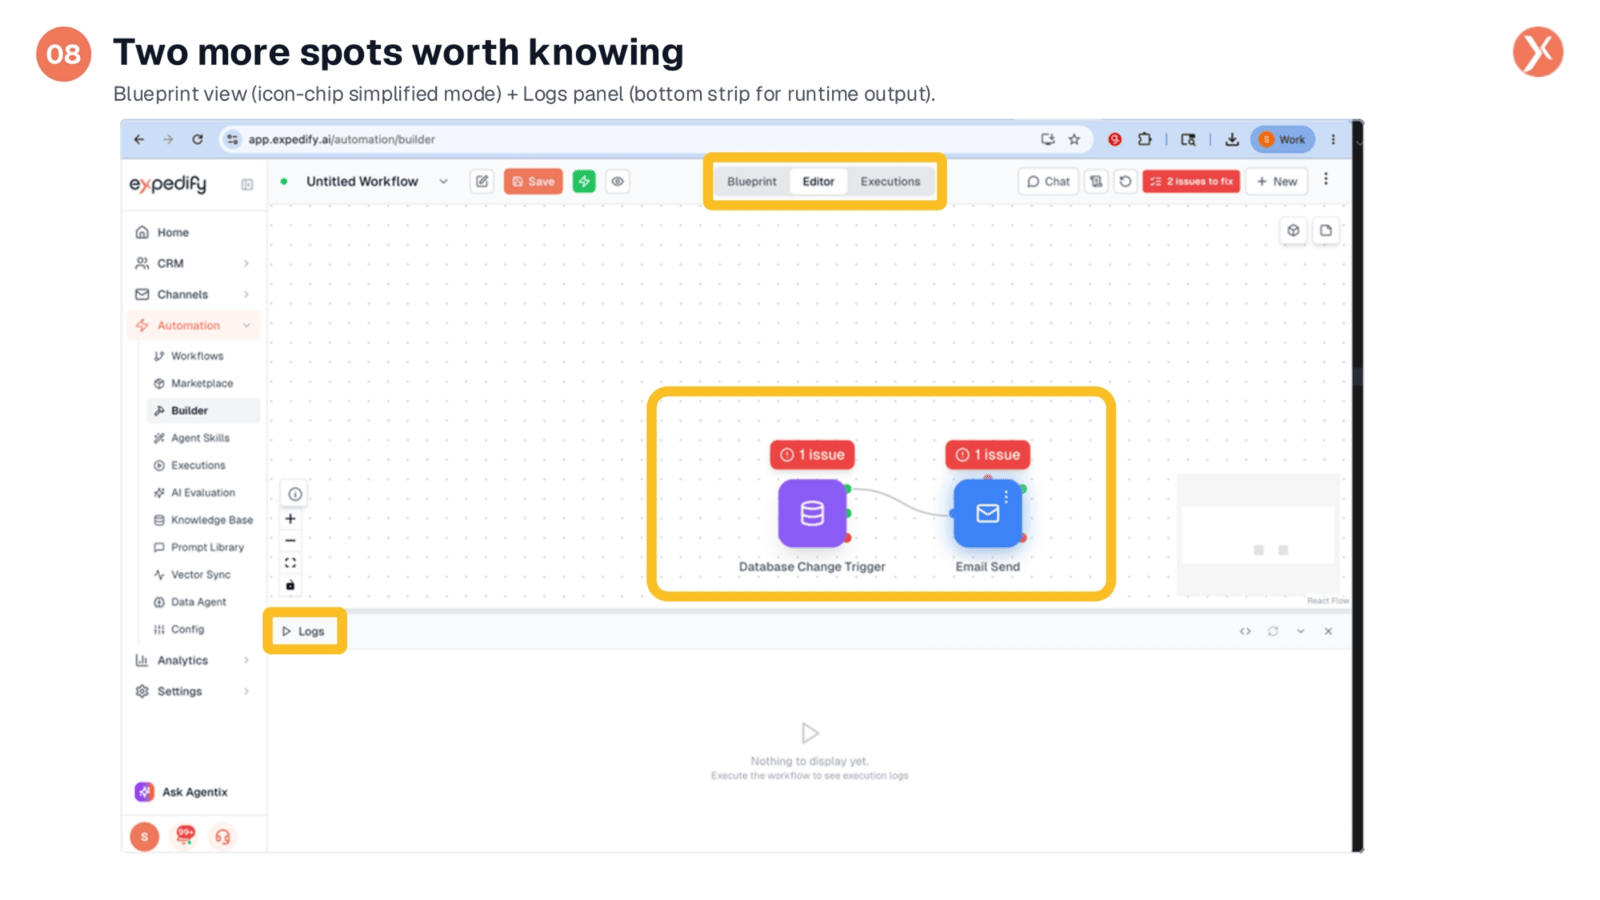
Beyond the main canvas and configuration panel, two additional areas are crucial for effective workflow management. The 'Blueprint' tab offers a simplified, icon-chip view of your entire workflow, which is particularly useful for quickly grasping its overall structure and flow. Below, the 'Logs' panel provides real-time insights into your workflow's execution, detailing each node's inputs, outputs, and overall activity. Both of these features will be utilized extensively as we progress through the course.
Blueprint View and Logs Panel
This concludes our tour of the Expedify Workflow Builder workspace. We've explored the six categories of nodes available in the palette, learned how to place them on the canvas, wire them into a logical flow, and configure their specific behaviors within the central Node Configuration Panel. We also covered the toolbar's essential functions for saving, activating, and validating your workflows. In the upcoming lesson, you'll apply this knowledge by building your own workflow from scratch, from an empty canvas to a fully functional automation.
Workspace Recap
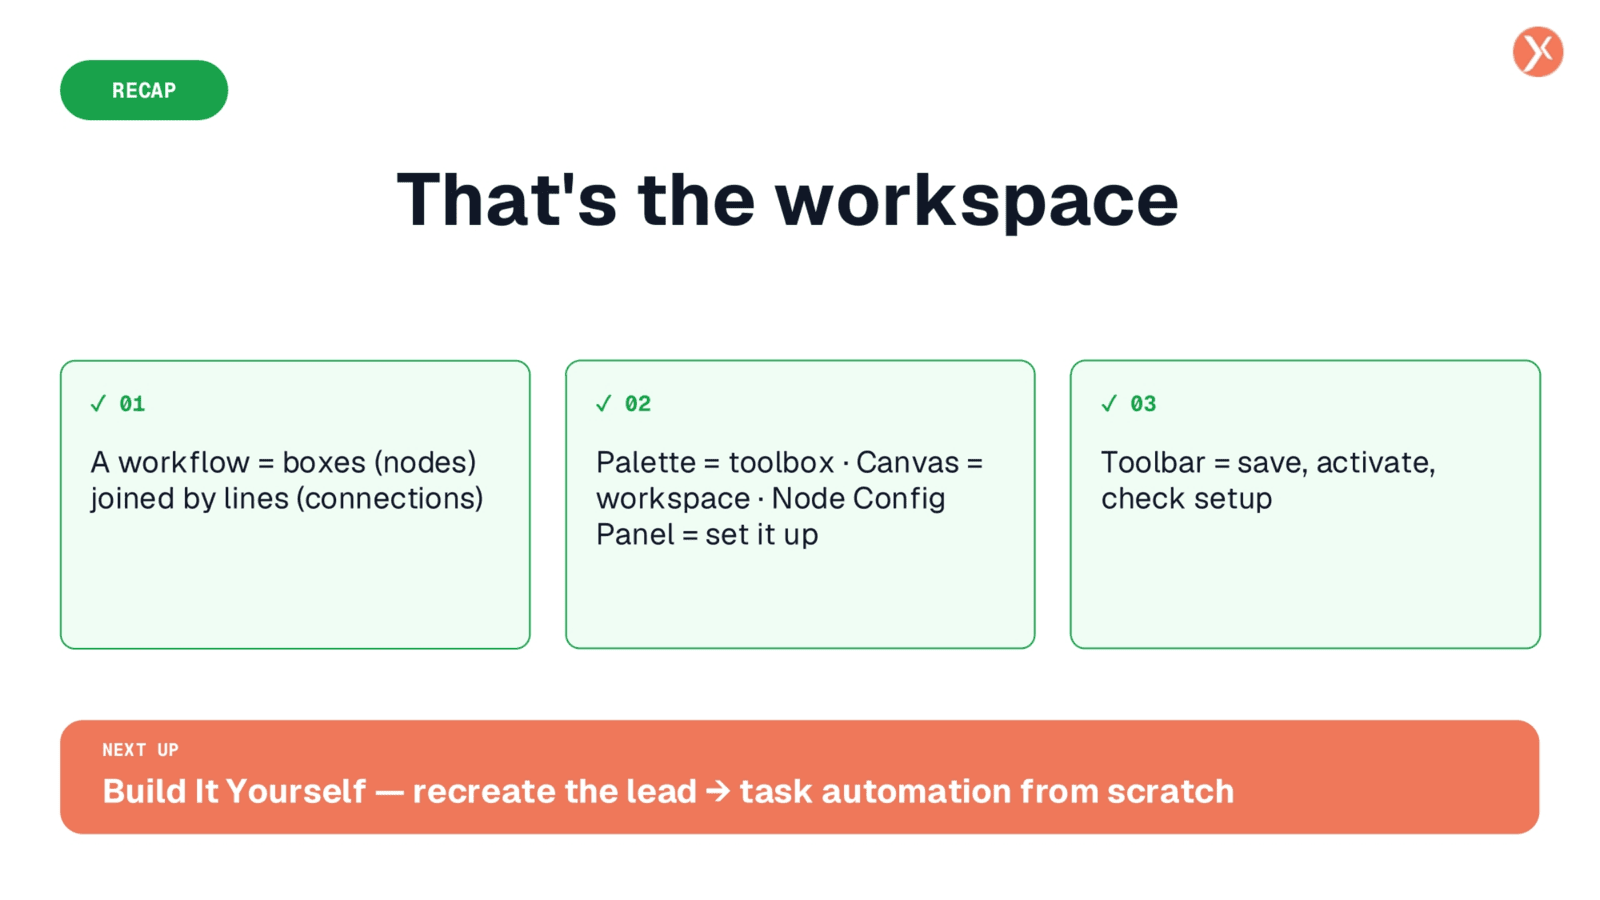
We've now completed our overview of the Workflow Builder workspace. You've gained an understanding of how to build, connect, and configure nodes, along with utilizing the toolbar for essential workflow management. This foundational knowledge prepares you for hands-on application in our next session.