SQL Builder
Expedify's SQL Builder empowers you to construct sophisticated SQL queries visually, eliminating the need for manual coding. This powerful tool allows you to define tables, fields, filters, and sorting, generating production-grade SQL in real time. We'll explore its capabilities and how it integrates with your workflows.
SQL Builder Demo Overview
Let's dive into a demo of the SQL Builder's step-by-step interface.
SQL Builder on the Canvas
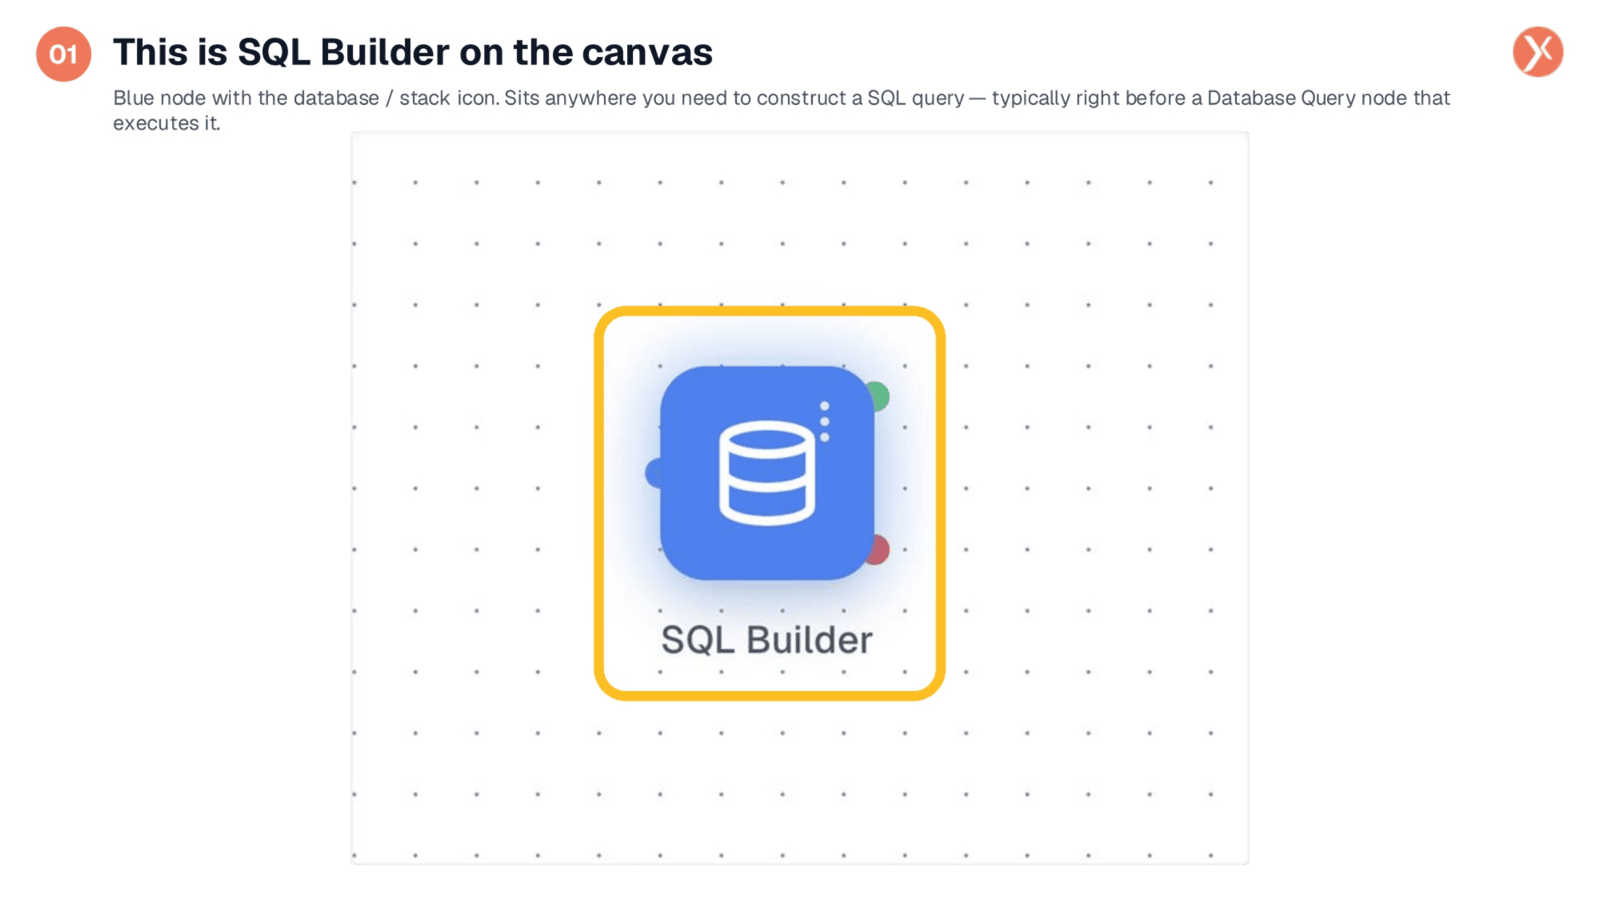
The SQL Builder appears on your canvas as a blue node, easily identifiable by its database stack icon. This signifies its role within the data and integrations family. You can place this node wherever you need to construct a SQL query within your workflow. It's crucial to remember that the SQL Builder solely focuses on building the query; its execution is handled by a separate Database Query node positioned further downstream. Consider the SQL Builder as your visual editor for crafting queries, while the Database Query node acts as the runtime environment. To begin configuring your query, simply double-click the SQL Builder node.
Opening SQL Builder Configuration
To access the configuration panel for the SQL Builder, you simply double-click the node directly on your canvas. This action opens the dedicated interface where you can begin defining and refining your SQL query visually. The intuitive design ensures that initiating the configuration process is straightforward, allowing you to quickly move into building your desired data extraction logic.
Eight Collapsible Steps in One Panel
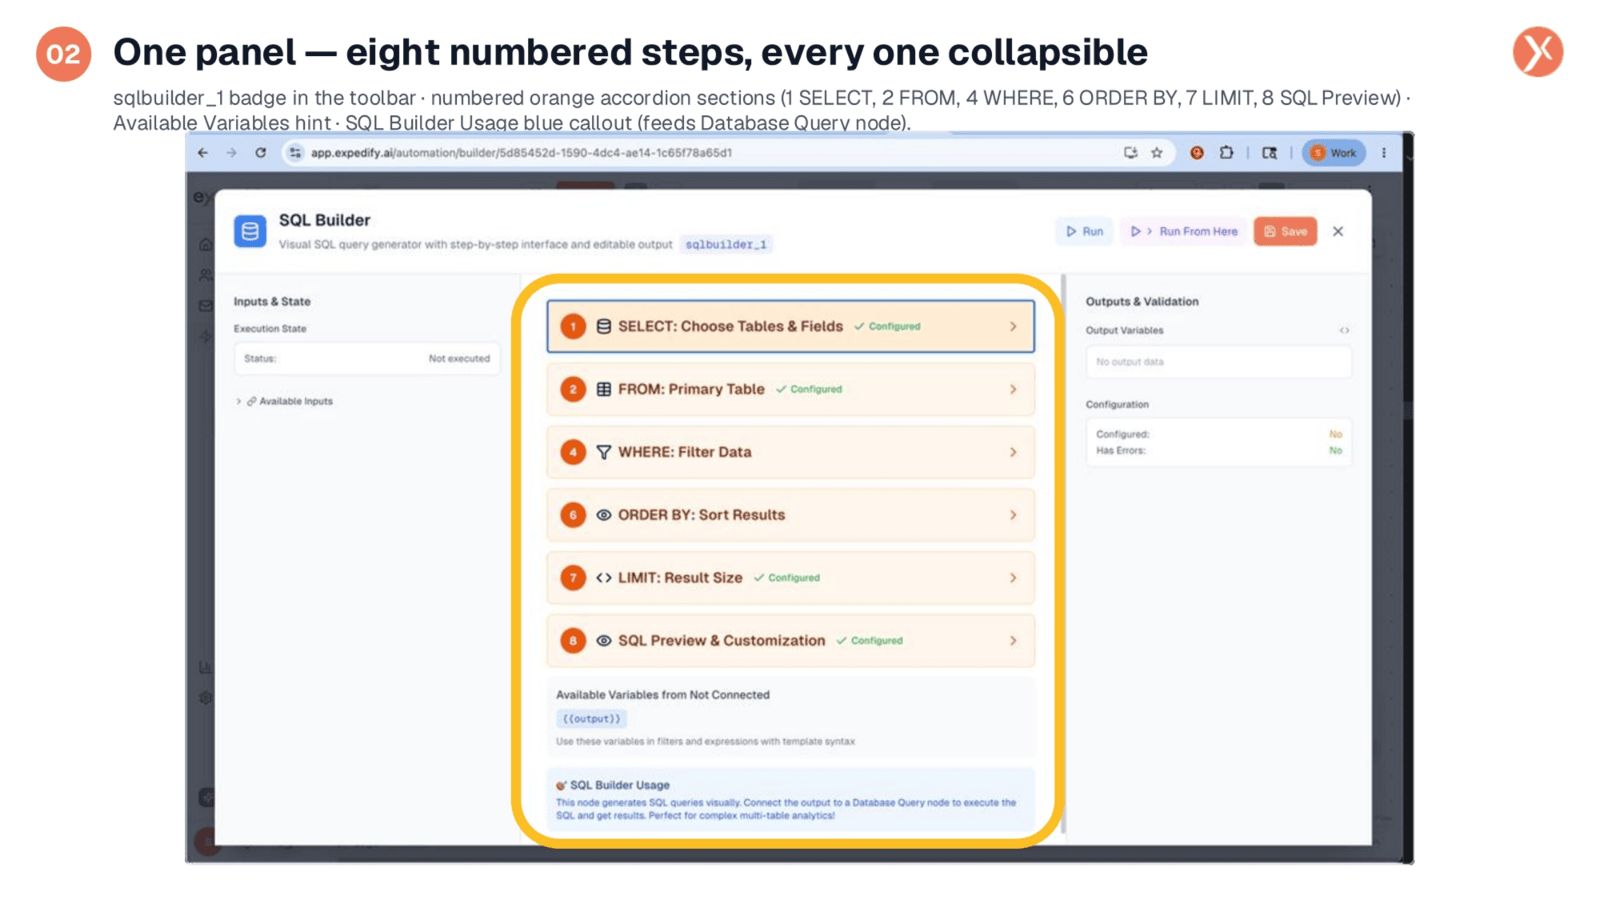
The SQL Builder's configuration panel presents a comprehensive, single-view interface. It features an eight-step accordion structure, with each section being collapsible for streamlined navigation. You'll notice a sqlbuilder_1 badge in the toolbar, which serves as the identifier for downstream nodes to reference this builder's output. The core of the panel consists of numbered orange tiles representing key steps like SELECT, FROM, WHERE, ORDER BY, LIMIT, and SQL Preview. Steps three for JOINs and five for GROUP BY are conditional, appearing only when relevant. Below the main accordion, helper blocks provide insights into available variables and a crucial reminder to connect the SQL Builder's output to a Database Query node for execution.
Step 1: Pick Tables from Your Database
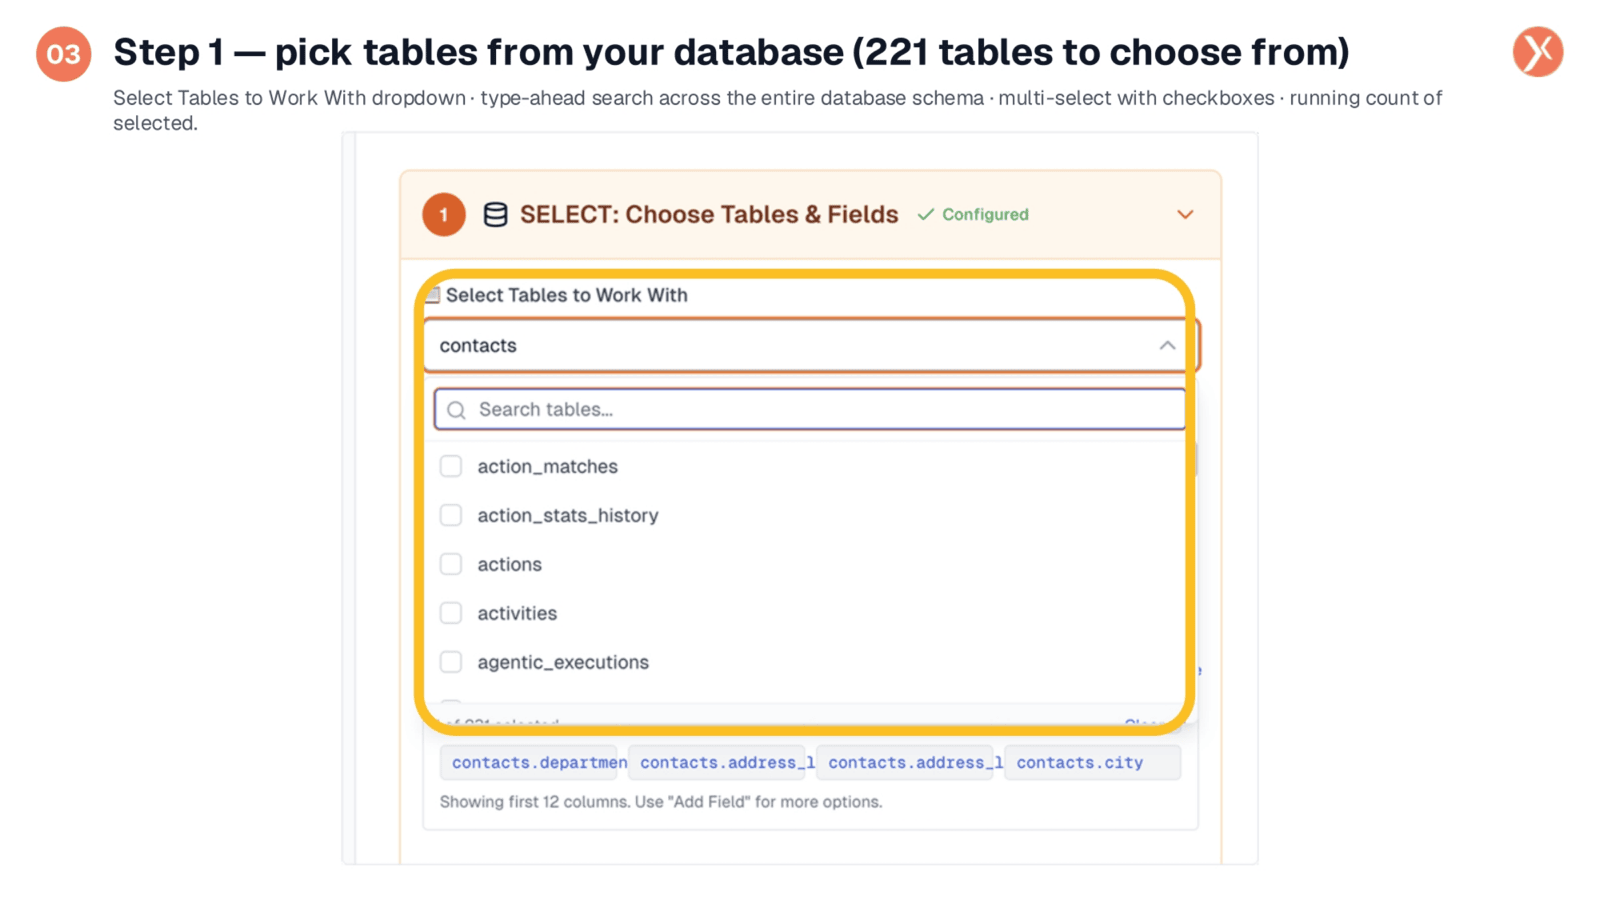
The first step in building your query is to select the tables you wish to work with. Opening the "Select Tables to Work With" dropdown reveals your organization's entire database schema, potentially offering hundreds of tables. To quickly locate specific tables, utilize the type-ahead search function at the top, which filters the list as you type. You can select multiple tables using checkboxes, a common requirement for more complex queries. A running count in the footer keeps track of your selections. Choosing more than one table will automatically unlock the JOIN step, allowing you to define relationships between your selected data sources.
Step 1 Continued: Quick Add Columns and Add Field
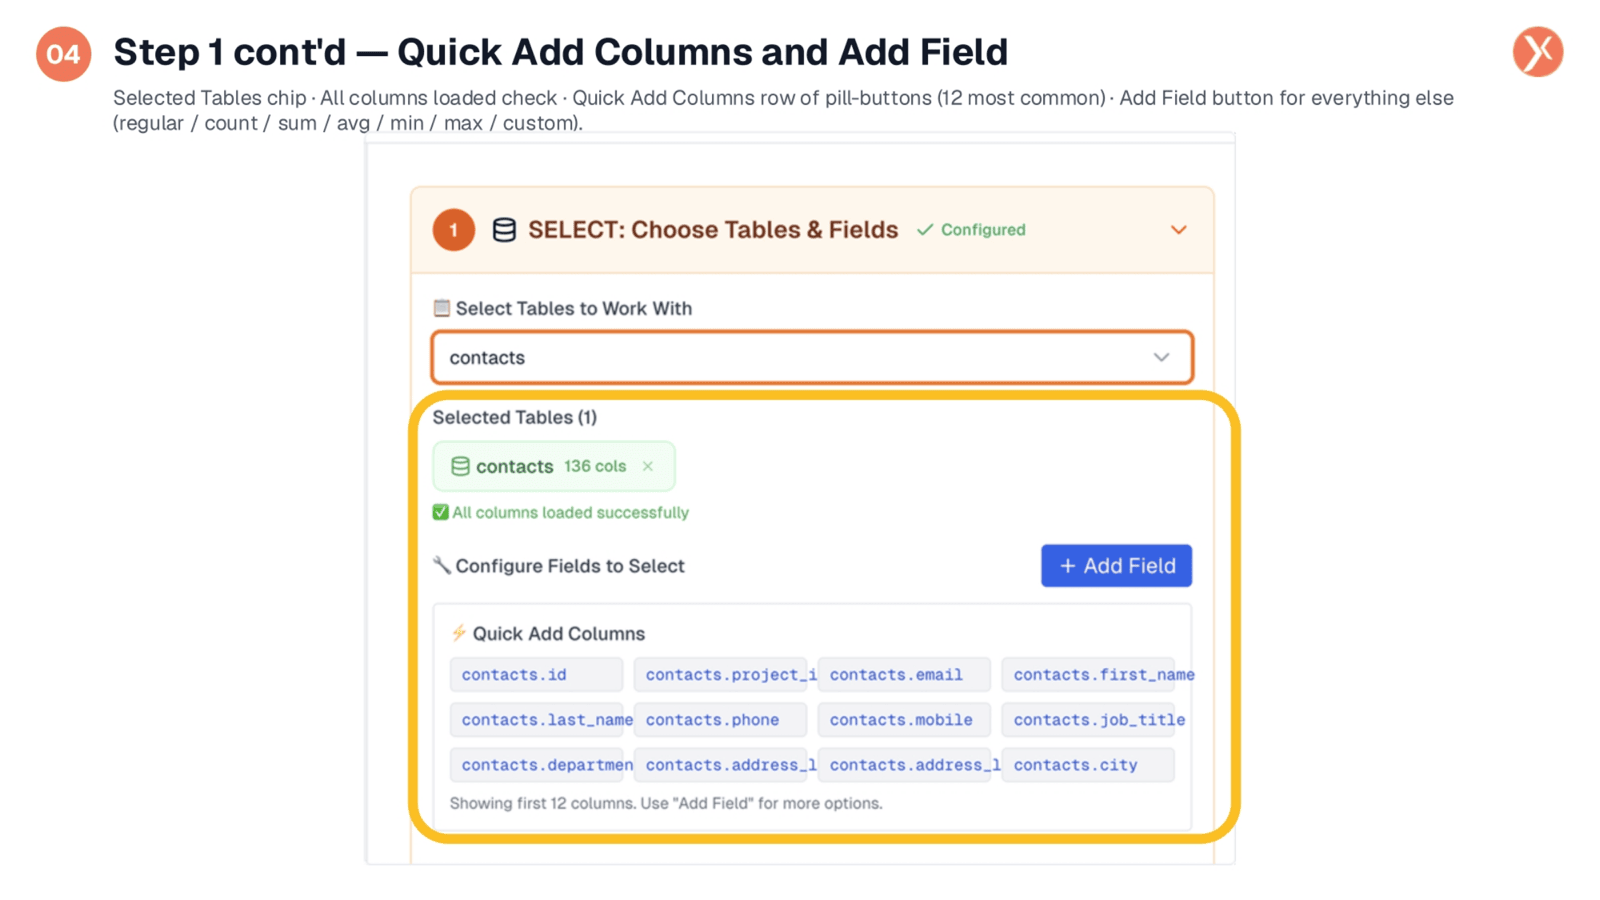
After selecting your tables, a "Selected Tables" chip appears, indicating the table name and its column count, such as "contacts" with 136 columns. The system then loads the column metadata. You have two primary methods for adding fields to your query. The "Quick Add Columns" feature provides a fast path, displaying the twelve most common columns for the selected table as convenient pill buttons, allowing for single-click additions. For more advanced needs, the "Add Field" button opens a comprehensive field configurator. Here, you can specify the table and column, apply aggregate functions like COUNT, SUM, AVG, MIN, or MAX, or even define custom SQL expressions, along with setting aliases for clarity. This flexibility allows you to combine quick additions with detailed configurations.
Step 4: WHERE Filter Conditions
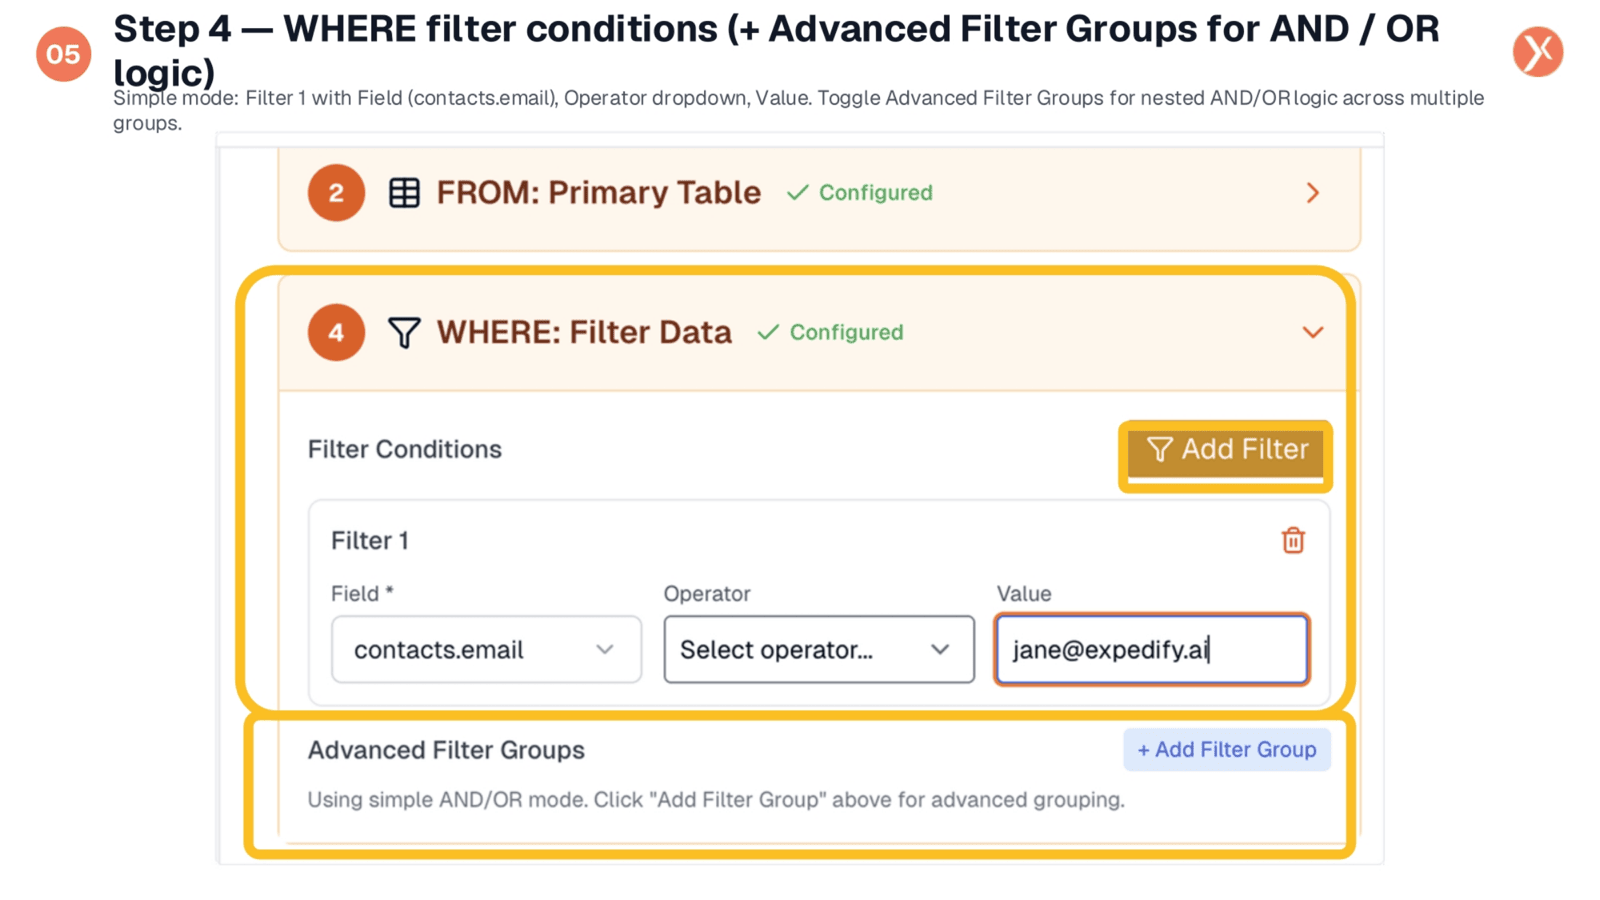
Step four focuses on defining your WHERE filter conditions, which are essential for narrowing down your dataset. In simple mode, you configure a filter by specifying a field, selecting an operator from a dropdown menu, and entering a value. The operator dropdown offers over thirty options, including various date presets like "today" or "last month," alongside common string and numeric comparisons. You can add multiple filter conditions, which are joined by default with an "AND" logic. For more complex scenarios, the "Advanced Filter Groups" option allows you to implement nested AND/OR logic across different groups, enabling sophisticated, production-grade filtering without requiring any SQL syntax.
Step 6: Sort Rules and Live ORDER BY Preview
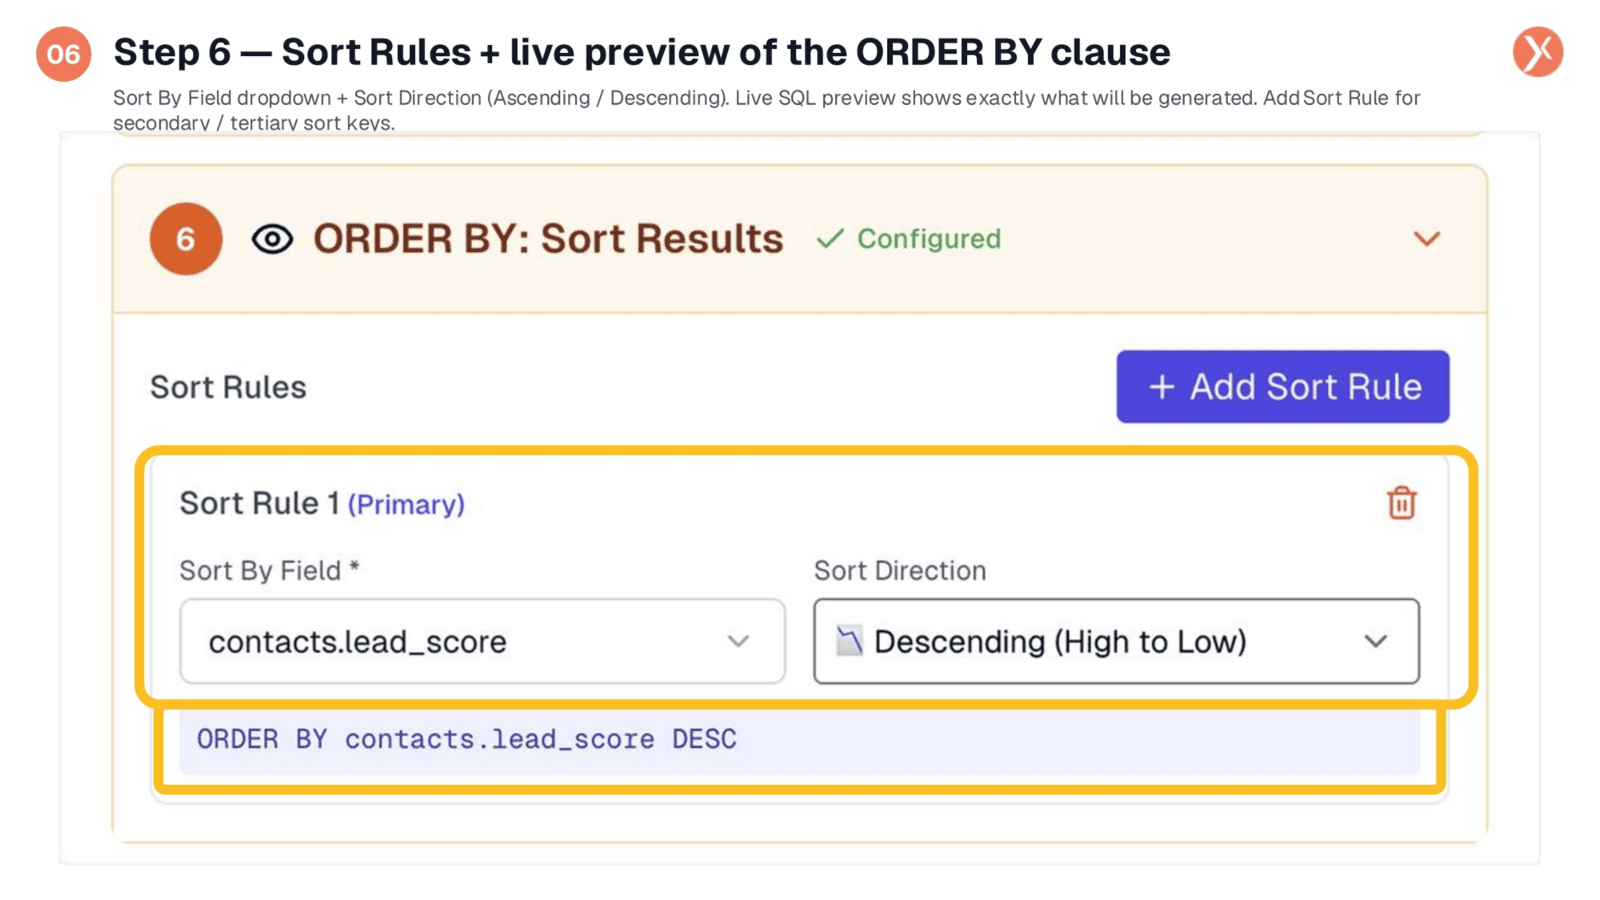
Step six allows you to define the sort rules for your query results using the ORDER BY clause. You simply select a field and then choose a sort direction, either ascending or descending. For instance, you might sort by contacts.lead_score in descending order, from high to low. A key feature is the live SQL preview, which immediately displays the exact SQL code generated by your visual selections, such as ORDER BY contacts.lead_score DESC. This provides instant feedback and helps you understand the underlying SQL. You can also add multiple sort rules to establish secondary or tertiary sort keys, allowing for precise ordering of your data.
Step 7: LIMIT and Offset
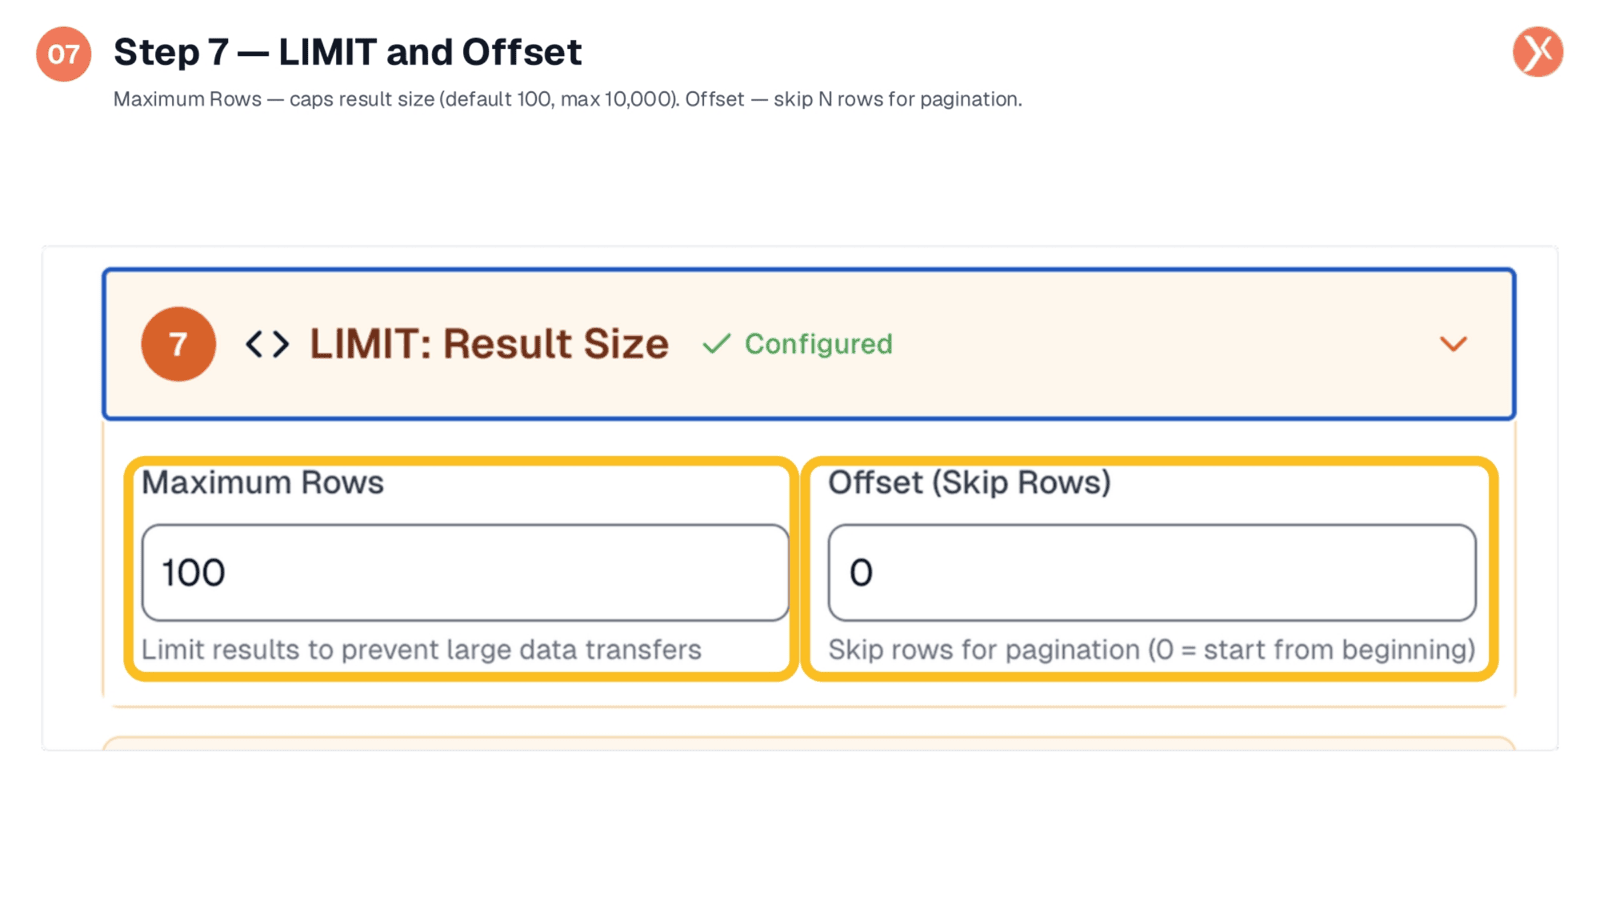
Step seven addresses the LIMIT and Offset parameters, crucial for managing the size and presentation of your query results. The "Maximum Rows" field allows you to cap the total number of rows returned, with a default of 100 and a maximum of 10,000. It's highly recommended to always set a limit, as executing a SELECT query on a very large table without one can significantly impact workflow performance. The "Offset" field is designed for pagination, enabling you to skip a specified number of initial rows. For example, setting an offset of 100 would retrieve rows 101 through 200, facilitating the processing of large result sets in manageable chunks.
Step 8: Live SQL Preview and Customization
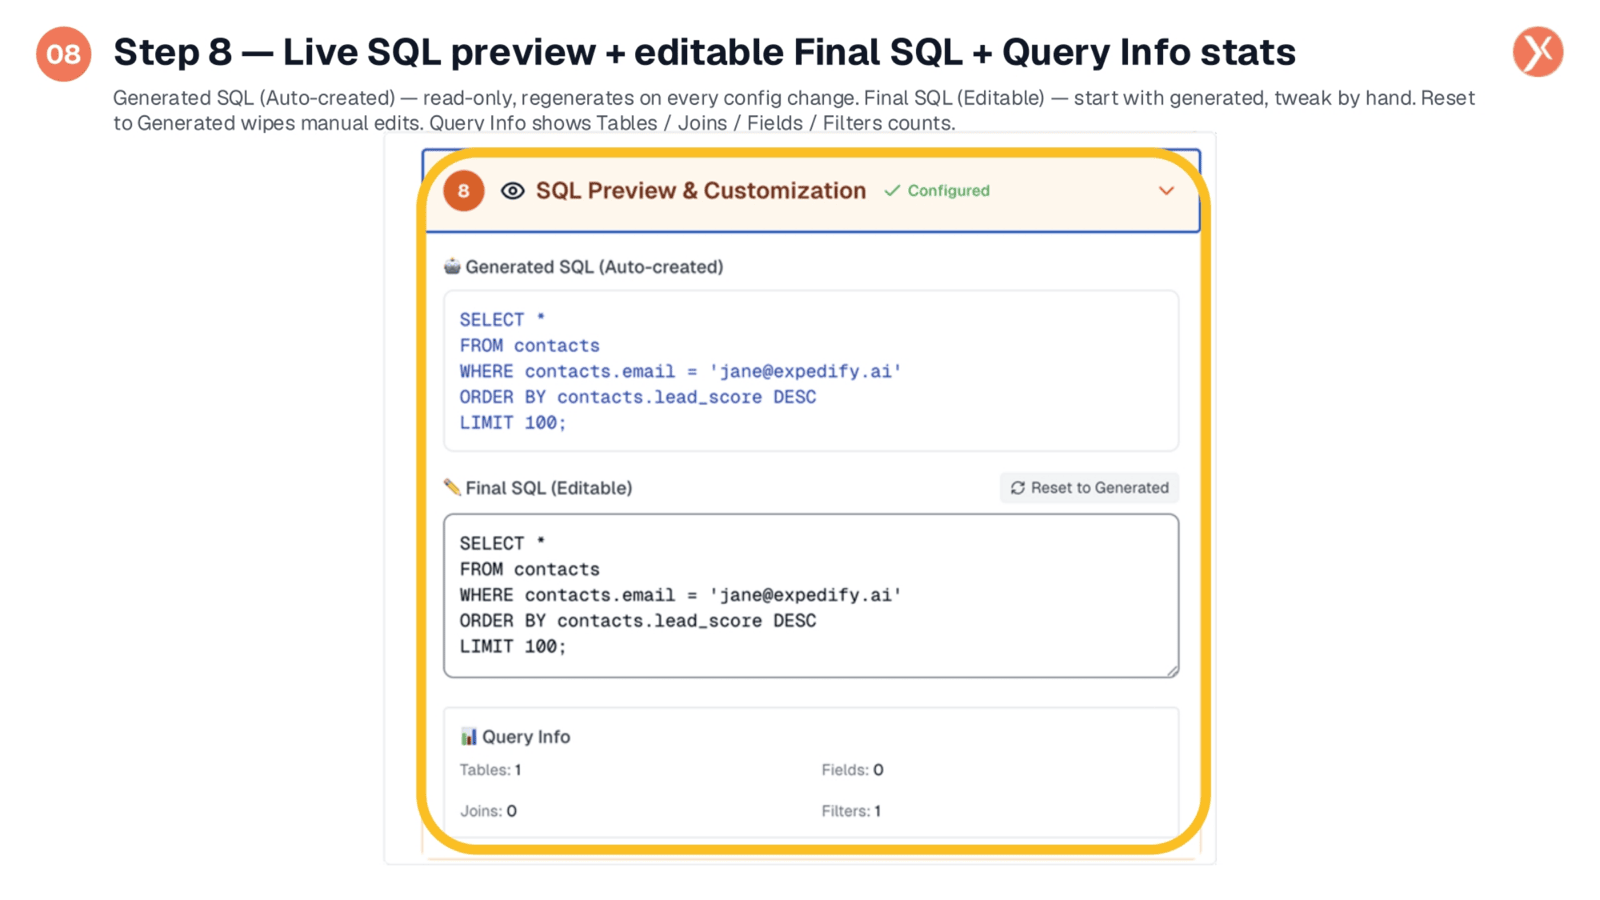
Step eight provides the culmination of your visual query building: a live SQL preview. The "Generated SQL" section is read-only and automatically regenerates with every configuration change, allowing you to observe your visual selections translate into SQL in real time. For power users, the "Final SQL" section is fully editable. It begins as a copy of the generated SQL, but you can manually tweak it to incorporate advanced SQL features like window functions, subqueries, or Common Table Expressions that the visual builder might not directly support. A "Reset to Generated" option allows you to revert any manual edits. Additionally, the "Query Info" section offers a metadata strip, displaying counts for tables, joins, fields, and filters, which is valuable for assessing query complexity before deployment.
Additional Powers Behind the Visual Builder
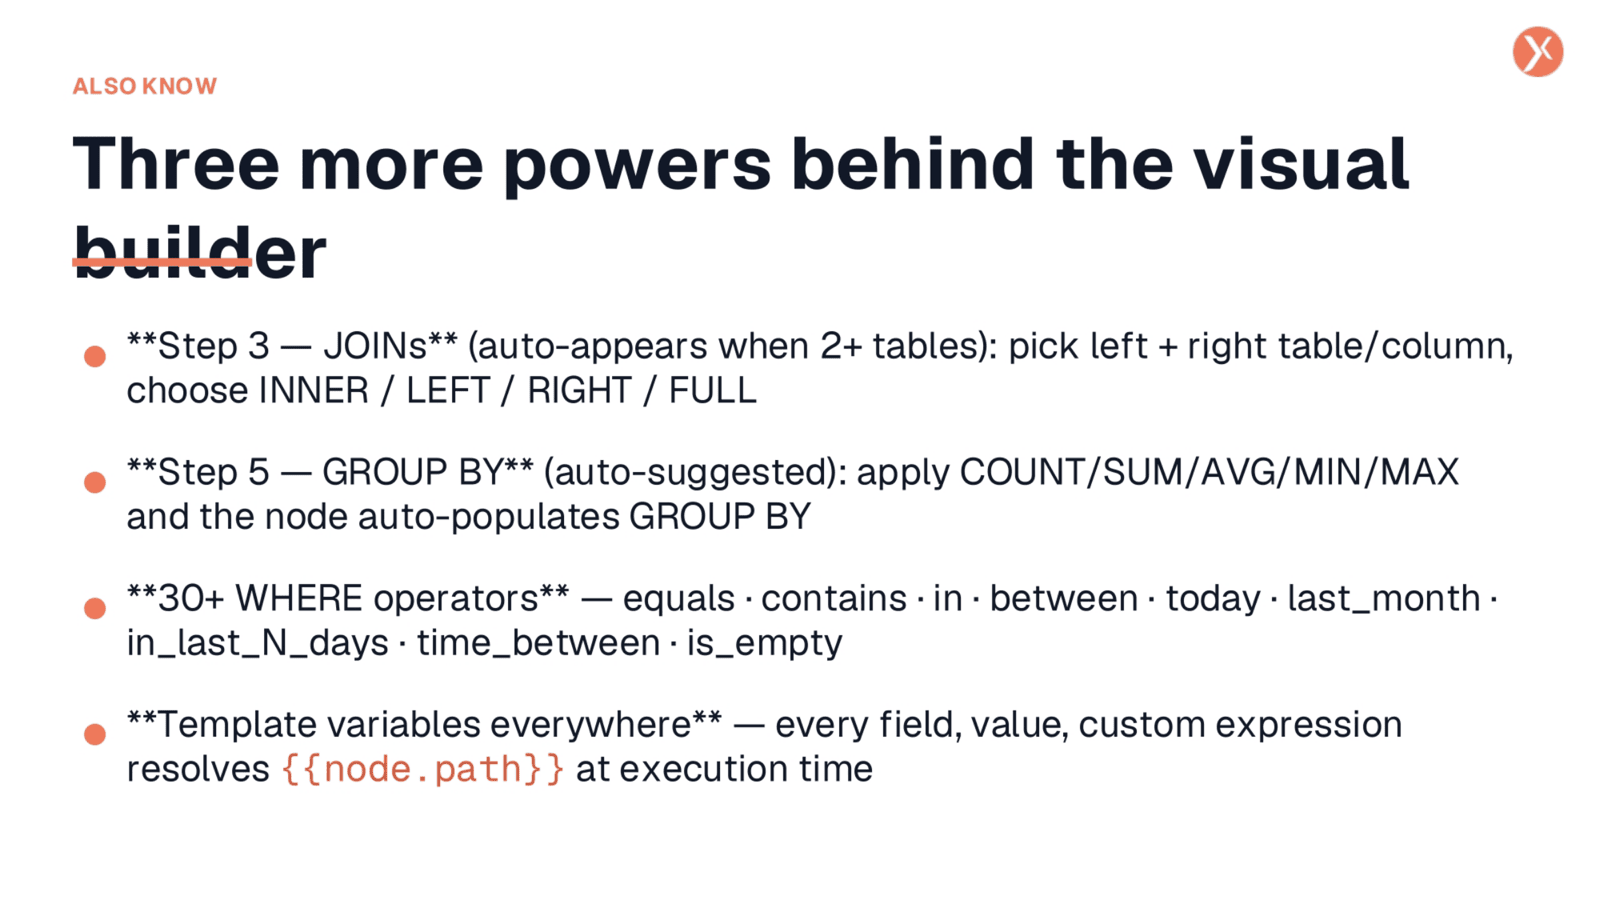
Beyond the steps we've covered, the visual builder offers additional powerful capabilities. Step three, for JOIN configuration, automatically appears when you select two or more tables. Here, you define relationships by picking left and right tables and columns, then choosing the join type: INNER, LEFT, RIGHT, or FULL outer. The builder handles the complex JOIN syntax. Similarly, step five, GROUP BY, is auto-suggested when you apply an aggregate function like COUNT, SUM, AVG, MIN, or MAX to any field, ensuring valid SQL by automatically populating the GROUP BY clause. Furthermore, the WHERE filter's operator dropdown includes over 30 options, encompassing extensive date presets and relative ranges. Crucially, all text fields throughout the builder support template variables, allowing for fully dynamic queries that resolve at execution time.
SQL Builder Outputs
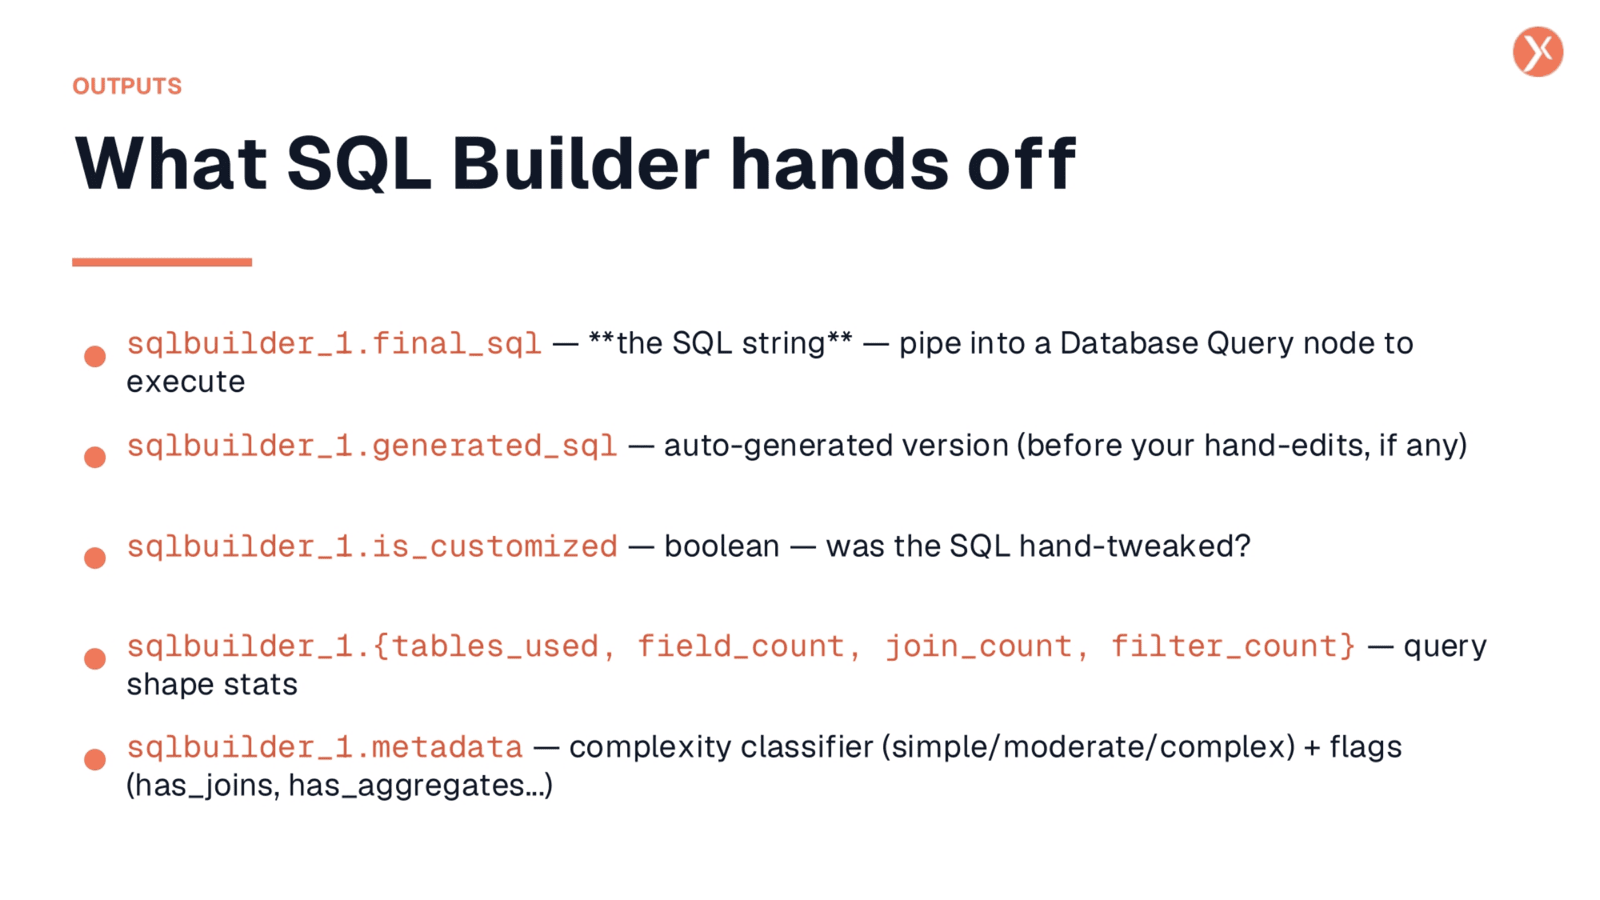
The SQL Builder provides several valuable outputs for downstream nodes. The primary output is sqlbuilder_1.final_sql, which is the actual SQL string. This is the output you connect to a Database Query node's SQL Query field for execution. You also get sqlbuilder_1.generated_sql, representing the auto-generated version before any manual edits, useful for comparison or reverting changes. The sqlbuilder_1.is_customized boolean indicates whether the SQL was manually tweaked, which can be valuable for audit trails. Additionally, query shape statistics are provided, including tables_used, field_count, join_count, and filter_count, offering quick insights into query complexity. Finally, sqlbuilder_1.metadata offers a complexity classifier and flags like has_joins or has_aggregates, aiding in query management and routing.
SQL Builder Recap and Next Steps
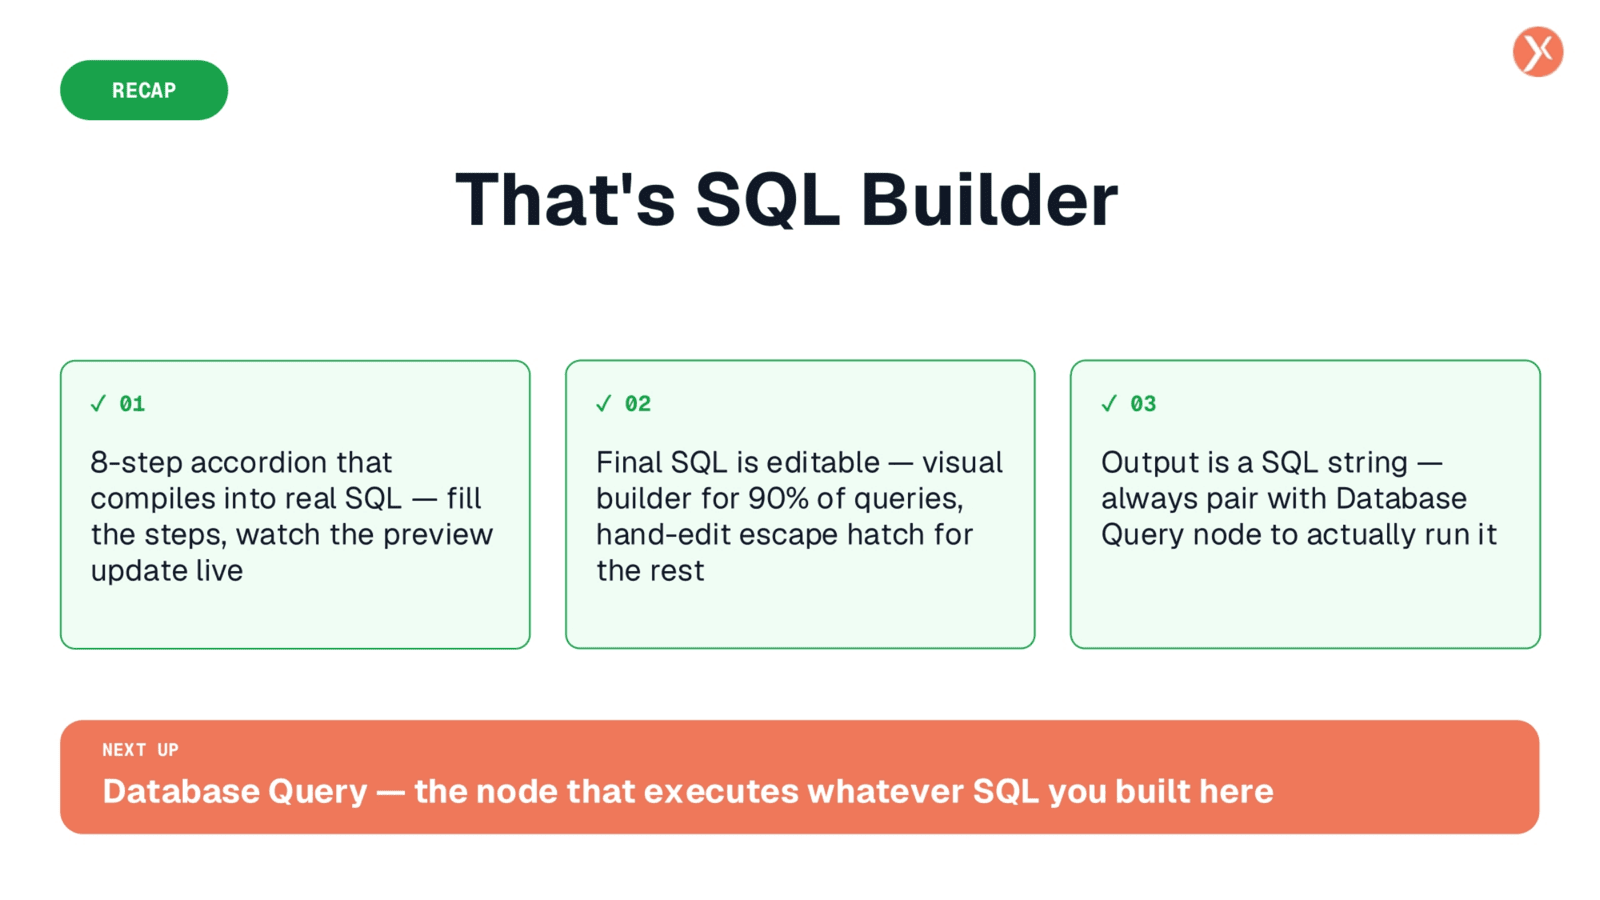
We've now explored the SQL Builder comprehensively. It features an intuitive eight-step accordion interface, where filling in the steps visually compiles into real SQL, with a live preview updating instantly. This visual builder handles approximately 90% of common queries, while the editable "Final SQL" section serves as an escape hatch for more complex scenarios requiring manual tweaks, such as window functions or subqueries. Remember, the SQL Builder's output is a SQL string, which must always be paired with a Database Query node to actually execute the query and retrieve data. Next, we will delve into the Database Query node, which is responsible for executing the SQL you've constructed here.