Configuring Workflow Details
Today, we're focusing on the Database Change Trigger, a core component for automating tasks based on database modifications. We'll explore how to configure its key aspects, including the changed entity, the specific type of change, the fields being watched, and any necessary filter conditions. This setup ensures your workflows react precisely to relevant database updates.
Workflow Settings Popup Demo
This demonstration will guide you through the Workflow Settings popup, a crucial interface for customizing your workflows. We'll cover all six tabs, starting from Basic Info and progressing to Advanced settings. This comprehensive walkthrough will show you how to give your workflows a clear identity and prepare them for various uses, from private operations to marketplace publishing.
Generic Workflow Starting Point
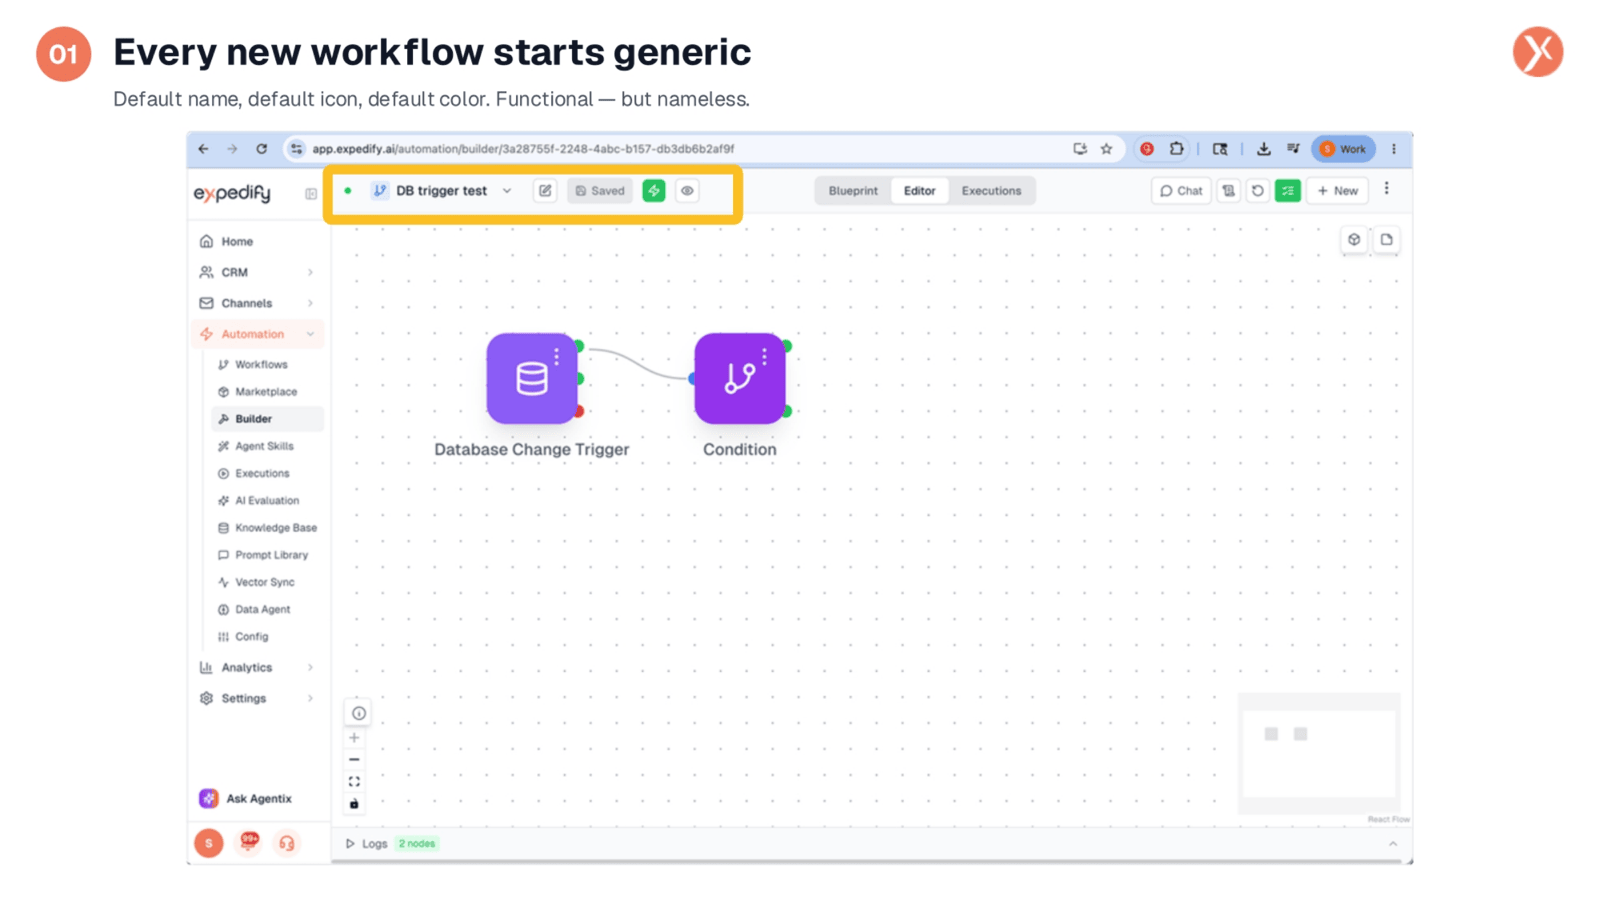
Every new workflow begins with a generic setup, featuring a default name, icon, and color. While functional, a workflow named 'DB trigger test' quickly becomes indistinguishable among many. Our goal is to transform this generic starting point into something easily identifiable and meaningful. This process is essential for maintaining an organized and efficient automation environment as your number of workflows grows.
Opening Workflow Settings
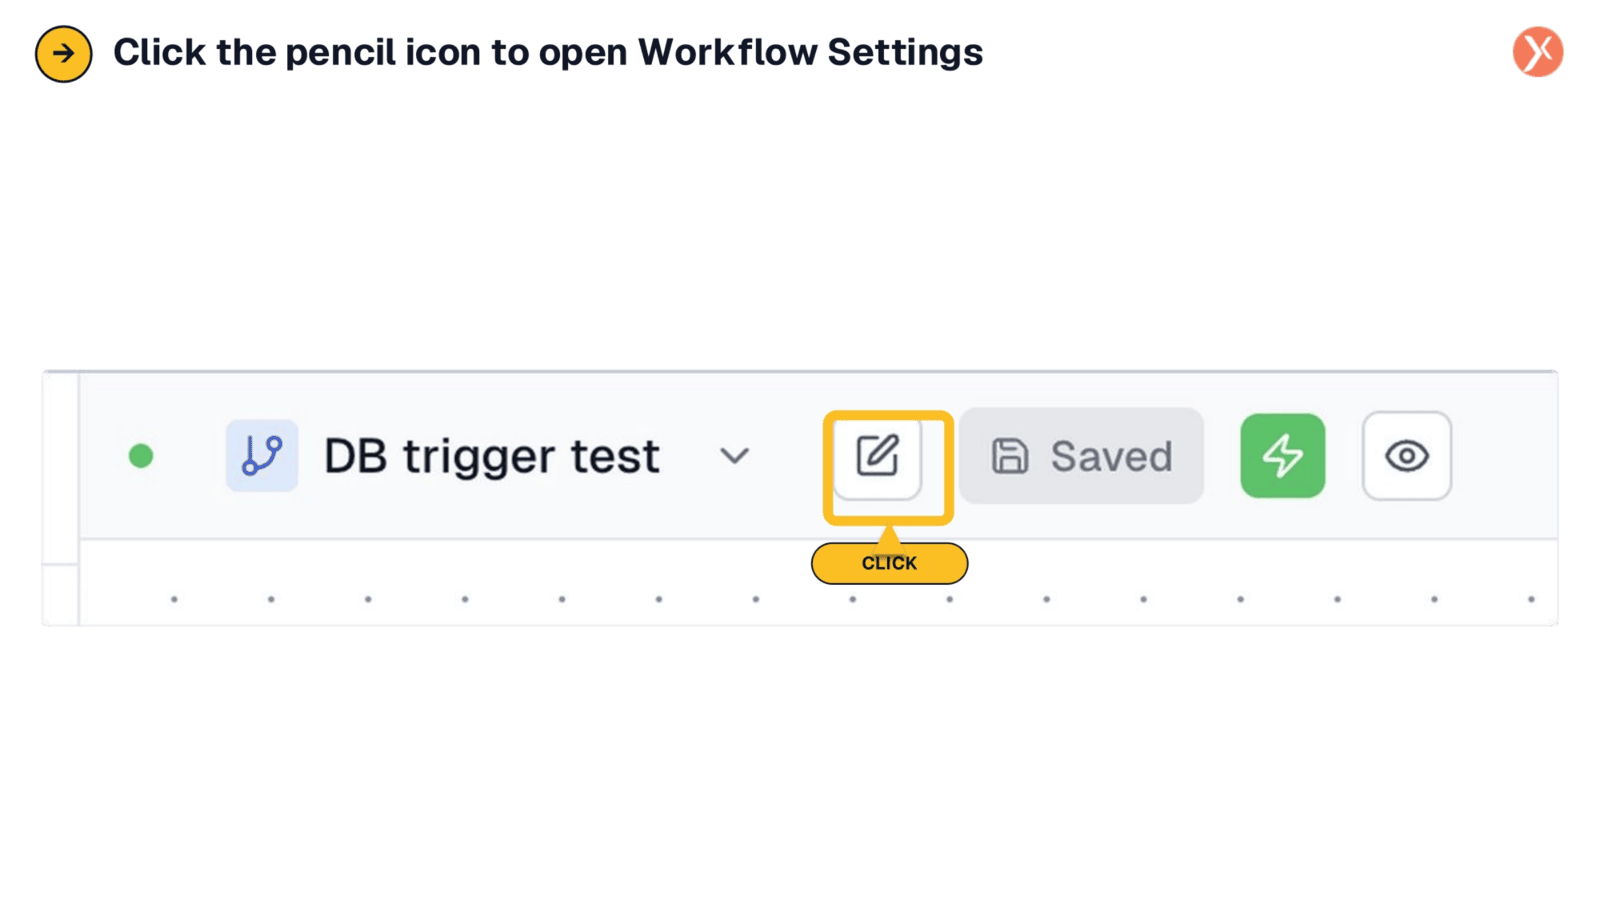
To begin customizing your workflow, locate the pencil icon positioned next to the workflow name in the toolbar. This icon serves as the gateway to the Workflow Settings. Clicking it will open the dedicated popup, allowing you to access and modify all the configuration options for your workflow's identity and behavior.
Tab 1: Basic Info
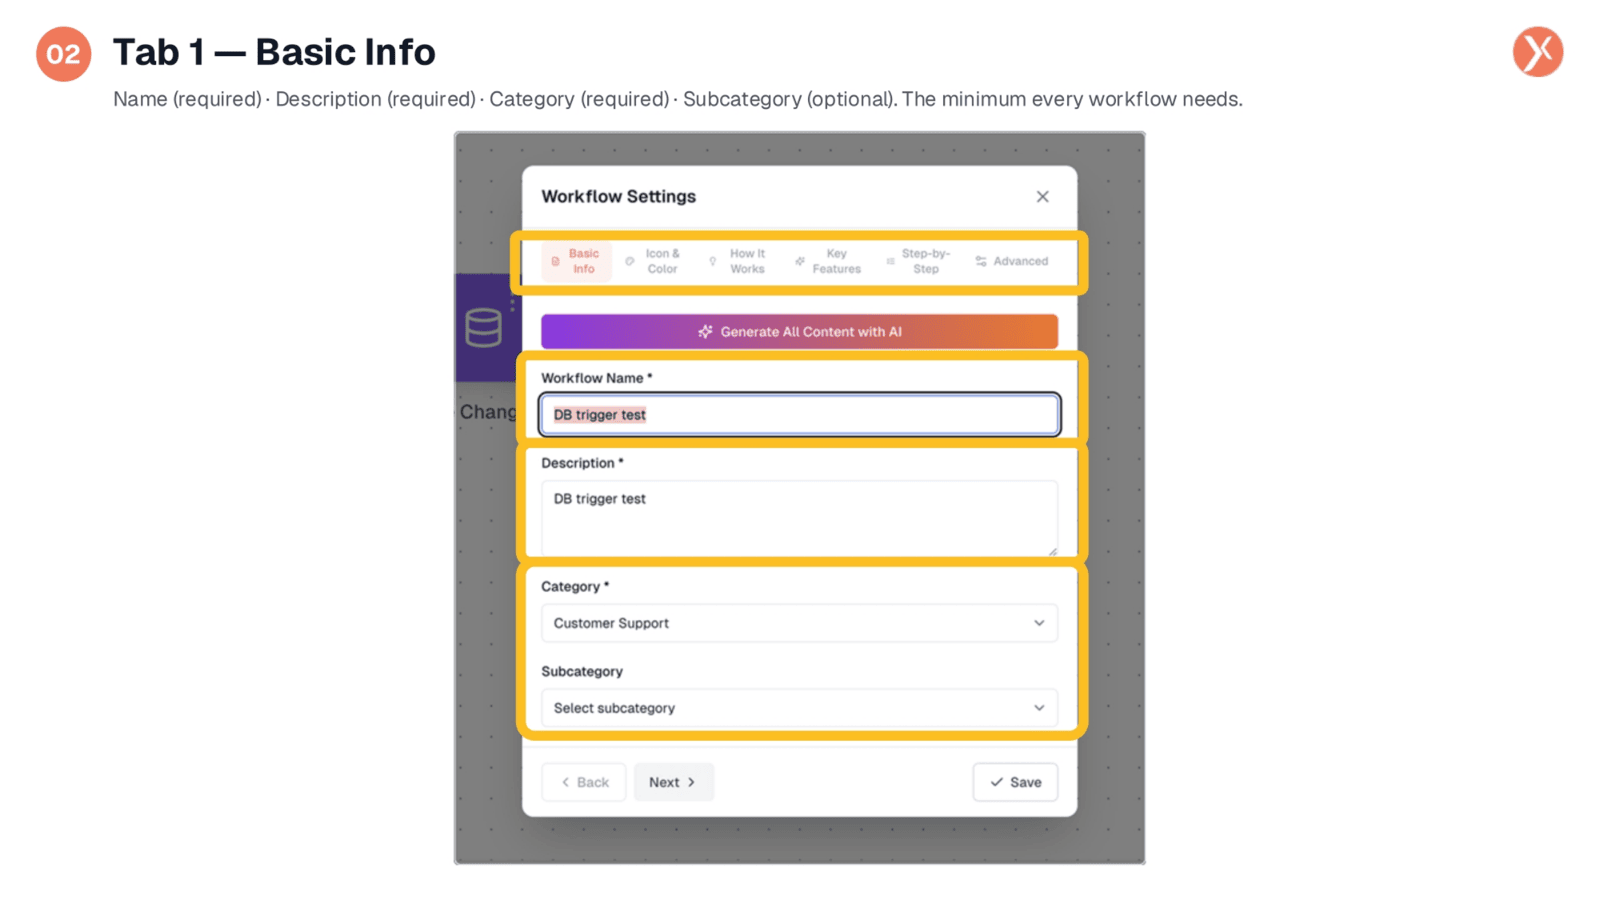
The first tab in Workflow Settings is 'Basic Info,' which covers the essential details every workflow needs. This includes the workflow's name, a concise description of its function, and its category. An optional subcategory provides further refinement. These fields are the minimum required to give your workflow a clear identity and ensure it's easily discoverable within your system.
Fixed Category List
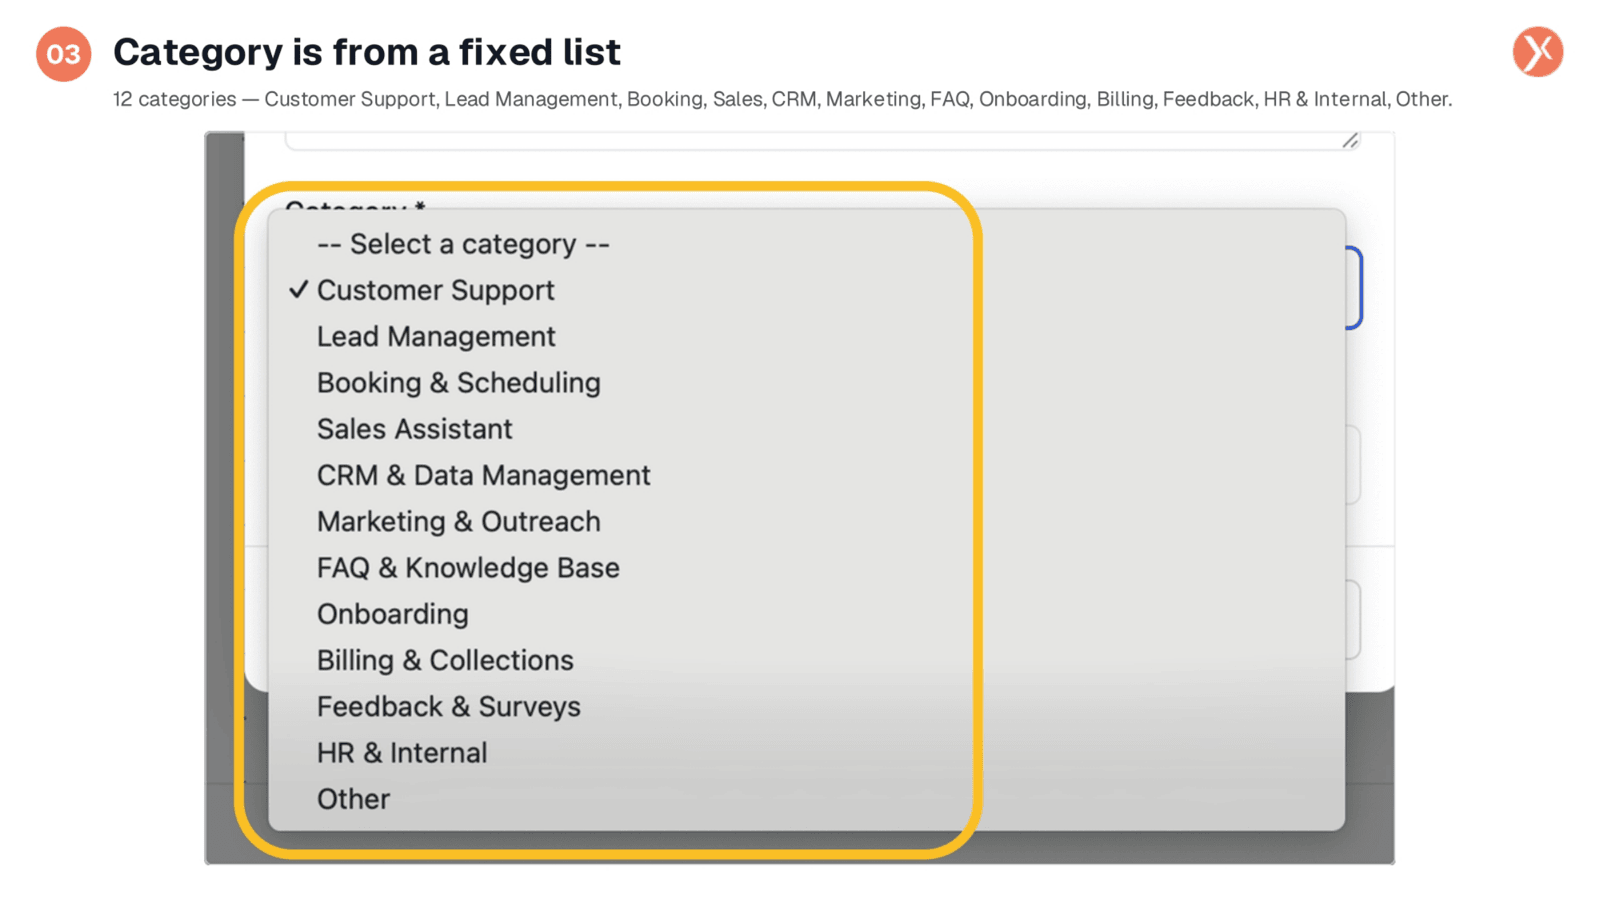
The category field offers a fixed list of 12 business-oriented buckets, such as Customer Support, Lead Management, Sales Assistant, and CRM & Data Management. These standardized categories help organize workflows consistently across the platform. Selecting the most appropriate category ensures your workflow is grouped logically, making it easier for others to find and understand its purpose, especially if you plan to publish it.
Real Name and Category Example
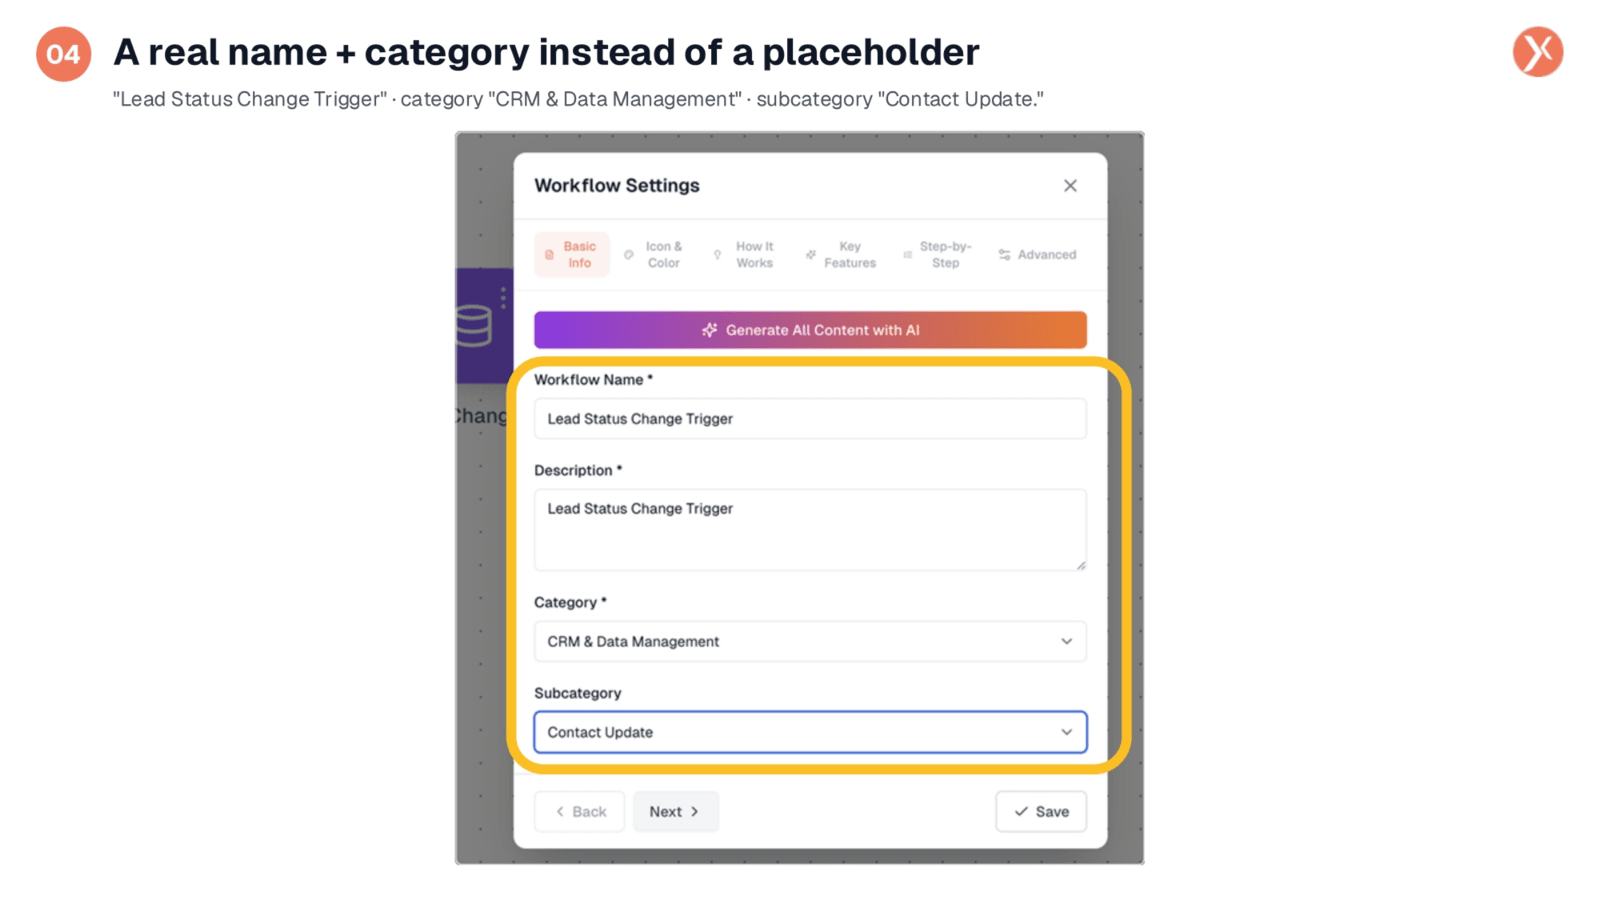
Here, we see the 'Basic Info' tab updated with a meaningful identity. The workflow is now named 'Lead Status Change Trigger,' clearly indicating its function. It's categorized under 'CRM & Data Management' with a subcategory of 'Contact Update.' This small investment of time in naming and categorization significantly improves the workflow's findability and clarity, making it much more useful than a generic placeholder.
Tab 2: Icon & Color
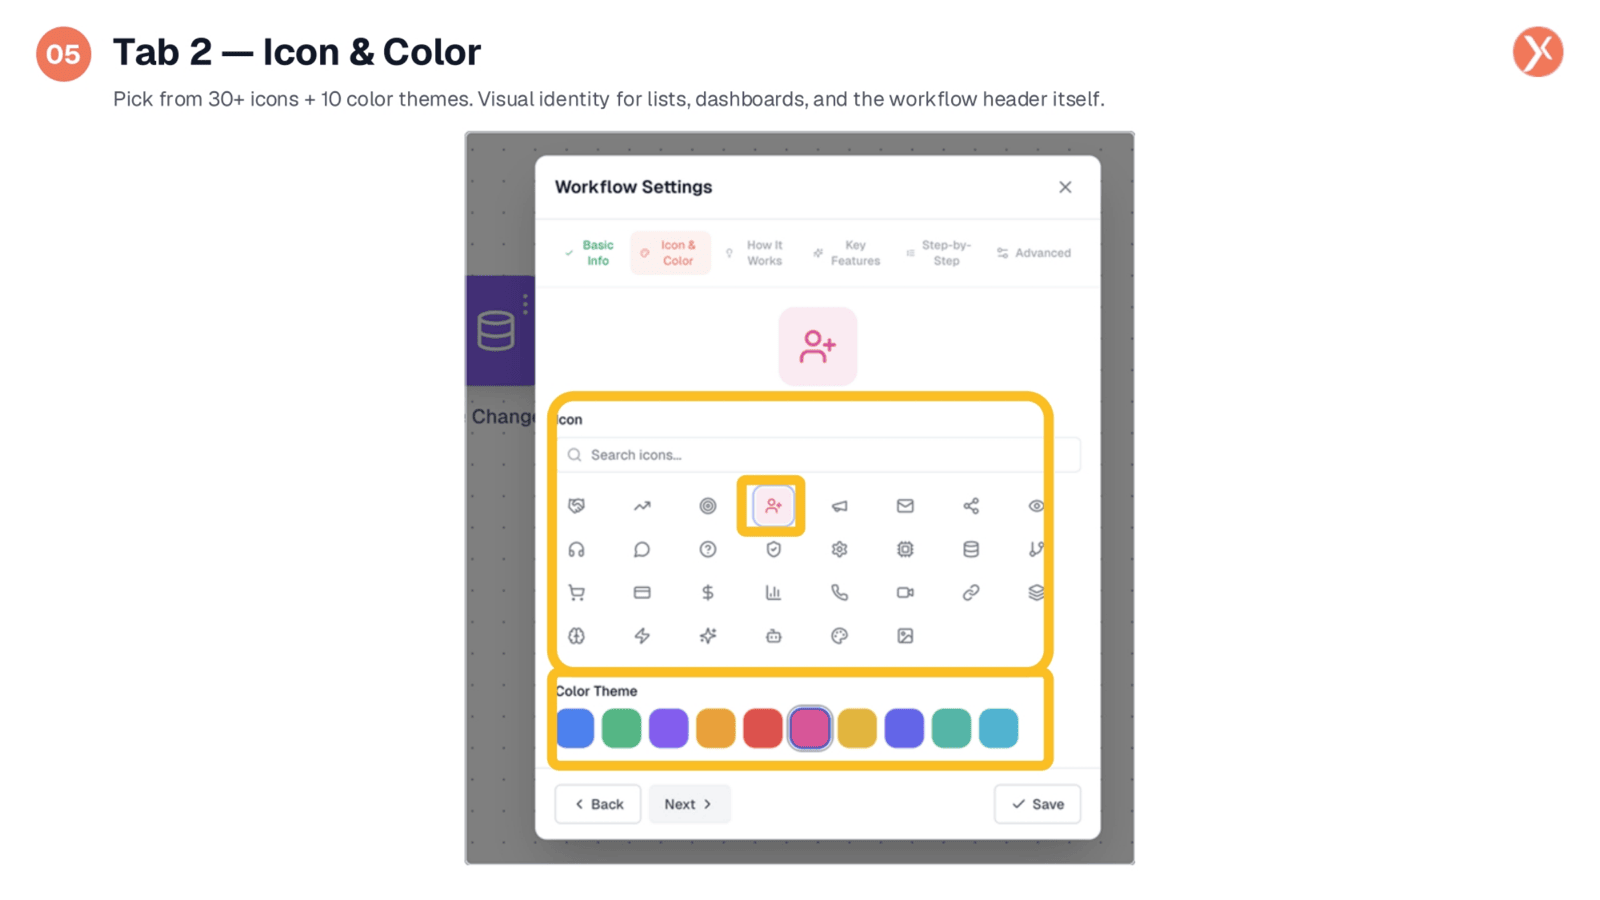
The 'Icon & Color' tab allows you to assign a visual identity to your workflow. You can choose from over 30 icons and 10 distinct color themes. This visual cue is incredibly helpful when scanning lists or dashboards containing numerous workflows, enabling quick recognition. A unique icon and color combination makes your workflow stand out and improves overall navigation and organization.
Tab 3: How It Works
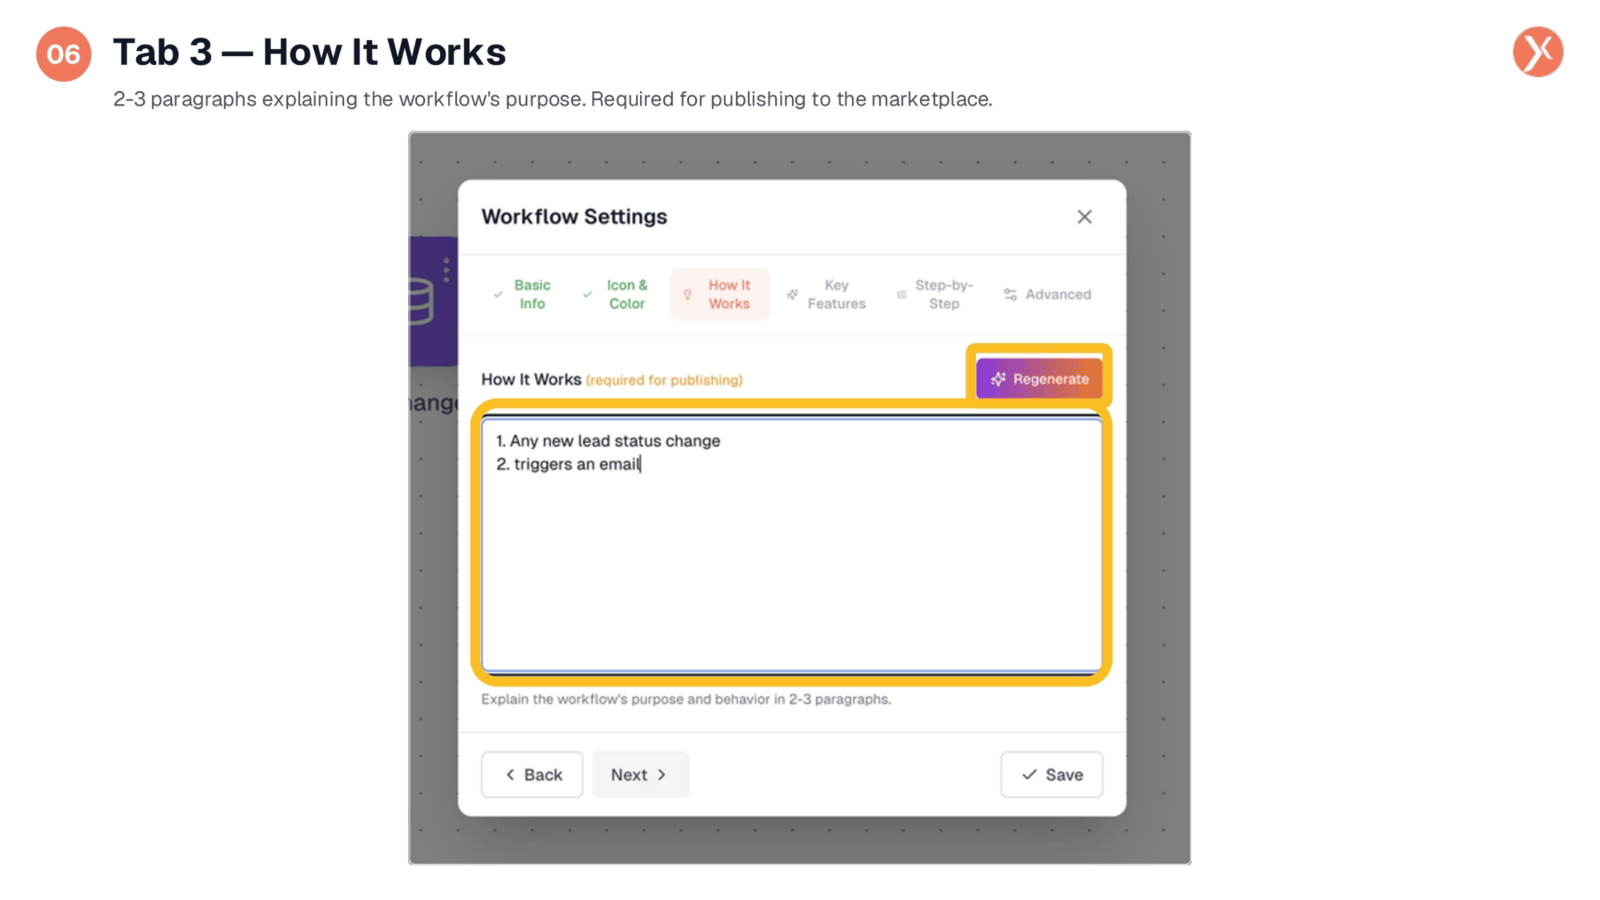
The 'How It Works' tab is where you provide a brief explanation of your workflow's purpose, typically in two to three paragraphs. This section is crucial for anyone encountering your workflow for the first time. While optional for private workflows, it becomes a mandatory field if you intend to publish your workflow to the marketplace, ensuring others can quickly grasp its functionality.
Tab 4: Key Features
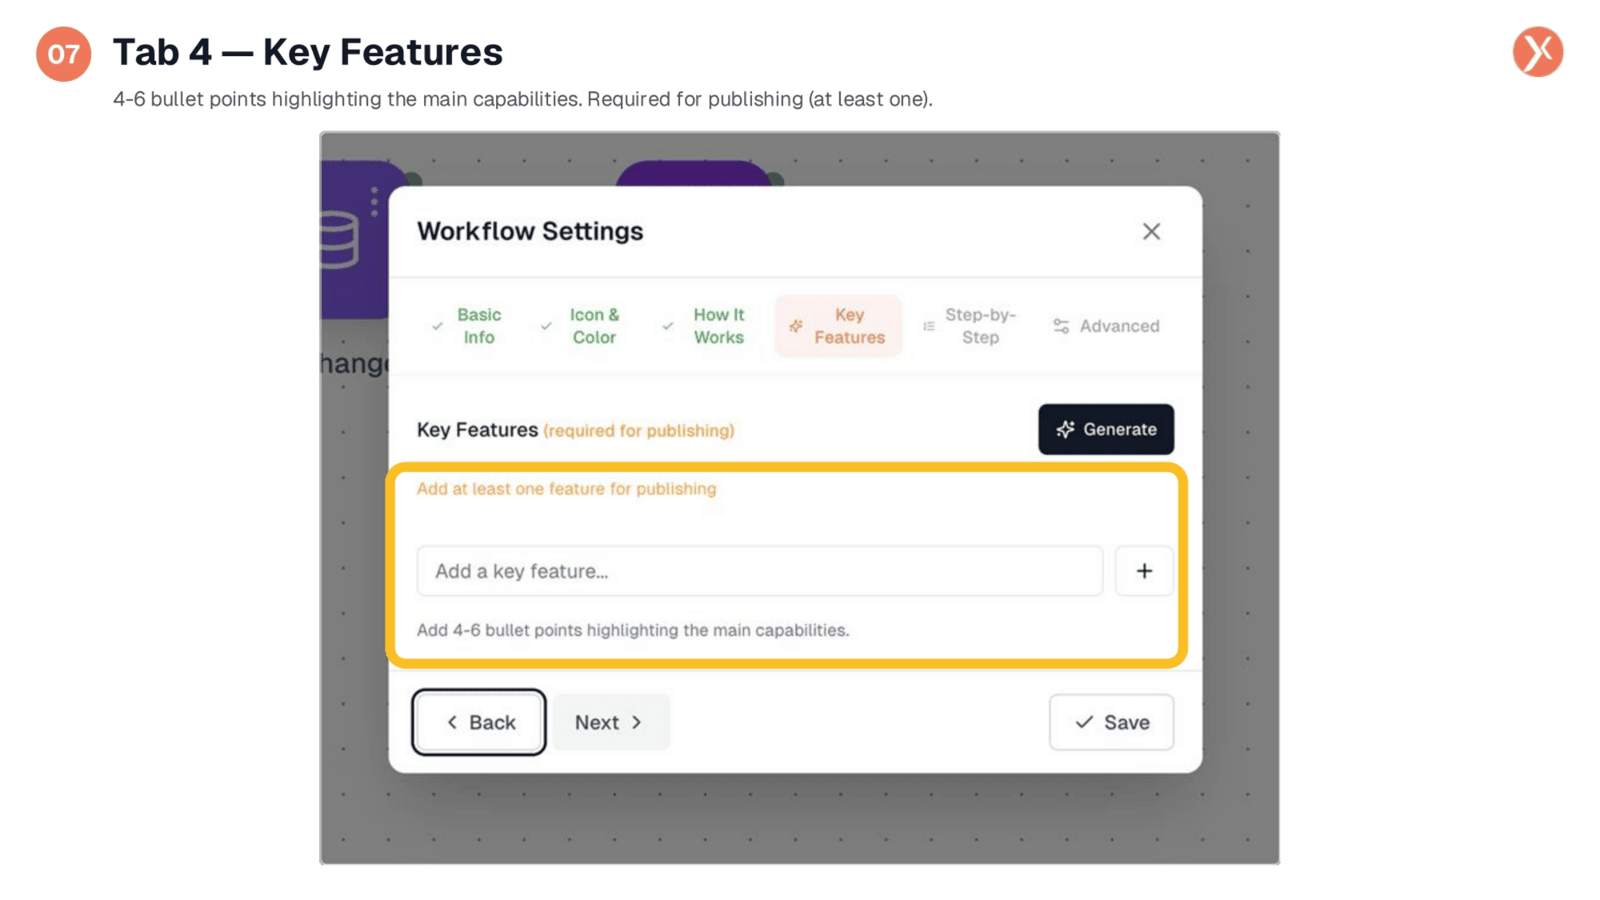
Under the 'Key Features' tab, you'll list the main capabilities of your workflow using four to six bullet points. This section highlights what users can achieve with your automation. Similar to 'How It Works,' at least one key feature is required for publishing to the marketplace, providing essential information for potential users. The 'Generate' button can assist in drafting these points based on your workflow's nodes.
Tab 5: Step-by-Step Guide
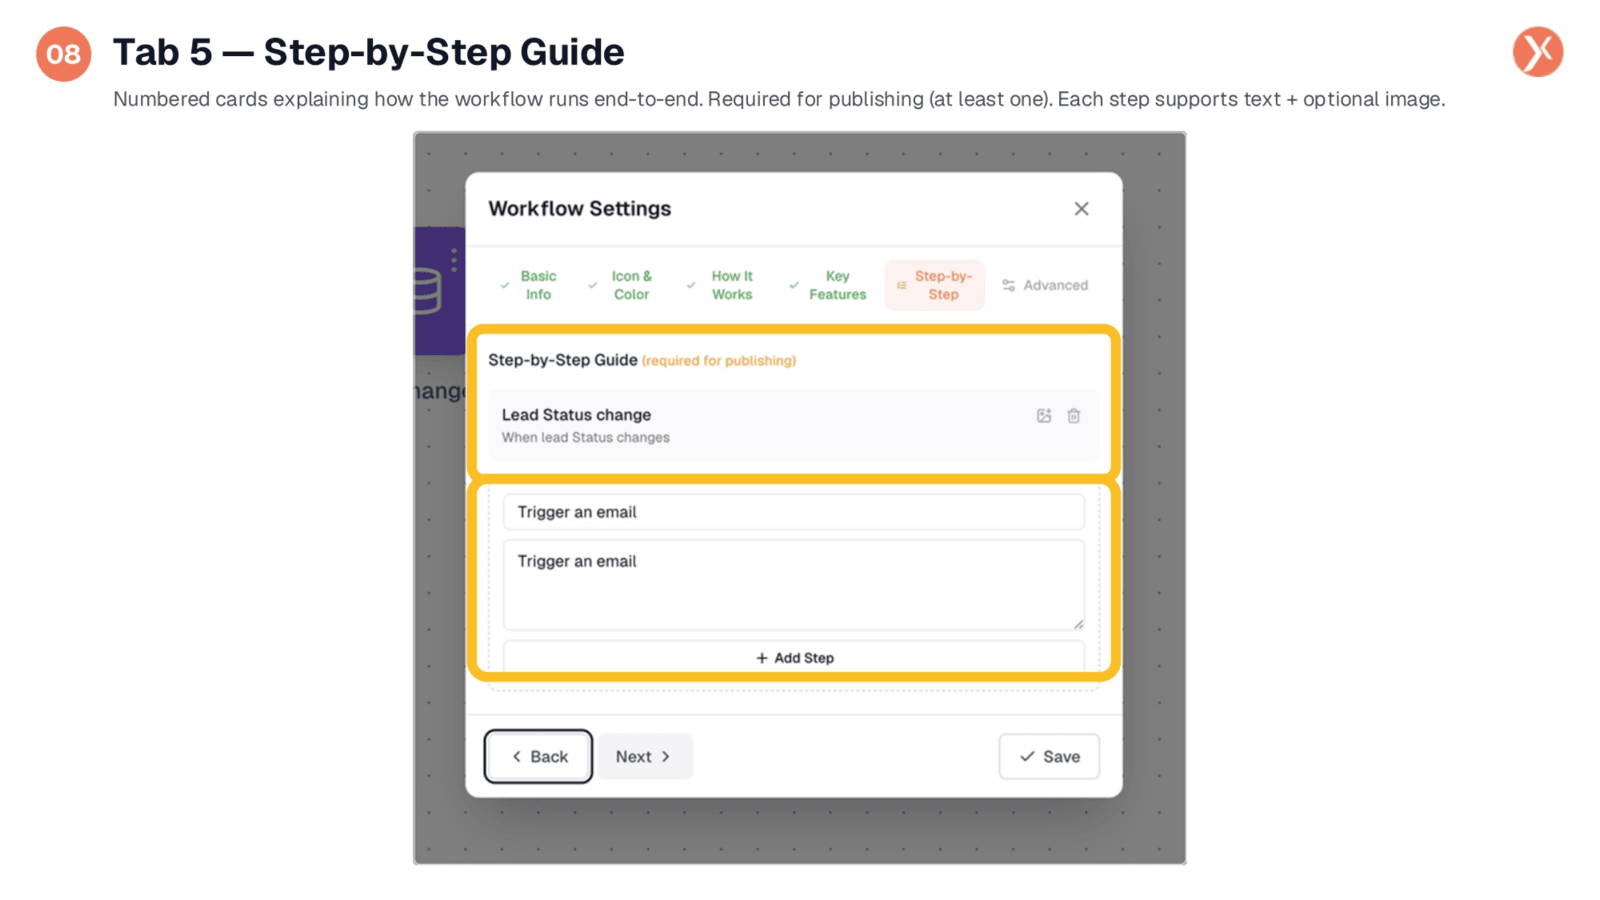
The 'Step-by-Step Guide' tab allows you to document the workflow's execution flow through numbered cards, each with a title and description. You can also include optional images for clarity. This guide acts as a comprehensive README for marketplace users. While optional for internal workflows, it's a critical component for published templates, ensuring users can easily understand and implement your solution.
Tab 6: Advanced Settings
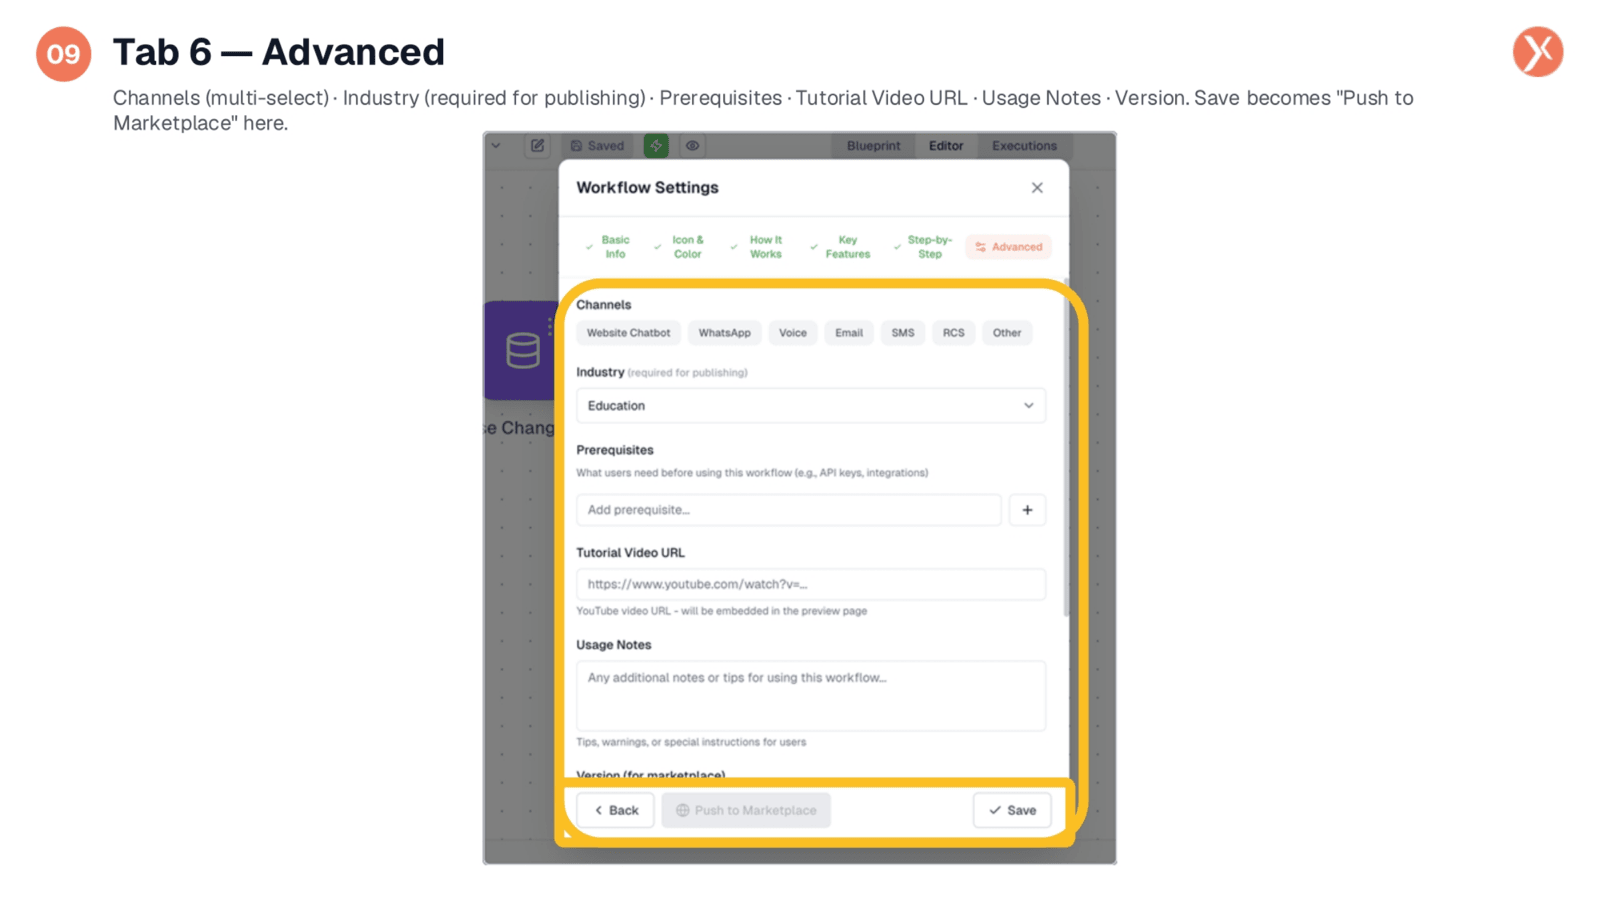
The 'Advanced' tab contains additional fields primarily relevant for marketplace publishing. These include multi-select options for channels the workflow interacts with, a required industry classification, and prerequisites like API keys. You can also add a tutorial video URL and usage notes. Notably, the 'Save' button transforms into 'Push to Marketplace' on this tab, serving as the final action for publishing your workflow.
Required vs. Optional Fields
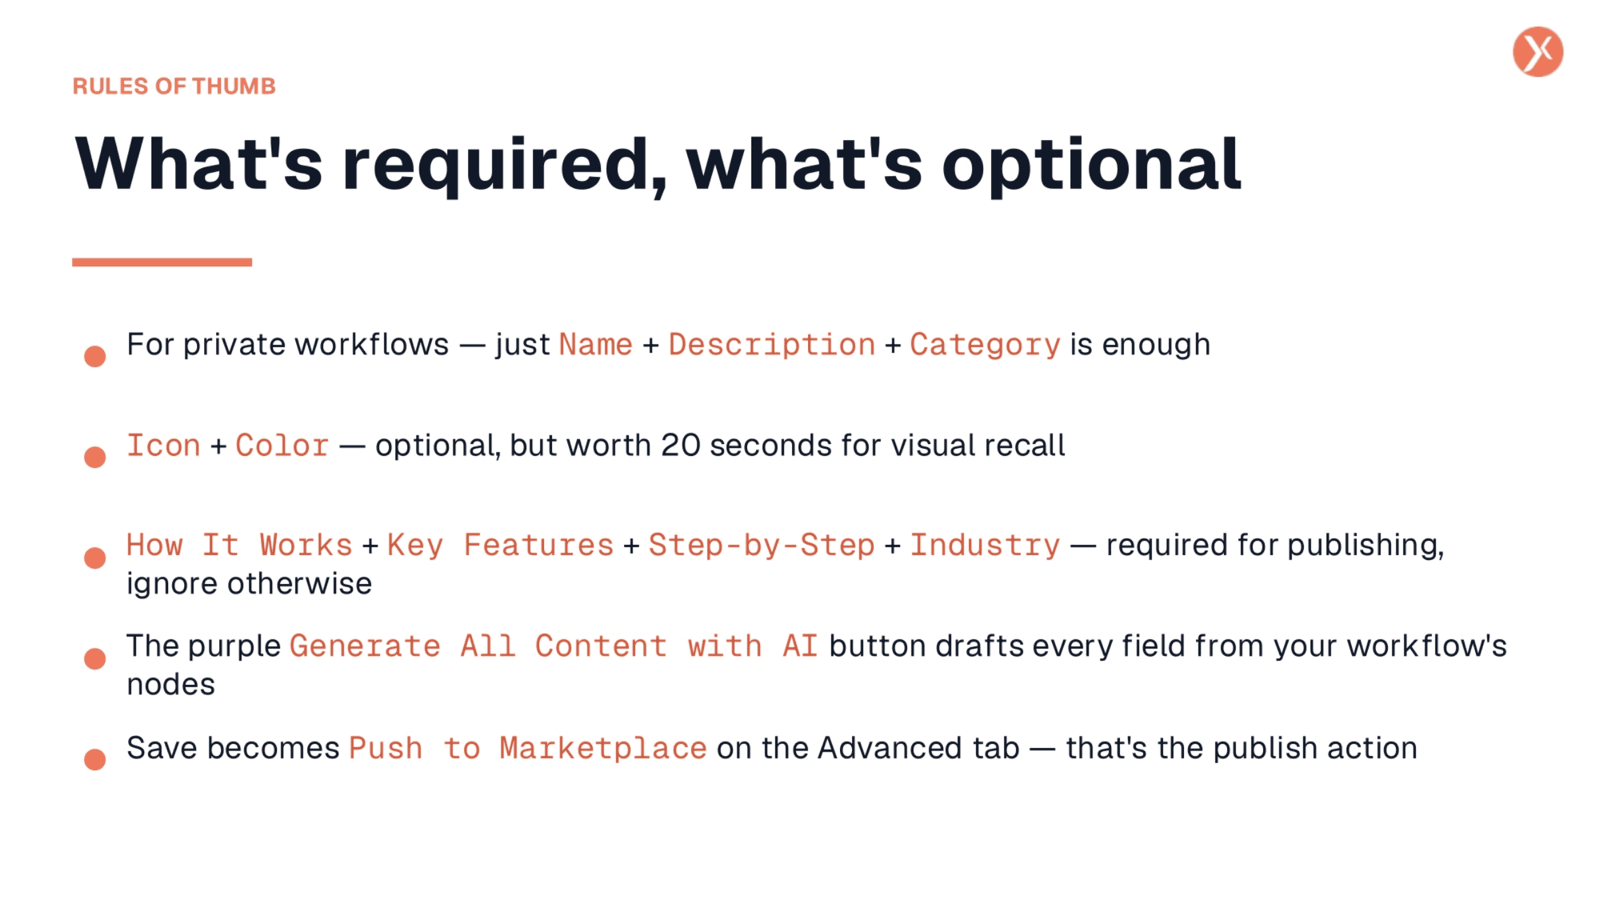
For private workflows, only the Name, Description, and Category fields are essential. Icon and Color are optional but highly recommended for visual recall. The 'How It Works,' 'Key Features,' 'Step-by-Step,' and 'Industry' fields are specifically required for publishing to the marketplace. Remember, the 'Generate All Content with AI' button can automatically draft content for many fields, and 'Save' becomes 'Push to Marketplace' on the Advanced tab for publishing.
Workflow with Real Identity
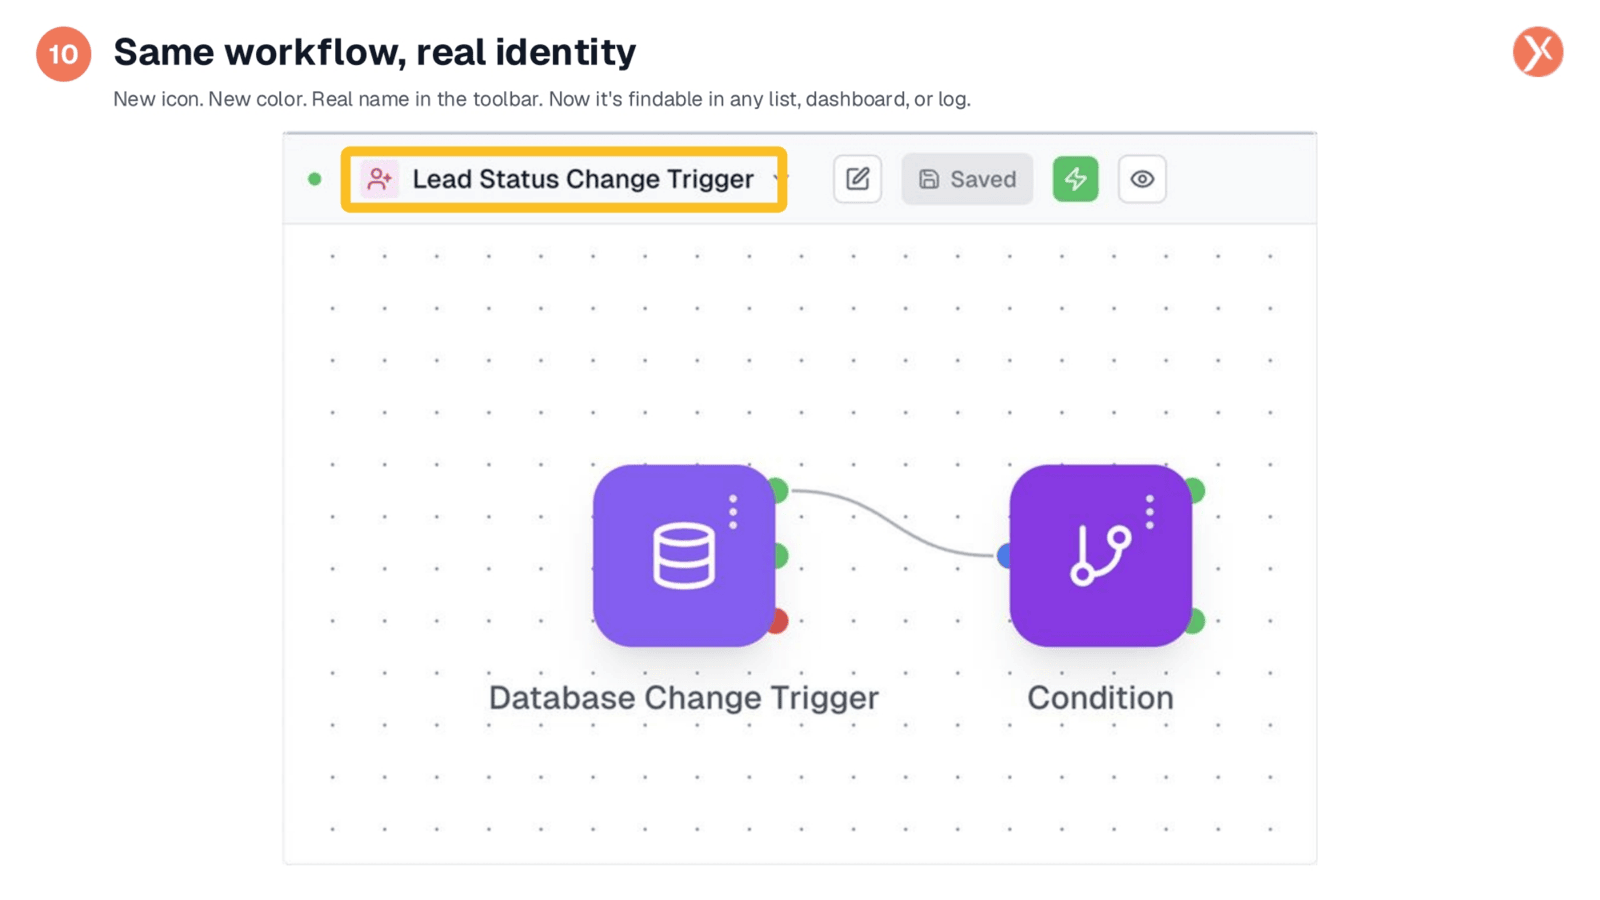
Observing the canvas now, we see the impact of applying a real identity to our workflow. The header proudly displays 'Lead Status Change Trigger' alongside its new pink person-plus icon. This transformation ensures the workflow is easily identifiable in any list, dashboard, or log within Expedify. A few moments spent in settings provides lasting clarity and organization.
Workflow Identity Recap and Next Steps
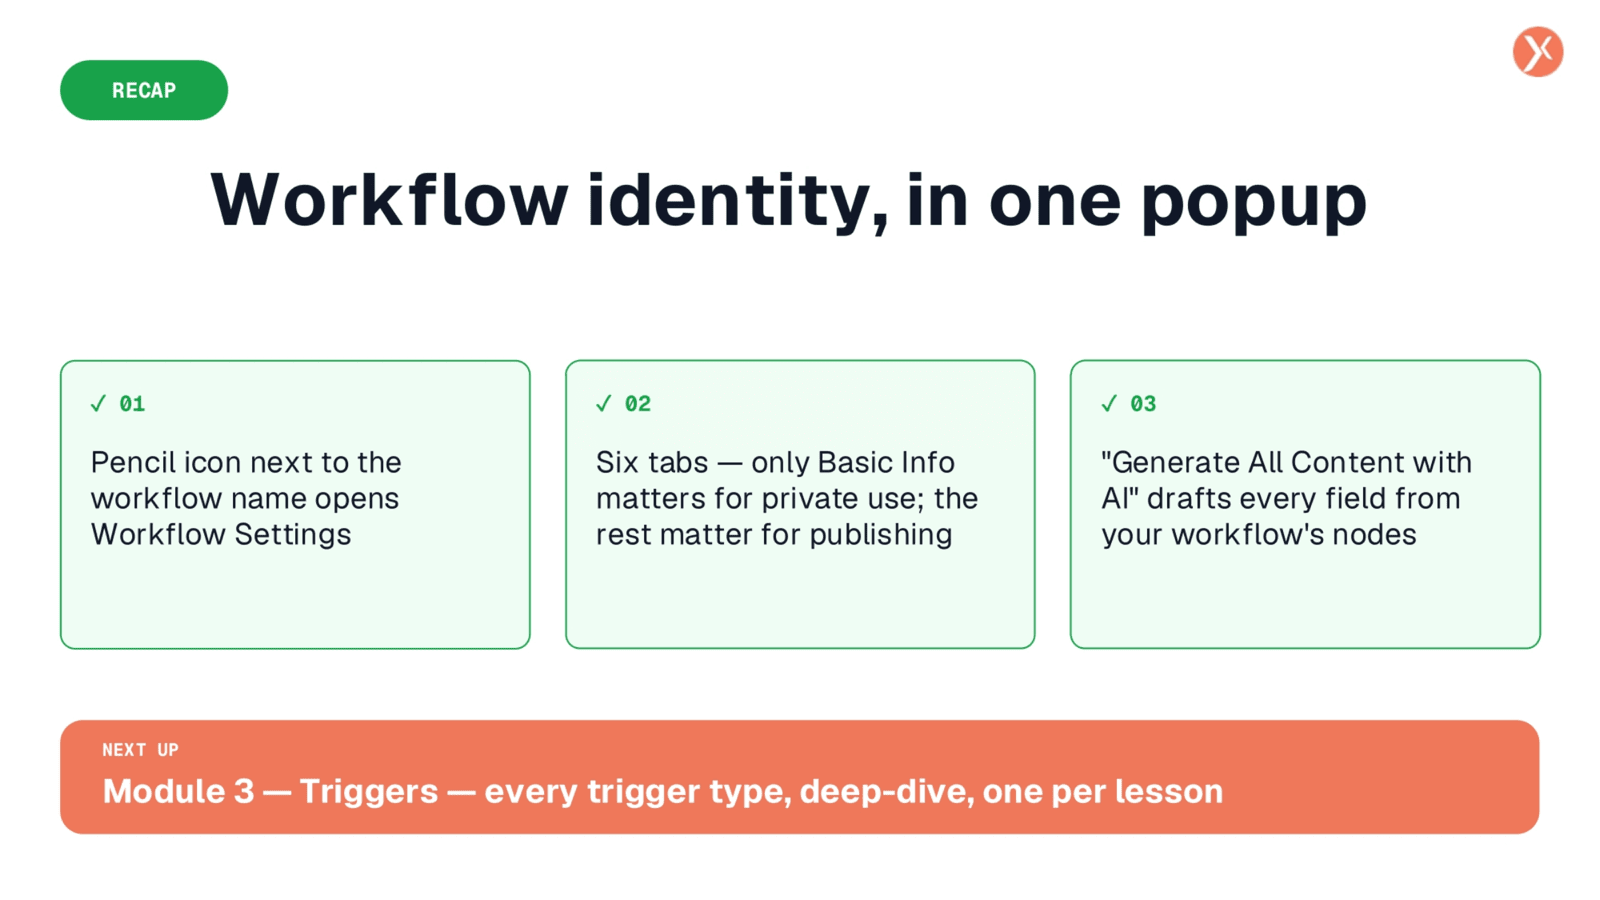
To recap, clicking the pencil icon opens Workflow Settings, where six tabs allow you to define your workflow's identity. Only the Basic Info tab is crucial for private use, while the others are vital for publishing. The 'Generate All Content with AI' button can efficiently draft content for these fields. Next, we'll dive into Module 3, exploring every trigger type Expedify offers, one lesson at a time.