Build It Yourself
This session focuses on building your very first workflow from an empty canvas. We'll create a simple yet powerful automation: sending a welcome email automatically whenever a new contact is added to your CRM. This involves just two nodes and one connection, and by the end, you'll have a live workflow triggered by a real test contact.
End-to-End Workflow Construction
Our plan for building this end-to-end workflow is straightforward. We'll begin with an empty canvas, then add a Database Change Trigger to initiate the workflow when a new contact is created. Next, we'll incorporate an Email Send action to dispatch the welcome email. After connecting these two nodes, we'll configure each with essential settings, save, name, and activate the workflow. Finally, we'll create a test contact to observe the automated email delivery.
Beginning with an Empty Canvas
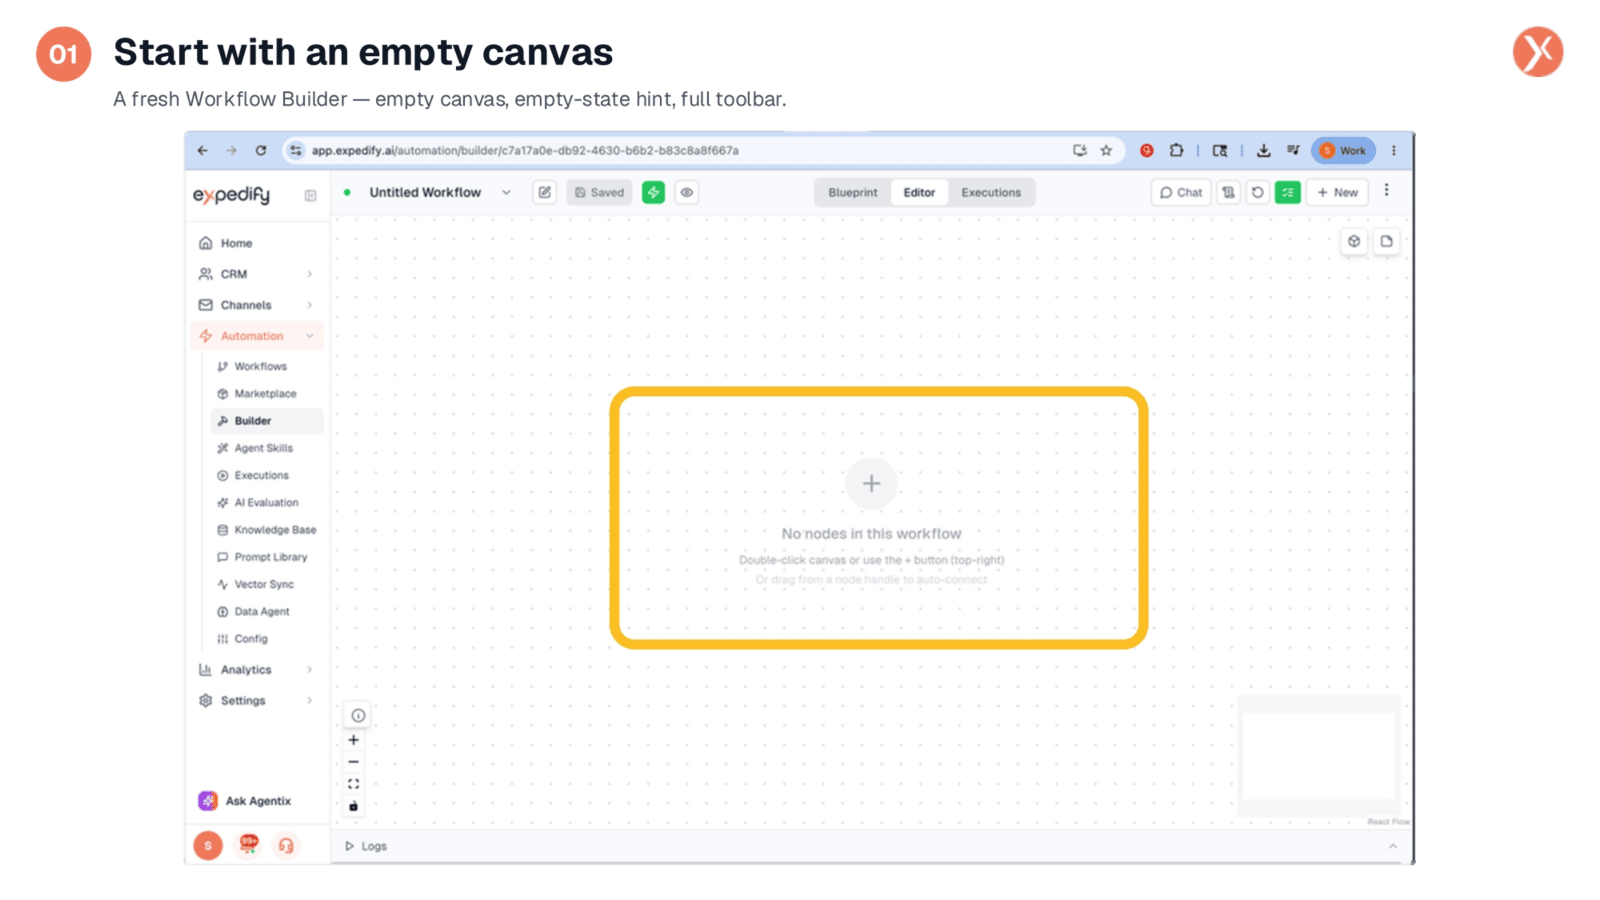
We're starting with a completely fresh Workflow Builder, presenting an empty canvas. The interface provides a helpful hint, guiding us to either double-click the canvas or use the plus button located at the top right to begin. Our goal is to add two nodes, connect them, and establish a fully functional automation. We'll start by adding our trigger node.
Adding a New Node
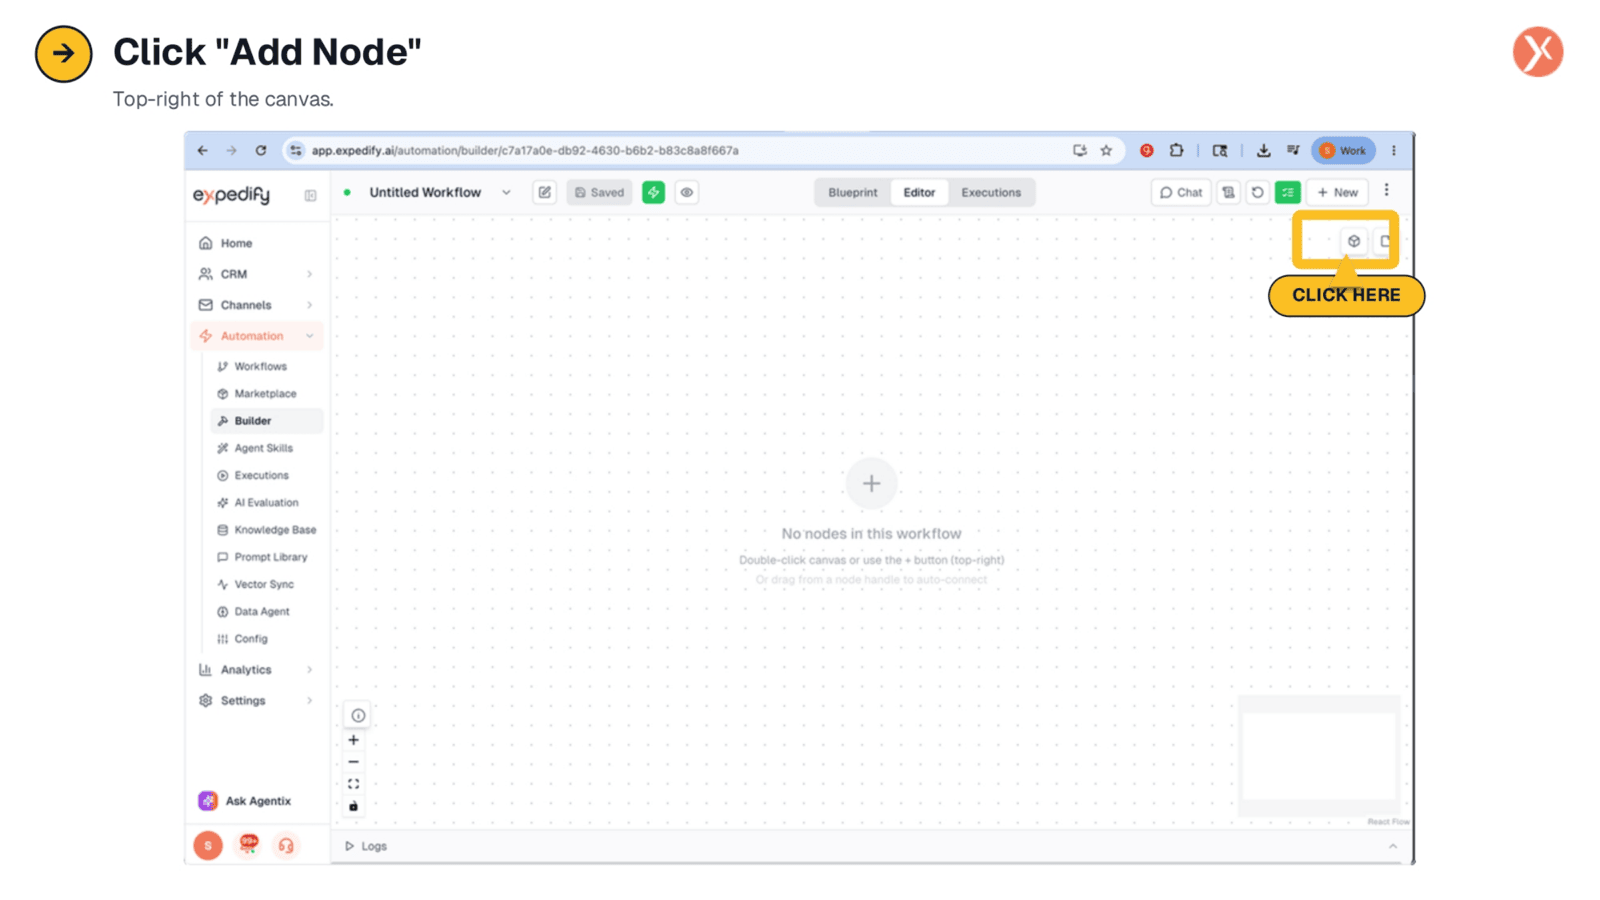
To begin adding components to our workflow, we'll click the "Add Node" button. This button is conveniently located in the top-right corner of the canvas, making it easily accessible for initiating the process of building out our automation.
Selecting the Database Change Trigger
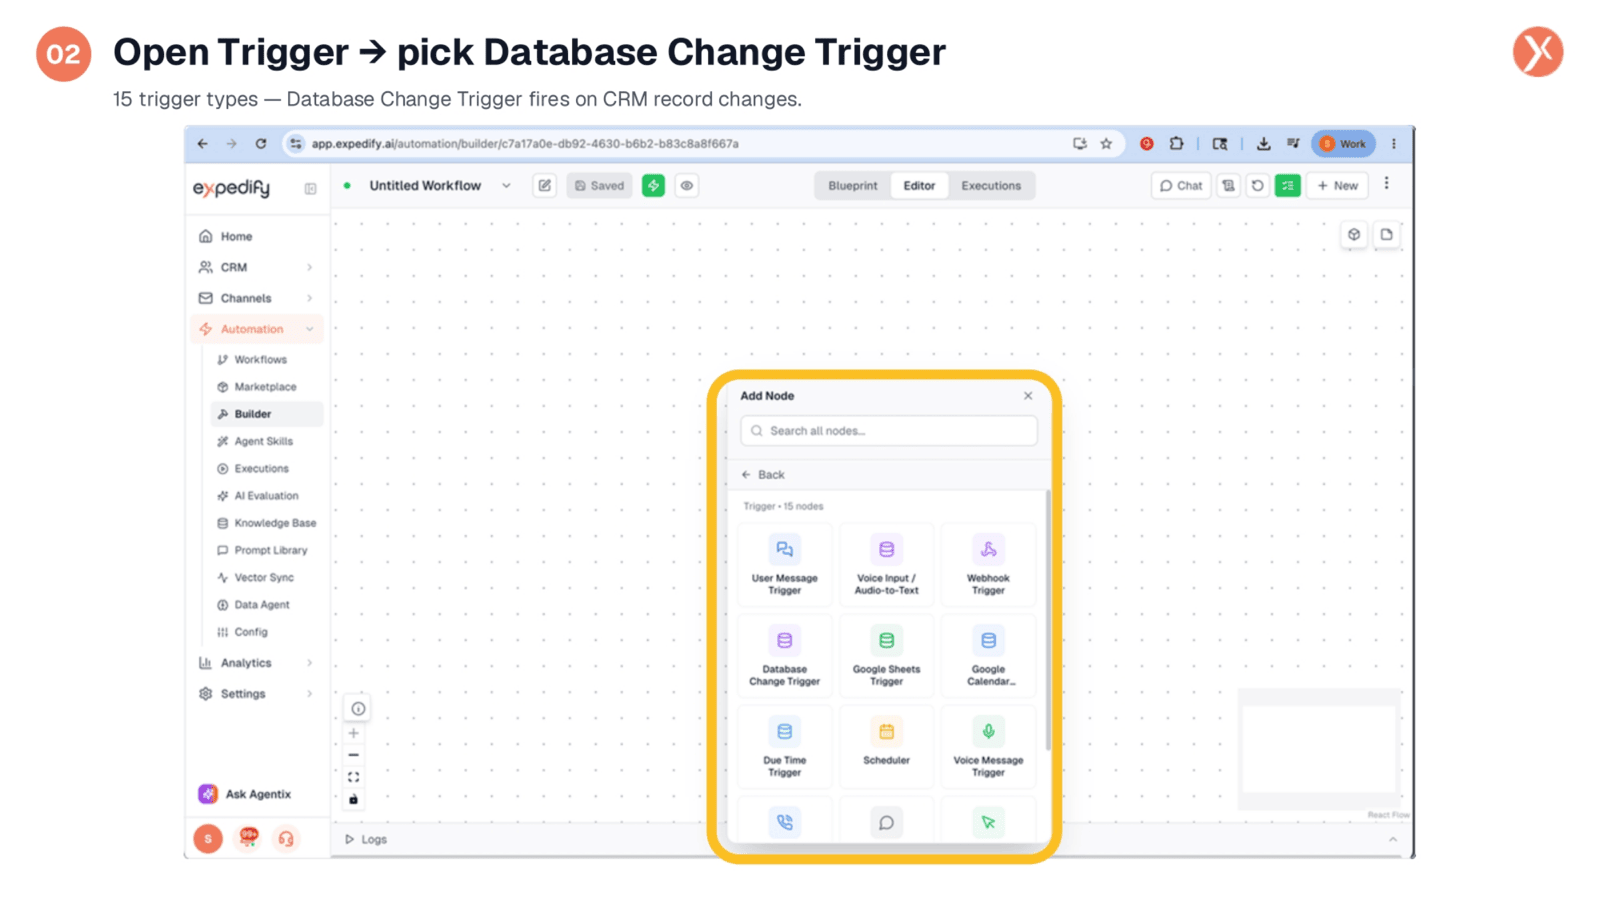
Upon clicking "Add Node," the palette opens, revealing various categories. We'll expand the "Trigger" category, which offers fifteen different trigger types, including webhooks, schedulers, and options for voice, sheets, or calendar events. For this workflow, we need the Database Change Trigger, which activates whenever a CRM record is created, updated, or its stage changes. Selecting this will place it onto our canvas.
Unconfigured Trigger Indication
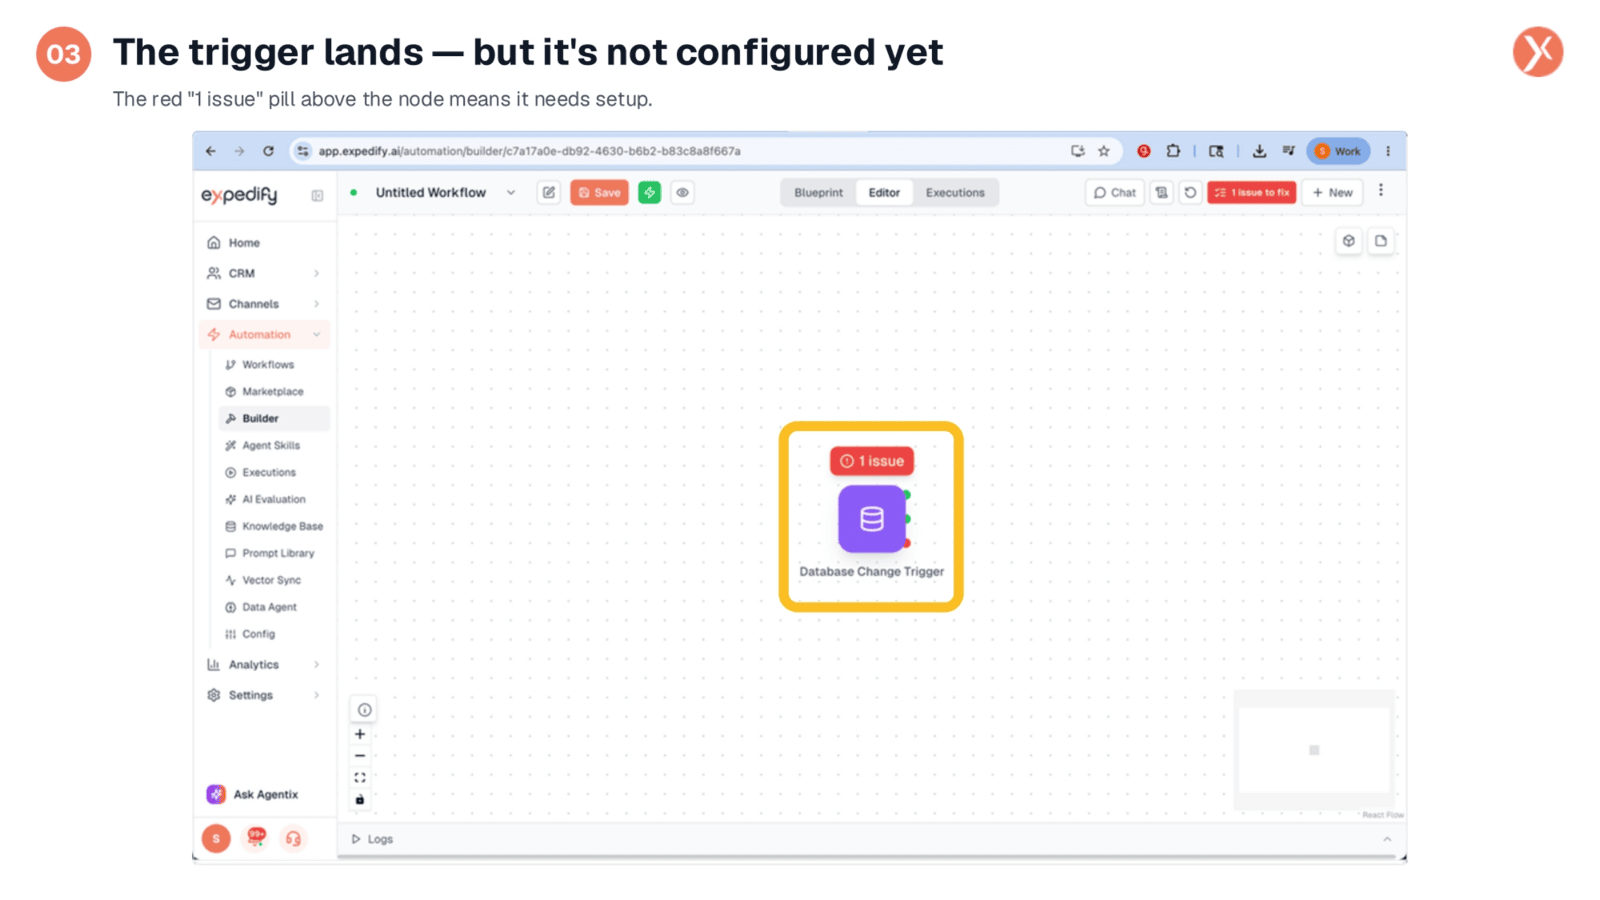
The Database Change Trigger is now on the canvas. Notice the red "1 issue" pill displayed above it. This indicator from Expedify signals that the node requires further setup. Each node performs self-validation during the building process, and a workflow cannot be activated until all components are correctly configured and show a green status. Our next step is to open and configure this trigger.
Accessing Trigger Configuration
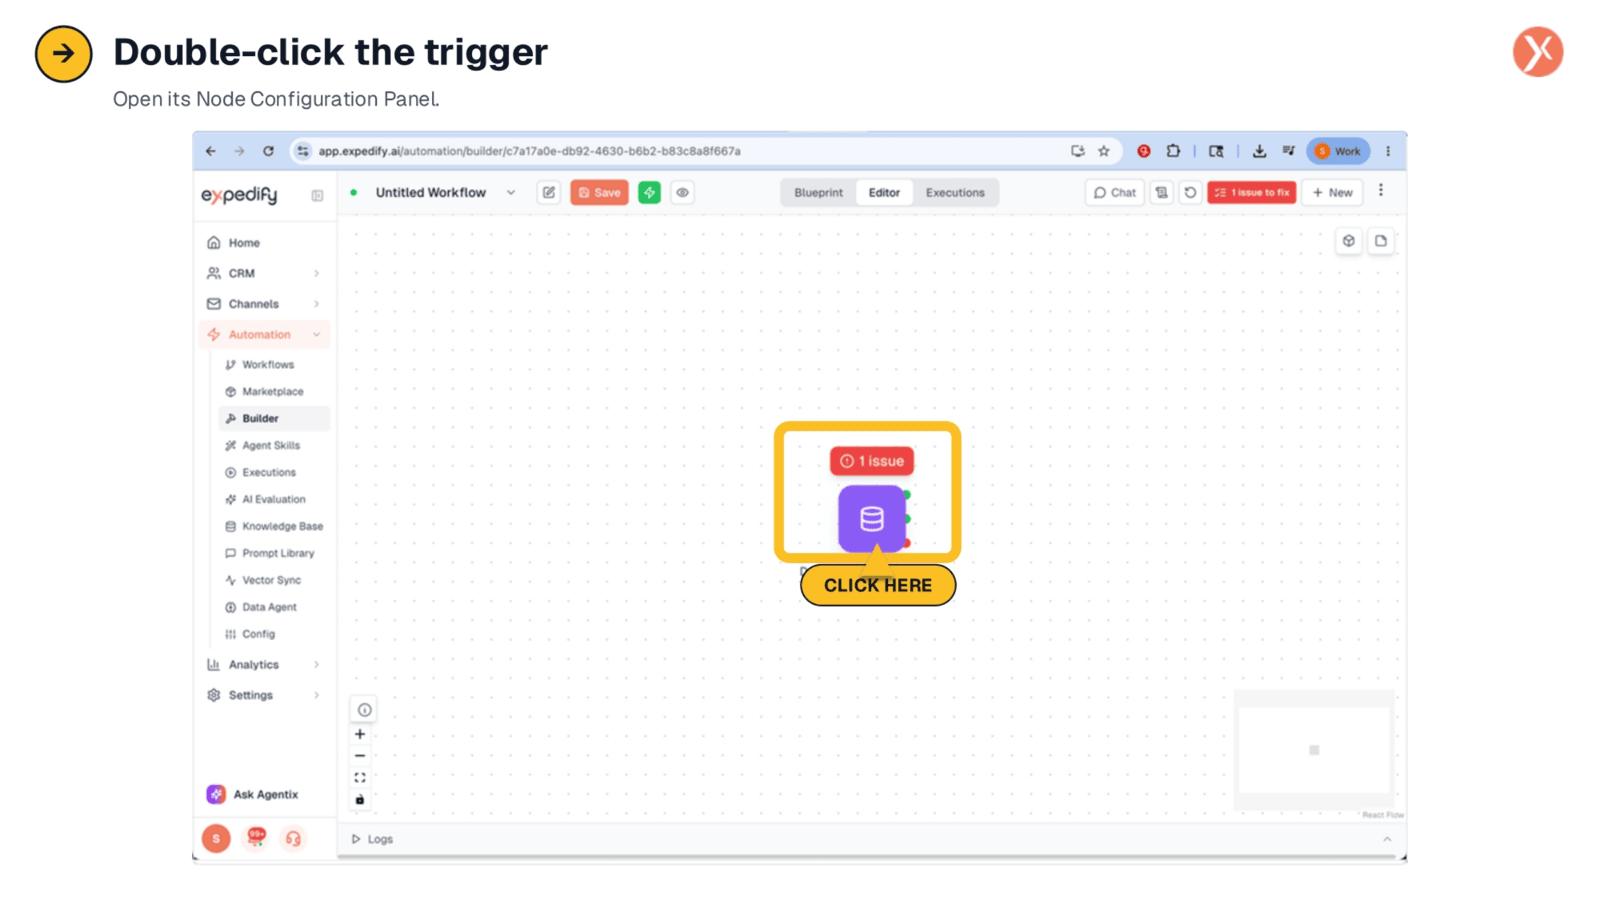
To proceed with configuring our Database Change Trigger, we simply need to double-click on the node itself. This action will open its dedicated Node Configuration Panel, providing us with the necessary settings to define how the trigger will operate within our workflow.
Configuring the Trigger for New Contacts
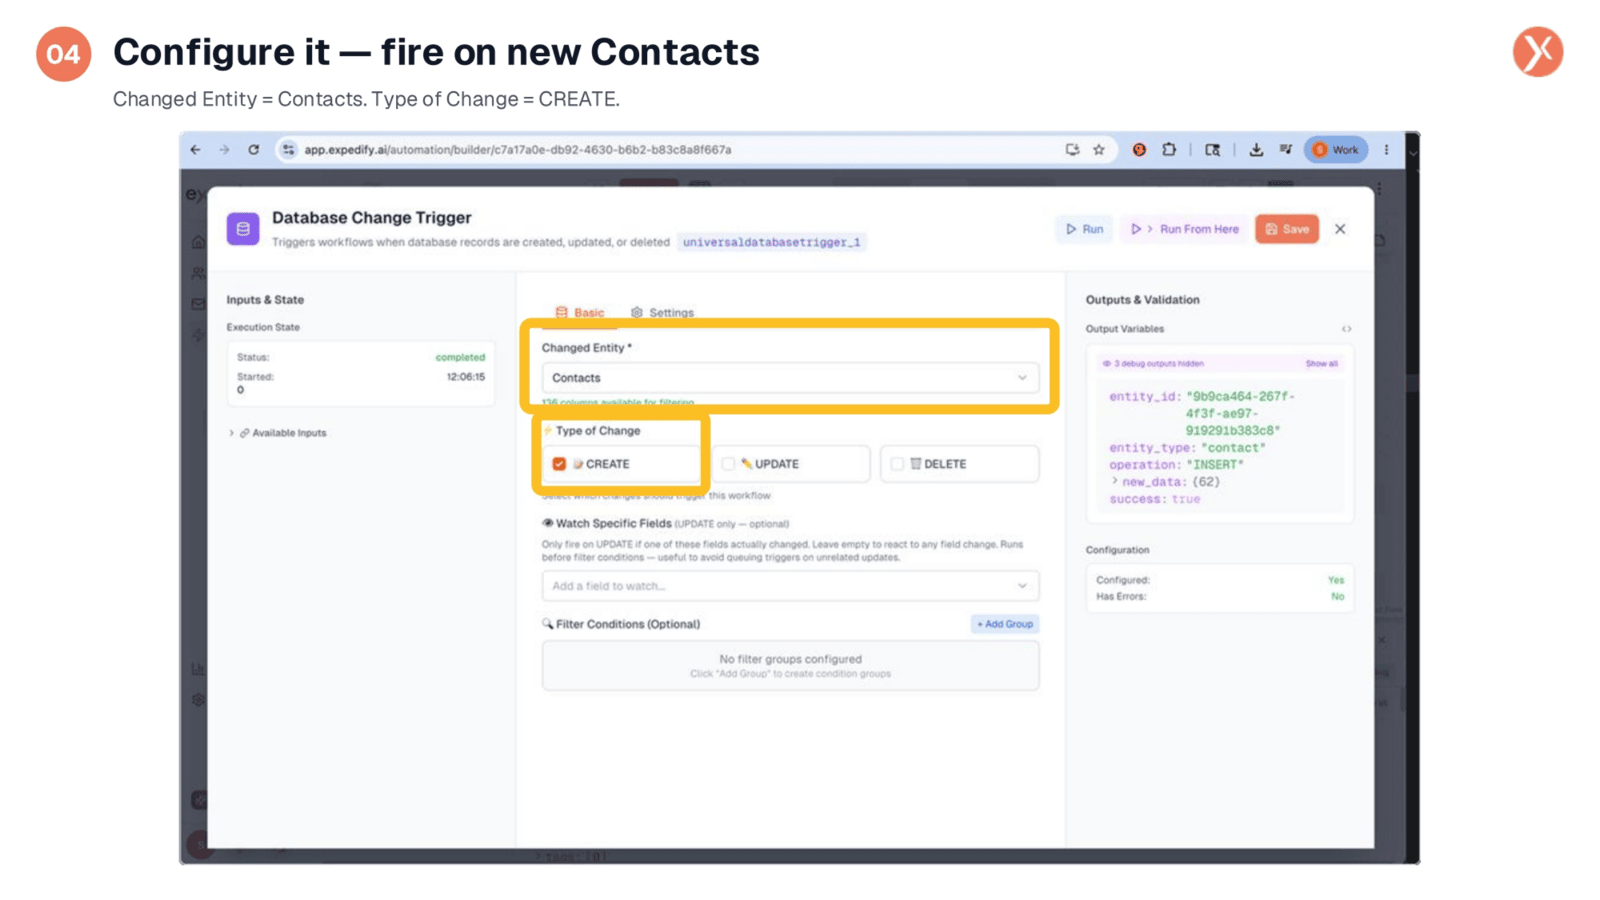
The Node Configuration Panel is now open, presenting a full-screen view. We need to adjust two key settings. First, for "Changed Entity," we select "Contacts" to specify that the workflow should monitor changes within our CRM's contact table. Second, under "Type of Change," we choose "CREATE" to ensure the trigger fires specifically when new contacts are added. The Output Variables panel on the right shows the data this node will pass to subsequent actions. With these settings, we can now save and close the panel.
Reopening the Node Palette
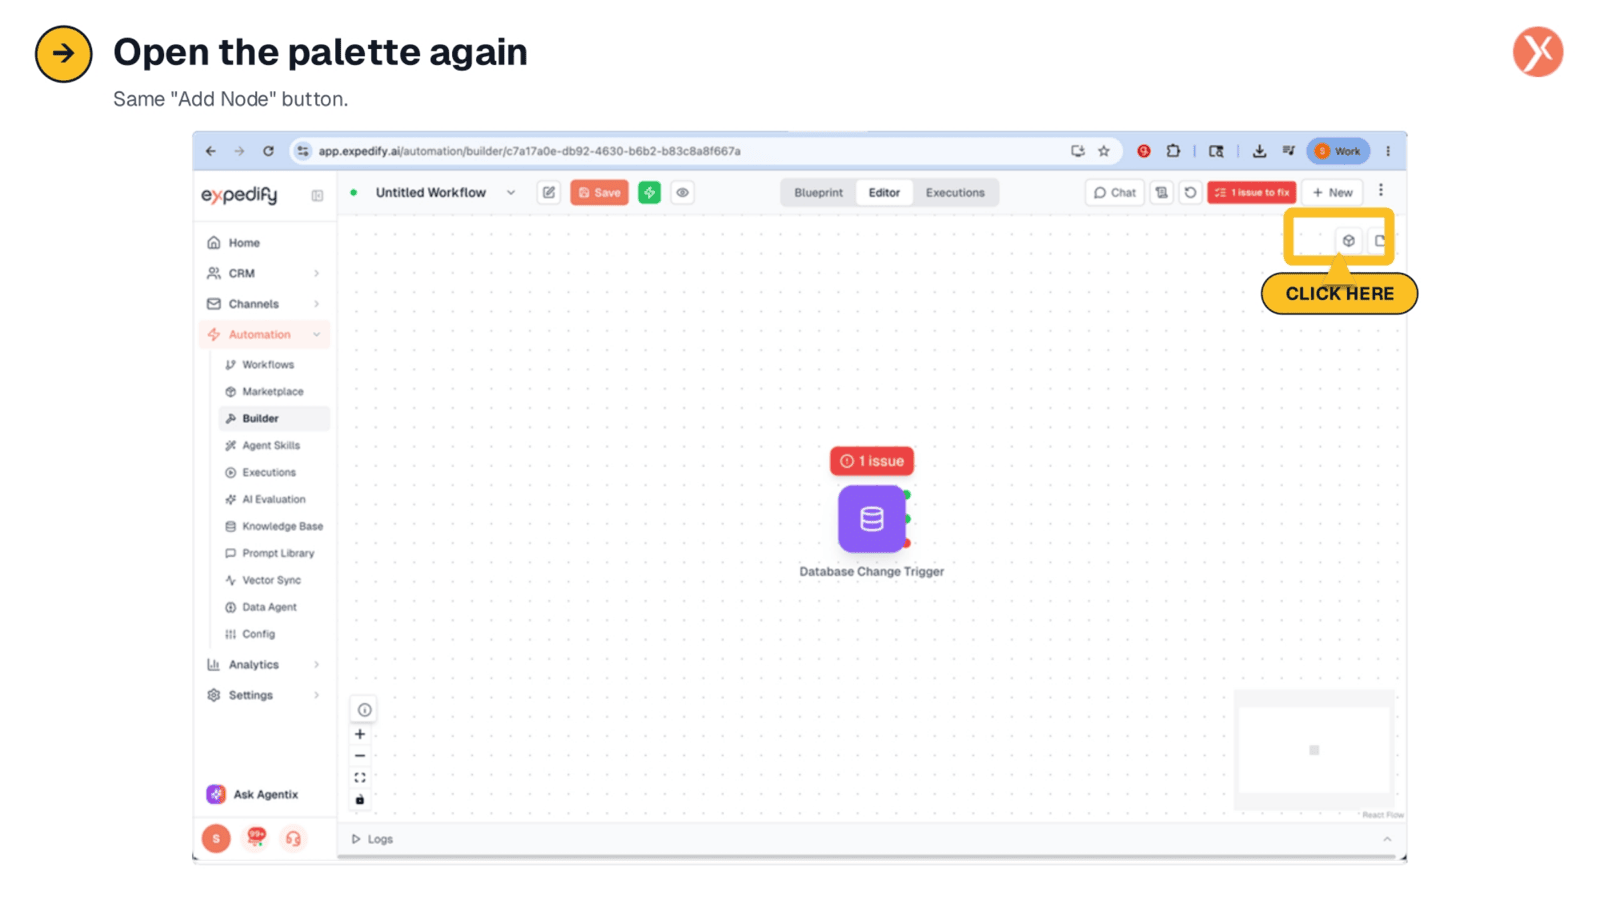
With our trigger successfully configured, we now need to add the next component to our workflow: an action. To do this, we'll once again click the "Add Node" button, which is the same button we used previously. This will reopen the node palette, allowing us to select the appropriate action for our workflow.
Selecting the Email Send Action
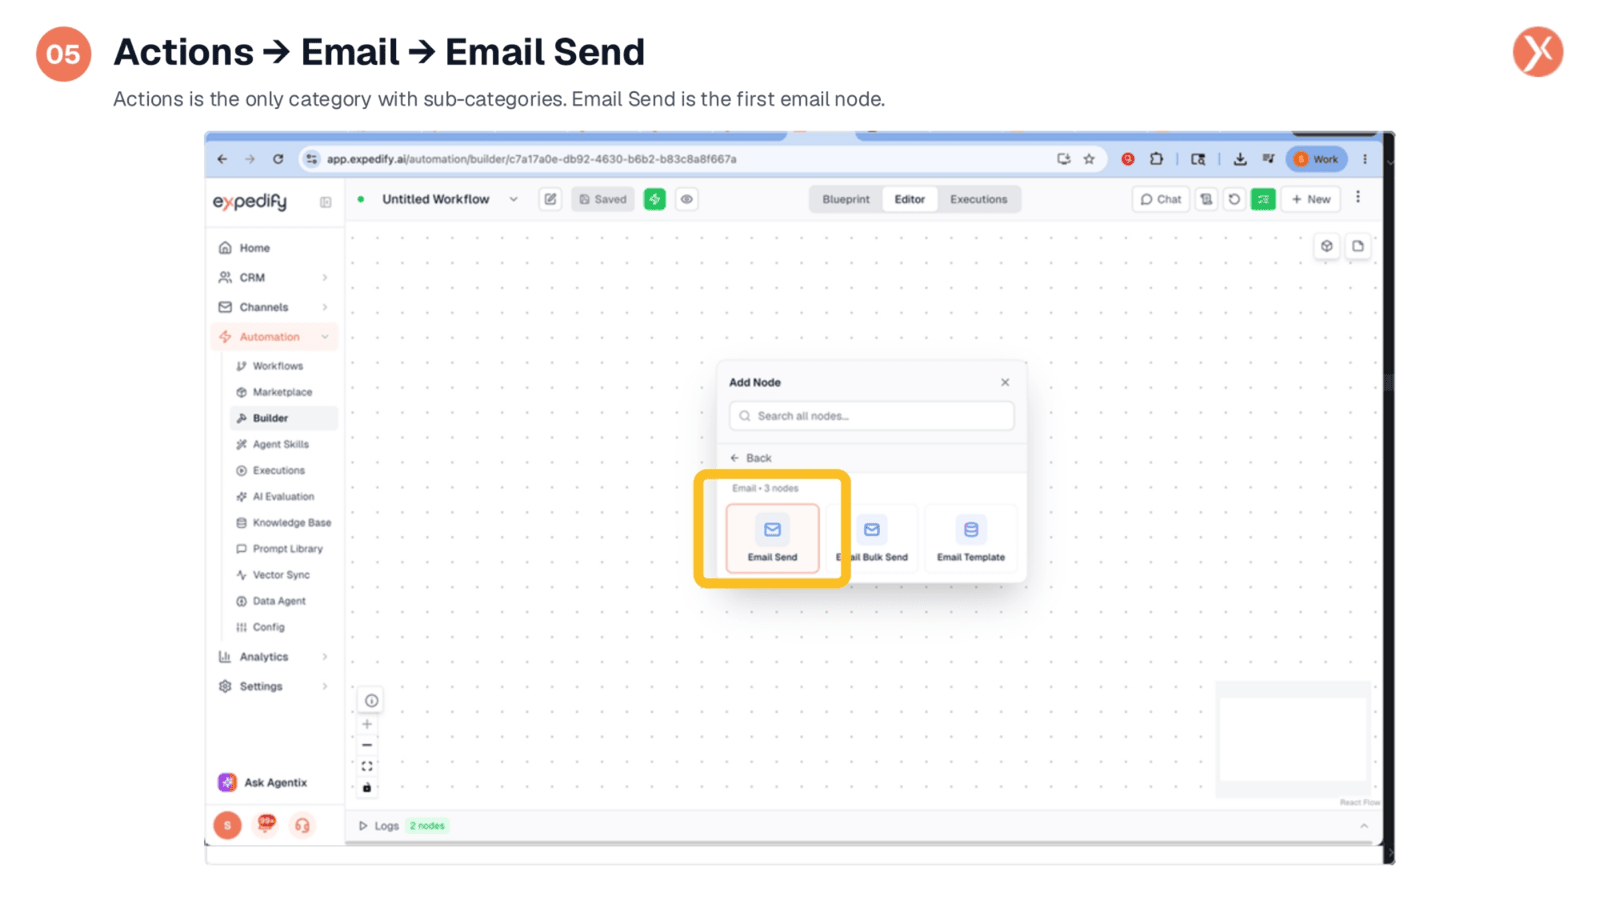
When navigating the node palette, you'll observe that the "Actions" category is unique in having sub-categories. We'll expand the "Email" sub-category, which presents three distinct email nodes: Email Send, Email Bulk Send, and Email Template. For our current workflow, we need the "Email Send" node, designed for dispatching a single email. After selecting it, this action node will be placed onto the canvas, positioned next to our configured trigger.
Unconnected Workflow Nodes
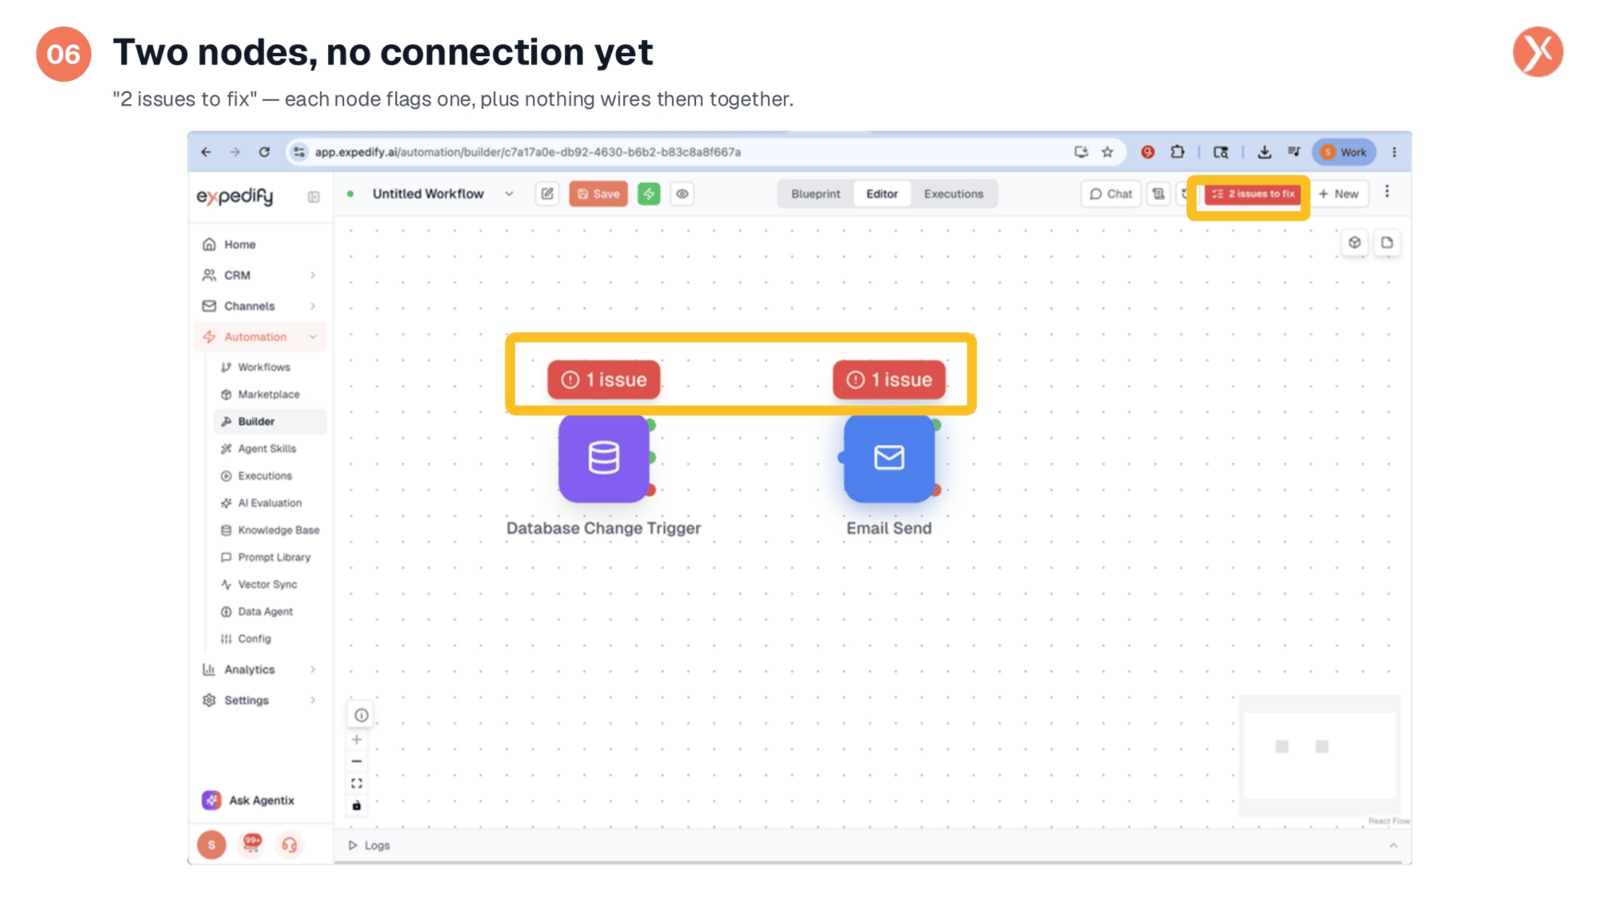
We now have both the trigger and the email action nodes present on our canvas. However, a glance at the top-right indicates "two issues to fix." This is because each node currently has an individual configuration issue, and crucially, they are not yet connected. A trigger cannot function effectively without downstream nodes to pass its output to. Our next step is to establish this connection by dragging the output handle from the trigger to the input dot on the Email Send node.
Connecting Trigger to Email Action
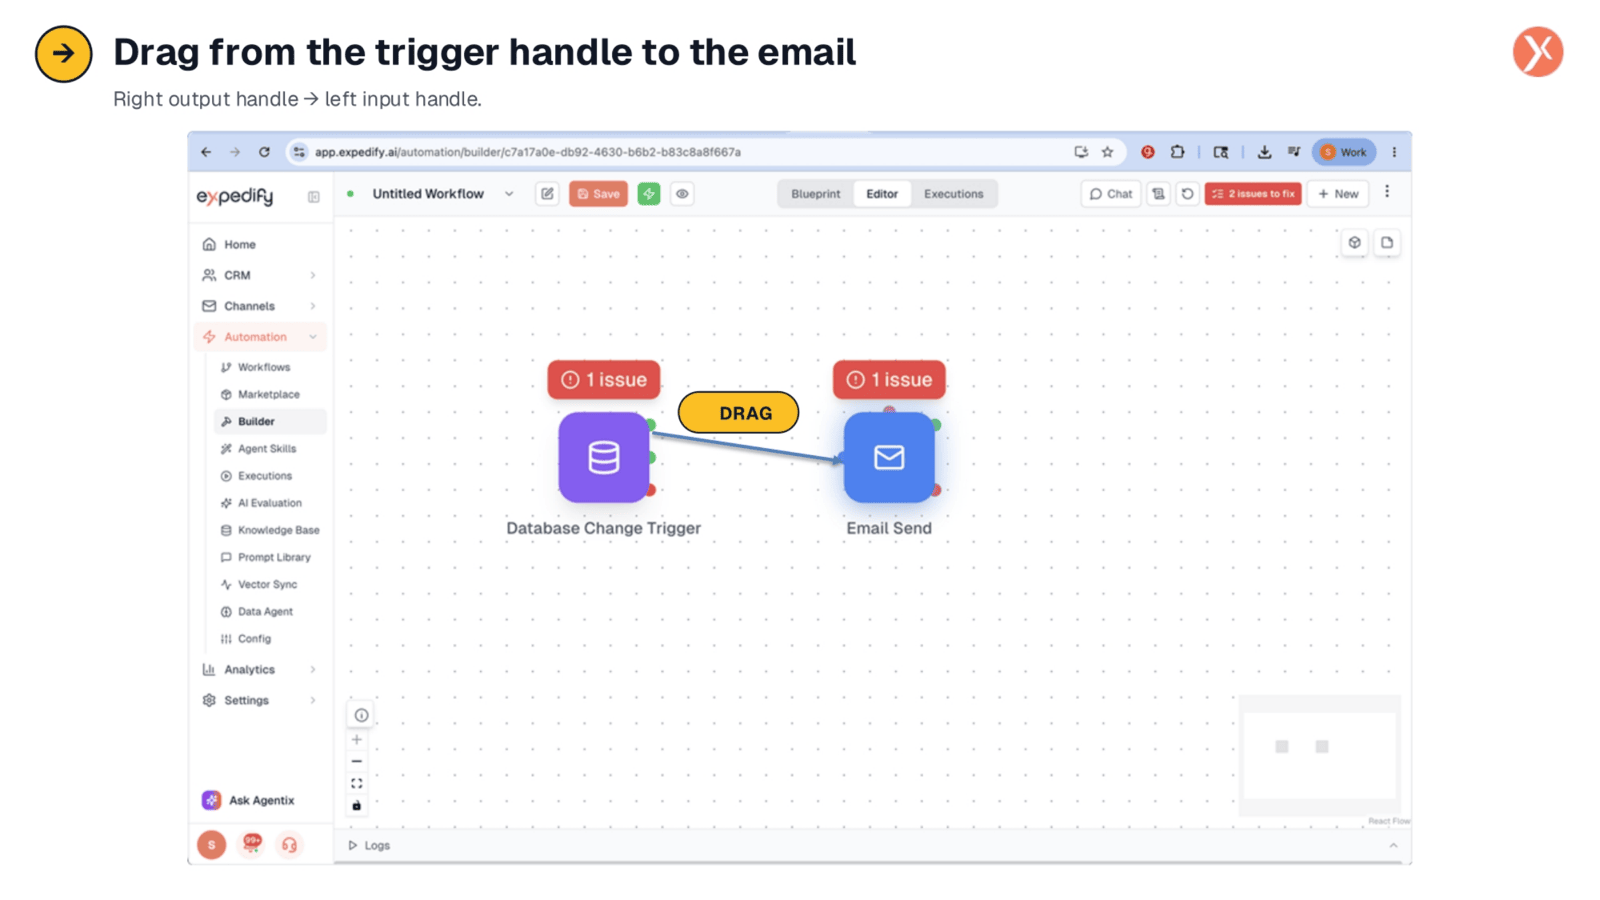
To establish the flow of our workflow, we will drag the right output handle from the Database Change Trigger. This handle represents the data and signal flow from the trigger. We'll then connect it to the left input handle of the Email Send node. This action visually links the two nodes, indicating that the output from the trigger will now feed directly into the email action.
Workflow Nodes Connected
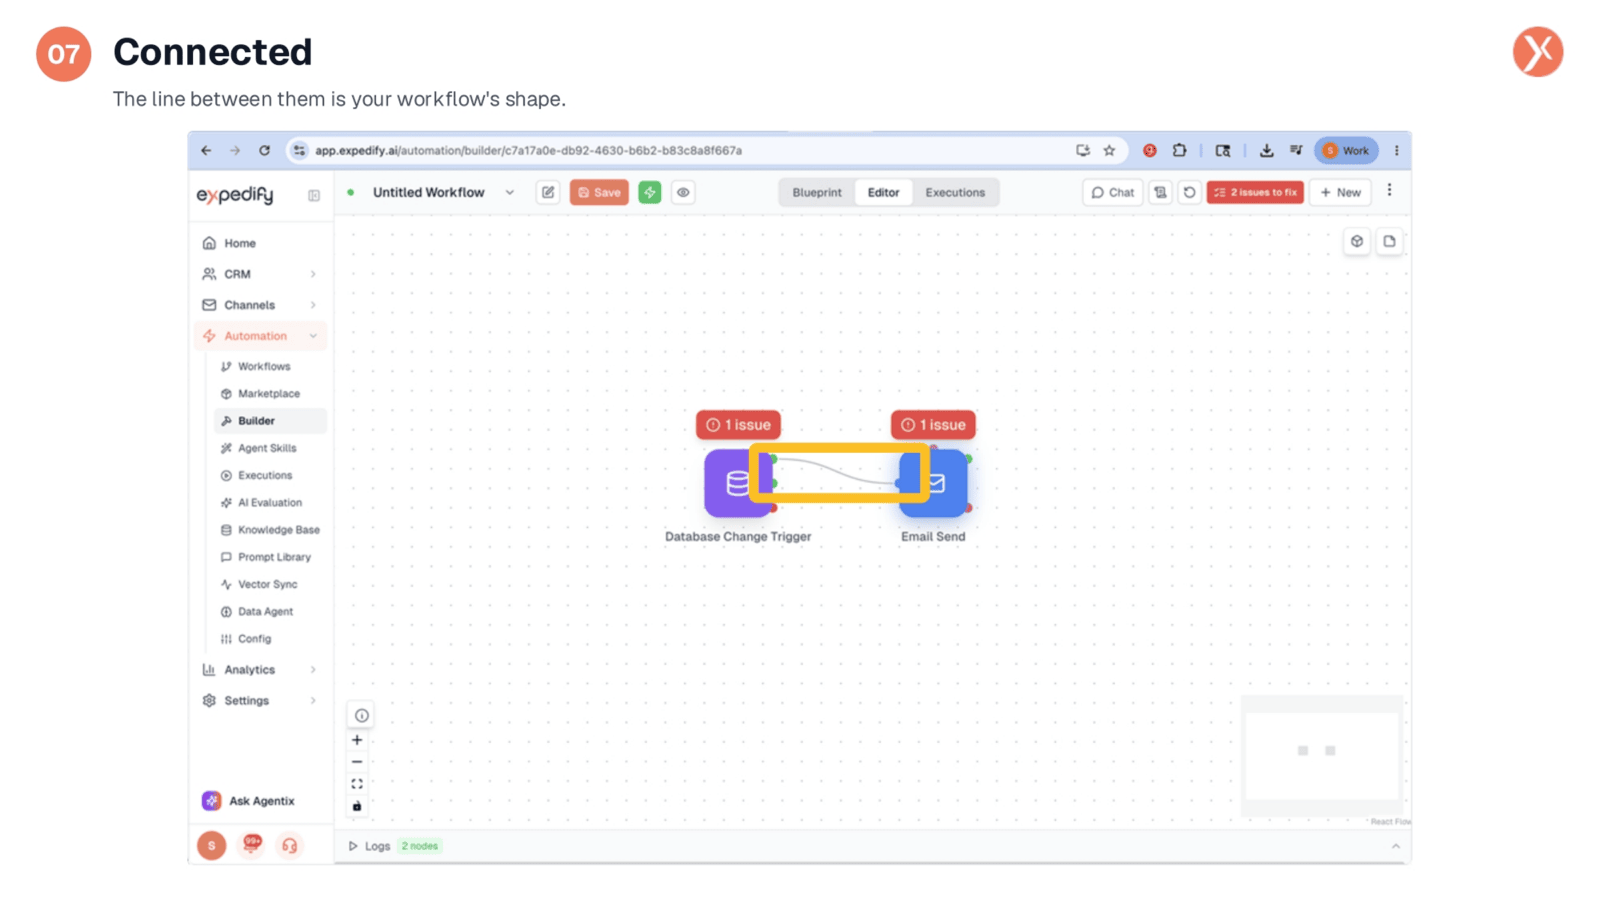
The line now connecting the trigger and the email action signifies our workflow's established connection. This visual link dictates that once the trigger fires, the email action will execute next. With two nodes and one connection, the basic structure of our workflow is complete. However, we still have one issue to resolve: the email node itself requires configuration. Let's open it to address this.
Opening Email Send Configuration
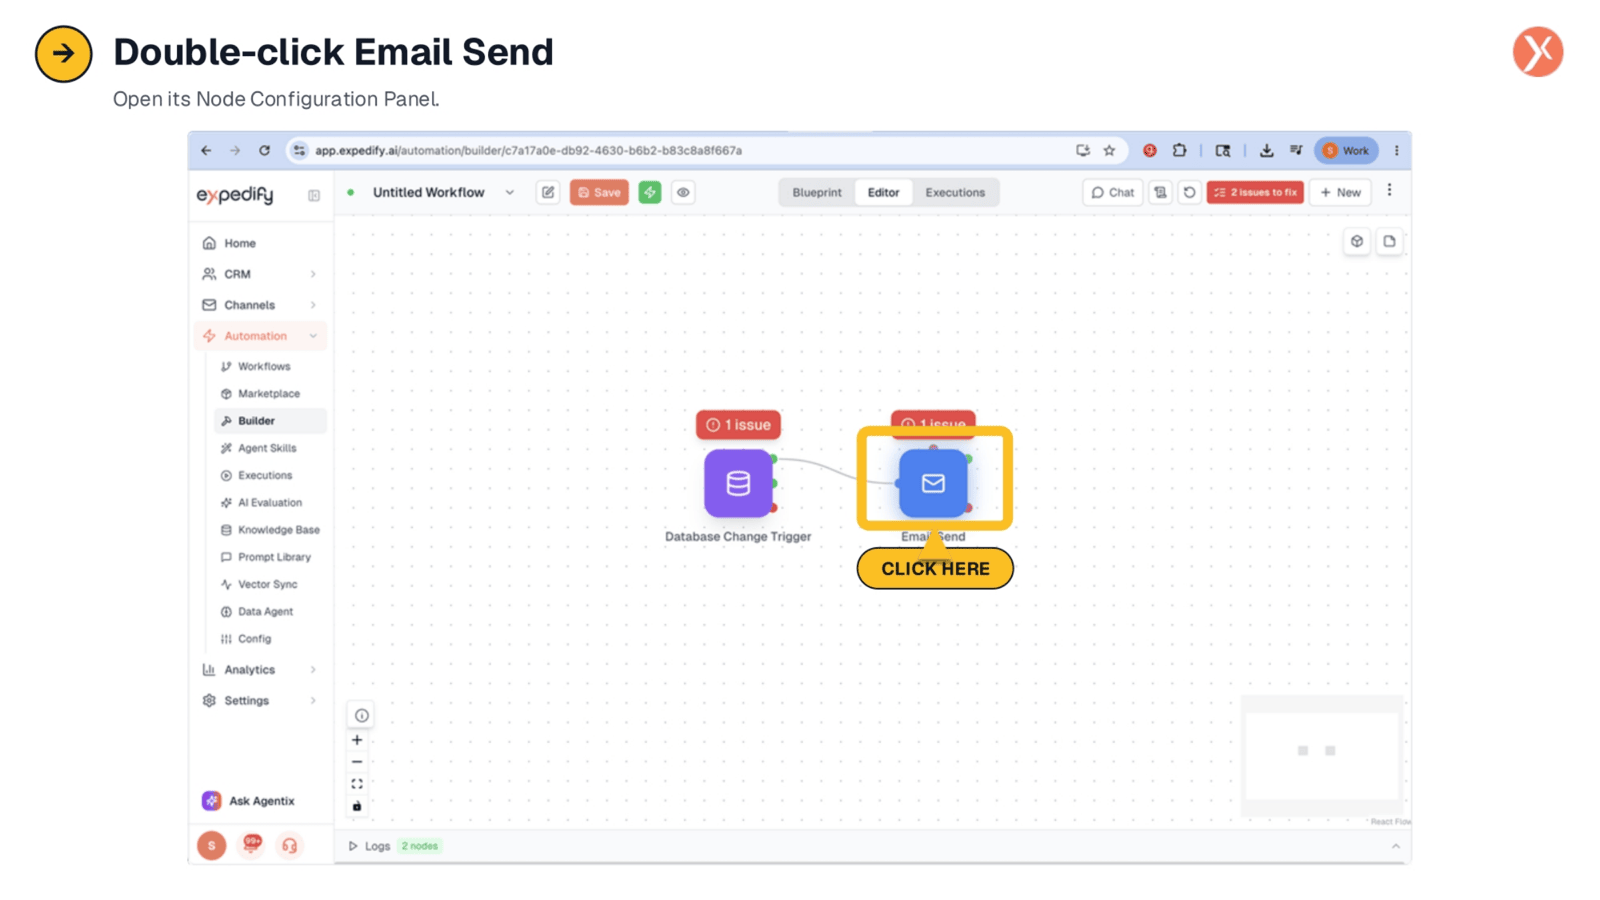
To finalize our workflow, we need to configure the Email Send node. This is achieved by double-clicking directly on the Email Send node on the canvas. This action will open its specific Node Configuration Panel, allowing us to define the details of the email that will be sent.
Email Configuration Details
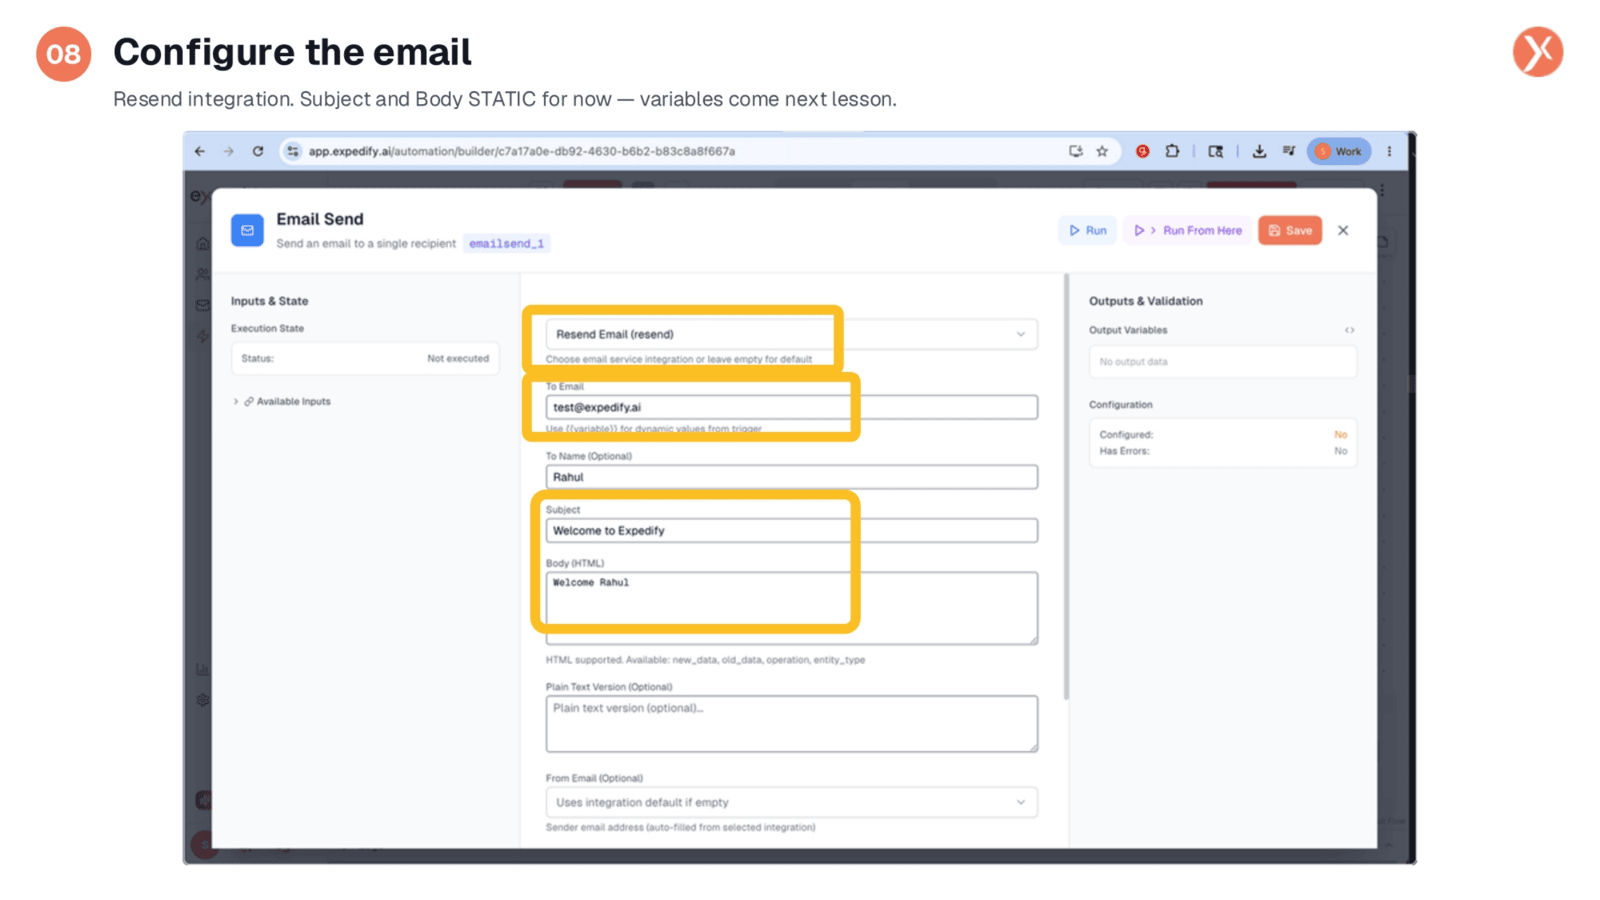
Configuring the email involves setting three crucial elements. First, we select "Resend" as our Email Service, which is the integration responsible for dispatching the email. Next, we specify a test address for the "To Email" field. Finally, for this lesson, we'll use static text for both the "Subject" and "Body," such as "Welcome Rahul" and "Welcome to Expedify." In a future lesson, we'll enhance this by incorporating variables to dynamically personalize the email with the lead's actual name.
Saving Email Configuration
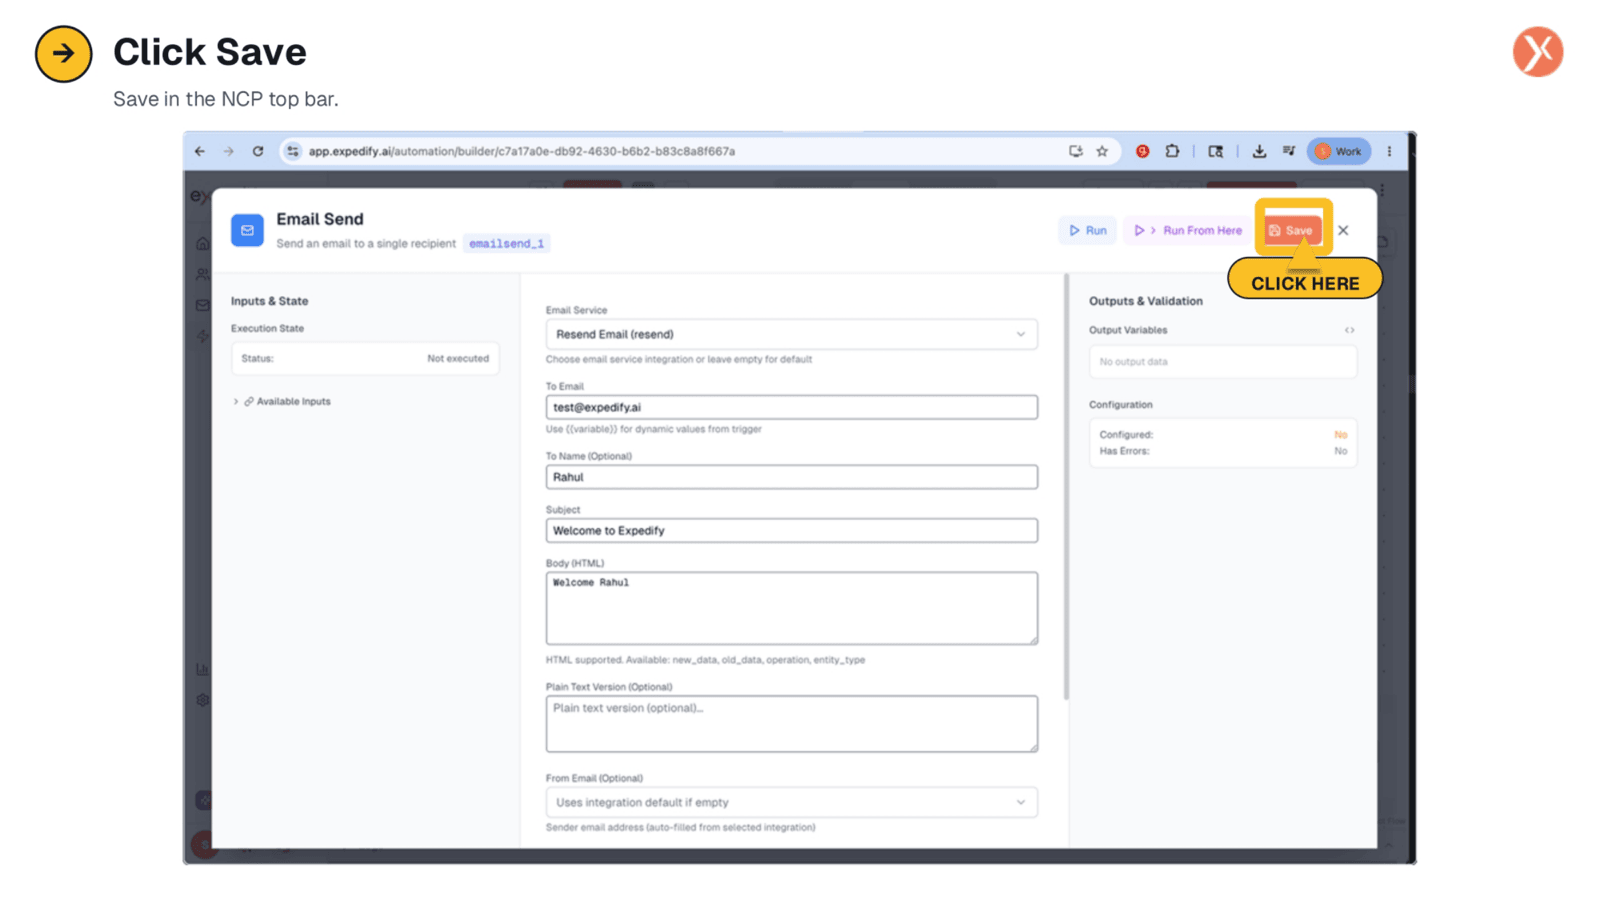
After inputting all the necessary details for our email, the next step is to save these configurations. We'll click the "Save" button, which is prominently located in the top bar of the Node Configuration Panel. This action ensures that all the settings we've just defined for the Email Send node are applied and stored within our workflow.
Naming and Saving the Workflow
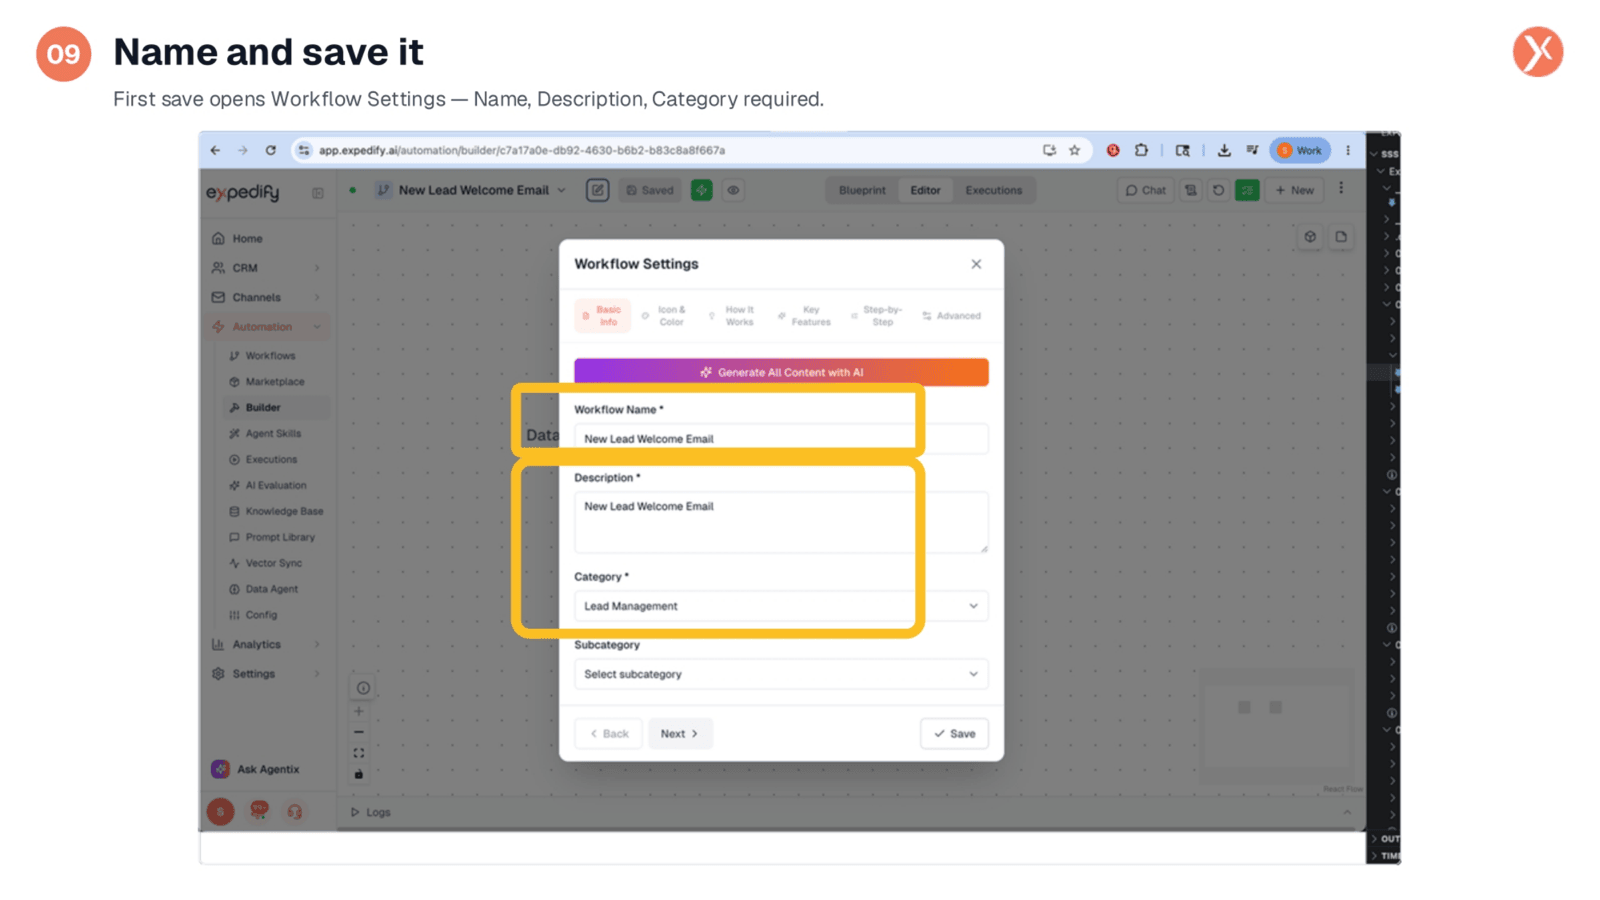
The first time you save a workflow, Expedify automatically opens the Workflow Settings dialog. This panel requires three essential fields: Name, Description, and Category. We'll name our workflow "New Lead Welcome Email," use the same text for the description, and select "Lead Management" as its category. This metadata is crucial for organizing your workflow library, making it easy to locate and manage your automations in the future. After filling these details, we'll proceed to save.
Navigating to Contacts
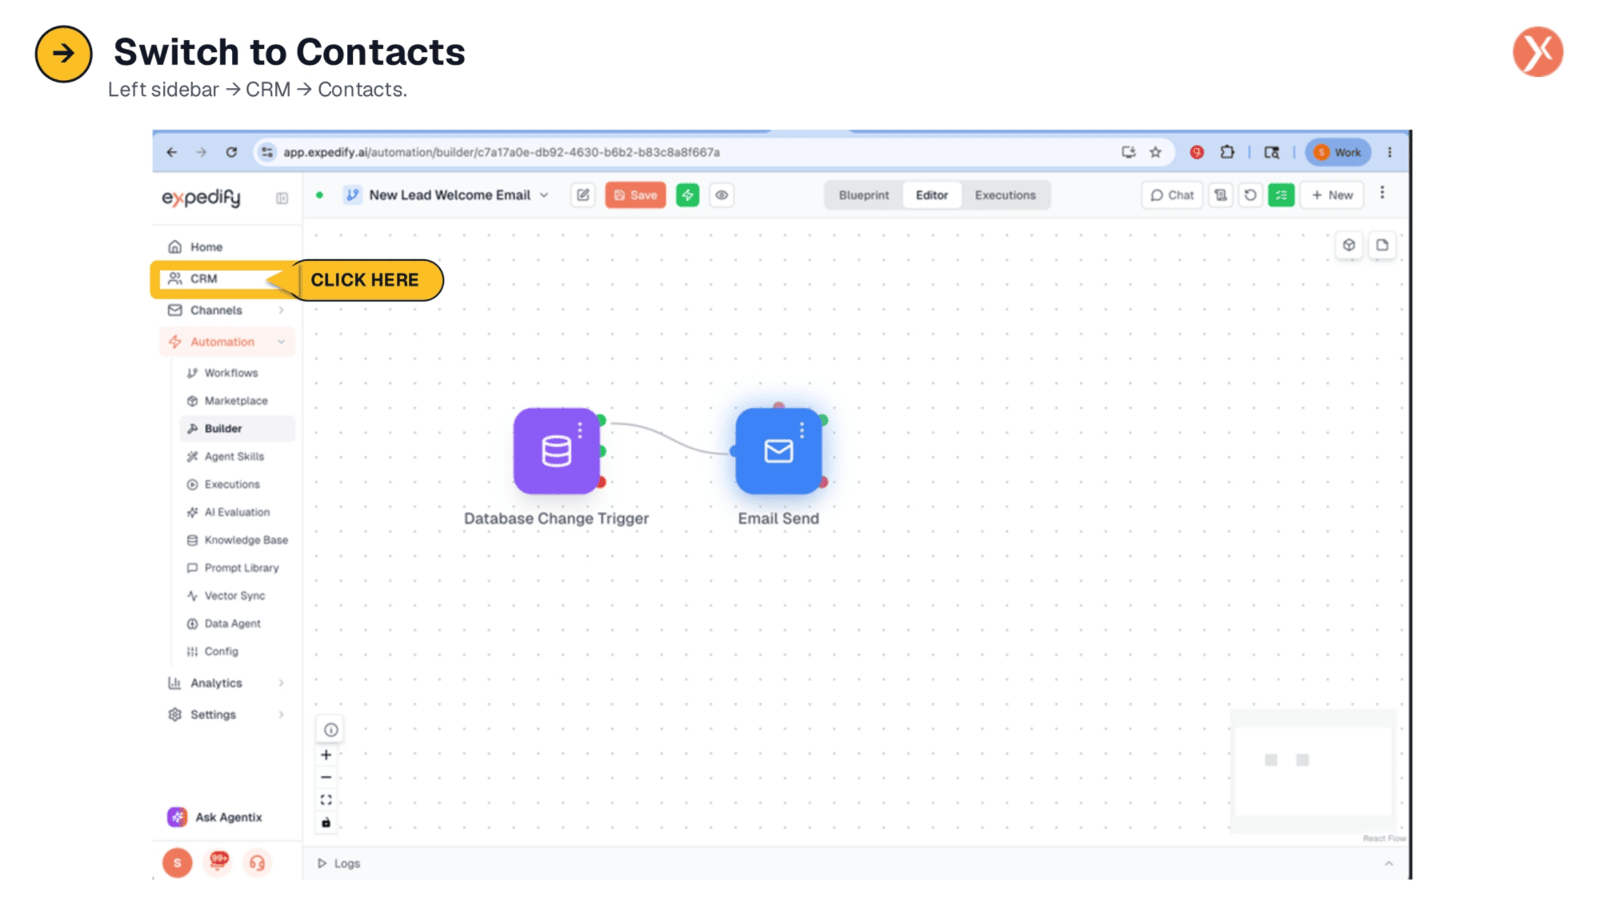
With our workflow now successfully saved and active, the next step is to test its functionality. To do this, we need to create a new contact within our CRM. We'll navigate to the "Contacts" section by using the left sidebar, selecting "CRM," and then choosing "Contacts." This will take us to the contact management interface where we can add our test entry.
Generating a Test Contact
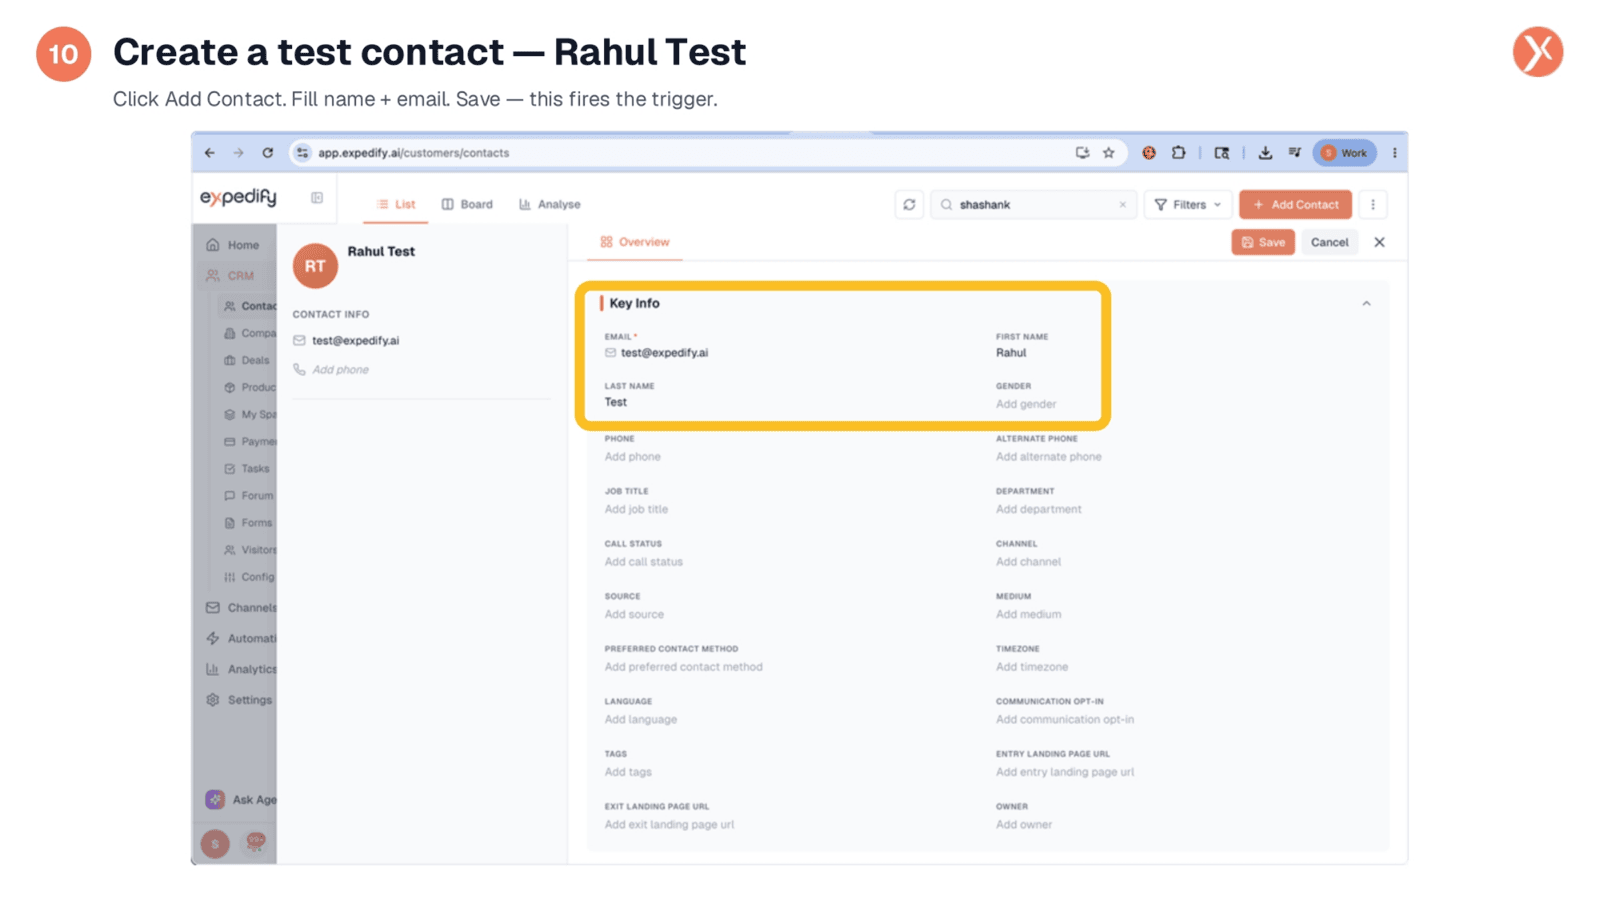
Within the Contacts list, we'll click "Add Contact" to create a new entry. We'll then fill in the necessary details: "Rahul Test" for the name and "test@expedify.ai" for the email address. The moment we click "Save," our Database Change Trigger will instantly fire, recognizing the creation of a new contact. This action will automatically initiate the entire workflow, demonstrating its end-to-end functionality without any further manual intervention.