Configuring Nodes Right
This session focuses on configuring nodes correctly within Expedify workflows. We'll explore the essential elements every node requires and demonstrate how our Setup Wizard acts as a safety net, guiding you through any missing configurations to ensure your automations are always ready.
Node Configuration Essentials and Setup Wizard
Our plan is to first examine an existing workflow and identify the three critical components each node needs for proper configuration. Then, we'll intentionally introduce an error to observe how Expedify's real-time validation catches it. The Setup Wizard will then guide us through the precise steps to resolve the issue, ensuring the workflow is fully functional.
Trigger Configuration: Entity and Type of Change
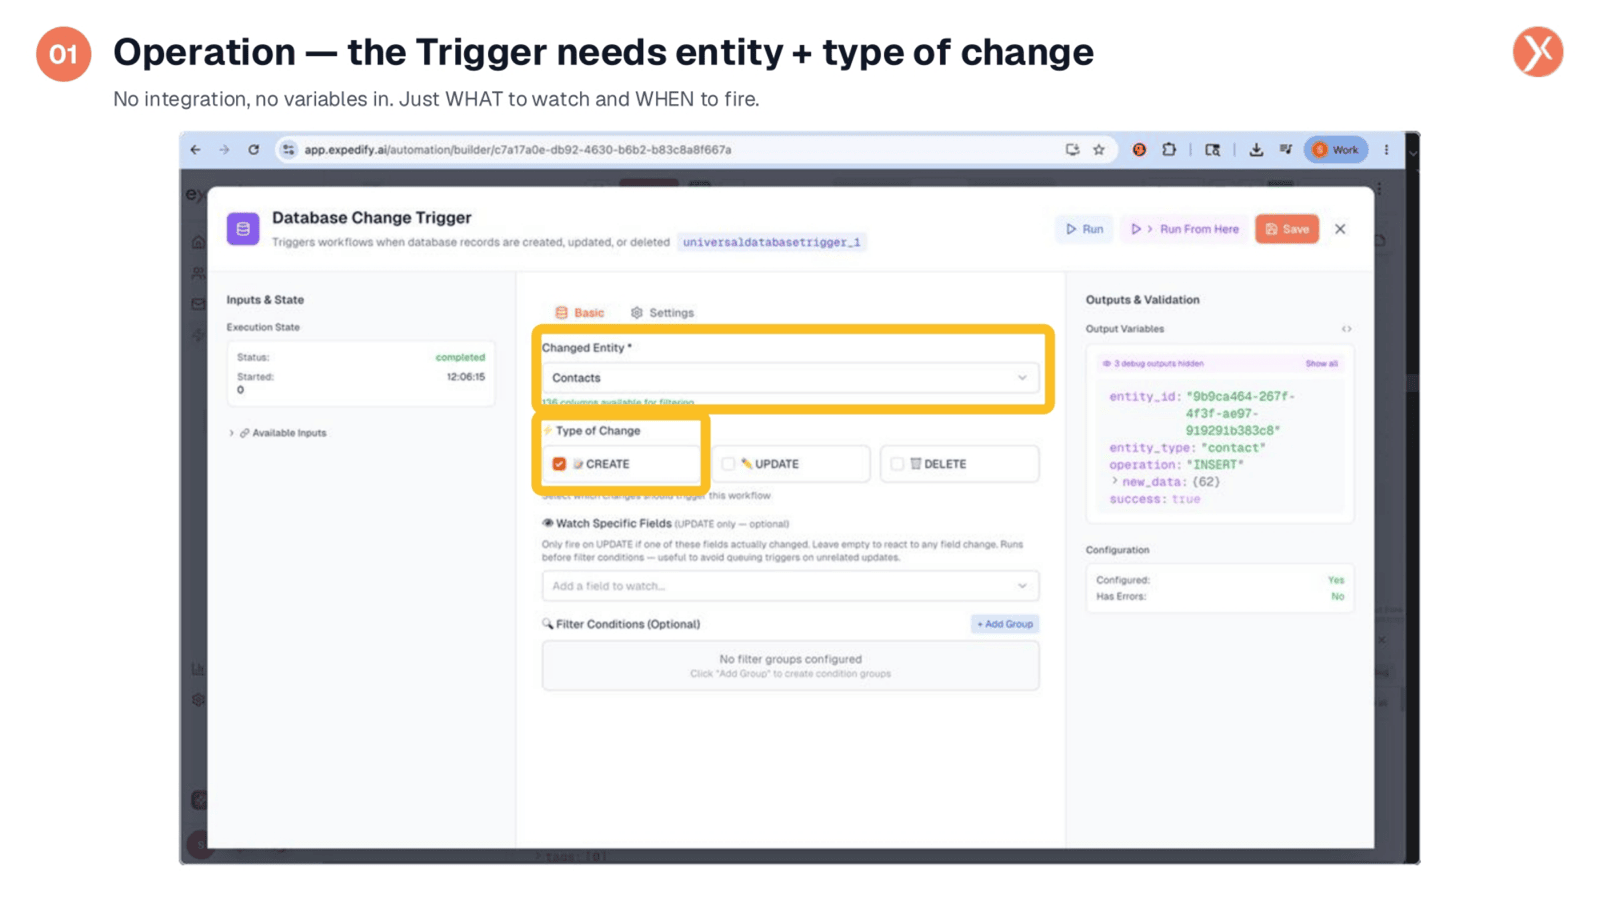
Let's begin by looking at the trigger node. Specifically, the Database Change Trigger panel requires two key fields: the 'Changed Entity,' which in our example is 'Contacts,' and the 'Type of Change,' set to 'CREATE.' These define what data to monitor and when to activate the trigger. For a trigger, correct configuration primarily involves setting these two operational fields, without needing external integrations or incoming variables.
Email Send Node: Operation, Integration, and Variables
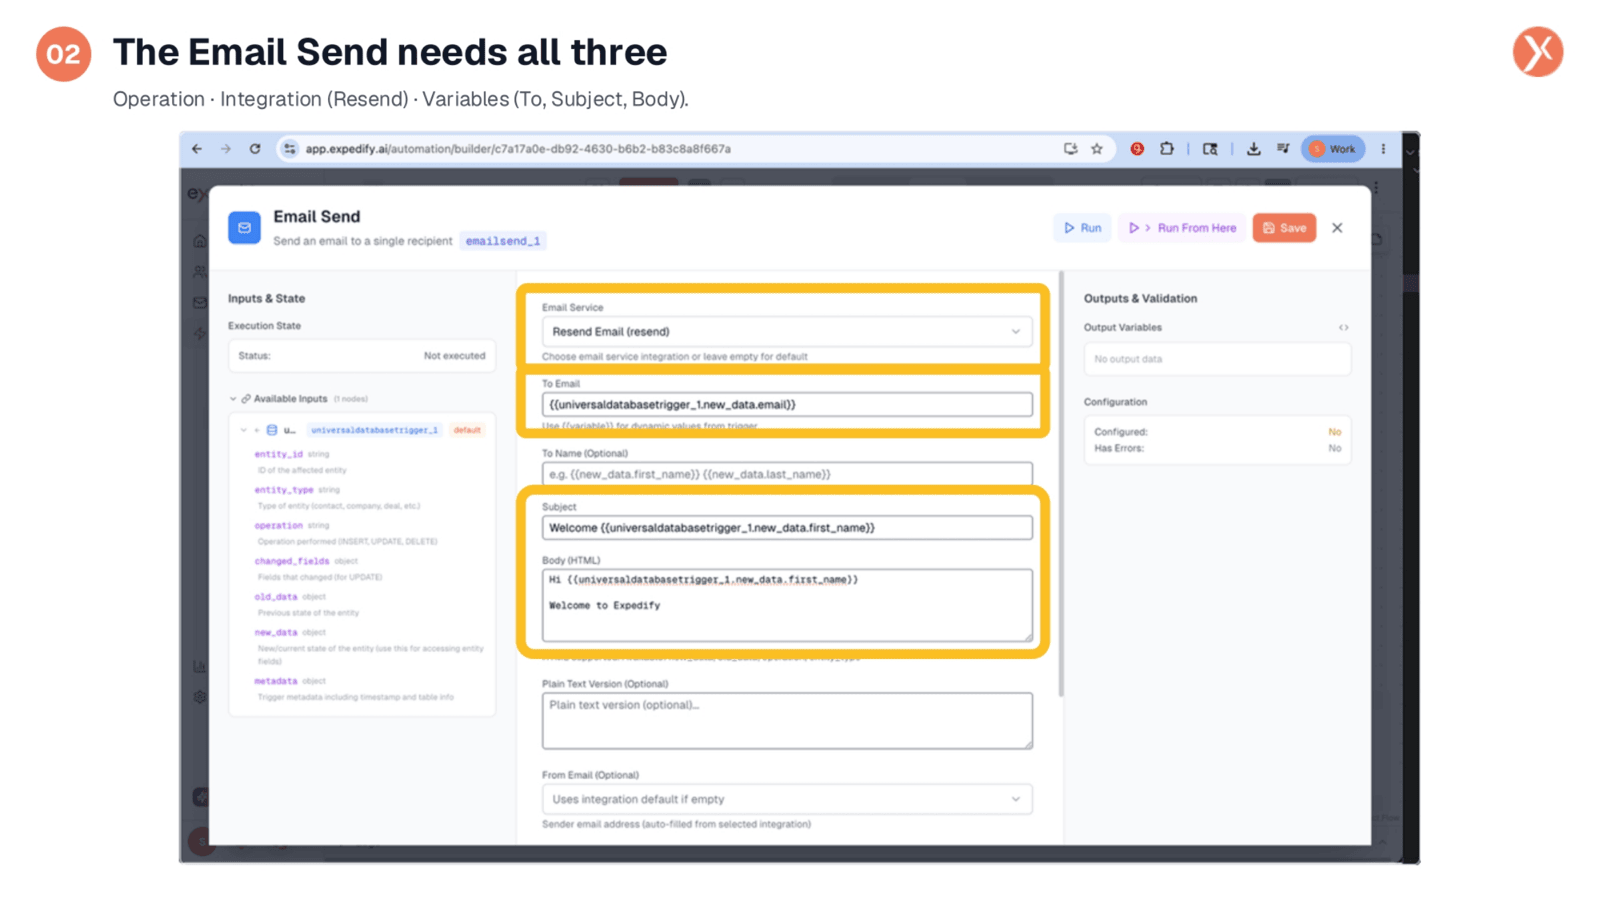
Now, consider the Email Send node. This node requires all three core components. Its operation, 'send a single email,' is inherent to its type. The integration, 'Resend,' specifies the service responsible for message delivery. Finally, variables like 'To,' 'Subject,' and 'Body' provide the dynamic data pulled from upstream. Missing any of these three crucial pieces will cause the node to fail. Let's see what happens when a required field is left unconfigured.
Identifying Workflow Issues on the Canvas
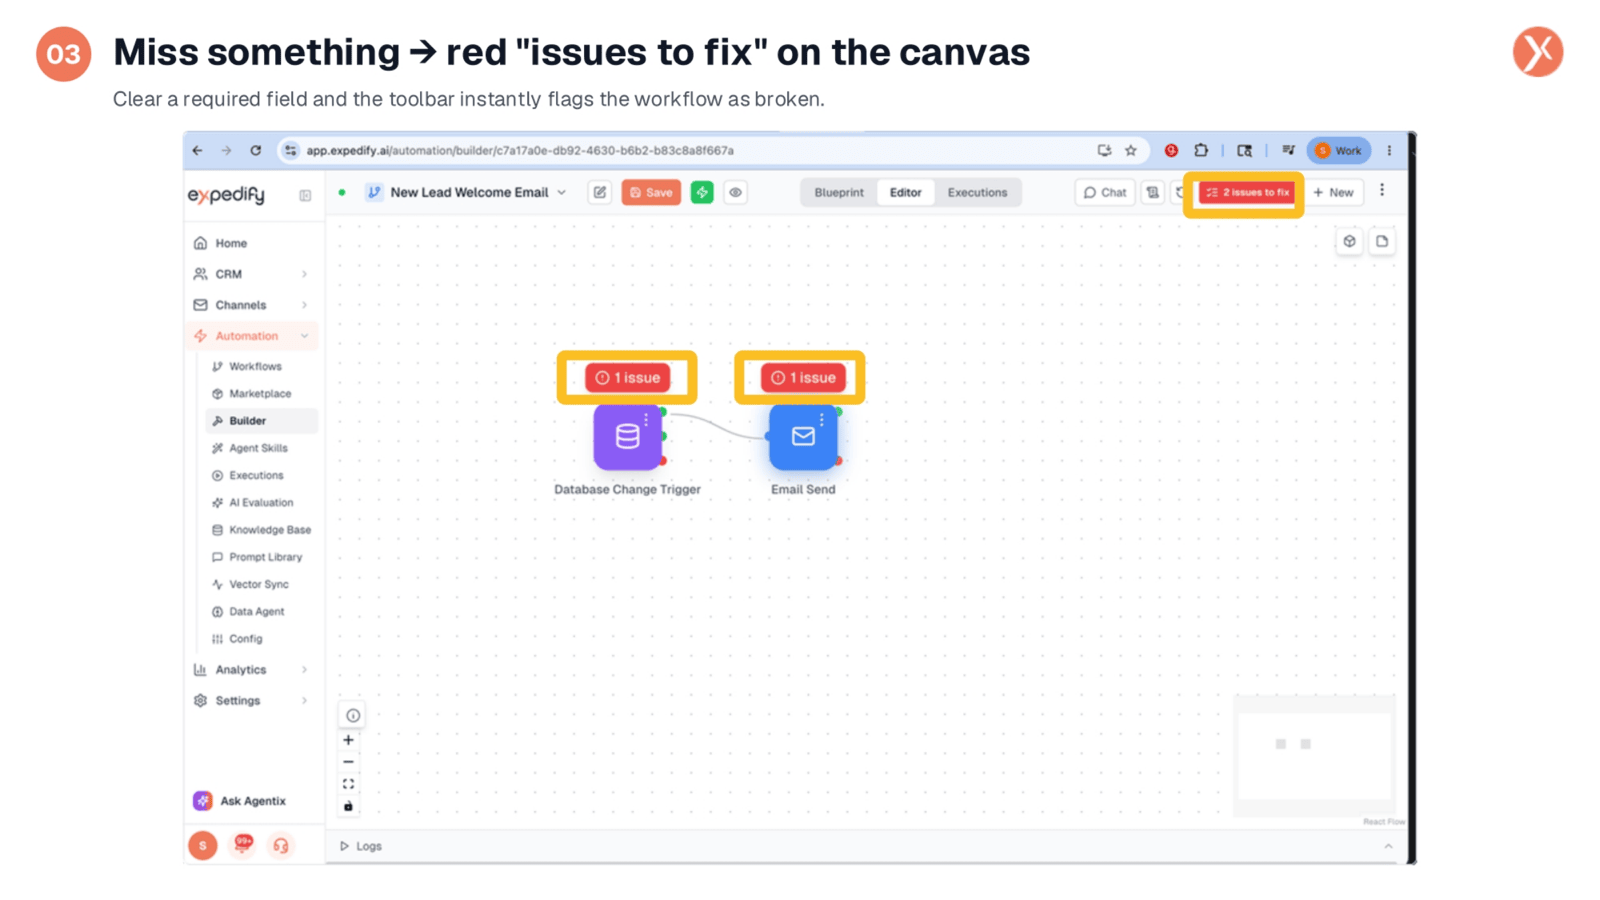
After intentionally clearing a couple of required fields in the email node, you can immediately see the impact. Each affected node now displays a red '1 issue' pill, and the toolbar at the top indicates '2 issues to fix.' Expedify provides real-time feedback, clearly signaling that this workflow is not ready for deployment. It not only alerts you to a problem but also points to the specific nodes affected.
Accessing the Setup Wizard
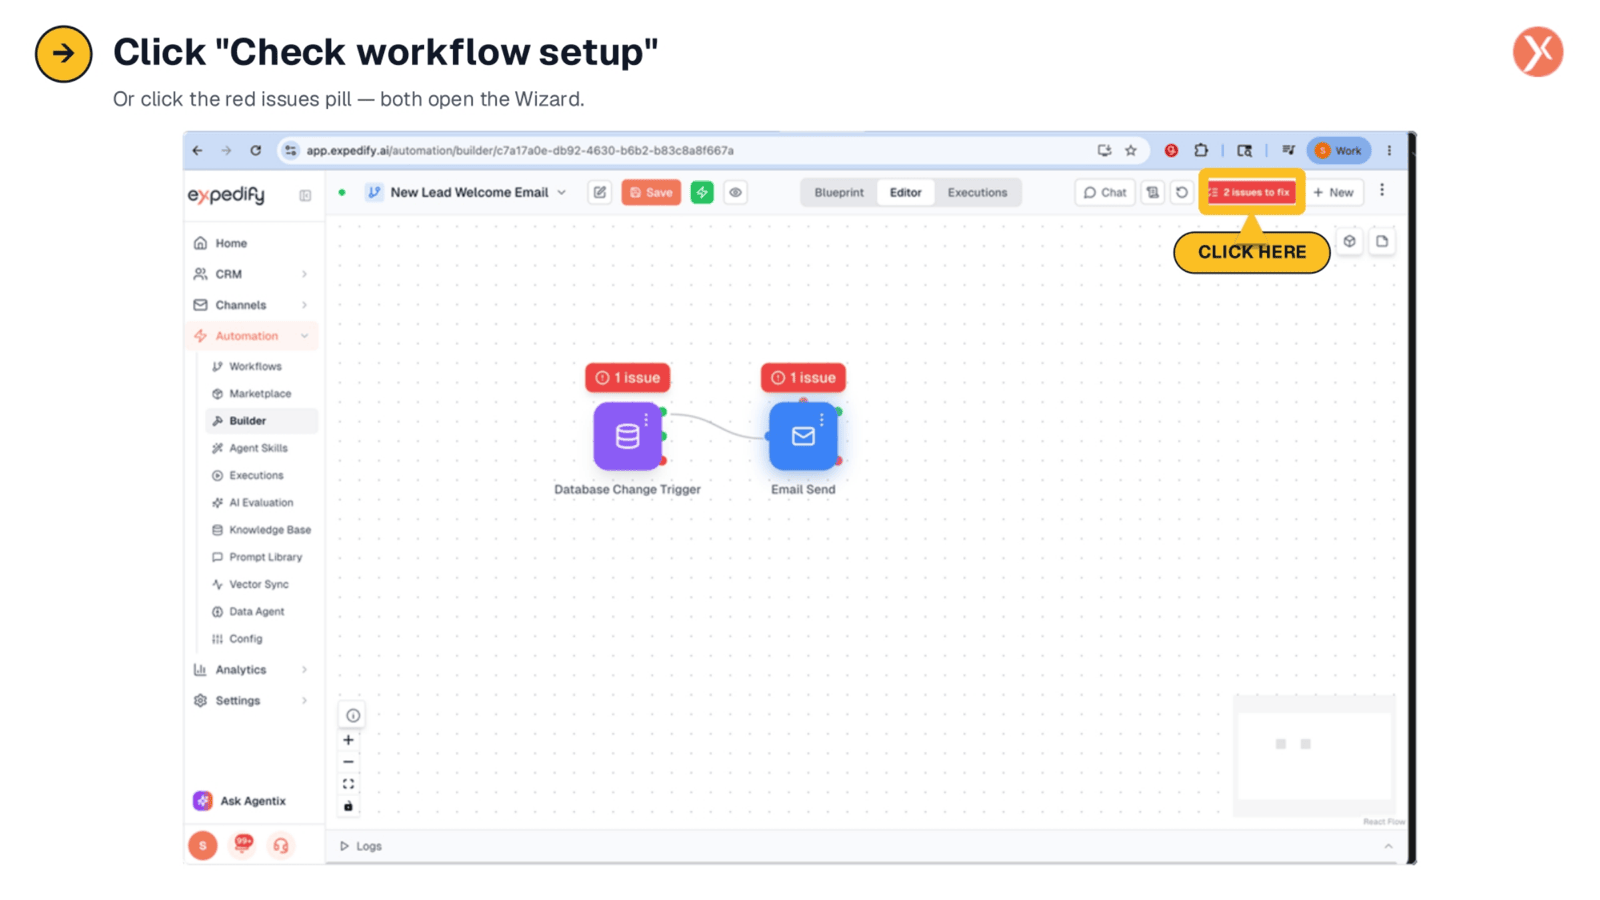
To address these identified issues, simply click on the red 'issues to fix' pill in the toolbar. This action will automatically launch the Setup Wizard, providing a guided experience to resolve any configuration problems within your workflow.
Overview of the Setup Wizard Panel
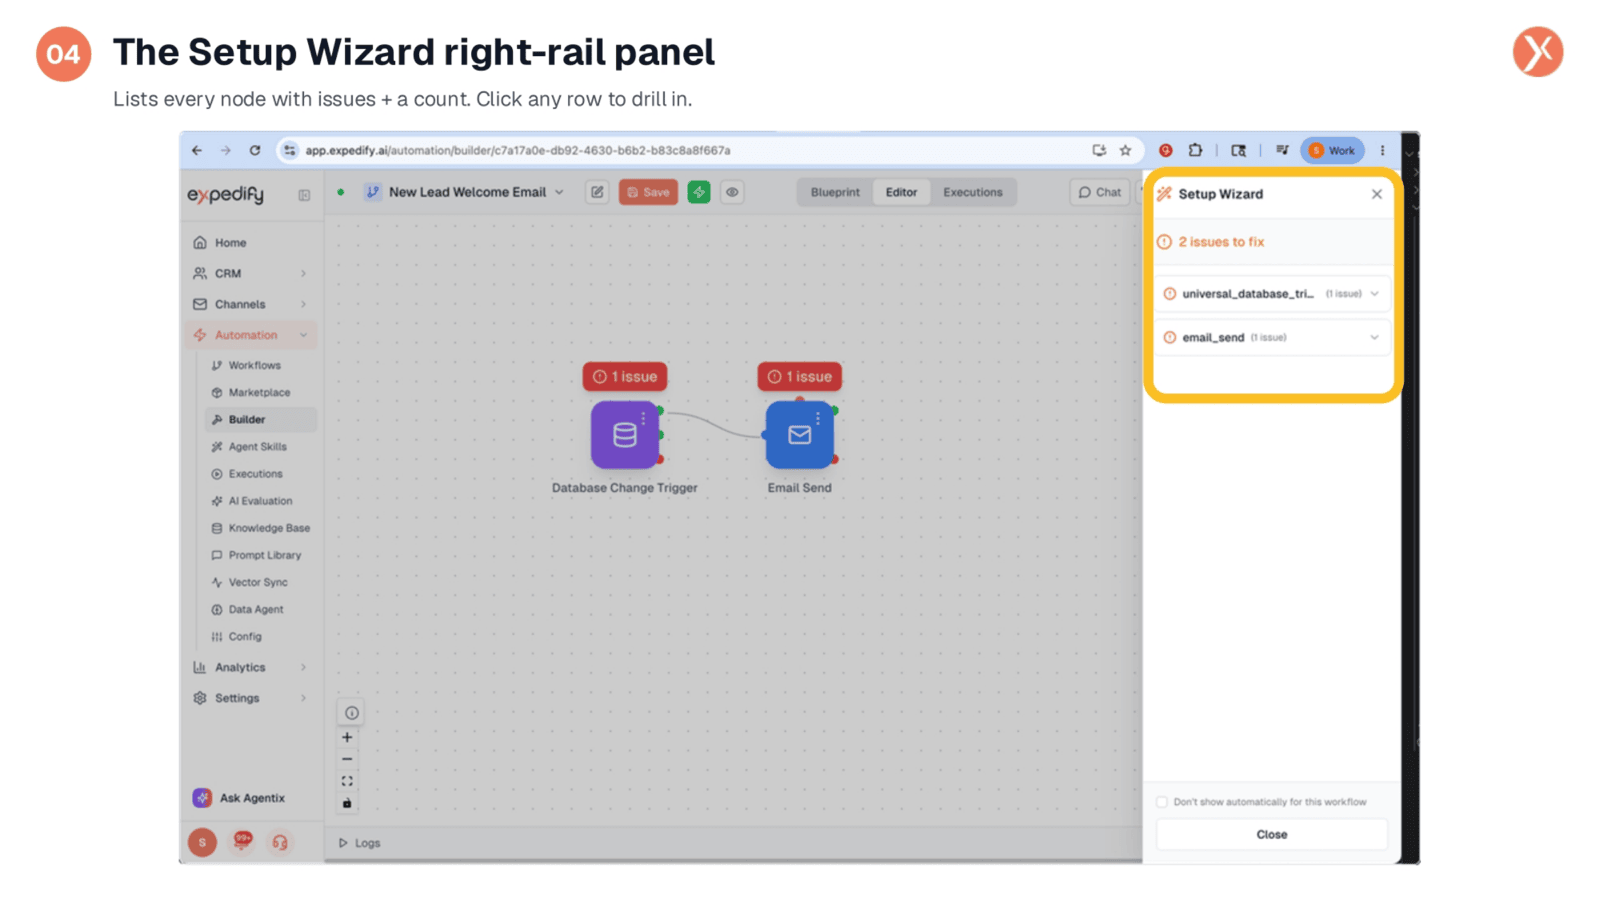
The Setup Wizard appears as a panel on the right side of your screen. It clearly states '2 issues to fix' and lists each node with a problem, such as 'universal_database_trigger with 1 issue' and 'email_send with 1 issue.' Initially, each row is collapsed, but you can expand them to view more specific details about the errors.
Expanding Node Details in Setup Wizard
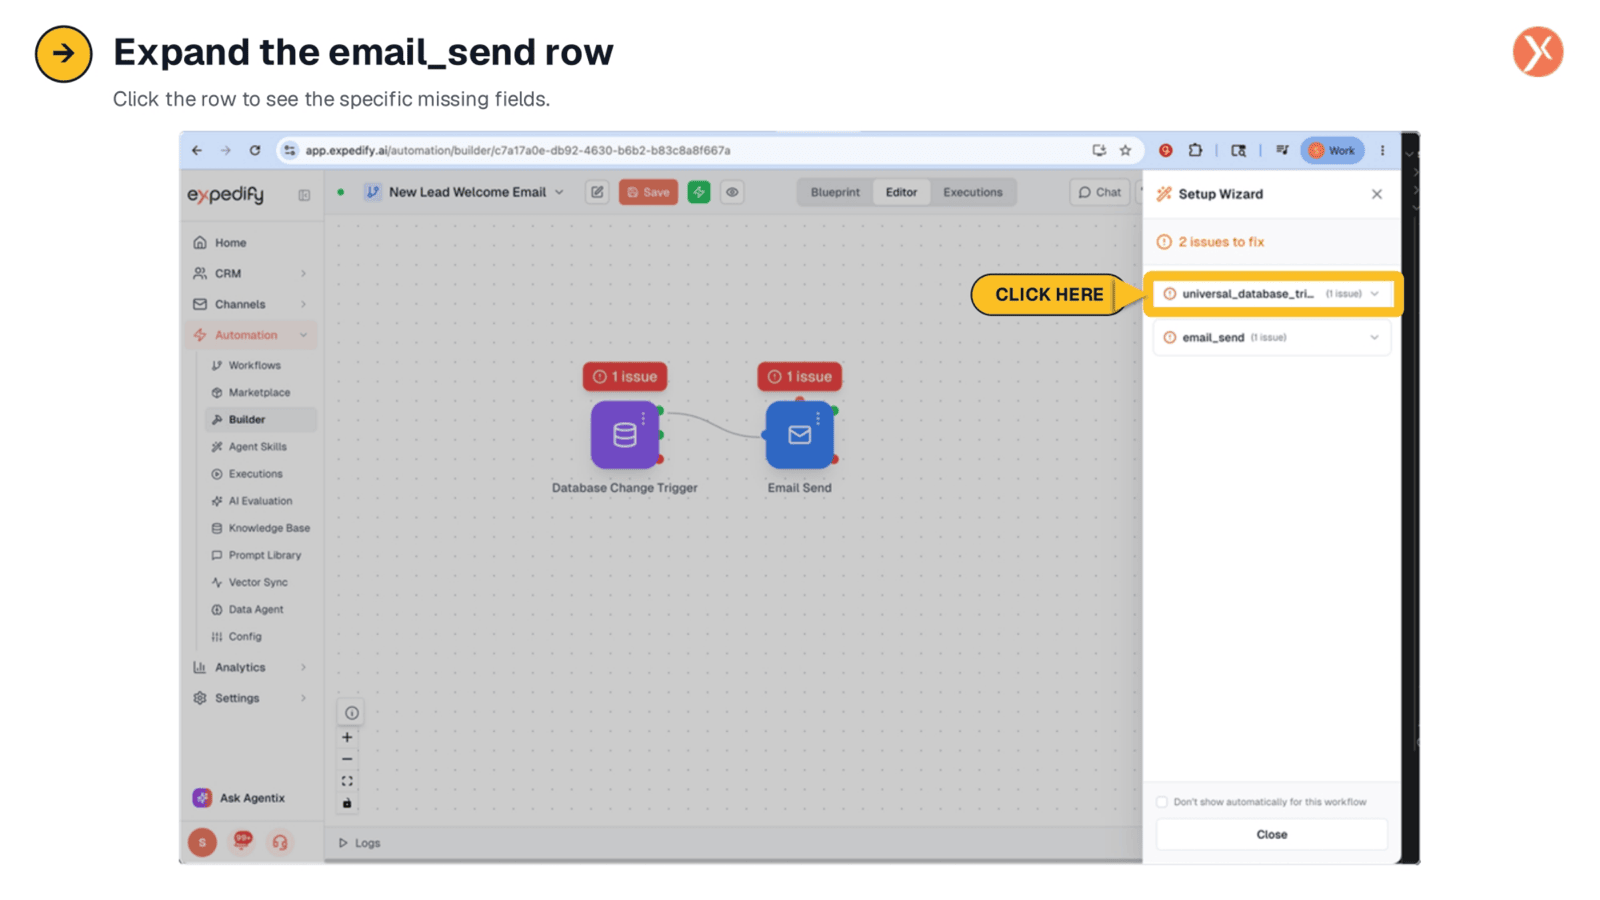
To delve deeper into the specific problems affecting a node, simply click on its corresponding row within the Setup Wizard. For instance, expanding the 'email_send' row will reveal a detailed breakdown of all the missing fields and required configurations for that particular node.
Precise Error Identification and Direct Fix Option
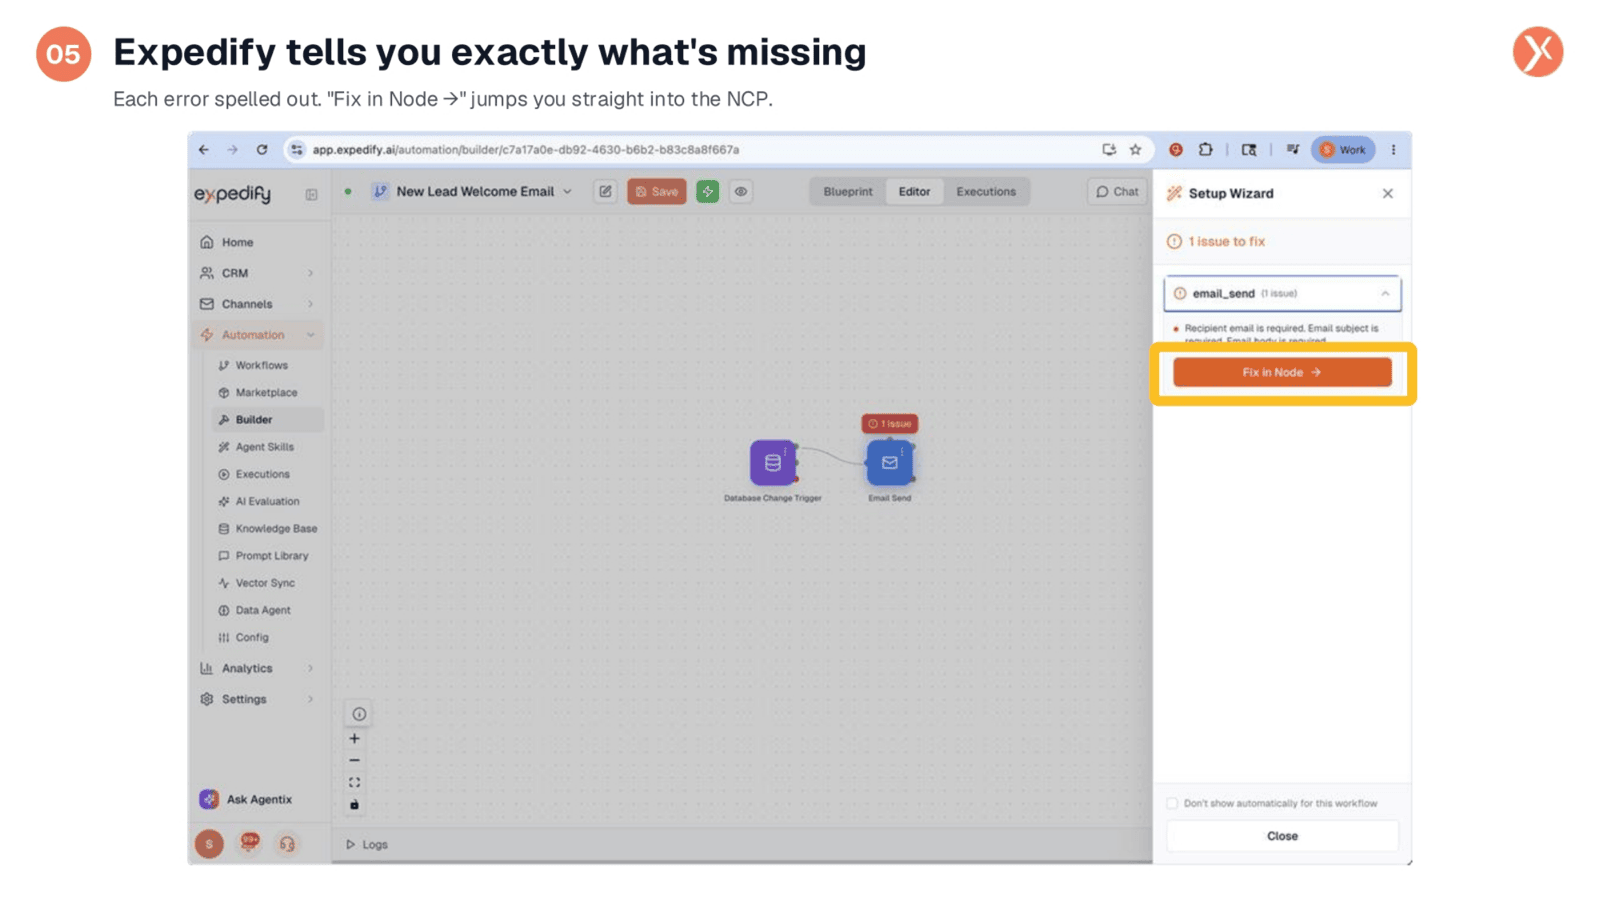
Once expanded, the Setup Wizard provides precise error messages, such as 'Recipient email is required,' 'Email subject is required,' and 'Email body is required.' Below these detailed explanations, an orange 'Fix in Node' button appears. Clicking this button will directly navigate you to the Email Send panel, allowing you to immediately input the necessary corrections.
Navigating to the Node Configuration Panel
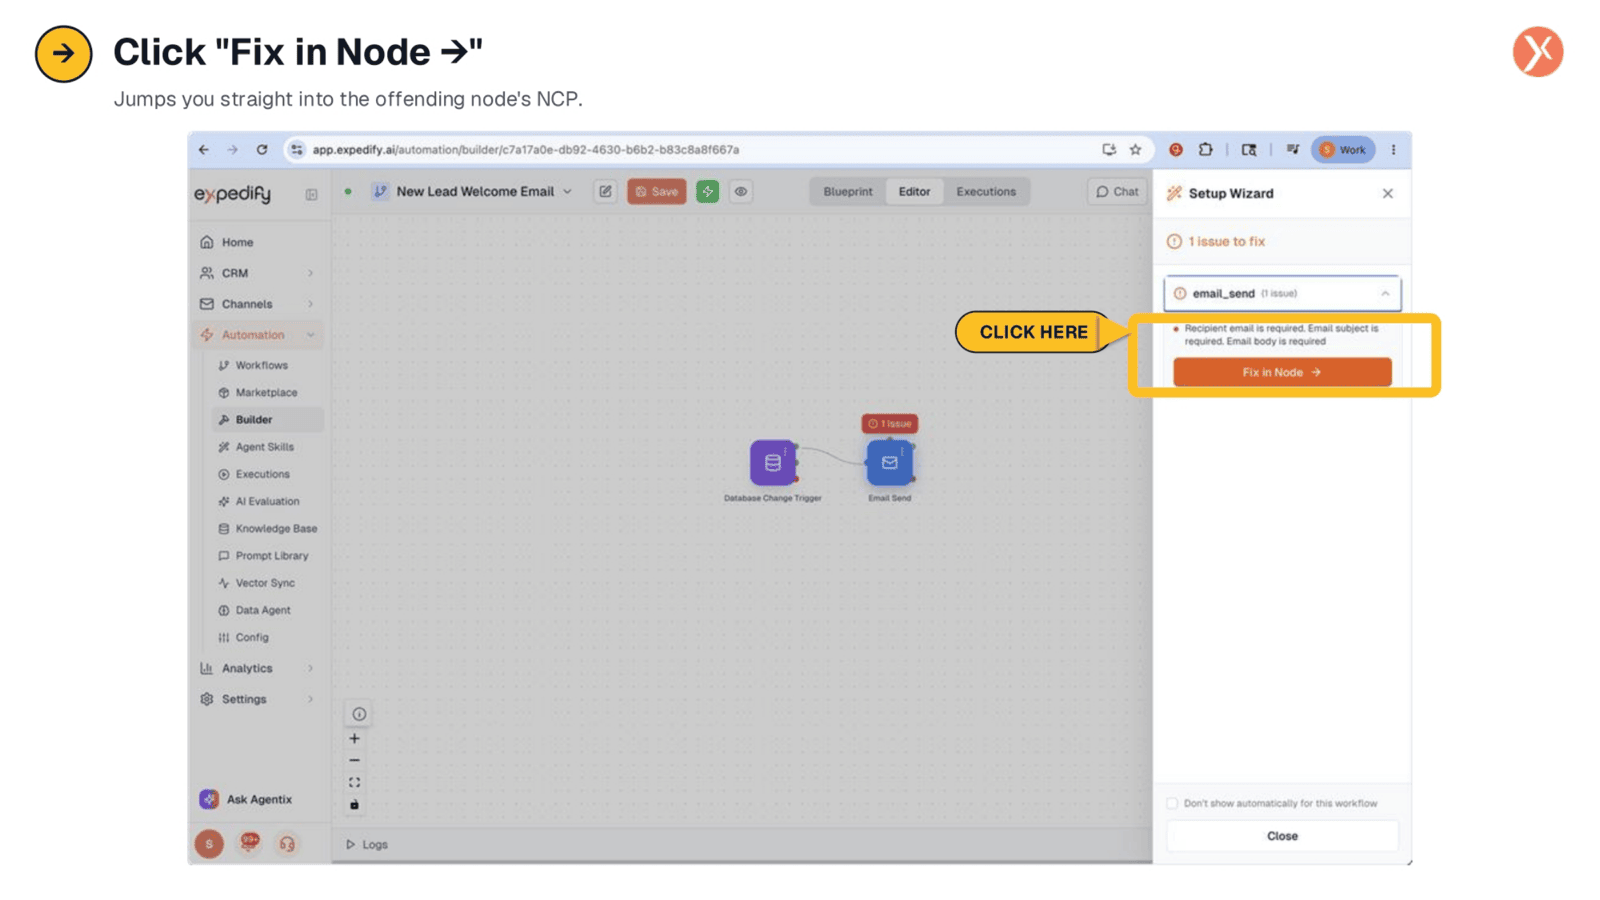
Clicking the 'Fix in Node' button seamlessly transitions you to the specific node's configuration panel. This direct navigation eliminates the need to manually search for the problematic node, streamlining the troubleshooting process and allowing you to focus immediately on applying the necessary corrections.
Applying Corrections in the Node Configuration Panel
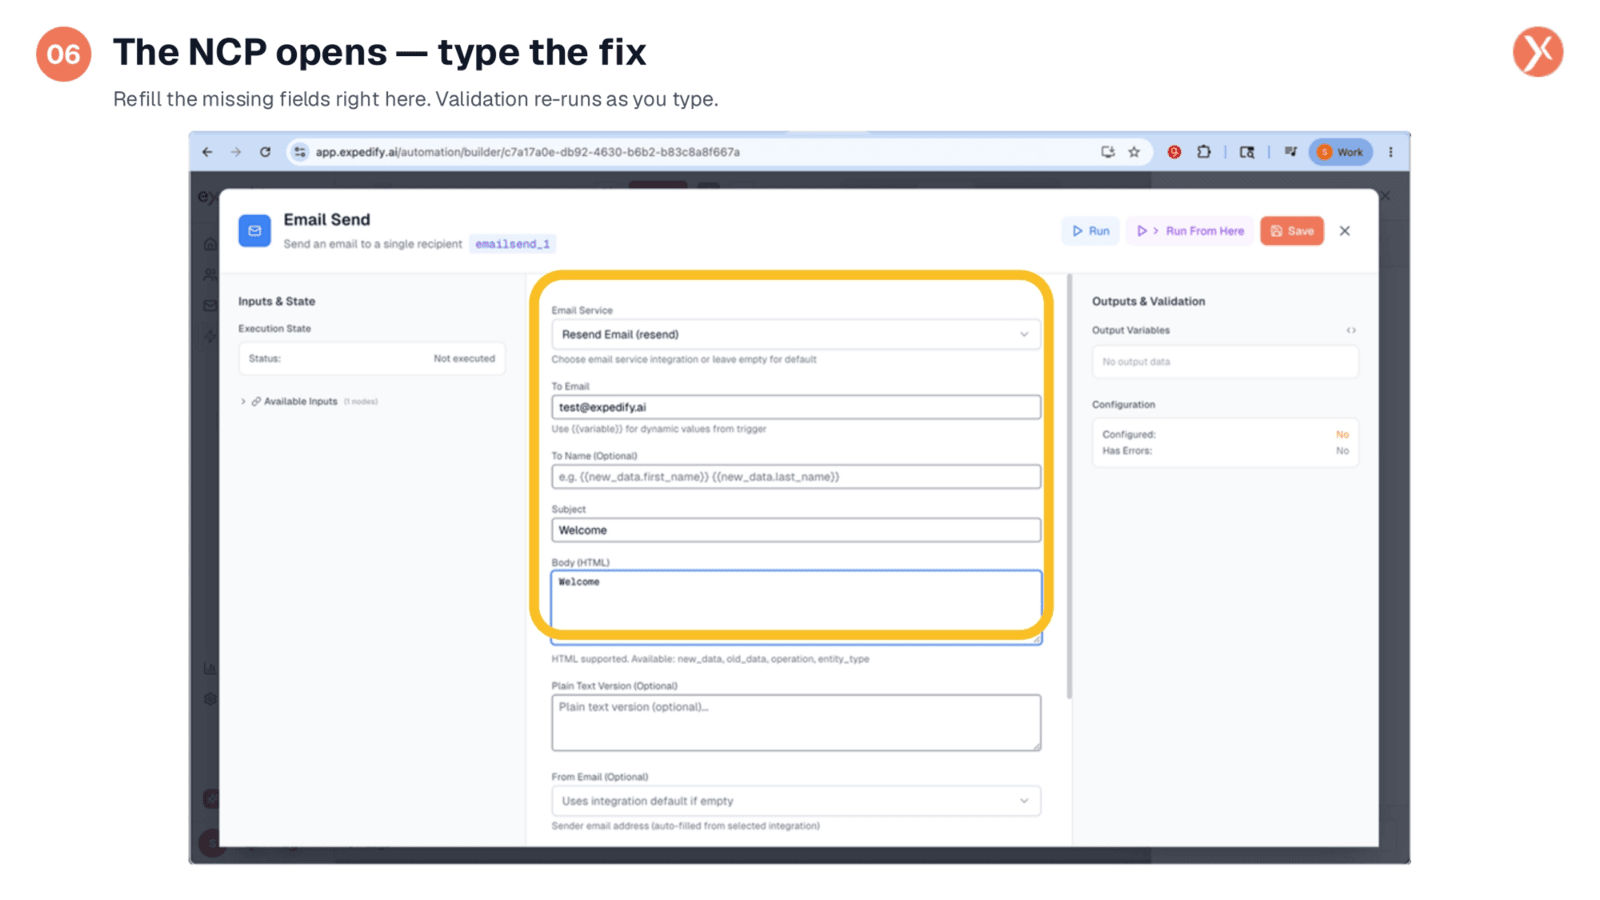
With the Email Send panel now open, we can quickly address the missing information. We'll re-enter the 'To' address, type 'Welcome' for the subject, and add 'Welcome' to the body. These inputs are sufficient to clear the validation errors. After making these corrections, we can return to the Setup Wizard to confirm that all issues have been resolved.
Workflow Validation Complete and Ready for Activation
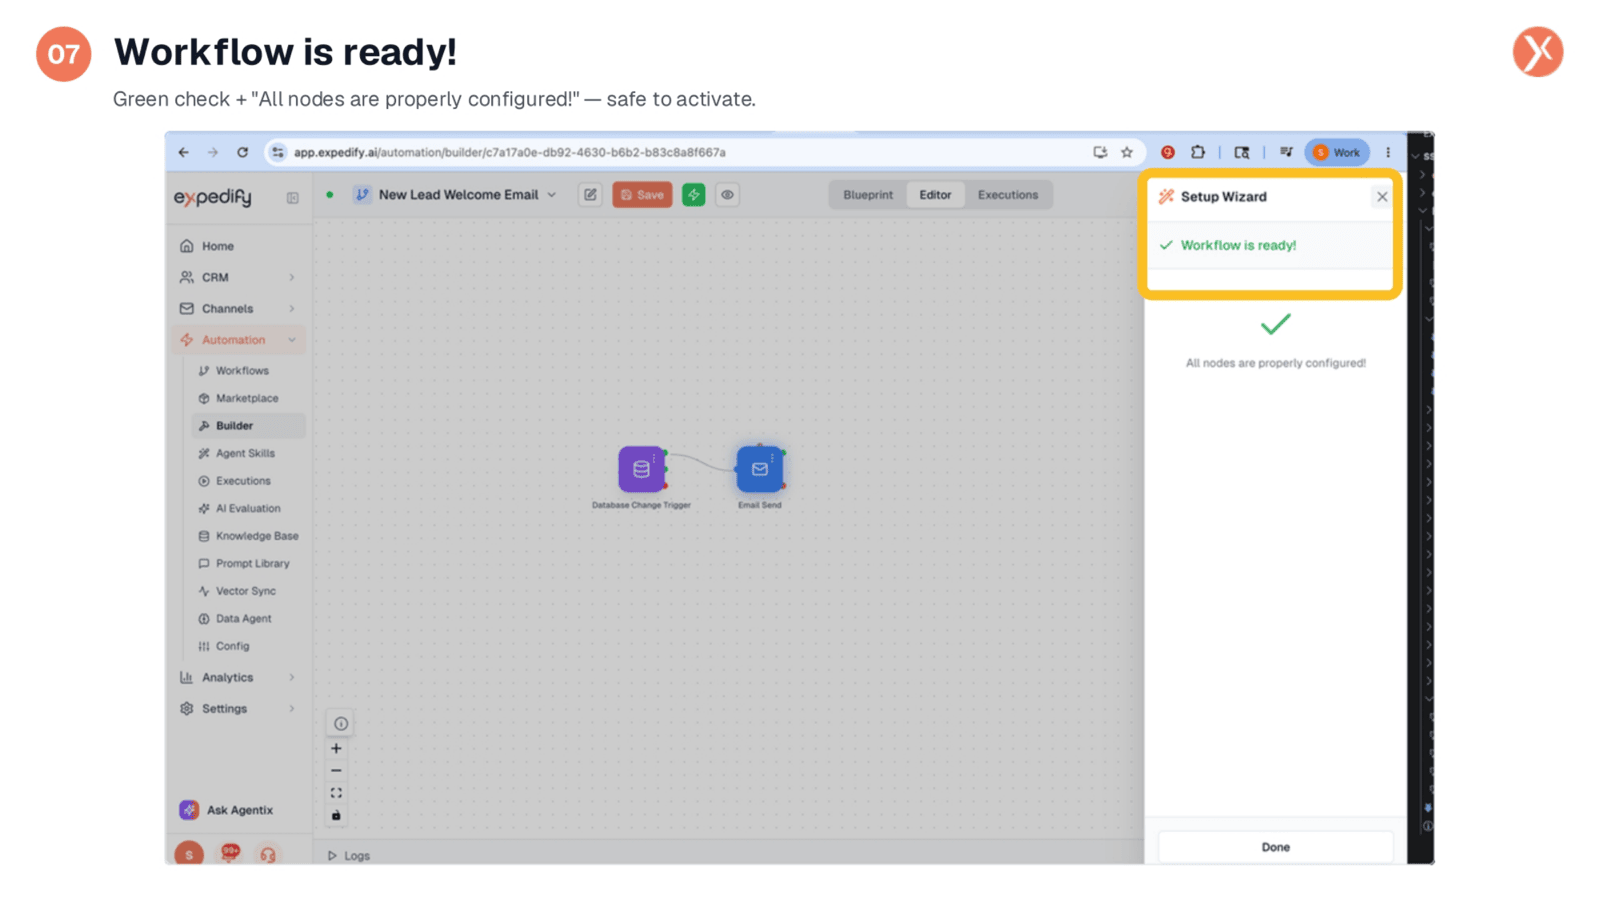
The Setup Wizard now displays a green checkmark and the message 'Workflow is ready!' along with 'All nodes are properly configured!' This signifies that your workflow is fully validated and safe to activate. Expedify's system ensures that all three critical elements—operation, integration, and variables—are correctly set, preventing broken automations from going live.
Builder Basics Recap and Next Steps
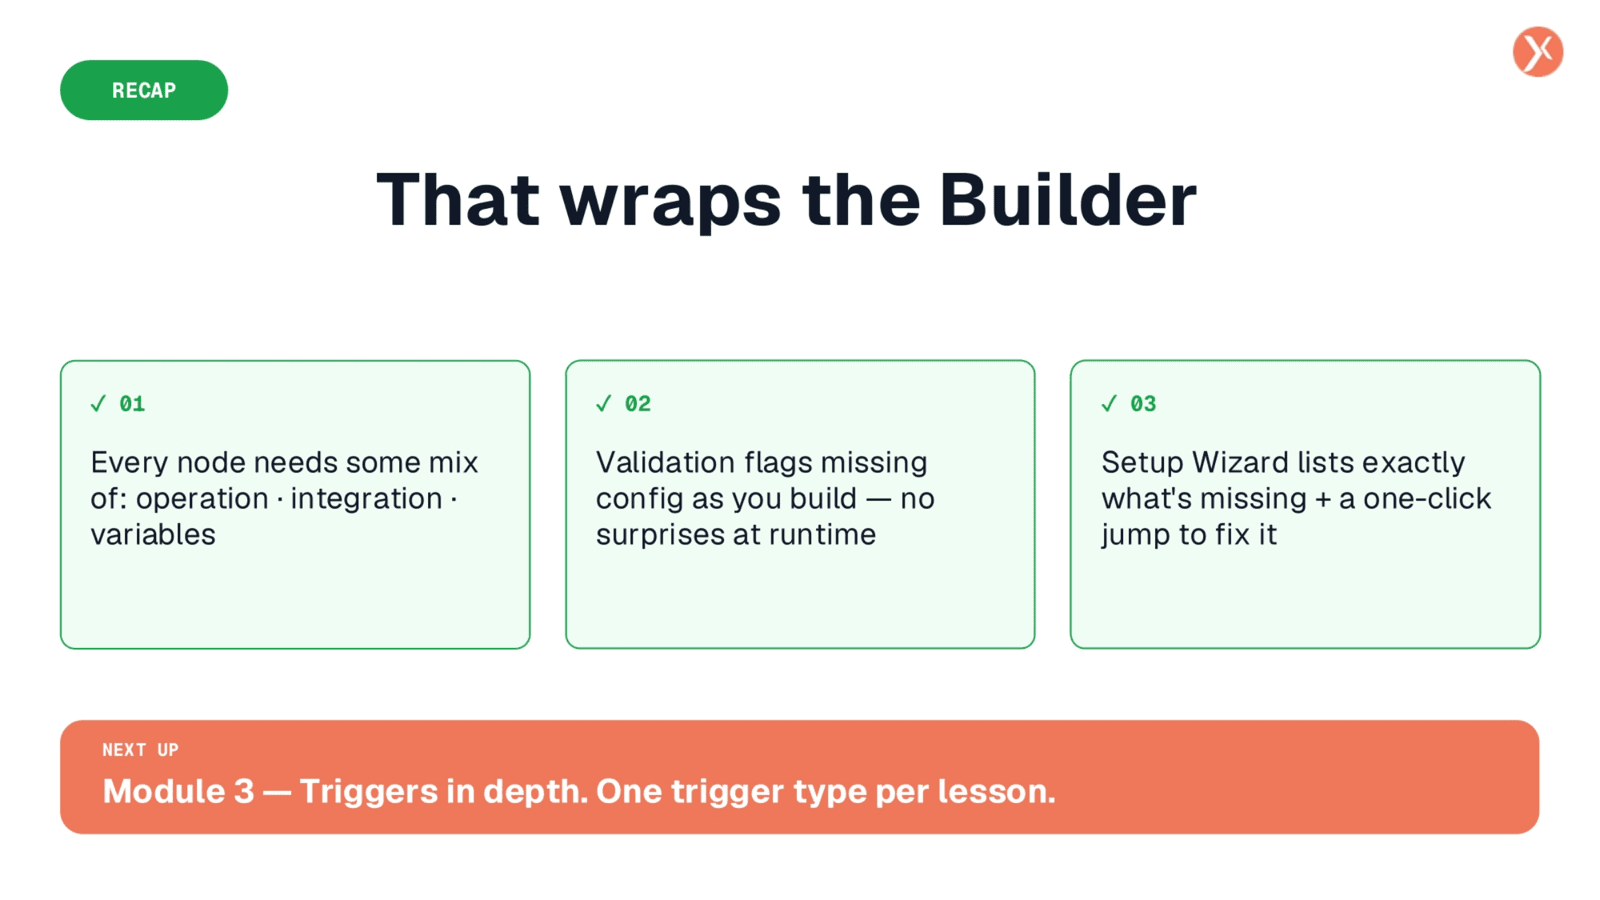
This concludes our overview of the Builder basics. Remember, every node requires a correct operation, integration, and variables. Expedify's real-time validation and the Setup Wizard provide a robust safety net, guiding you through any missing configurations. Next, we'll delve deeper into triggers, exploring various types in detail.