Custom Function
The Custom Function node serves as an essential escape hatch for complex logic within your workflows. While most tasks leverage pre-built nodes, you'll occasionally encounter transformations requiring custom code, such as parsing strings, scoring leads, or deduplicating lists. This feature provides a Python editor directly within the builder, complete with pre-installed libraries and an AI assistant to help generate code. We'll explore each component of this powerful tool.
Custom Function Demo Overview
This demonstration will guide you through the Custom Function's core components. We'll cover how to map upstream data, write Python code, utilize AI generation, configure timeouts, select pre-installed libraries, and define local variables like API keys.
Introducing the Custom Function Node
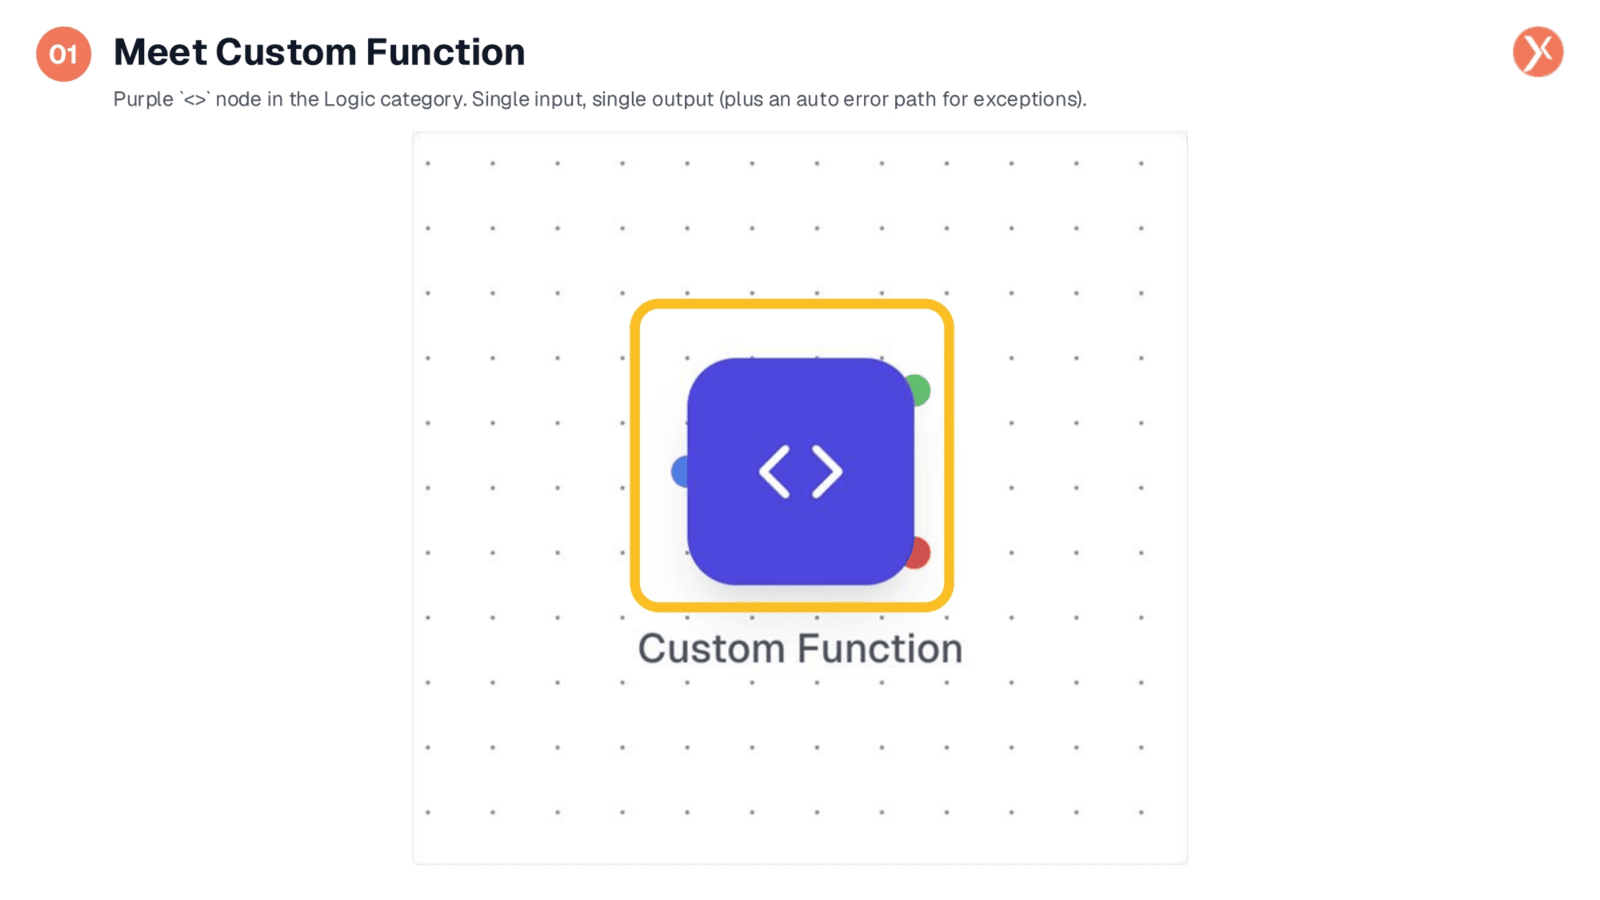
The Custom Function node is easily identifiable by its purple color and code-tag icon, located within the Logic category of the Node Palette. It features a single input and a single output, along with an automatic error path for handling exceptions in your code. This node is ideal for integrating small scripts into your workflow, such as between an upstream data lookup and a downstream action, allowing your Python code to run seamlessly inline.
Custom Function Interface: Six Pieces, One Panel
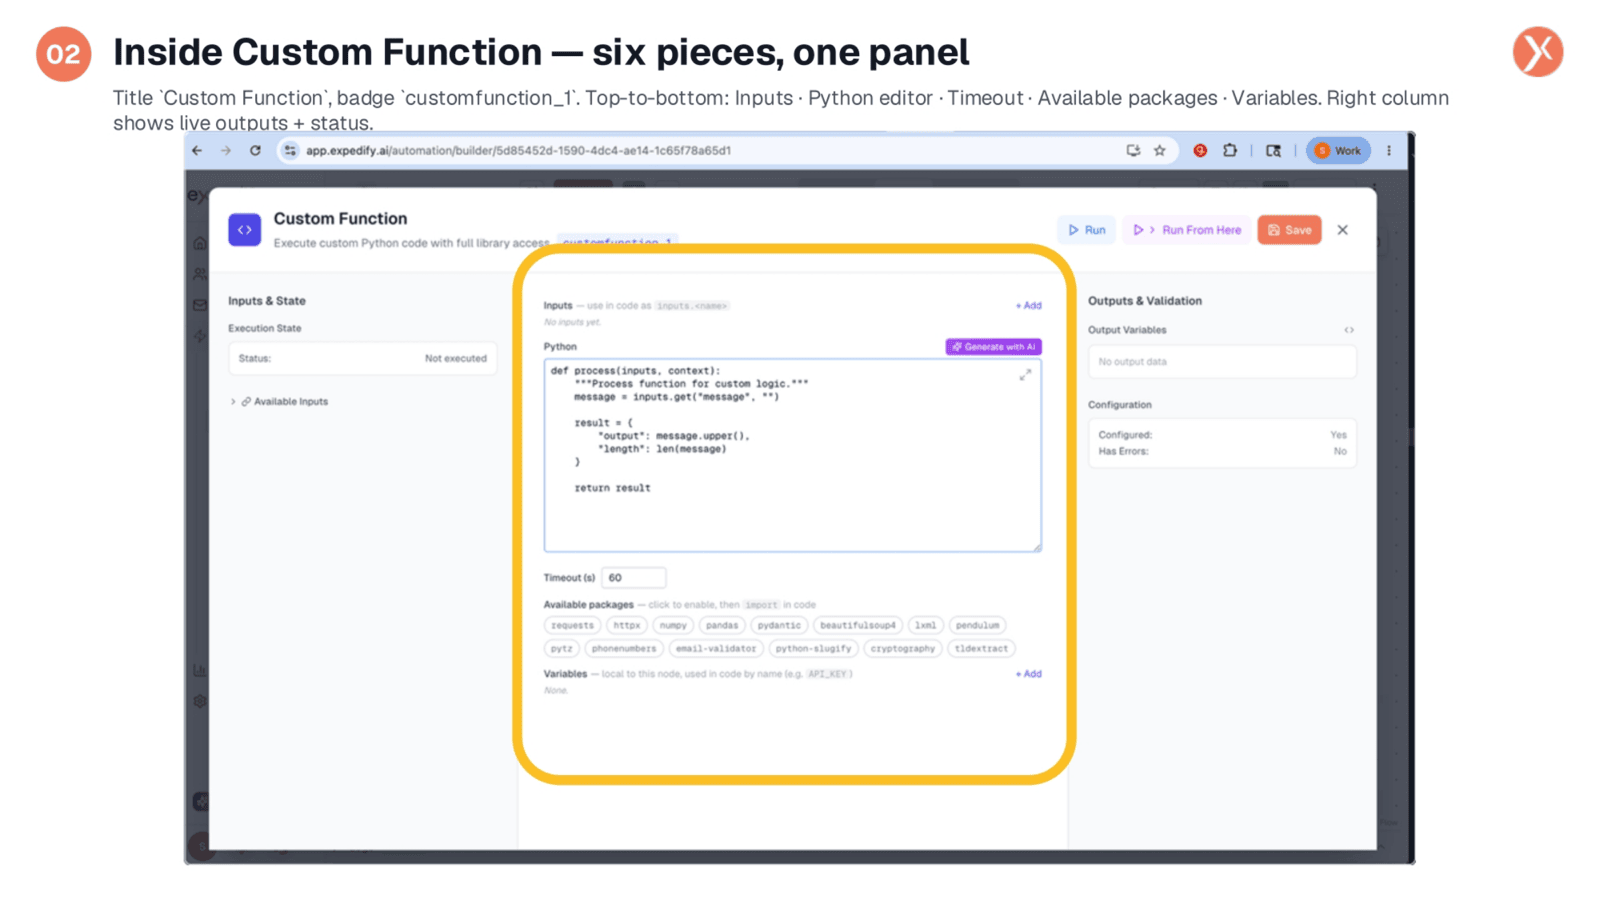
Opening the Custom Function node reveals its comprehensive interface, identified by the "customfunction_1" badge, which serves as its downstream namespace. The panel is organized into six key sections. From top to bottom, you'll find Inputs for mapping upstream data, the Python editor for writing your code, and Timeout settings, defaulting to sixty seconds. Below that, Available packages lists pre-installed libraries, and Variables allows for defining local, per-node values like API keys. The right column displays the live configuration and error status.
Inputs: Naming Your Code's Data
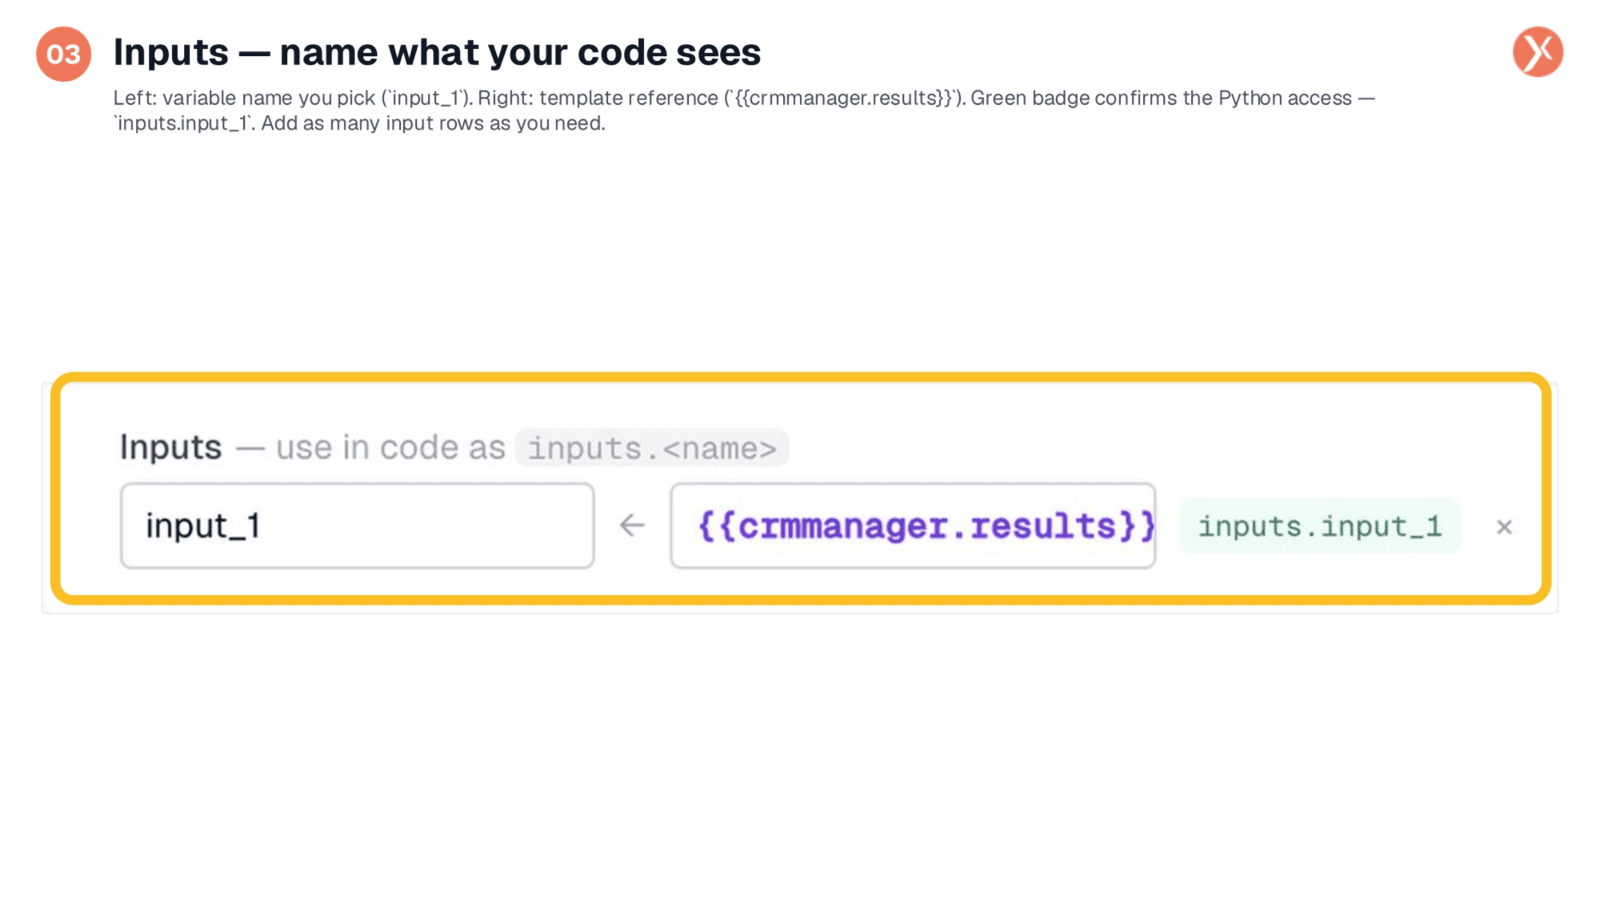
The Inputs section is crucial for bridging upstream data into your Python code. You assign a clear variable name, such as input_1, lead, or record, on the left. On the right, you link it to an upstream node's output using a template reference, like crmmanager.results. The green badge then confirms the exact Python access path, inputs.input_1. This ensures that within your Python code, inputs.input_1 directly represents the raw, structured object from the upstream source, offering a much cleaner and more intuitive way to access data compared to older methods.
Python: Writing Your Process Function
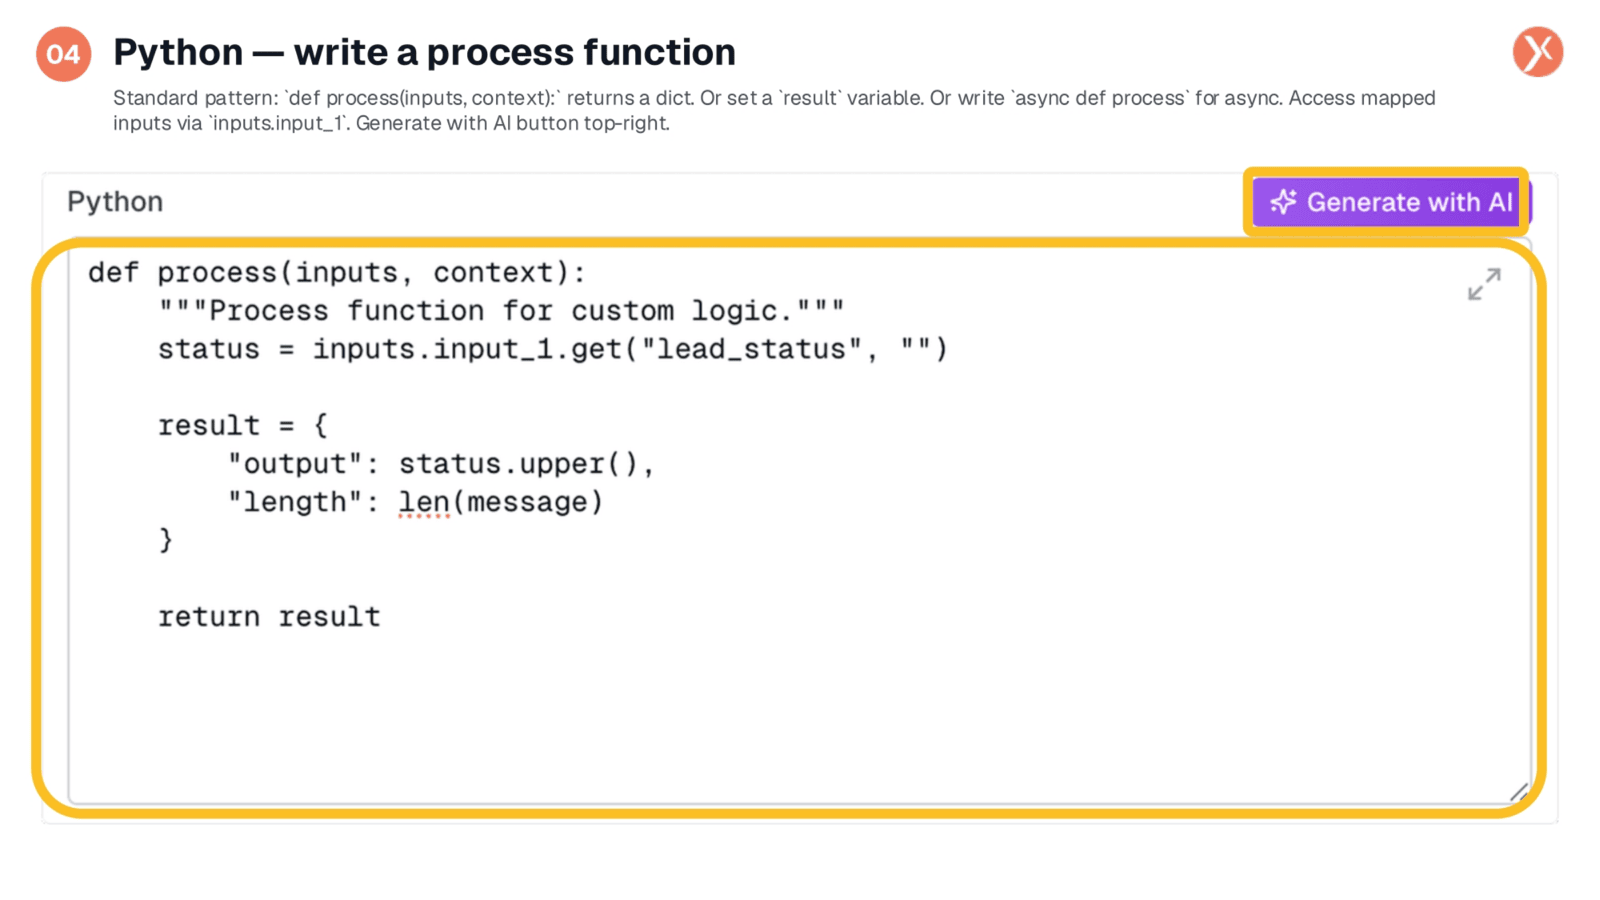
Within the Python editor, the standard practice is to define a process function that accepts inputs and context parameters, then returns a dictionary. This returned dictionary becomes the node's output, accessible downstream as customfunction_1.output. Alternatively, you can write simpler code and assign a result variable, which Expedify will automatically capture. For asynchronous operations, you can define an async def process function. The inputs parameter provides the structured data from the Inputs section, while context offers utility helpers like save_data, load_data, and log. Notice the "Generate with AI" button in the top-right, which we'll explore shortly.
The Bridge: Input Declaration to Code Usage
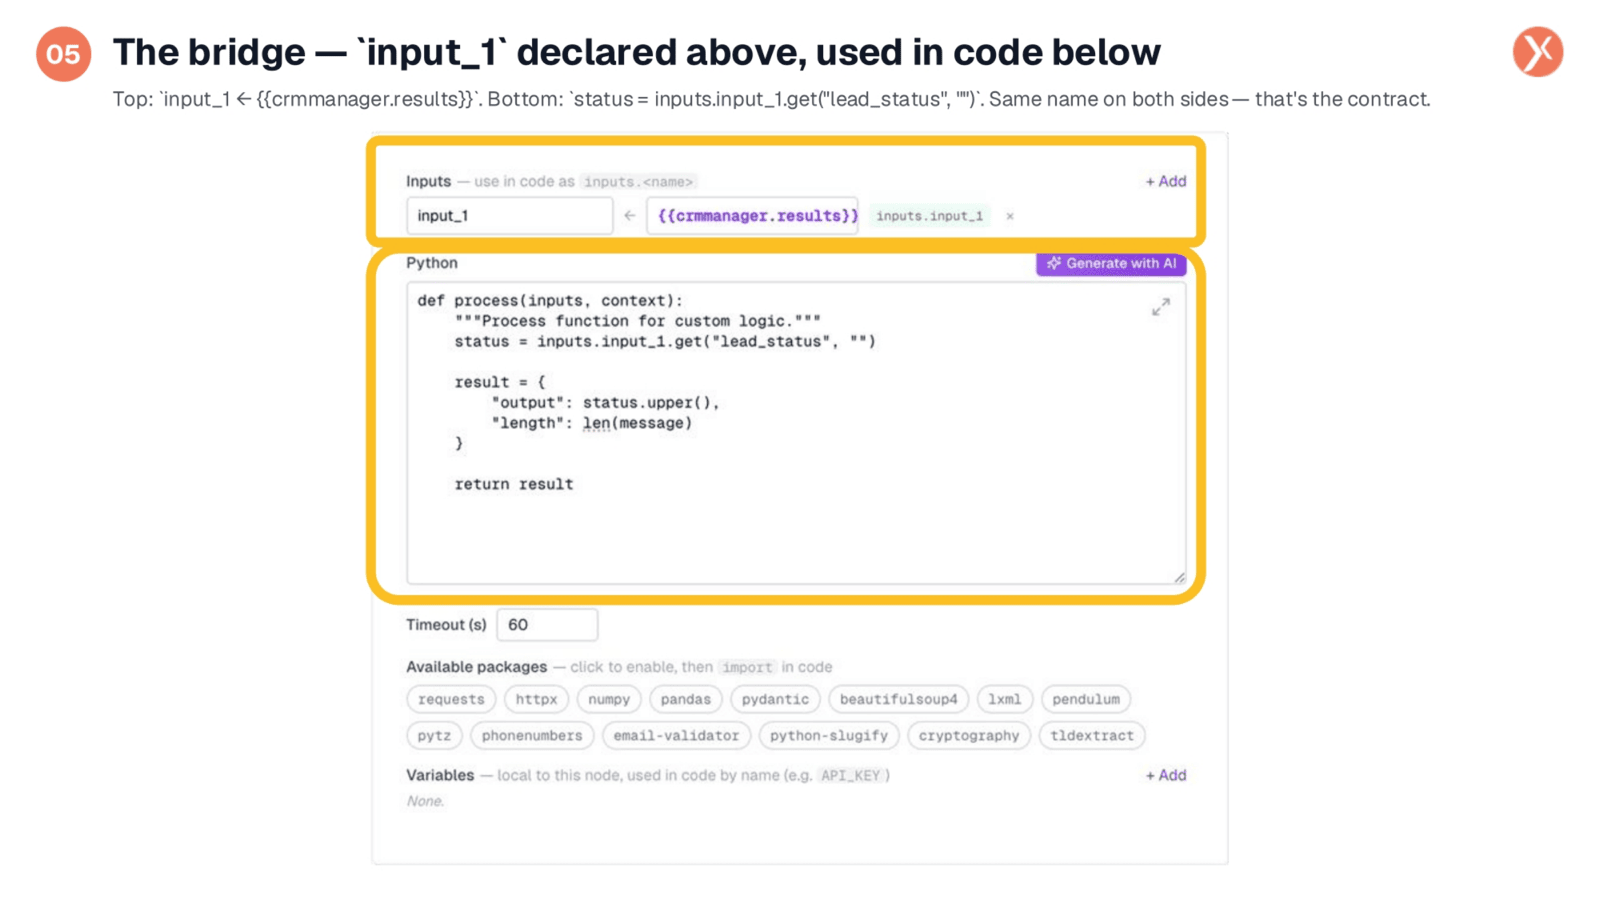
This slide highlights the critical connection between your input mapping and your Python code. Observe the input_1 variable name defined in the Inputs section at the top. This exact name is then used within your code, as seen in inputs.input_1.get('lead_status'). This consistent naming convention is the core contract: the Inputs section declares what's available, and your code consumes it using that precise name. Renaming an input, for instance, from input_1 to lead, automatically updates its access path to inputs.lead, ensuring clarity and readability in your Custom Function.
Timeout and Available Packages
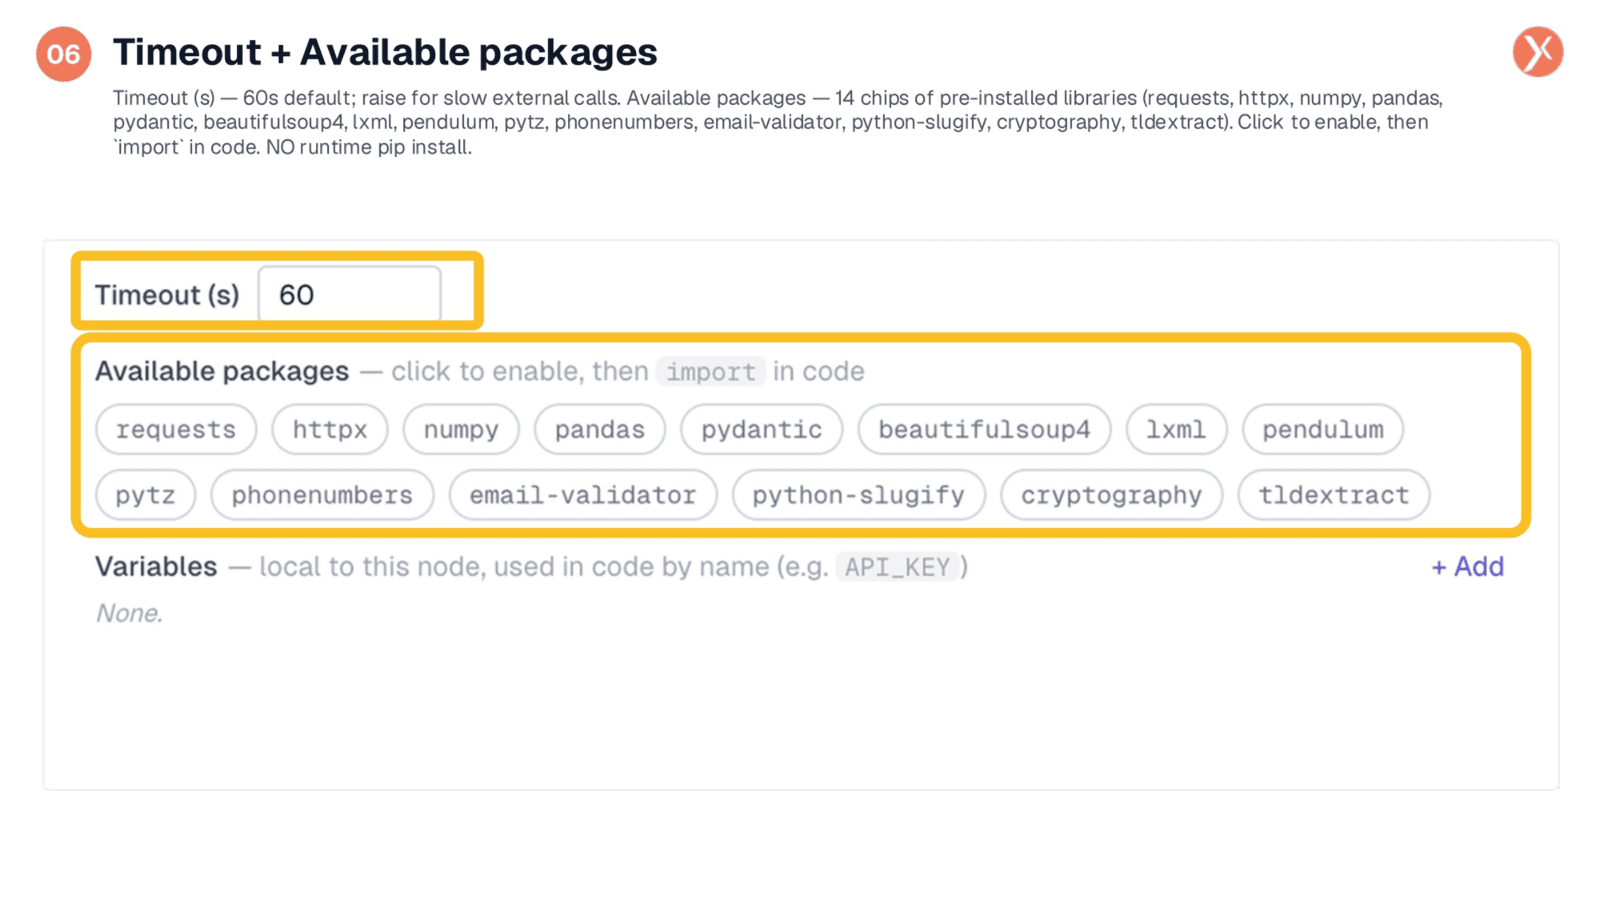
The Timeout setting establishes a strict execution limit, with sixty seconds typically sufficient for most logic. You can increase this duration if your code involves calls to slow external APIs. Below that, the Available packages section presents a selection of fourteen pre-installed libraries. These include requests and httpx for HTTP operations, numpy and pandas for data manipulation, pydantic for validation, and beautifulsoup4 and lxml for HTML parsing, among others. Simply click a chip to enable it for import into your code. It's crucial to remember that this is not a runtime pip install; only libraries from this specific list can be used, preventing ImportError exceptions.
Variables: Local Values by Name
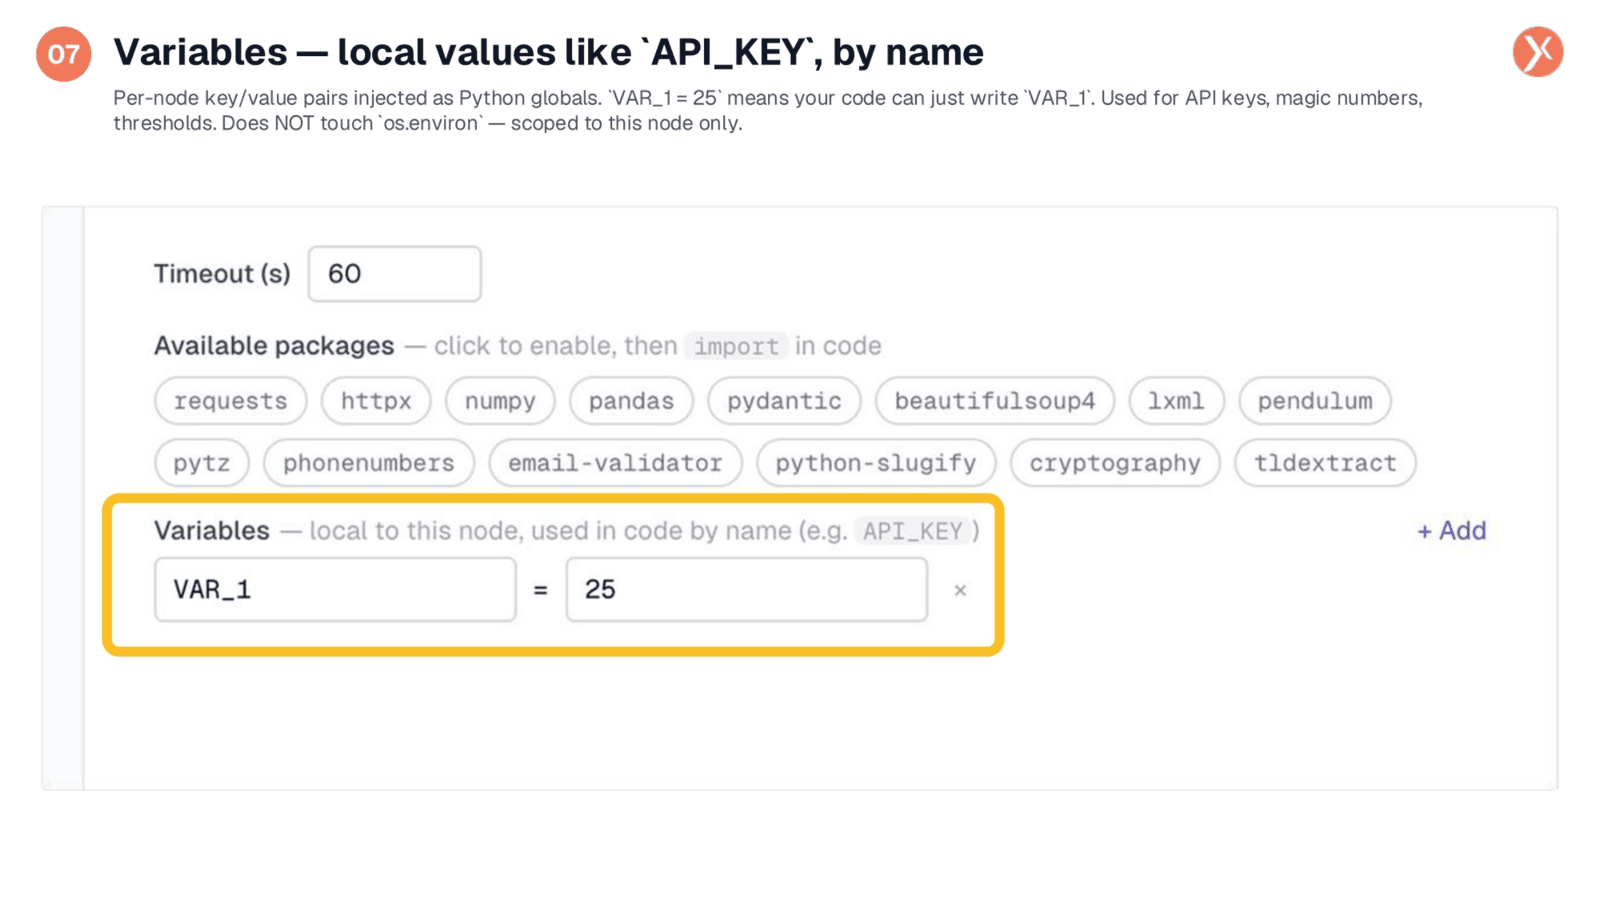
Variables function as local, node-specific environment variables, but with a cleaner implementation. Expedify injects each key as a Python global, allowing your code to directly reference API_KEY instead of os.environ.API_KEY. You can add a row, assign a name, and provide a value. For instance, setting VAR_1 to 25 enables your code to use VAR_1 directly. This feature is ideal for managing API keys, threshold values, or other configuration parameters without hardcoding them. These variables are strictly scoped to the individual node, ensuring deliberate isolation and preventing leakage across other nodes or workflows.
Initiating AI Code Generation
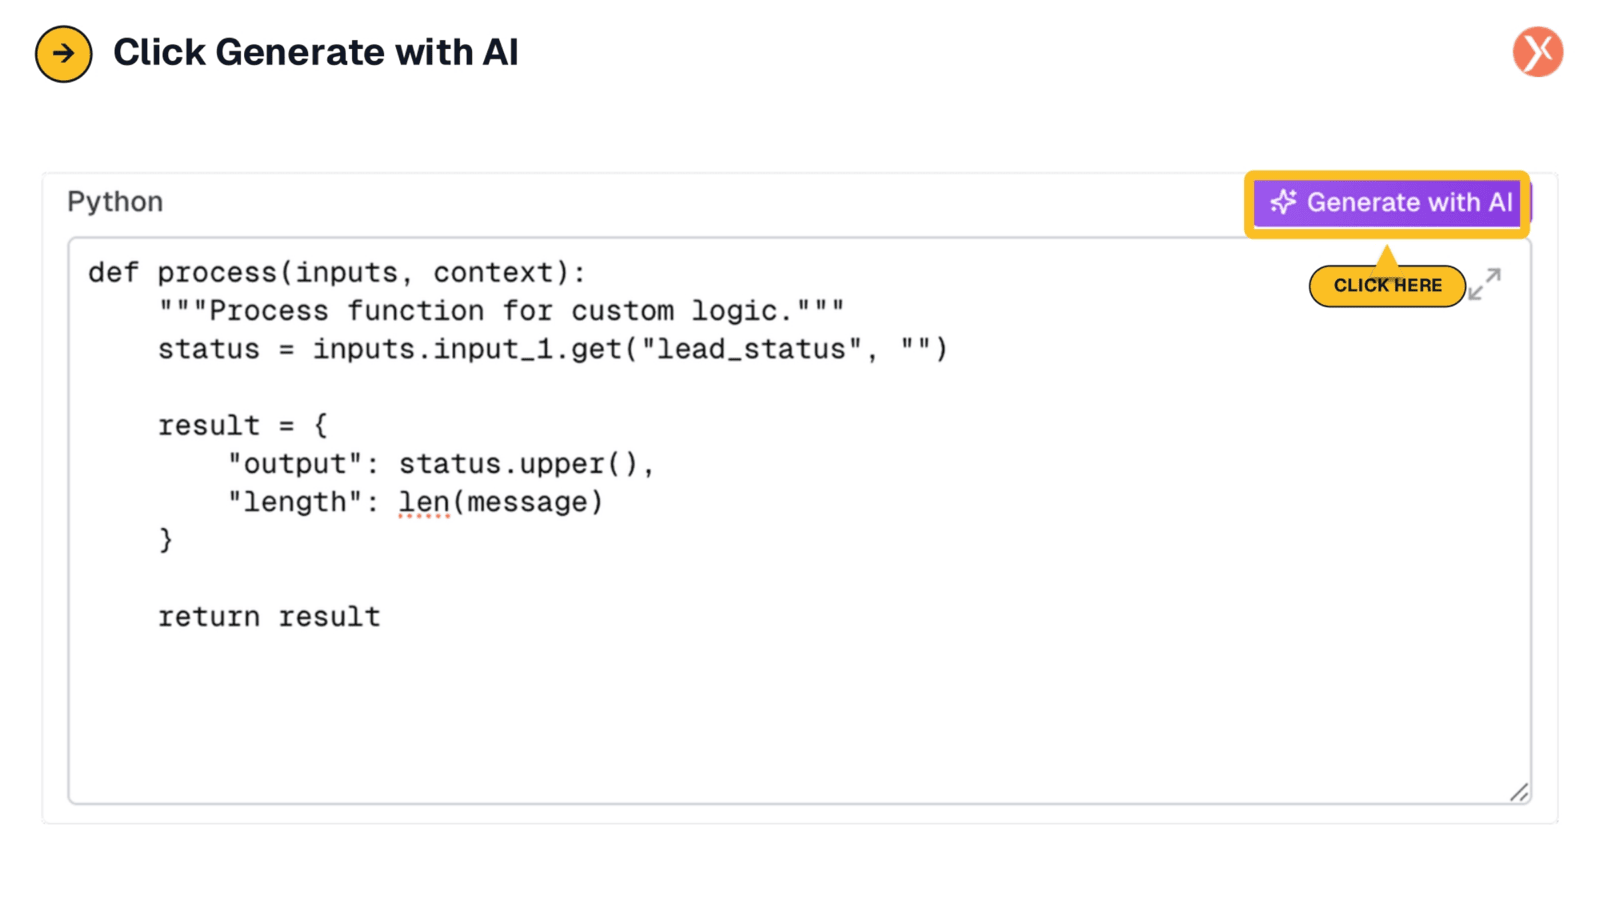
To leverage Expedify's intelligent assistance, simply click the "Generate with AI" button. This feature allows the AI to either write new code from scratch or refine your existing Python logic, streamlining your development process within the Custom Function node.
AI Code Generator: Describing Code Functionality
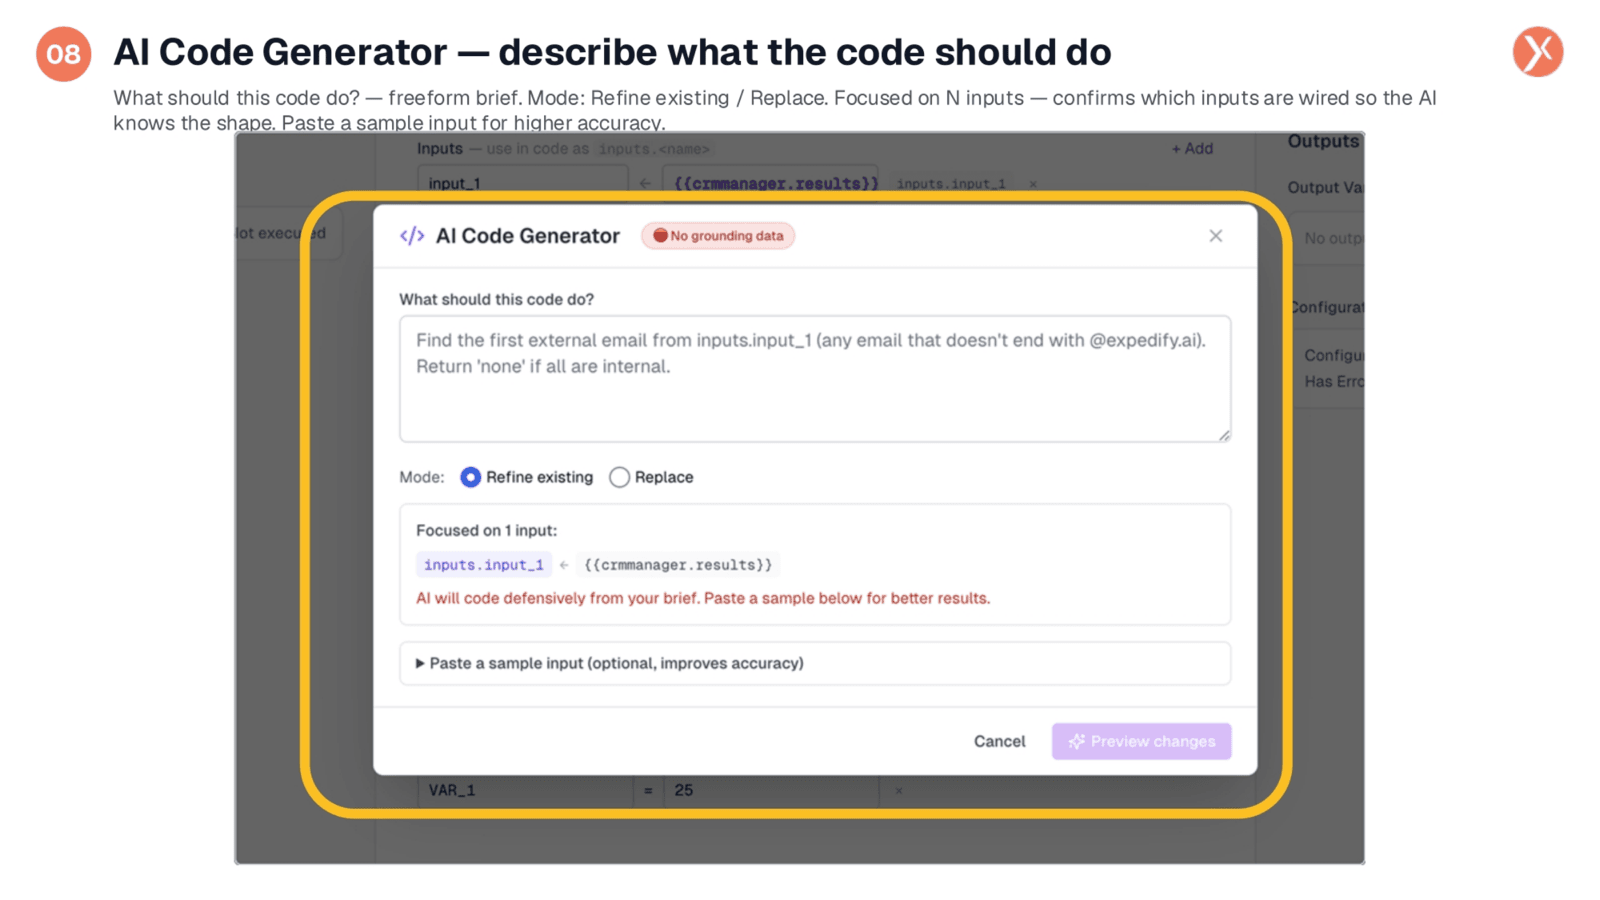
The AI Code Generator modal prompts you to describe the desired code functionality with a freeform brief. For example, you might instruct it to "find the first external email from inputs.input_1 that doesn't end with @expedify.ai, returning 'none' if all are internal." This level of specificity is key for optimal results. You can choose to "Refine existing" code or "Replace" it entirely. The "Focused on inputs" panel ensures the AI understands the structure of your wired inputs, and providing a sample input significantly enhances the accuracy of the generated code.
Proposed Changes: Selective Acceptance
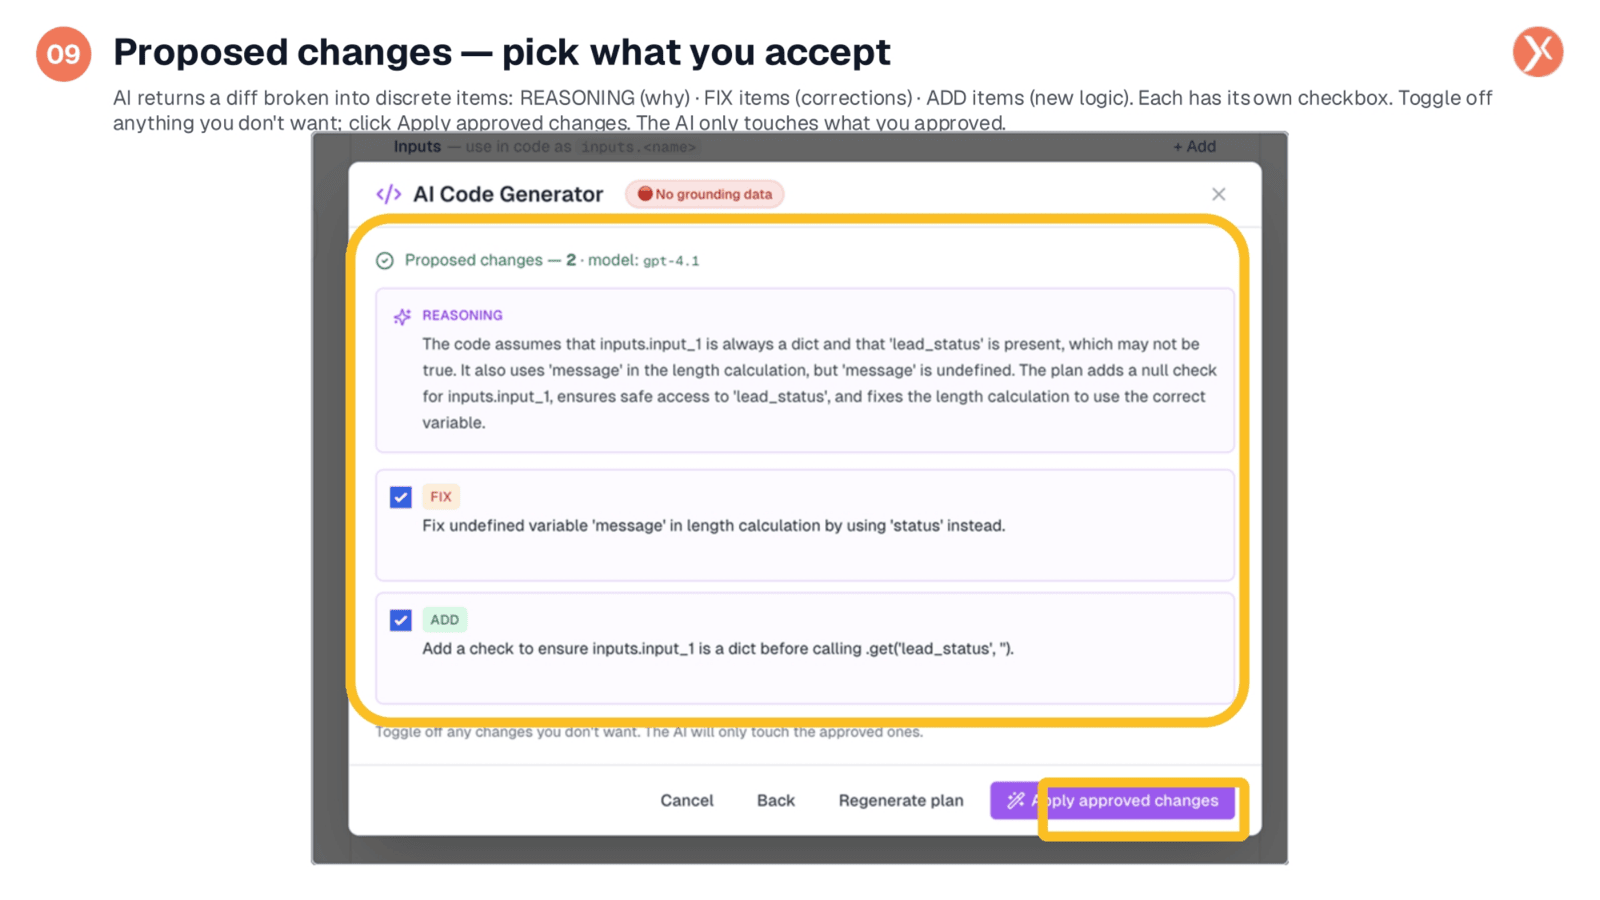
The "Proposed changes" feature ensures the AI Code Generator is safe and transparent. The model presents its plan as discrete items, starting with REASONING, which outlines its assumptions. Below this, FIX items address potential bugs in your existing code, while ADD items introduce new logic. Each proposed change has a checkbox, allowing you to selectively approve or reject specific modifications. This granular control means the AI only implements what you explicitly approve, empowering you as the editor rather than a passive observer of code generation.
Custom Function Outputs
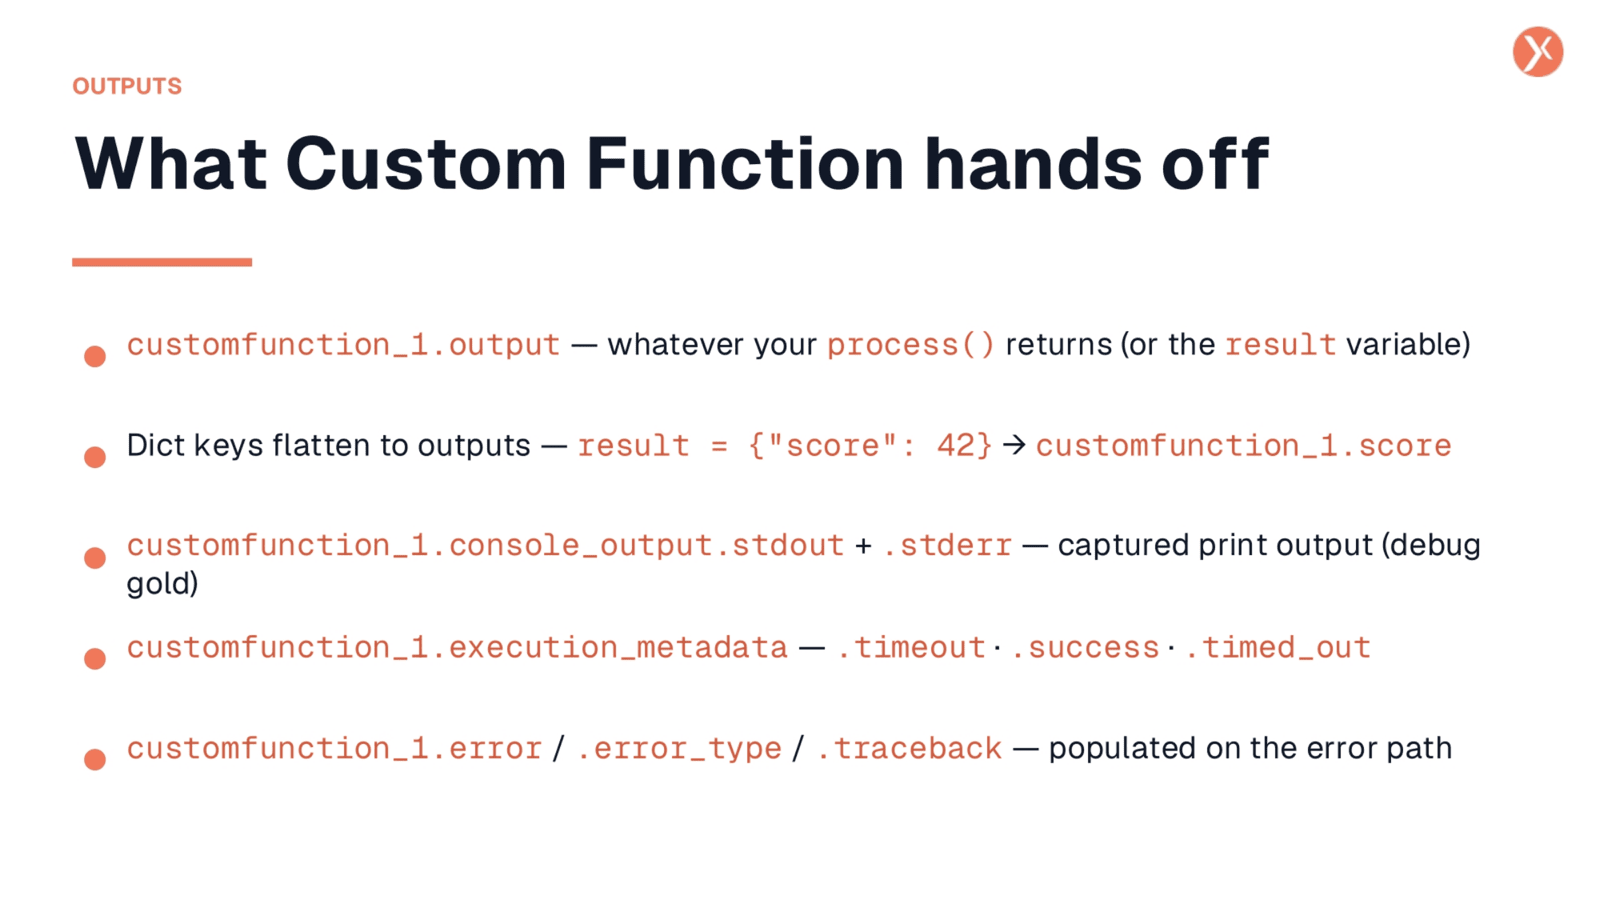
The Custom Function provides several valuable outputs. customfunction_1.output represents the return value of your process function. If your function returns a dictionary, each key within that dictionary also becomes a top-level output, such as customfunction_1.score, directly accessible downstream. For debugging, customfunction_1.console_output captures all stdout and stderr from your print statements. customfunction_1.execution_metadata offers details like execution time and timeout status. In case of an exception, customfunction_1.error, .error_type, and .traceback provide the error message, exception class, and full Python traceback, enabling you to set up crash alerts.
Custom Function: Your Python Escape Hatch
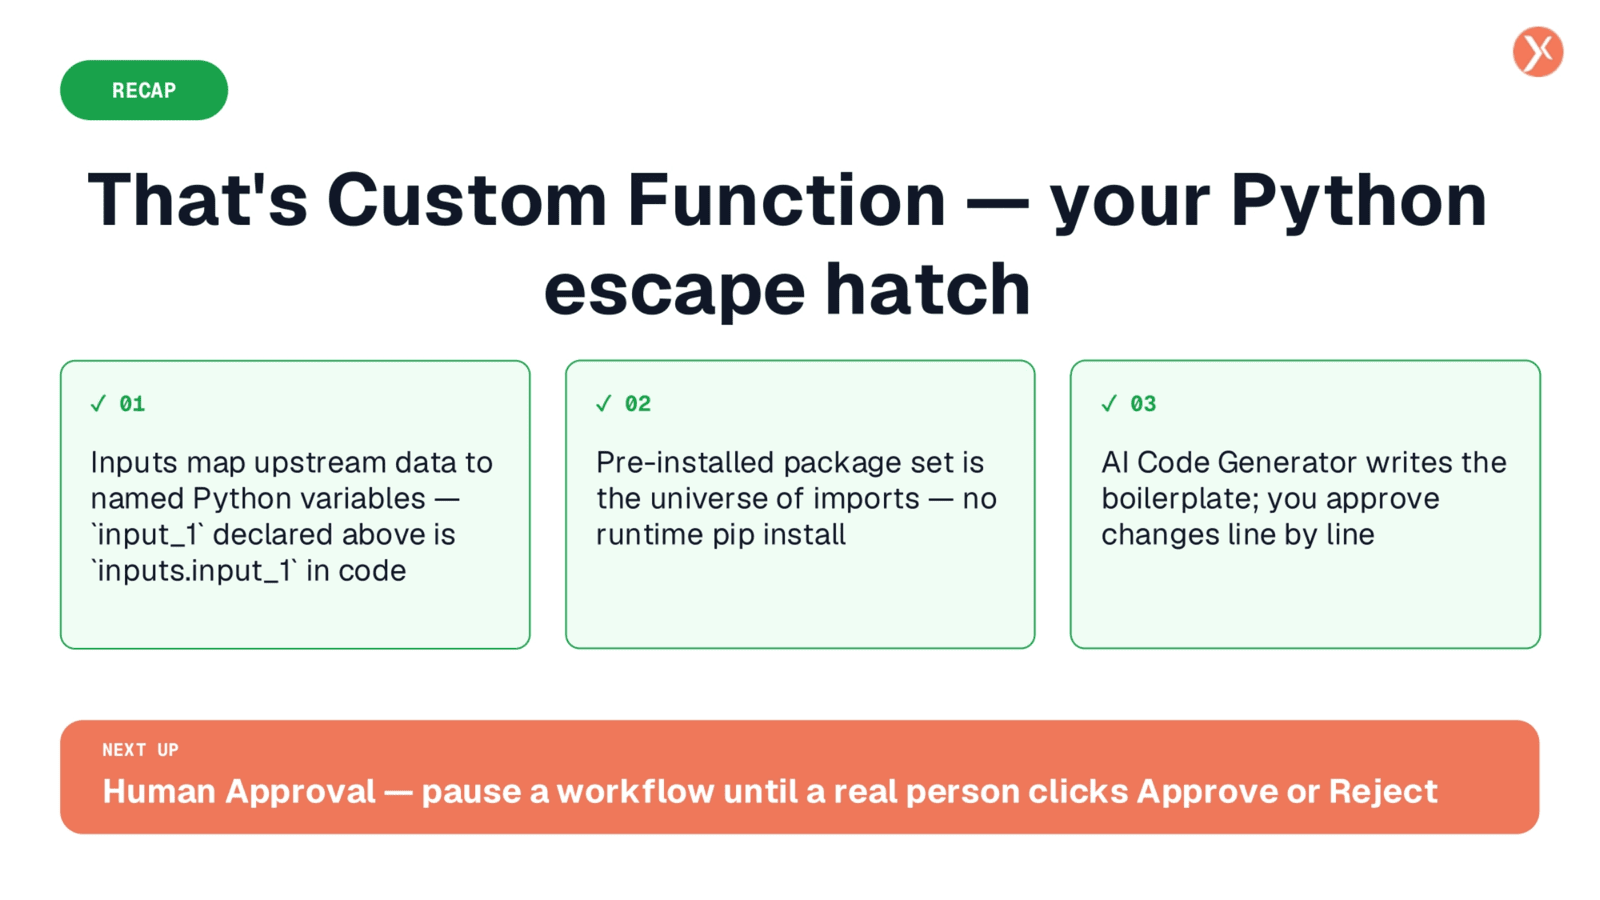
That concludes our overview of the Custom Function, your Python escape hatch for complex logic. It offers a safe sandbox with full Python access, allowing you to integrate custom code seamlessly. Thank you for joining this session.