User Message Trigger
Today, we're diving into the User Message Trigger, a core component for building automated chat experiences in Expedify. We'll cover its functionality, how to configure it, and the essential variables it provides for your workflows.
Simple Chat - Echo Back What the User Typed
Our objective is to construct the simplest possible chat workflow: one that merely echoes back whatever the user types. This two-node setup will demonstrate the trigger's end-to-end functionality without complex integrations like CRM or AI. You'll learn to open the chat, type a message, receive an immediate response, and understand how variables flow from the trigger to the response.
A Two-Node "Simple Chat" Workflow
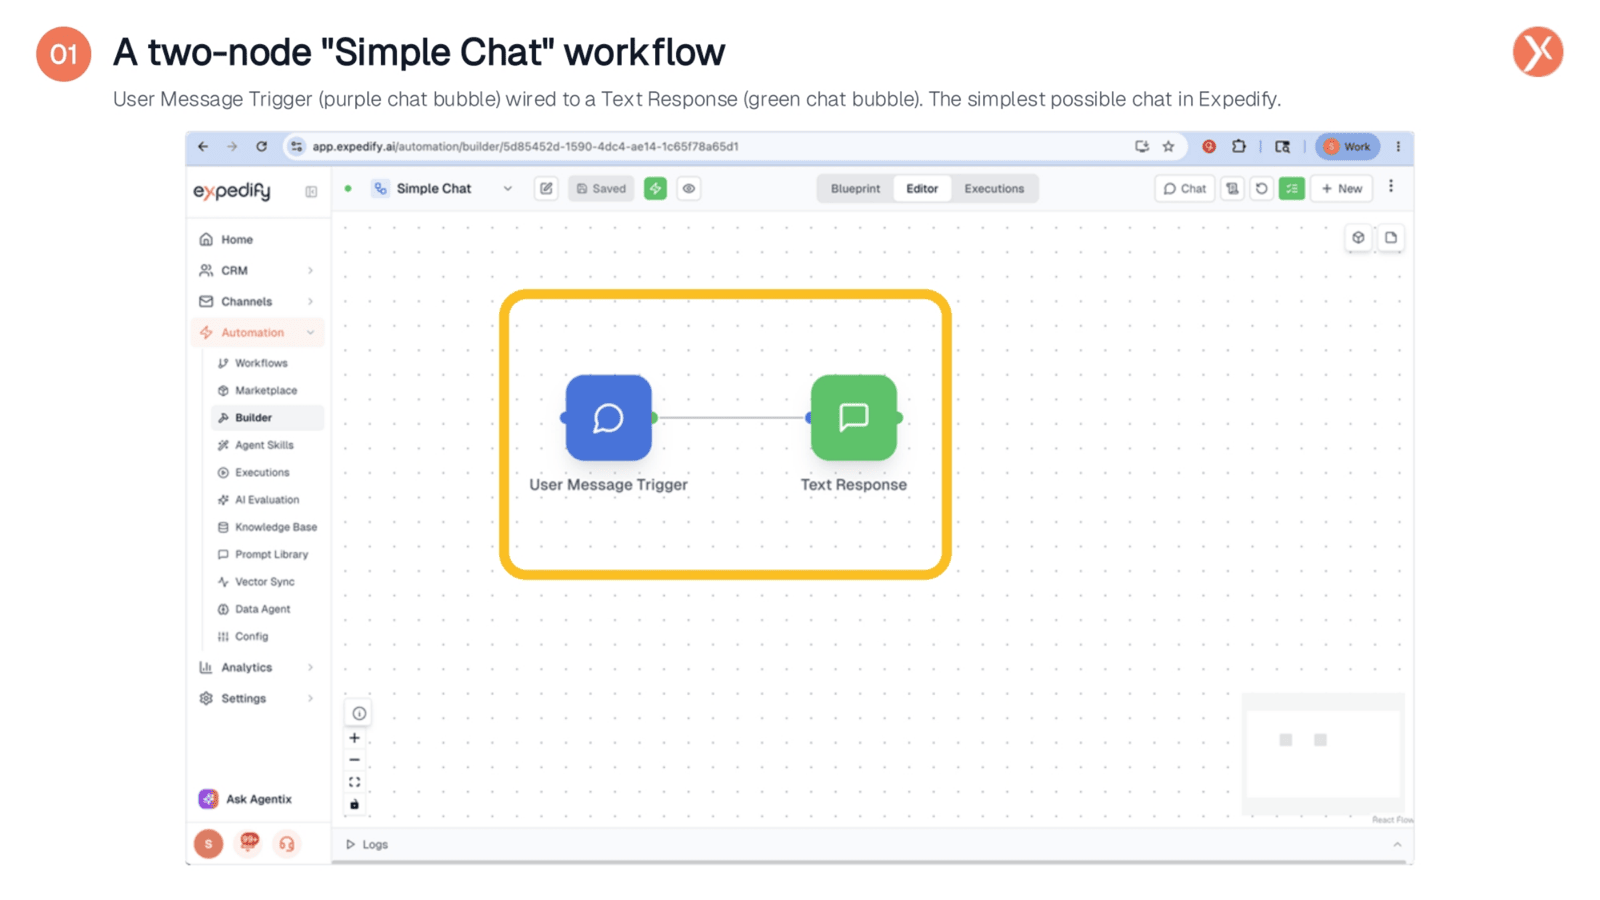
Visualizing our workflow on the canvas, we see a straightforward two-node configuration. The purple chat bubble represents the User Message Trigger, which initiates the workflow upon receiving a user message. Connected by a single line, the green bubble signifies a Text Response, responsible for sending a message back to the chat participant. This design, aptly named "Simple Chat," highlights the fundamental interaction within Expedify.
Double-Click the Trigger to See Its Config
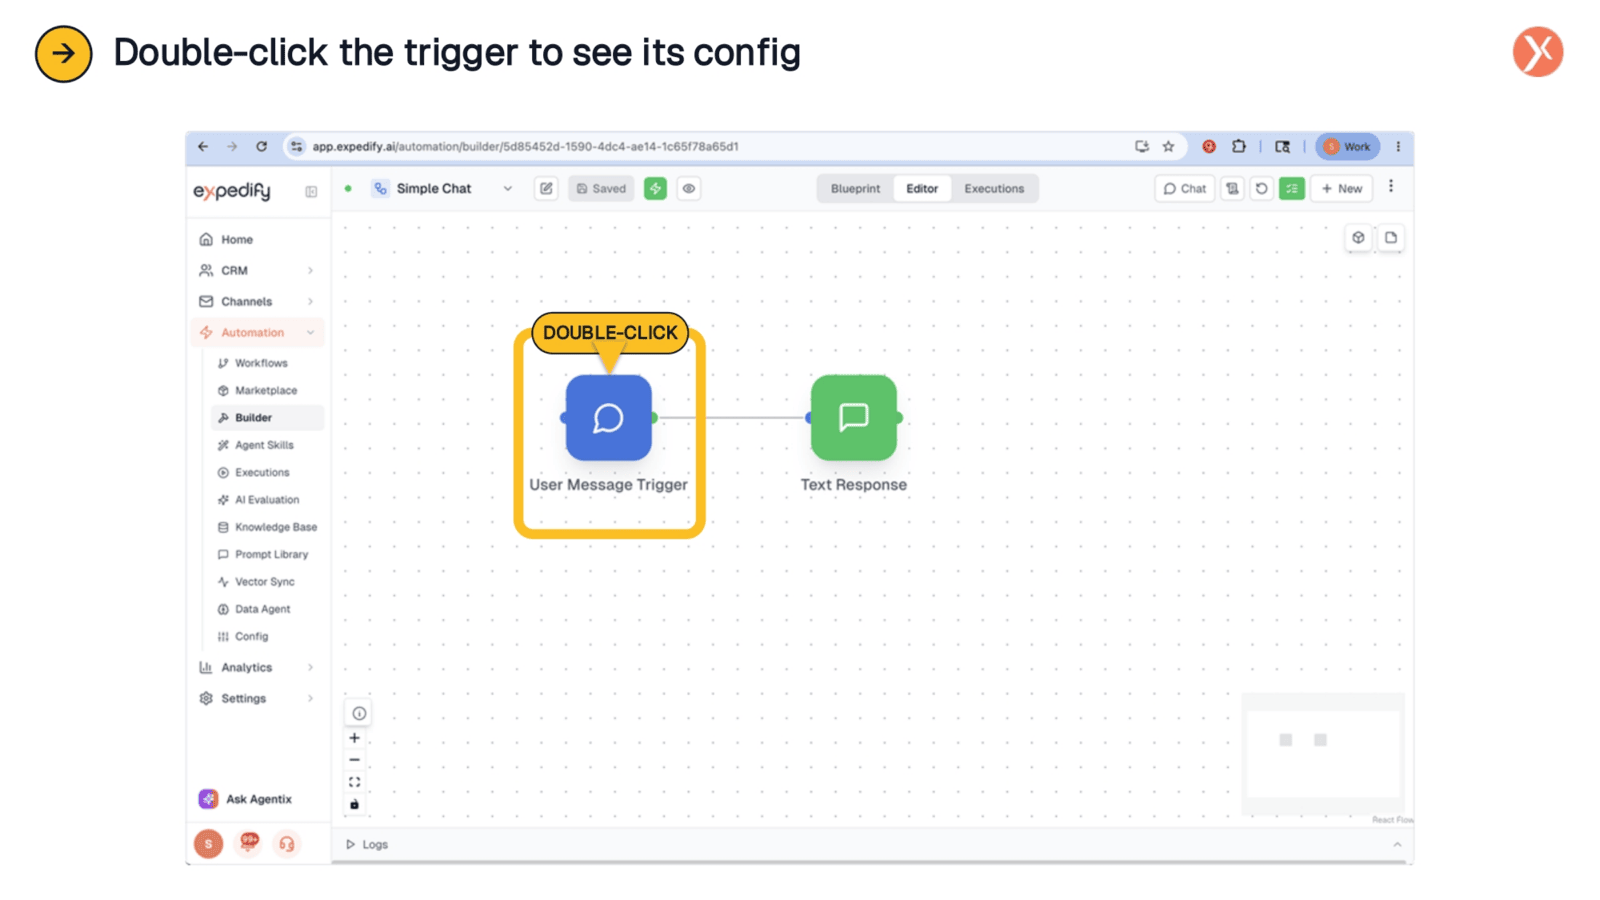
To delve deeper into the User Message Trigger's capabilities, the next step is to access its configuration panel. By double-clicking the trigger node on the workflow canvas, you can open its settings. This action reveals the various parameters and options available for customizing how the trigger behaves and processes incoming user messages.
The Config - Keywords Are Optional
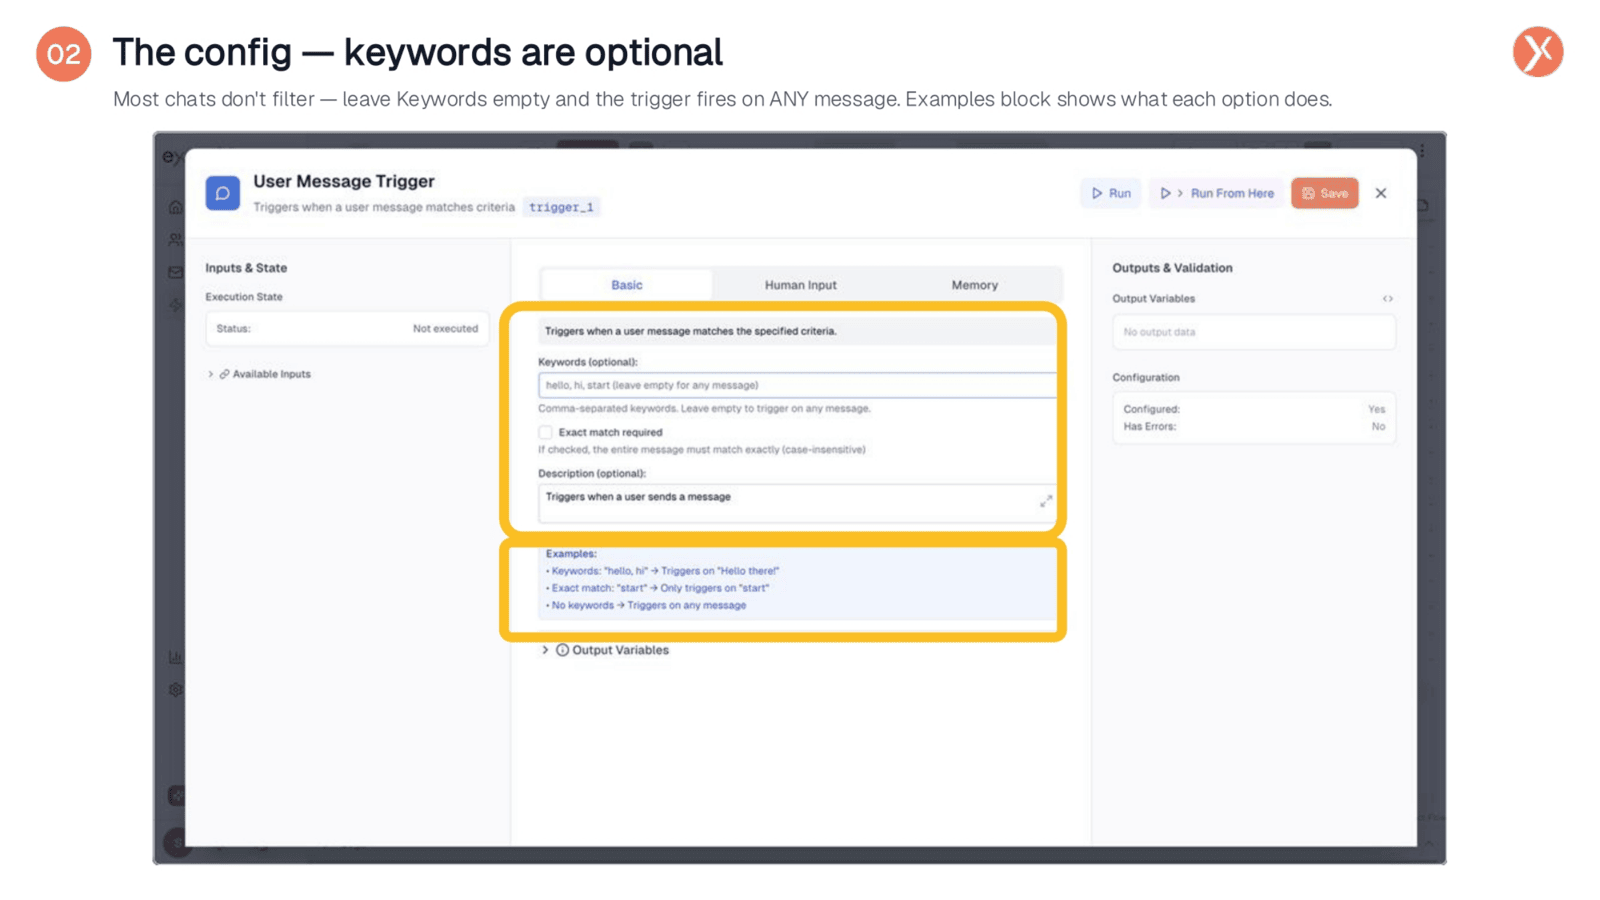
Within the trigger's configuration, you'll find three tabs: Basic, Human Input, and Memory. We'll focus on the Basic tab, where the Keywords field is located. This optional field allows you to filter messages, ensuring the trigger only fires when specific words are present, which is useful for routing different chats. The 'Exact match required' option further refines this, demanding the entire message match a keyword. Leaving both fields empty ensures the trigger activates for any incoming message, as needed for our echo chat.
The Variable Badge - trigger_1
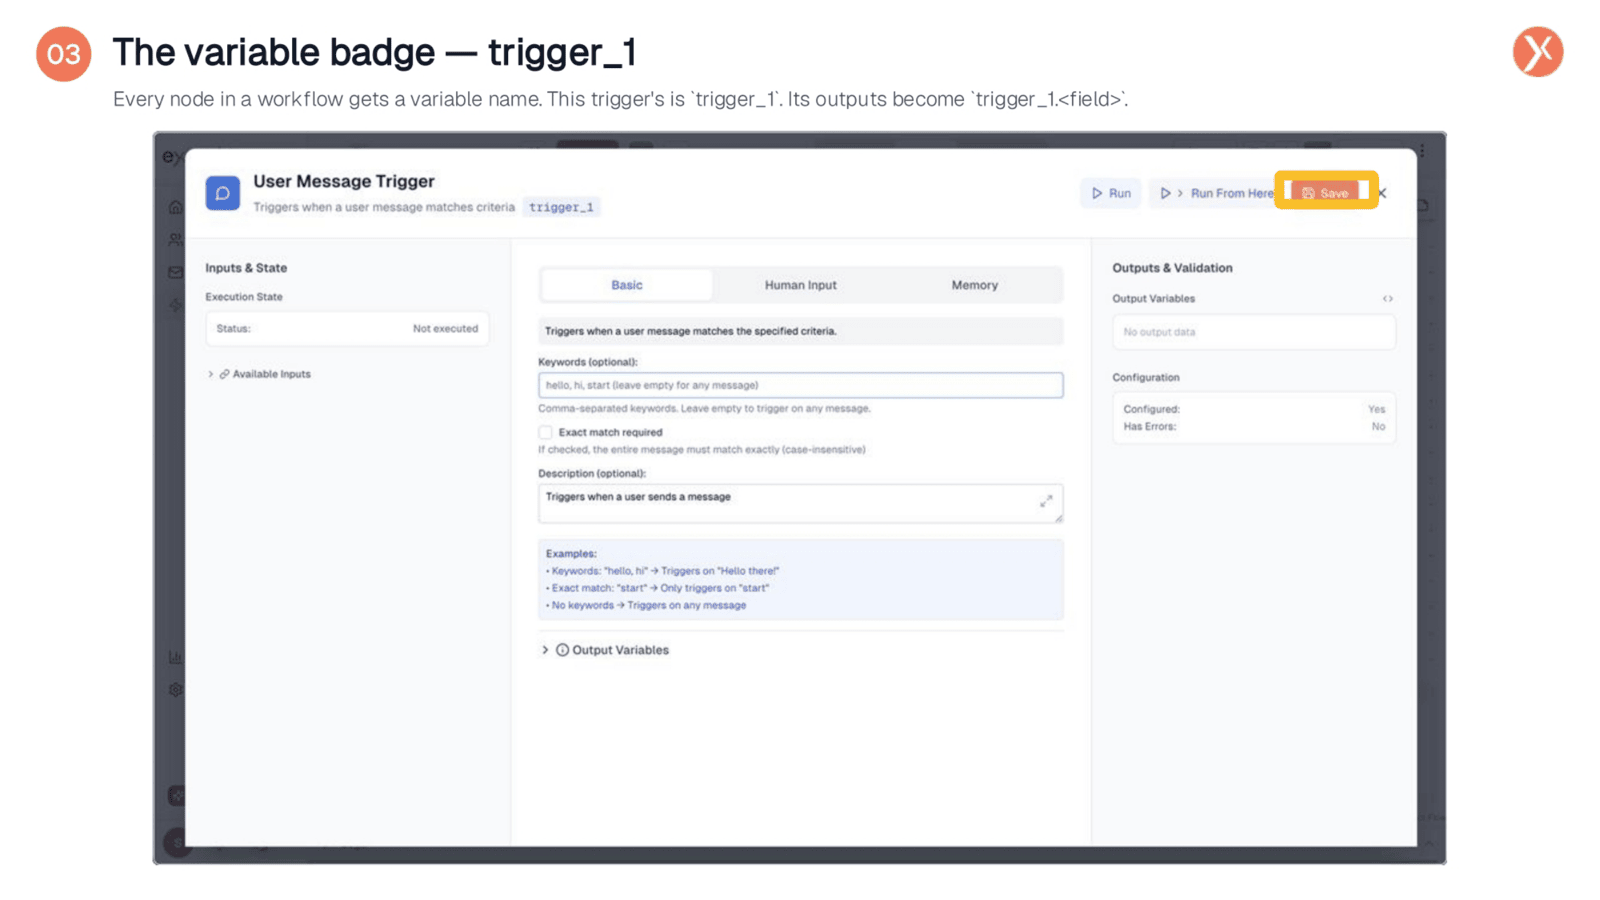
A crucial element to observe at the top of the panel is the 'trigger_1' badge. This represents the node's unique variable name within the workflow. Every output generated by this trigger, such as the user's message or keyword match status, becomes accessible through 'trigger_1' followed by a specific field name. For instance, the user's text is 'trigger_1.message'. Downstream nodes, like our Text Response, utilize these variables by referencing them in their templates, facilitating seamless data flow throughout the workflow.
Open Chat to Test the Workflow
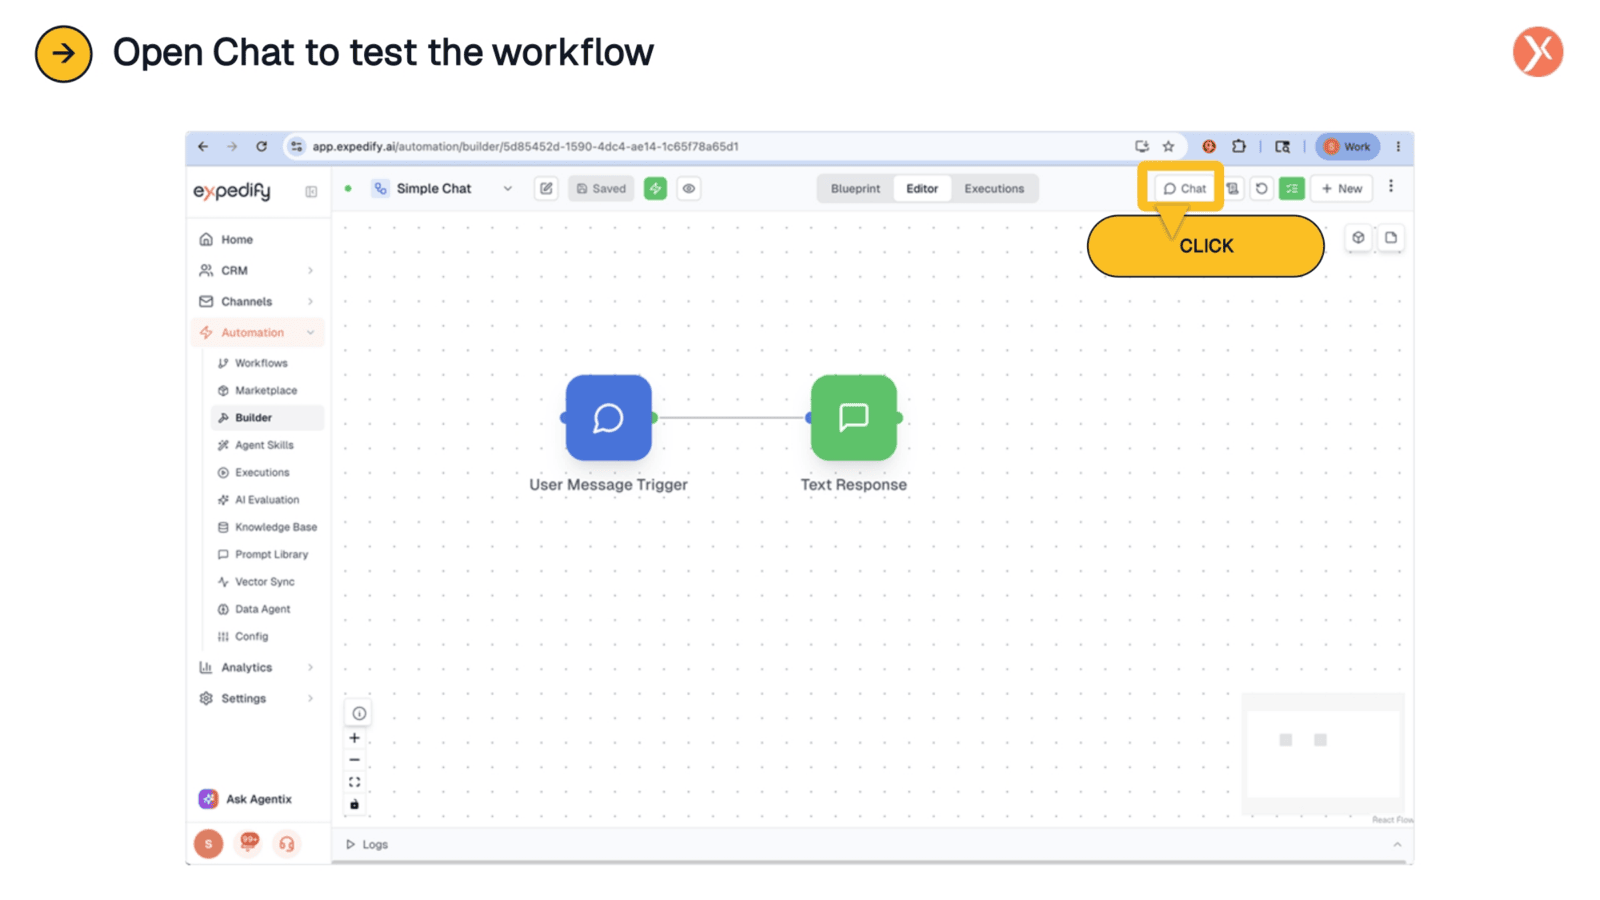
With the trigger configured, the next logical step is to test the workflow's functionality. To do this, we'll close the configuration panel and open the in-Builder Chat. This integrated testing environment allows you to interact with your workflow directly from the Expedify Builder, providing an immediate way to verify that your trigger and response nodes are working as intended without navigating away from the current page.
Test Your Workflow Right Inside the Builder
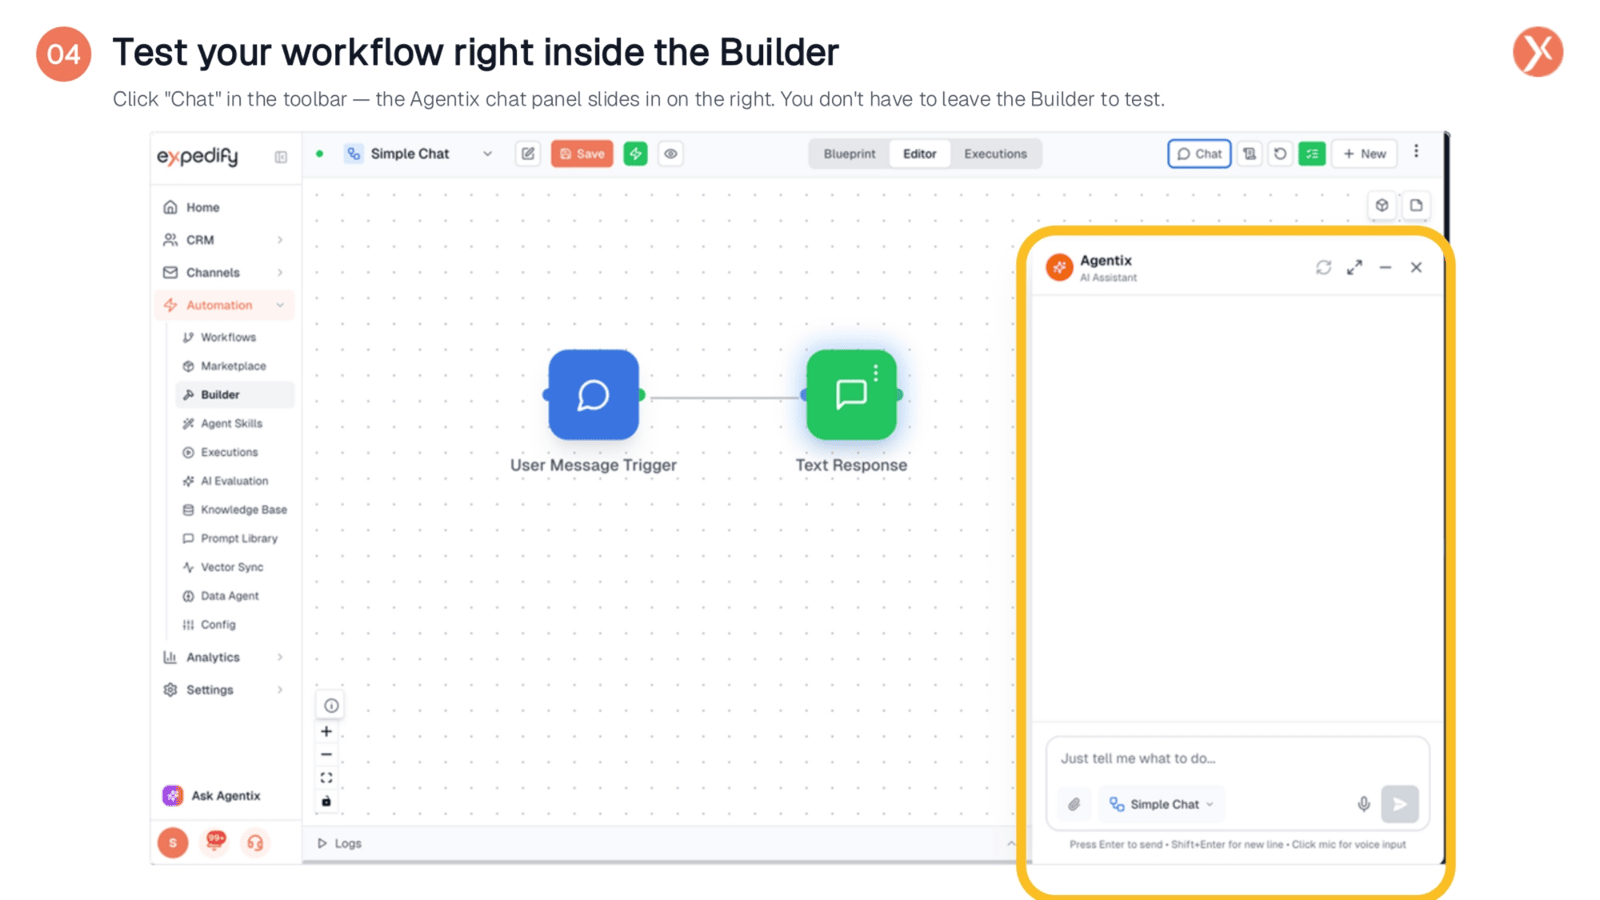
Upon opening the chat, the Agentix chat panel conveniently slides in from the right side of the Builder interface. This integrated chat tester is designed for immediate workflow validation. At the bottom of the panel, ensure the workflow selector is set to "Simple Chat" to direct your messages to our current project. Any message you type into this panel will now activate the workflow, allowing for real-time testing and observation of its behavior.
Typed "Hi" - Got "Hi" Back
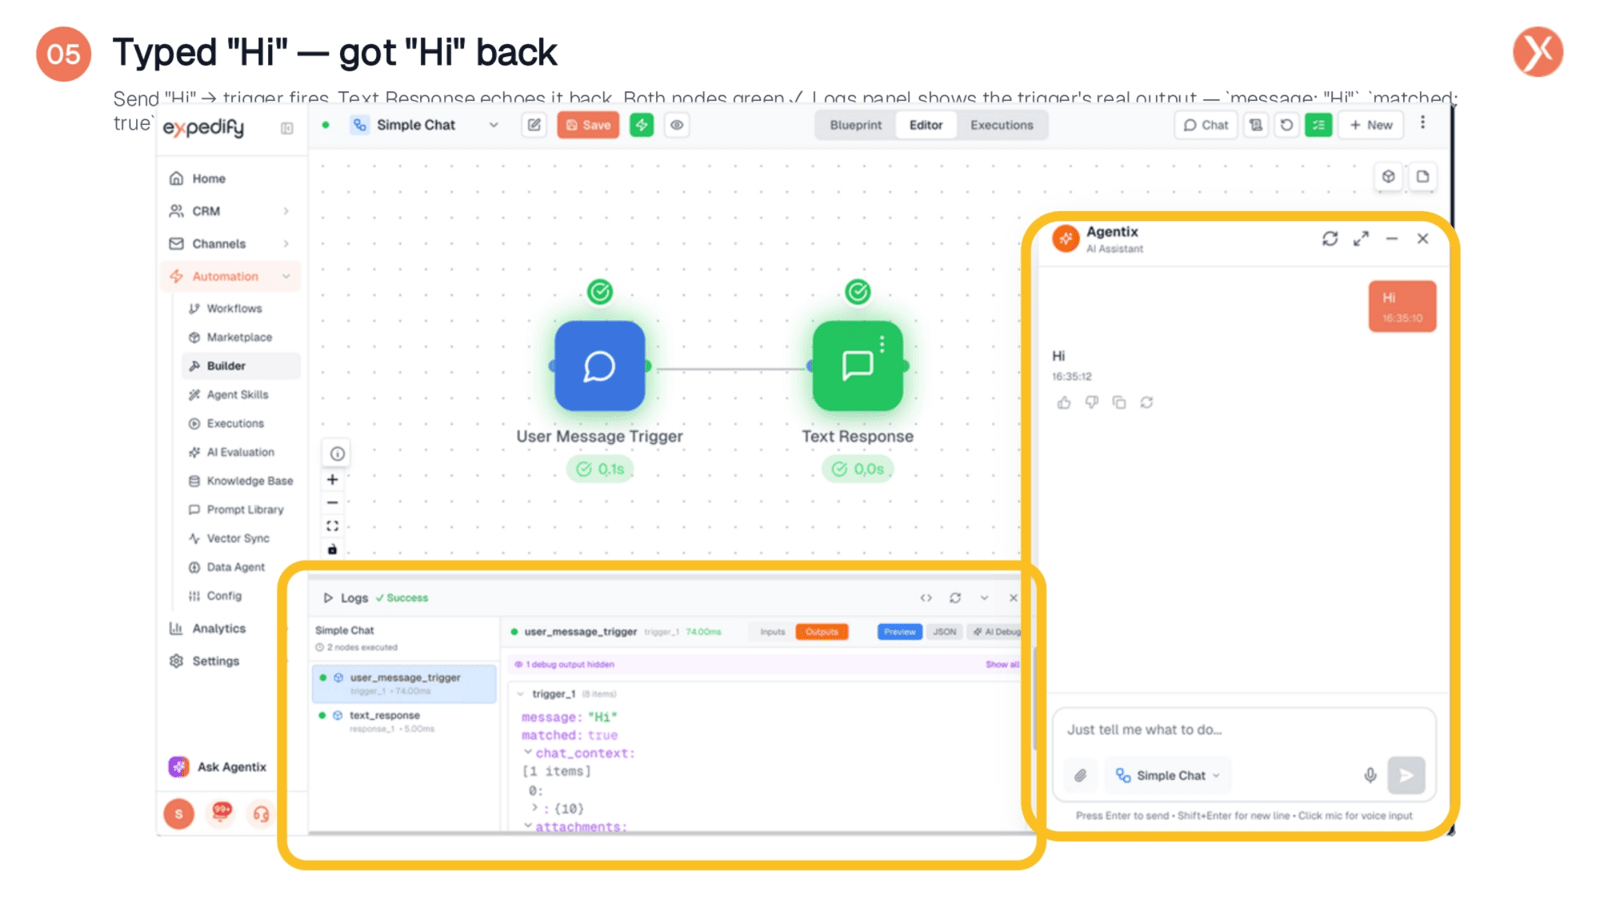
After typing "Hi" into the chat, the system immediately echoed "Hi" back, confirming the workflow's success. Notice the green check marks on both the User Message Trigger and Text Response nodes, indicating they executed without errors. The Logs panel provides a detailed view of each node's activity. It shows the trigger's output as JSON, including 'message: "Hi"' and 'matched: true'. This demonstrates how 'trigger_1.message' transformed from a template into the literal string "Hi," which the Text Response then used for its reply.
What the User Message Trigger Hands Off
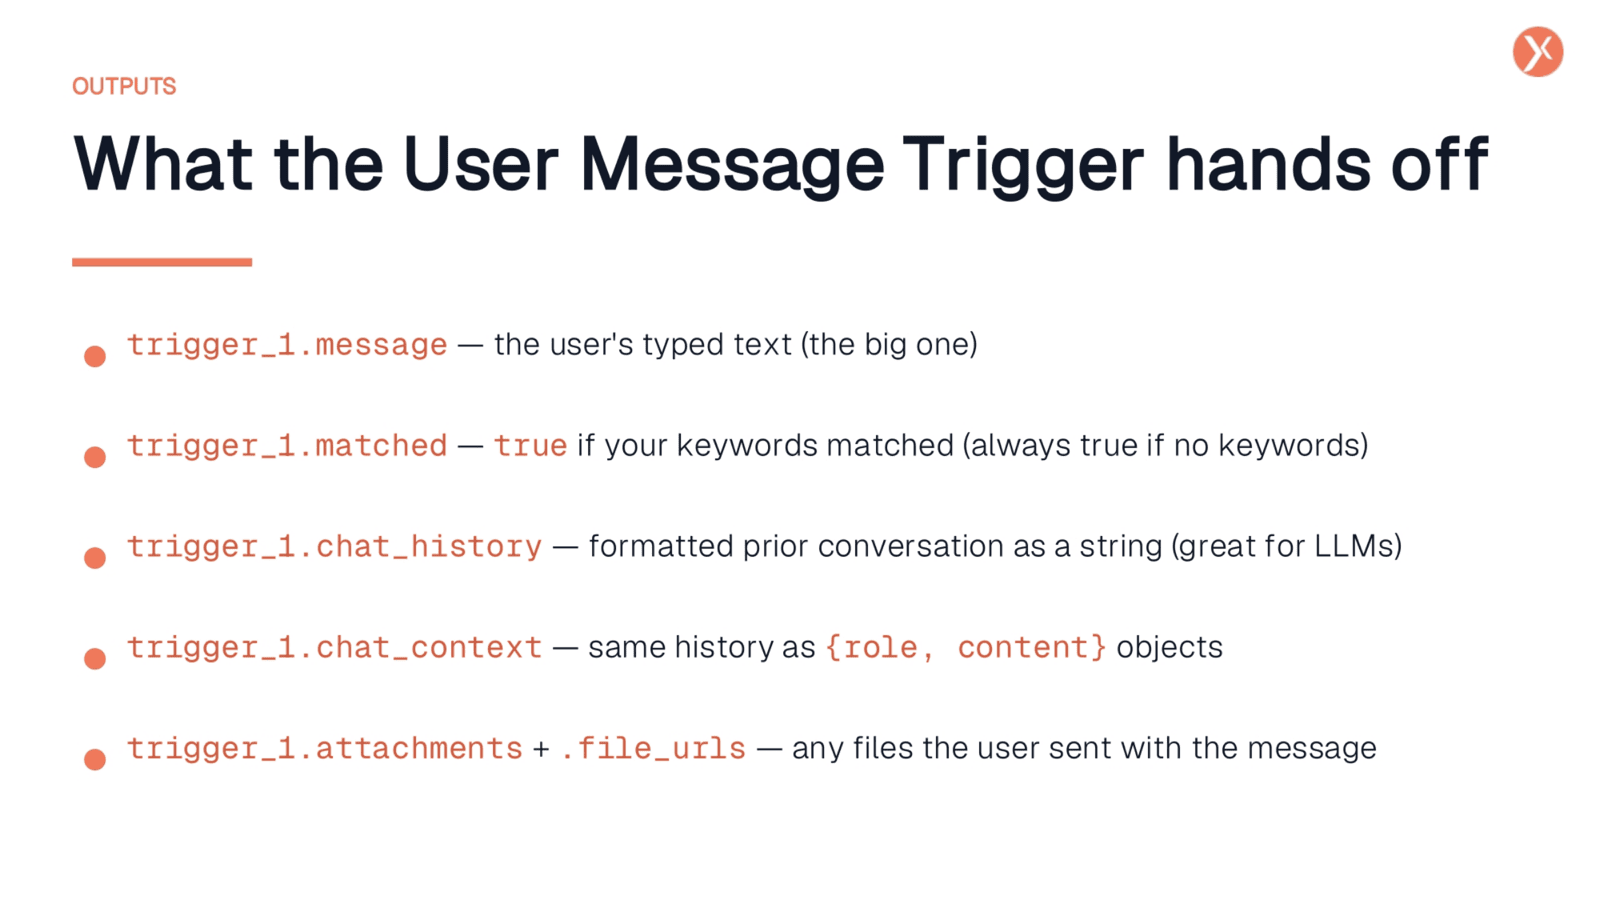
The User Message Trigger provides several valuable output variables for downstream nodes. 'trigger_1.message' delivers the user's typed text, which is frequently used. 'trigger_1.matched' indicates if keywords were matched, always true if no keywords are set. For conversational context, 'trigger_1.chat_history' offers prior conversation as a formatted string, ideal for large language models. Alternatively, 'trigger_1.chat_context' provides the same history as an array of role and content objects. Finally, 'trigger_1.attachments' and '.file_urls' contain information about any files sent by the user.
That's the User Message Trigger
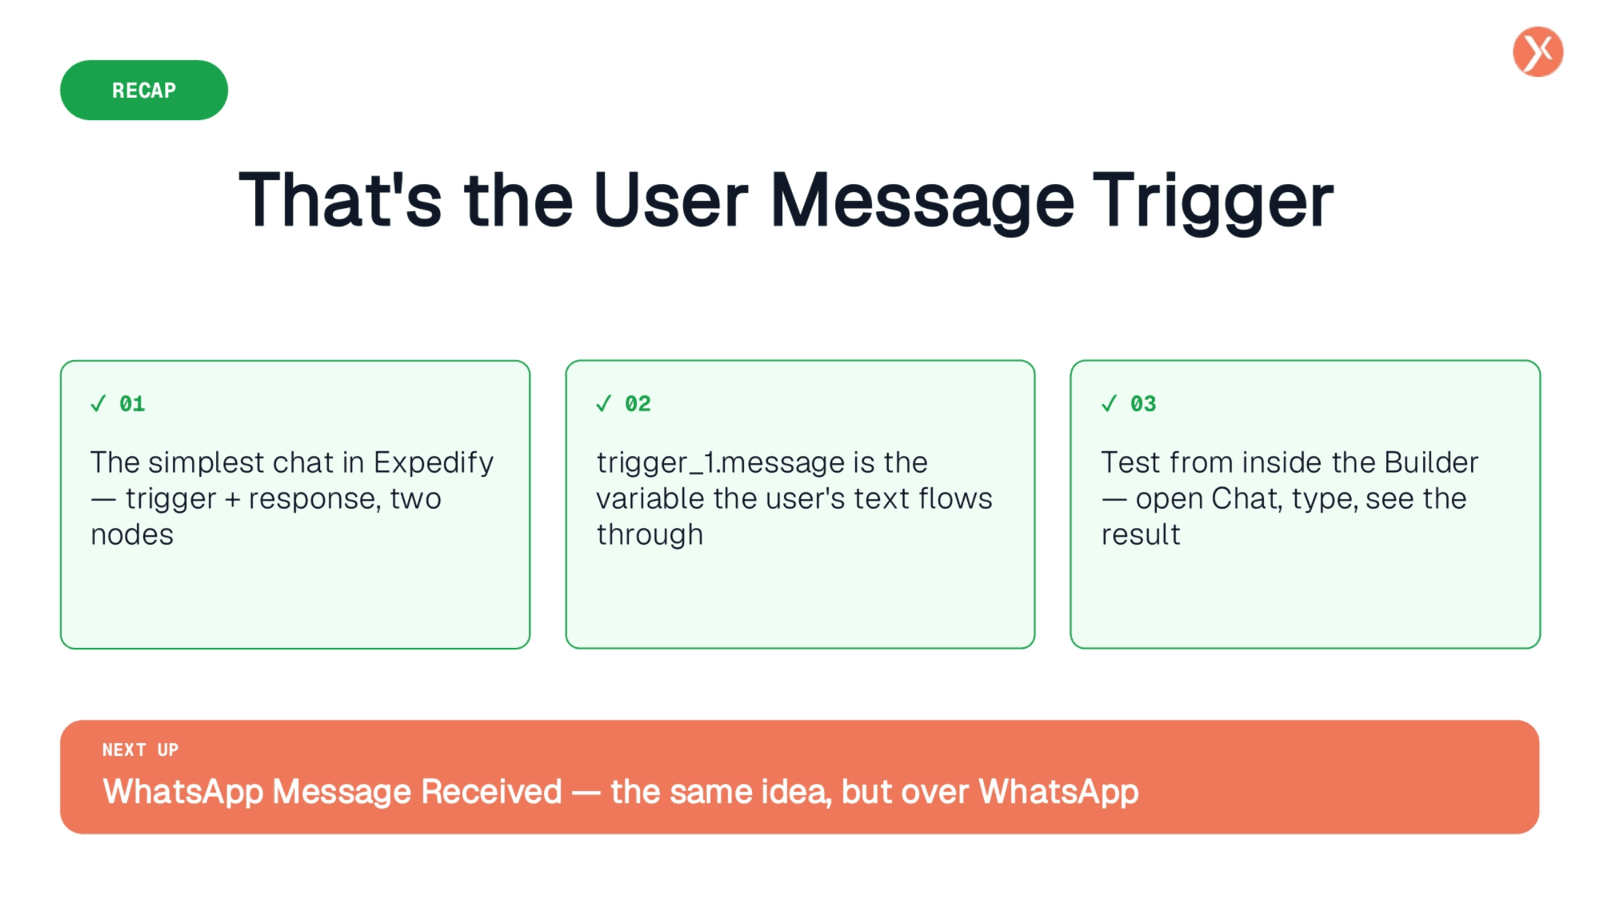
The User Message Trigger is fundamental for building interactive chats in Expedify, with 'trigger_1.message' being the key variable for user input. Configuring optional keywords allows for message filtering, and the in-Builder Chat provides a seamless testing environment.