Webhook Trigger
Today, we're diving into the Webhook Trigger, a powerful mechanism for automating tasks across various platforms. We'll see how external applications can connect to Expedify via a Webhook URL, triggering a workflow that, in our example, creates a new CRM contact.
Webhook Trigger Demo: Odoo to Expedify
Our demonstration today maps out the entire process. We'll begin by examining a two-node workflow, featuring the Webhook Trigger and a CRM Manager configured to create a contact. We'll then explore how to specify which webhook the trigger listens to, followed by a quick look at where these webhooks are managed in Settings. Finally, we'll see how the CRM Manager extracts data from the incoming payload, culminating in new contacts automatically populating Expedify from Odoo.
Two Nodes: Webhook In, CRM Record Out
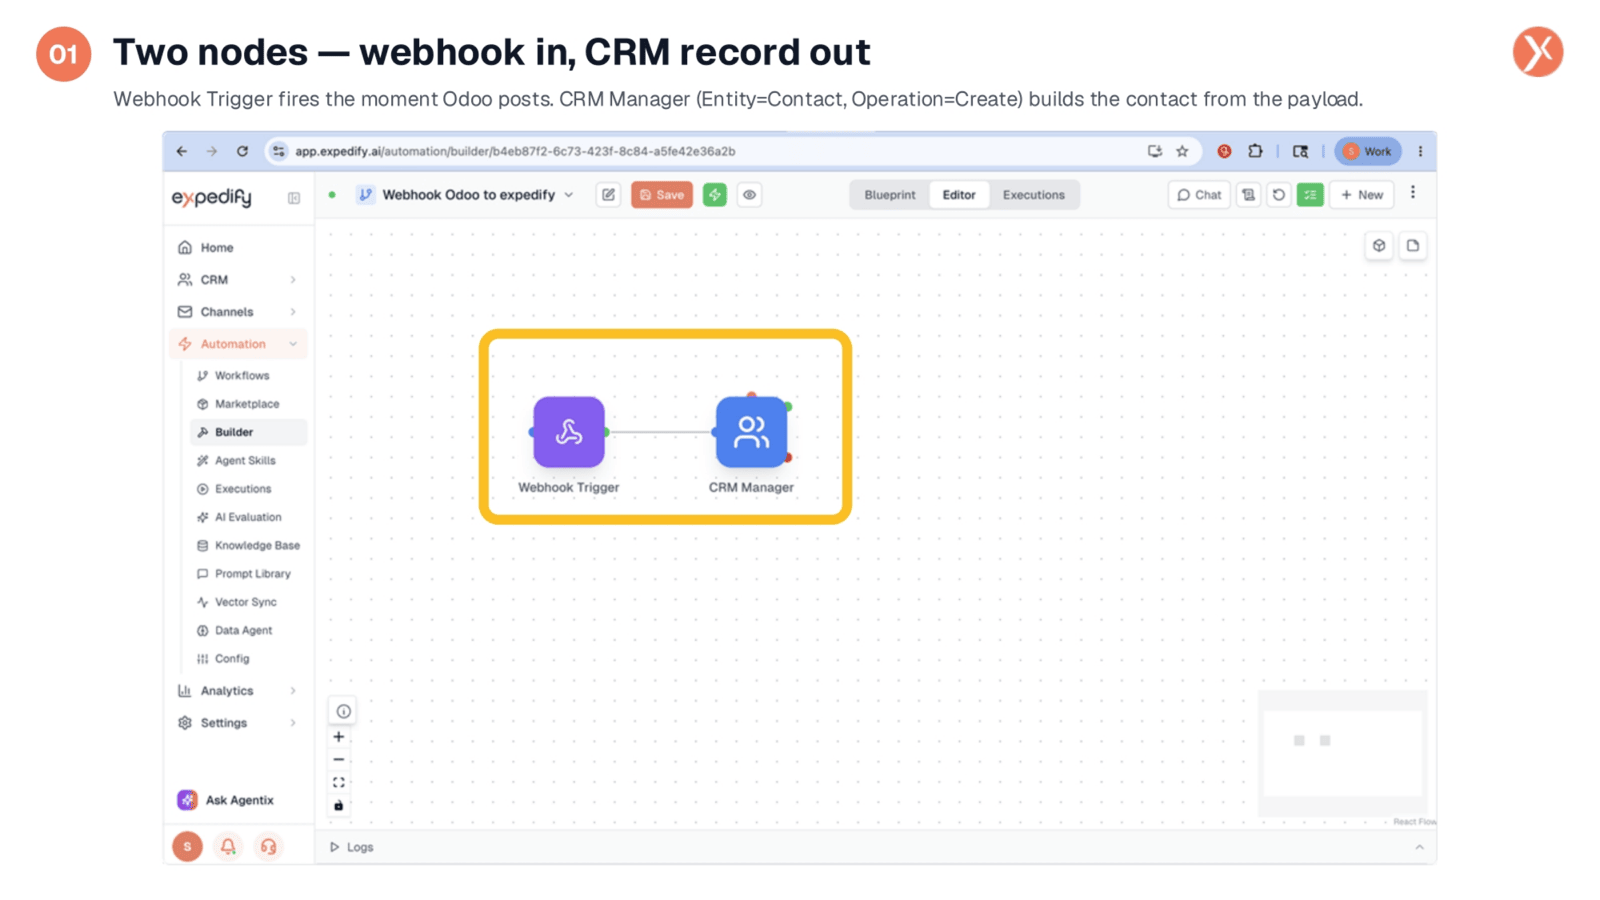
This workflow illustrates a simple yet powerful automation: a Webhook Trigger on the left, connected to a CRM Manager on the right. The Webhook Trigger activates the moment Odoo posts data, initiating an HTTP request. The CRM Manager then processes this incoming data, specifically configured to create a new contact entity from the payload. This entire workflow is aptly named 'Webhook Odoo to Expedify', clearly defining its purpose. Next, we'll examine the trigger's configuration.
Configure the Webhook Trigger
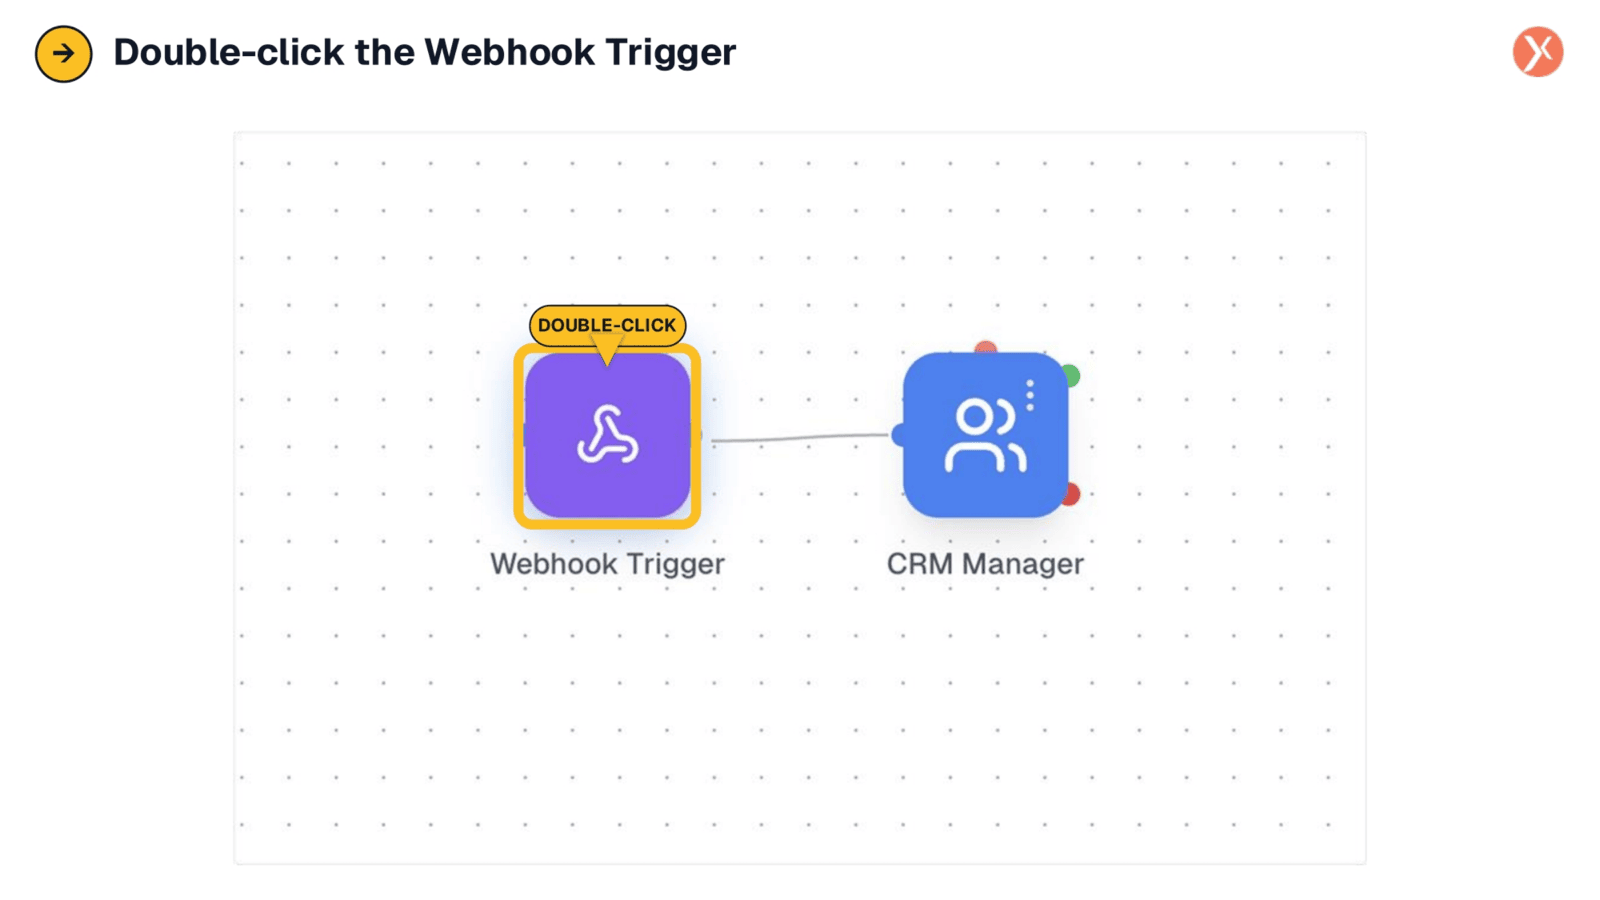
Let's configure the Webhook Trigger.
Inside the Trigger: Select a Webhook
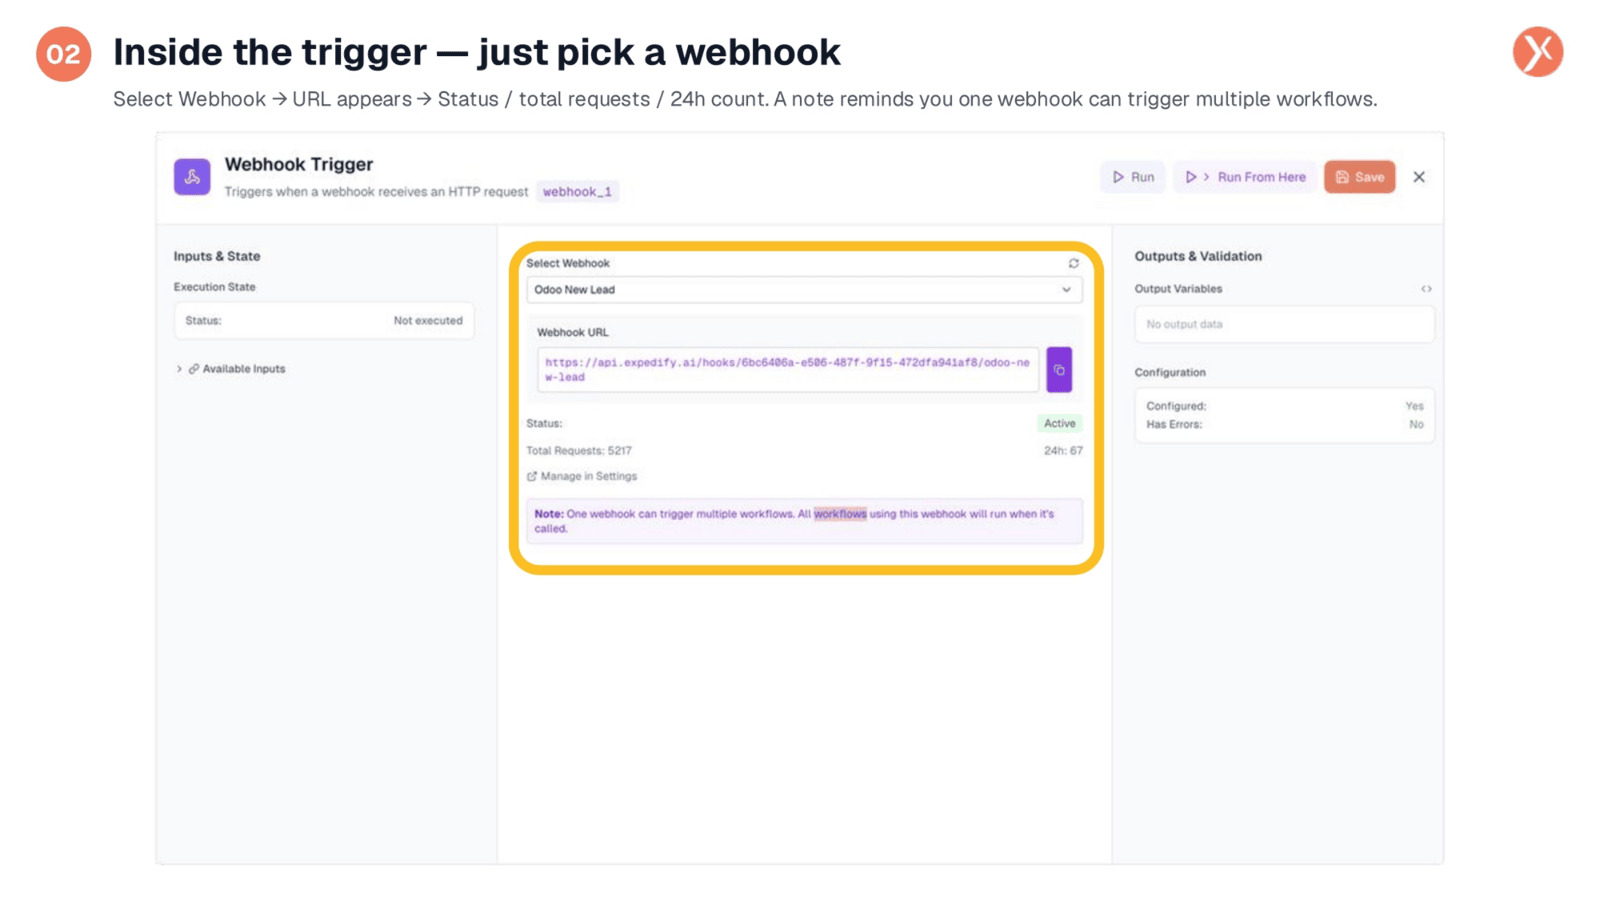
Configuring the Webhook Trigger is straightforward. The core functionality of receiving webhooks is managed elsewhere; here, you simply select which pre-configured webhook this specific workflow should listen to. Once selected, the webhook's URL, its current status, total request count, and activity over the last 24 hours are displayed. Importantly, a single webhook can activate multiple workflows, allowing the same incoming request to fan out and trigger various automations, such as creating a CRM contact and sending a Slack alert simultaneously.
Click the Select Webhook Dropdown
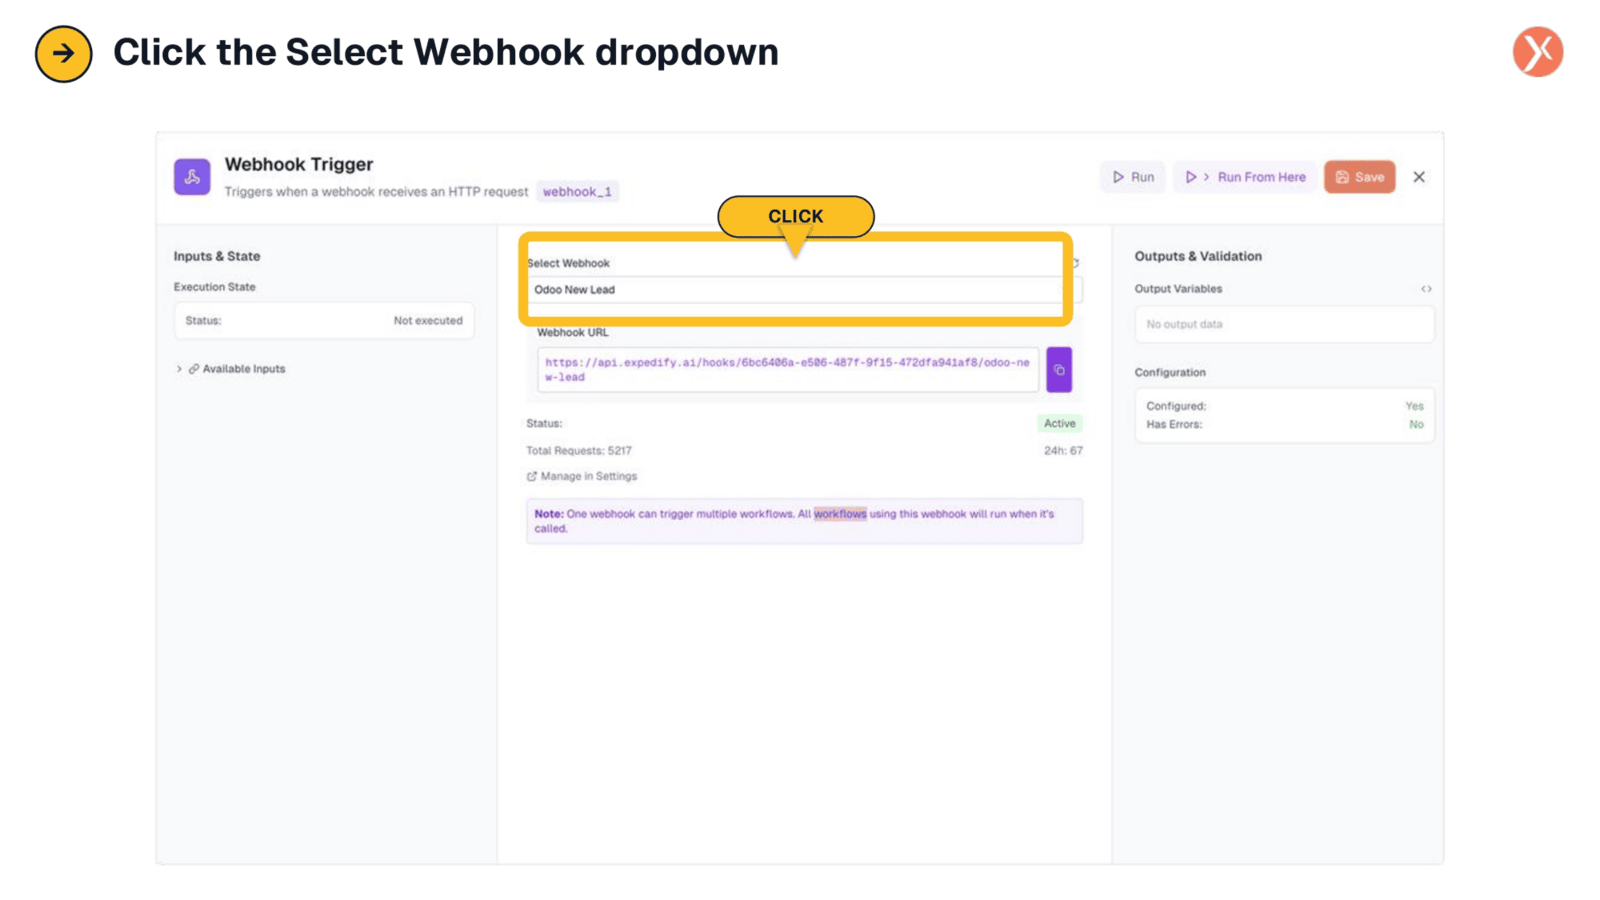
To choose the appropriate webhook, simply click the 'Select Webhook' dropdown menu. This action will reveal a list of all available incoming webhooks that have been previously created and configured within your Expedify settings. From this list, you can easily identify and select the specific webhook that this workflow needs to monitor for incoming HTTP requests.
Incoming Webhooks Registry
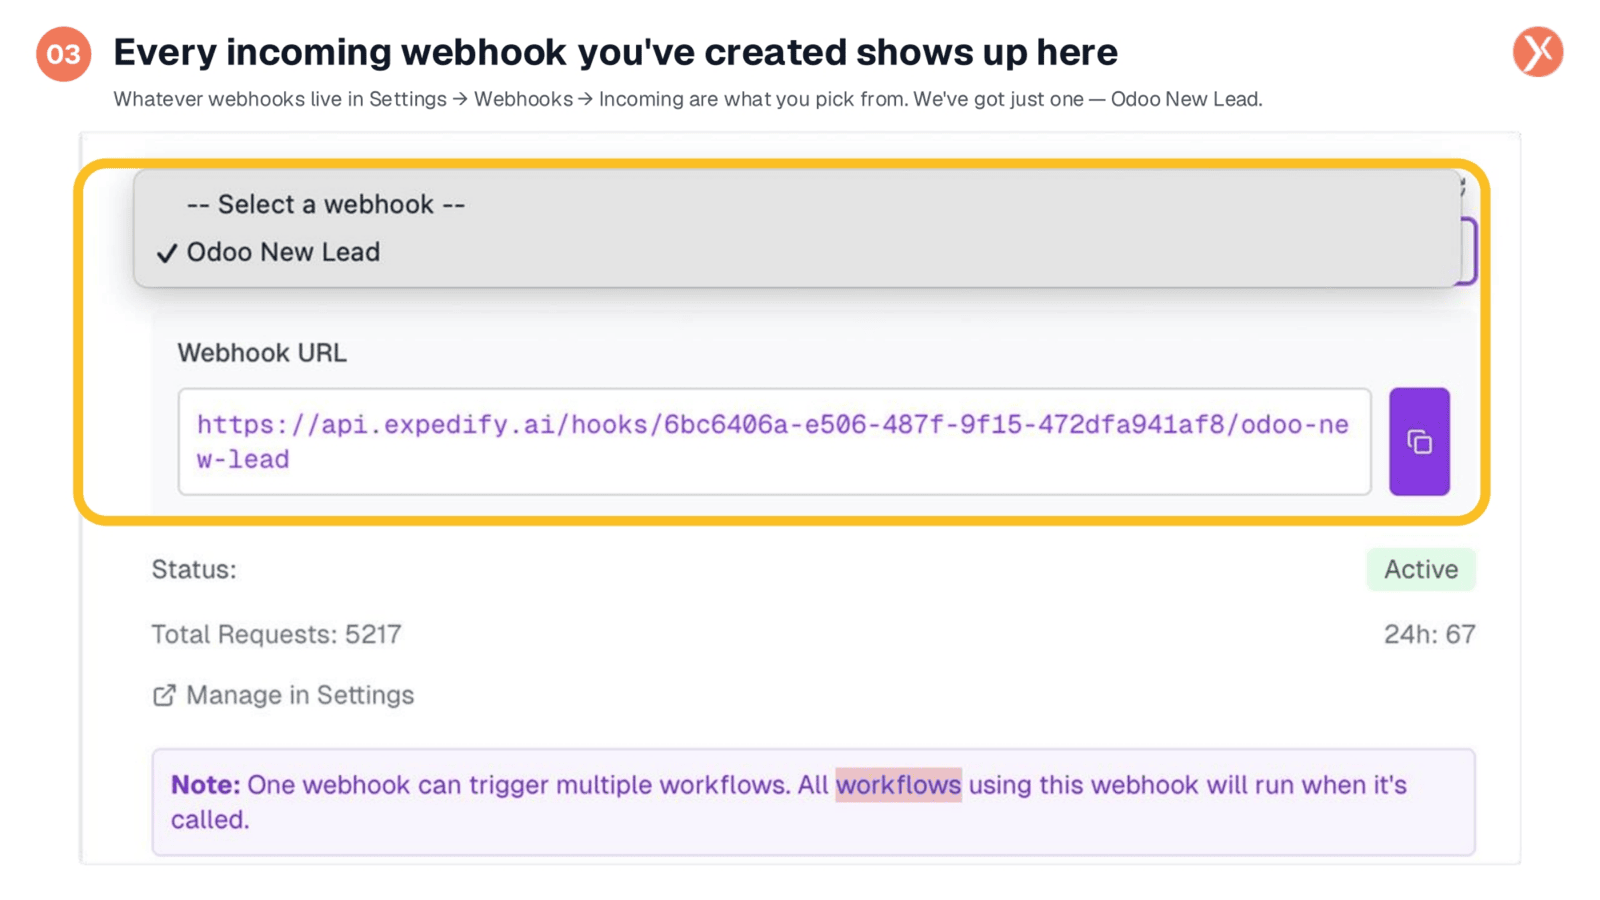
Within this dropdown, you'll find every incoming webhook you've established. For this example, we have 'Odoo New Lead', which was configured during the initial setup. If you had multiple webhooks, they would all be listed here, allowing you to select the one relevant to your workflow. Once chosen, the trigger configuration is complete. This naturally leads to the question of where these webhooks are created and managed, which we'll explore next.
Webhook Management in Settings
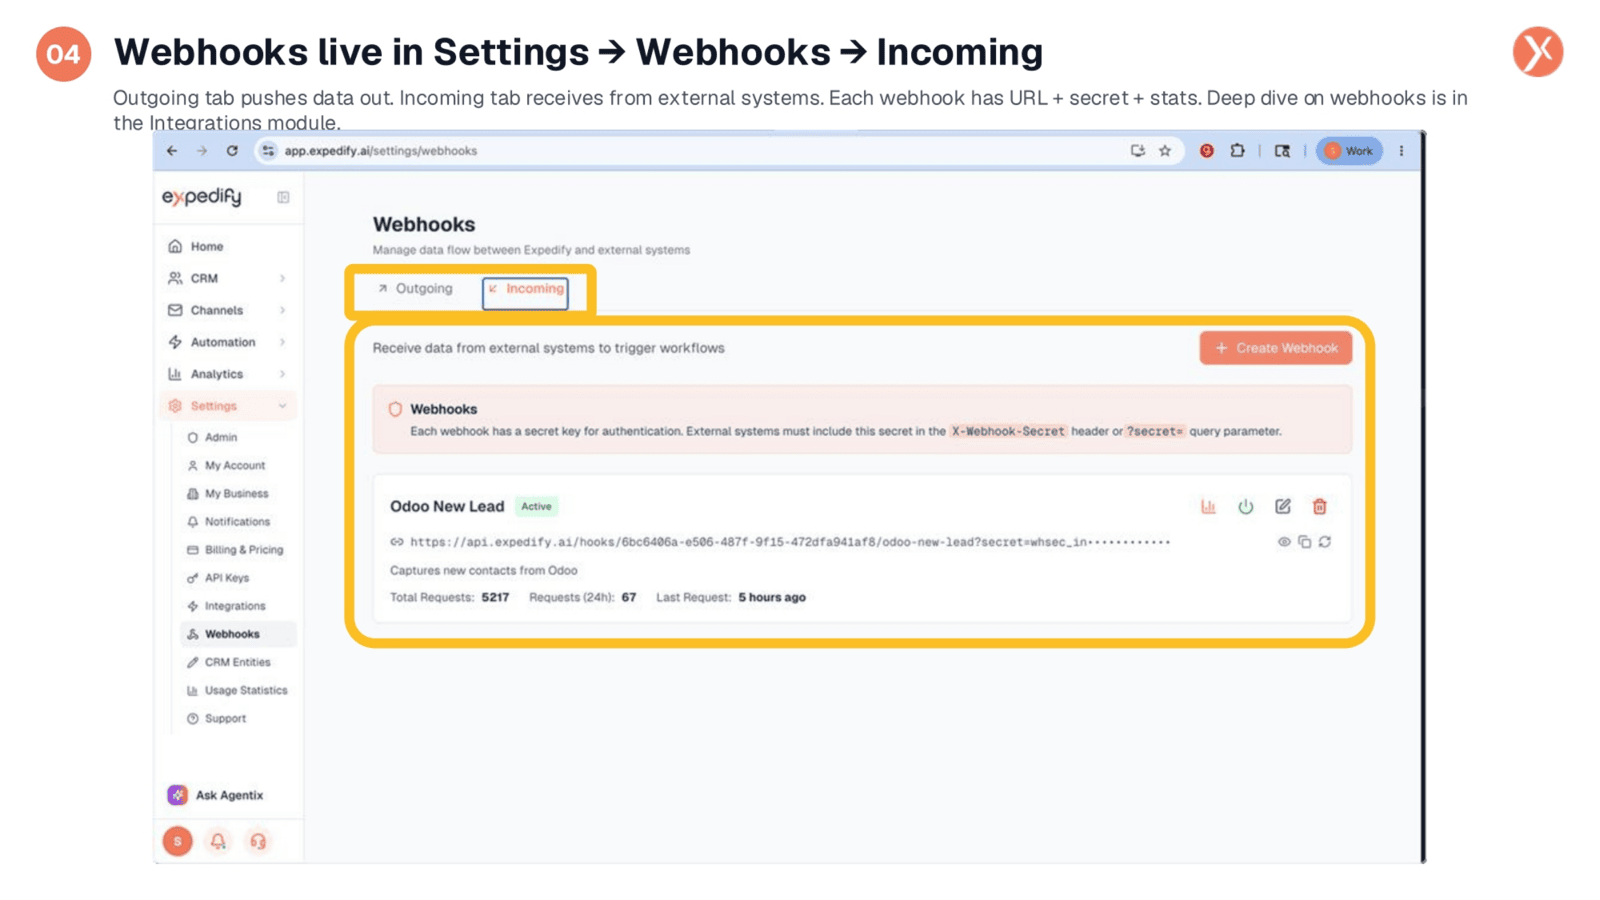
Webhooks are centrally managed within Expedify's 'Settings' under the 'Webhooks' section, specifically within the 'Incoming' tab. While an 'Outgoing' tab exists for pushing data from Expedify, our focus today is on receiving data from external systems. Each incoming webhook is assigned a stable URL, includes a secret for authentication, and provides essential statistics like total requests and recent activity. Our 'Odoo New Lead' webhook, for instance, has processed over 5,000 requests. For a deeper understanding of webhook security, debugging, and retry behavior, refer to the dedicated Integrations module.
Creating a New Webhook
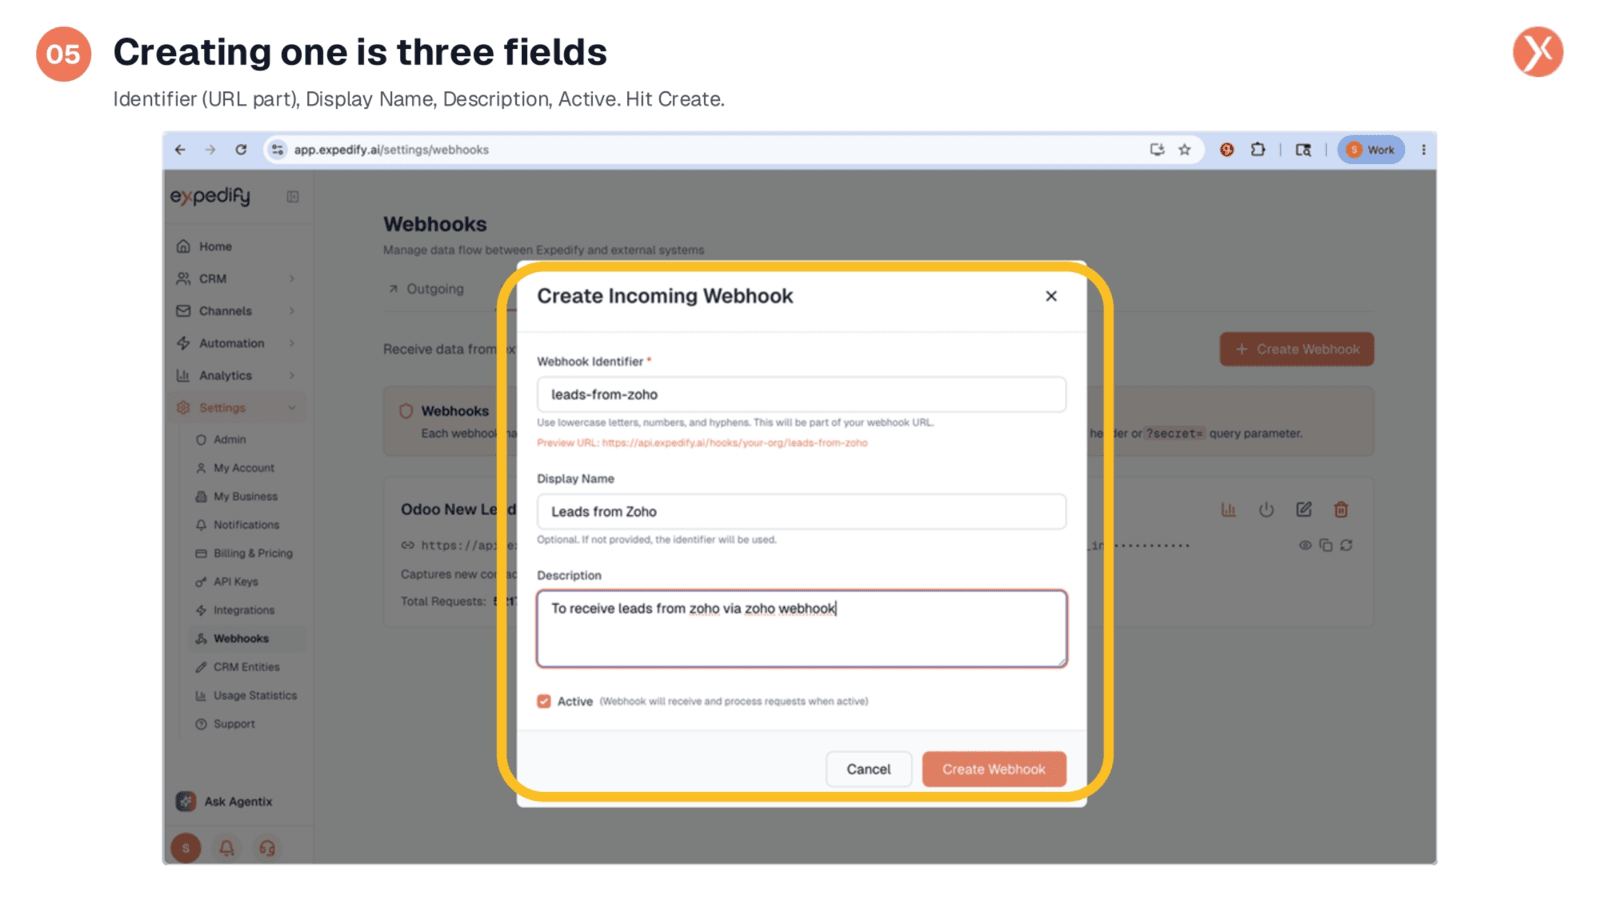
Creating a new incoming webhook is a straightforward process, requiring just a few key pieces of information. You'll define an 'Identifier', which forms a unique part of the webhook's URL, using lowercase letters and hyphens. A 'Display Name' provides a user-friendly label that appears in the workflow builder dropdown. Additionally, a 'Description' helps clarify the webhook's purpose for future reference. After ensuring the 'Active' checkbox is selected, simply click 'Create' to generate the webhook and its unique URL, ready for integration with external systems.
Copying the Webhook URL
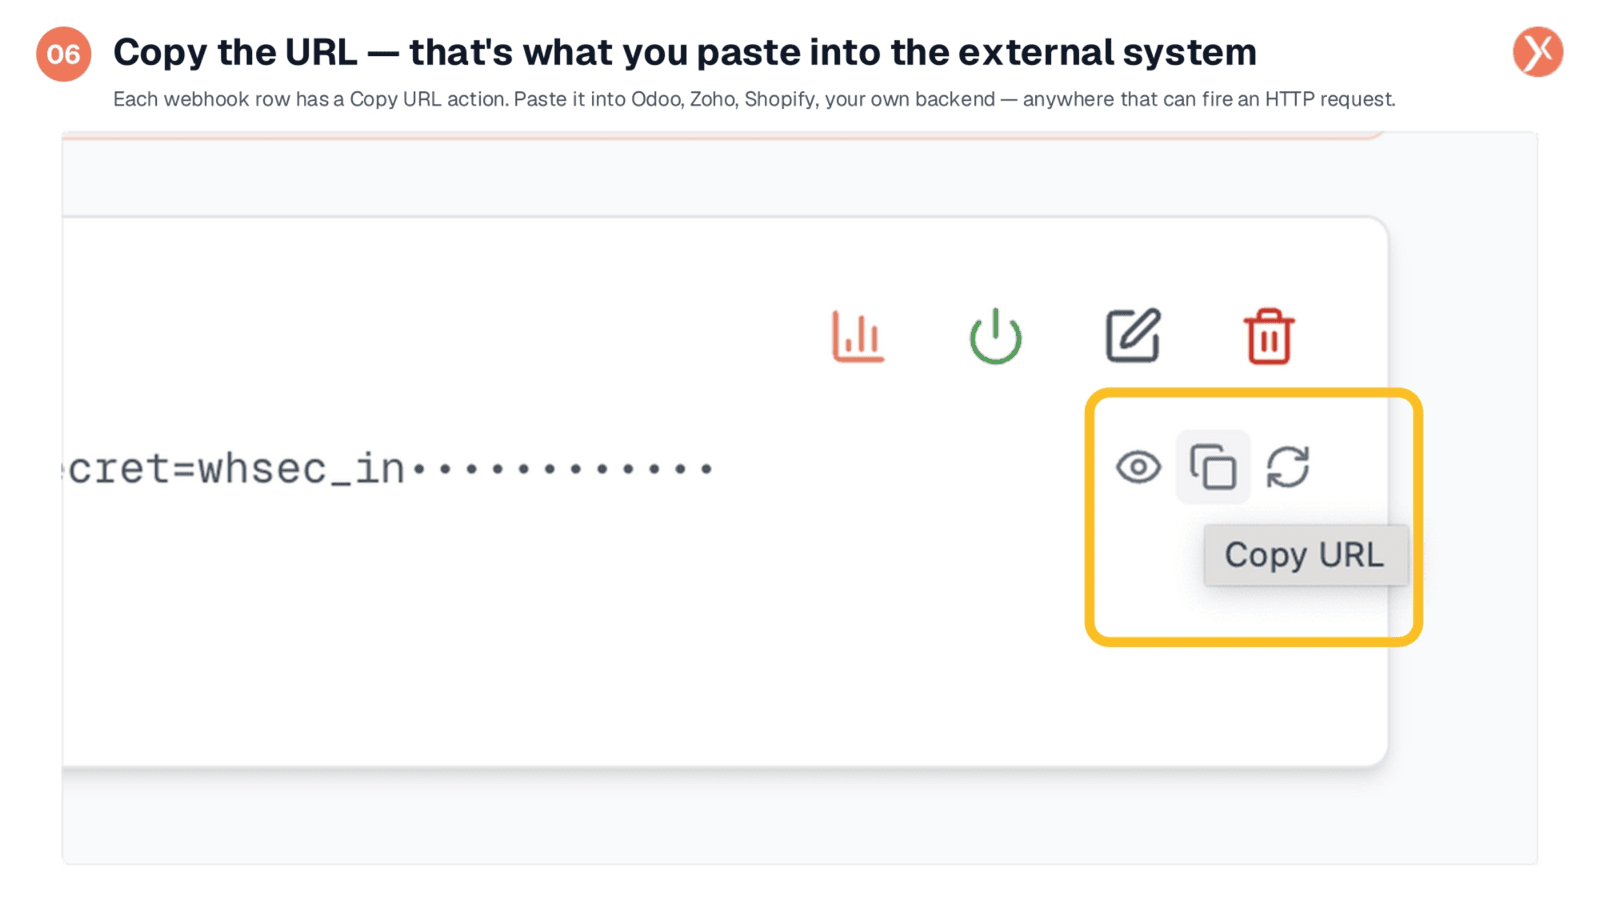
After creating your webhook, the most critical step is to copy its unique URL. This is done using the 'Copy URL' action available for each webhook row. You then paste this URL into the webhook settings of your external system, whether it's Odoo, Zoho, Shopify, or a custom backend. Once configured, any HTTP request sent to this URL by the external system will automatically trigger all workflows listening to that specific webhook. An eye icon also allows you to view the secret key, if required for authentication by the external system.
CRM Manager: Mapping Payload to Contact Fields
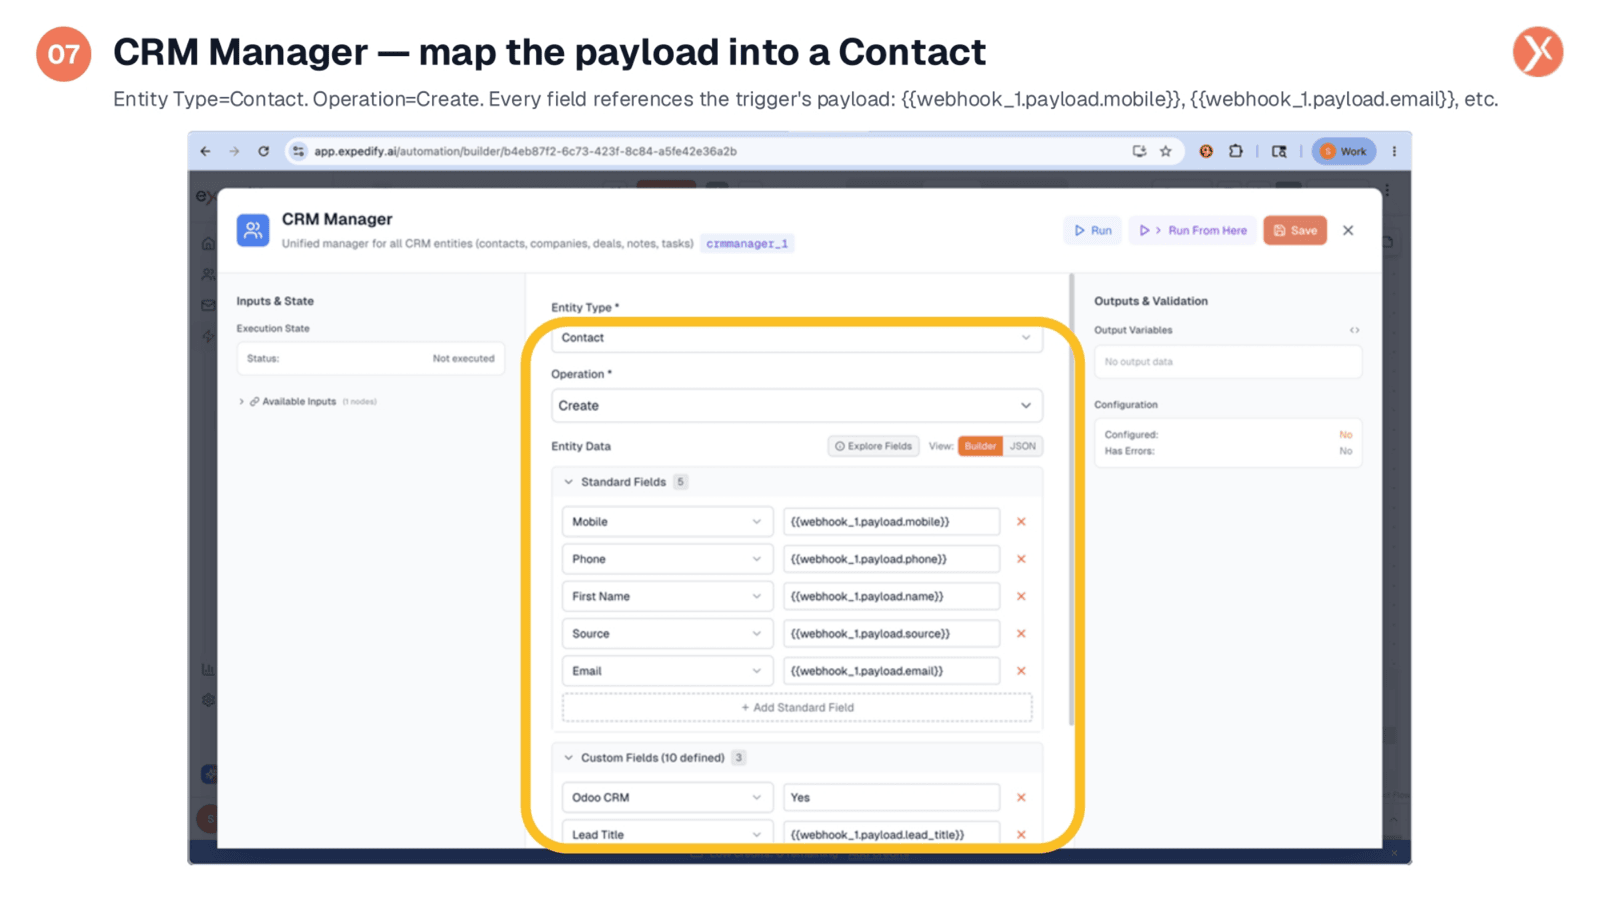
Moving to the downstream part of our workflow, the CRM Manager node is configured to process the incoming request. We've set the 'Entity Type' to 'Contact' and the 'Operation' to 'Create'. For each contact field we wish to populate, we map it directly to the corresponding key within the webhook's payload. For example, mobile numbers are mapped from webhook_1.payload.mobile, and email addresses from webhook_1.payload.email. This includes custom fields like 'Odoo CRM' and 'Lead Title', ensuring all relevant data from the external system is accurately captured. Once saved and activated, the workflow is fully operational.
Odoo Leads Become Expedify Contacts
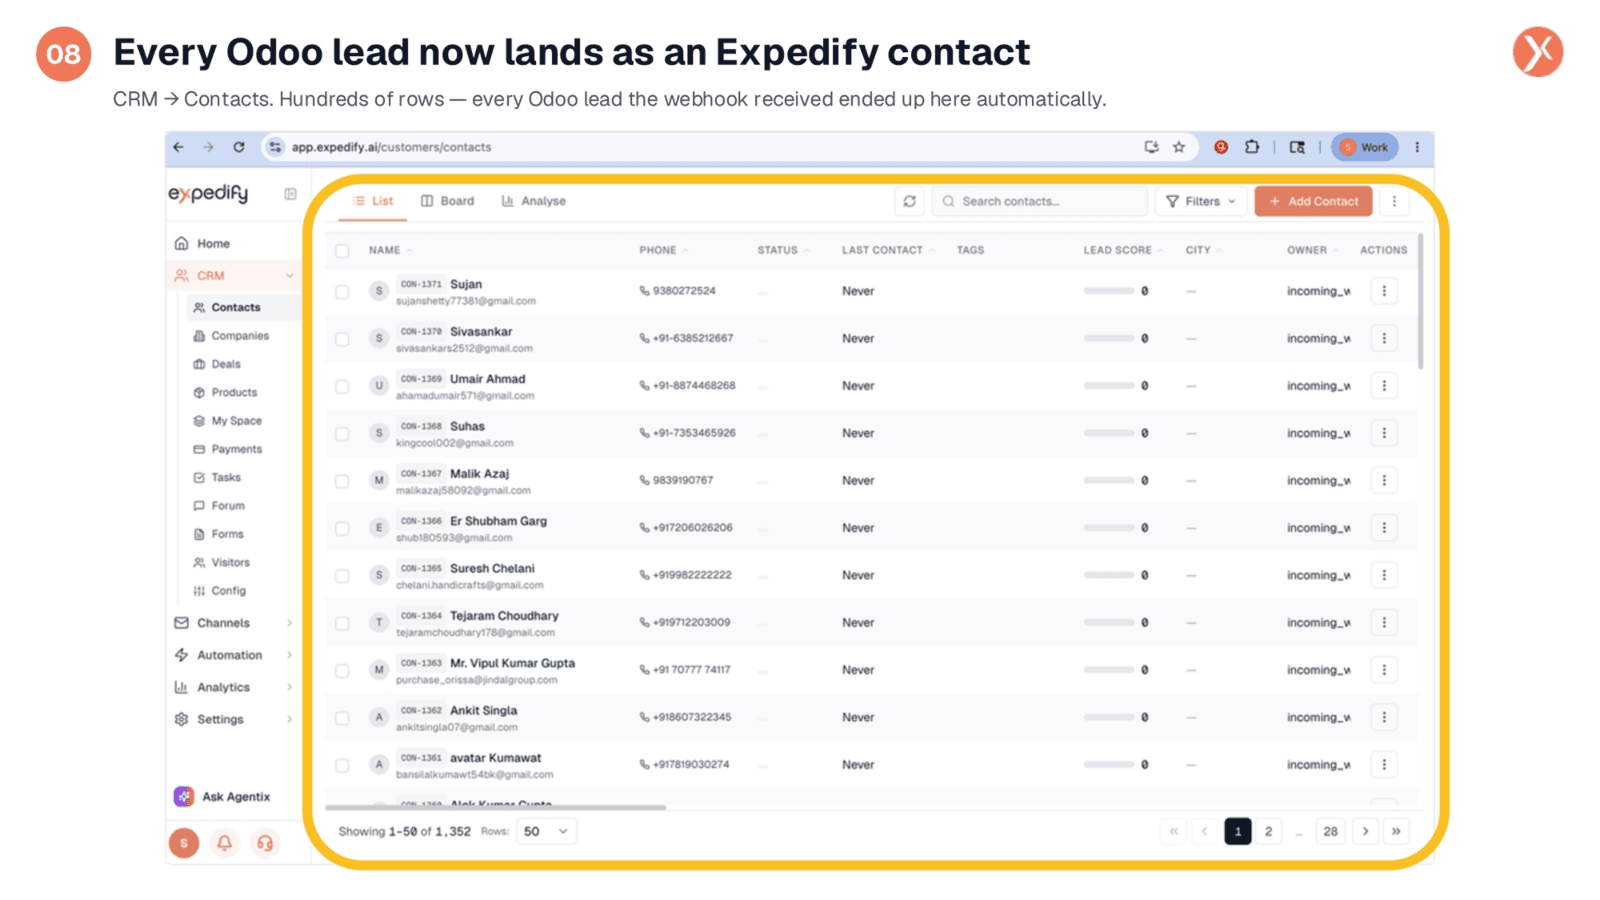
This view demonstrates the powerful outcome of our automation: every Odoo lead received via the webhook is automatically transformed into a new Expedify contact. Navigating to 'CRM' and then 'Contacts' reveals hundreds of entries, each representing a lead seamlessly integrated into our system. The 'Owner' column clearly indicates these contacts were generated through automation, not manual entry. With over five thousand webhook hits, this translates to thousands of contacts created effortlessly, showcasing how any external system's HTTP request can initiate a valuable workflow within Expedify.
Webhook Trigger Outputs
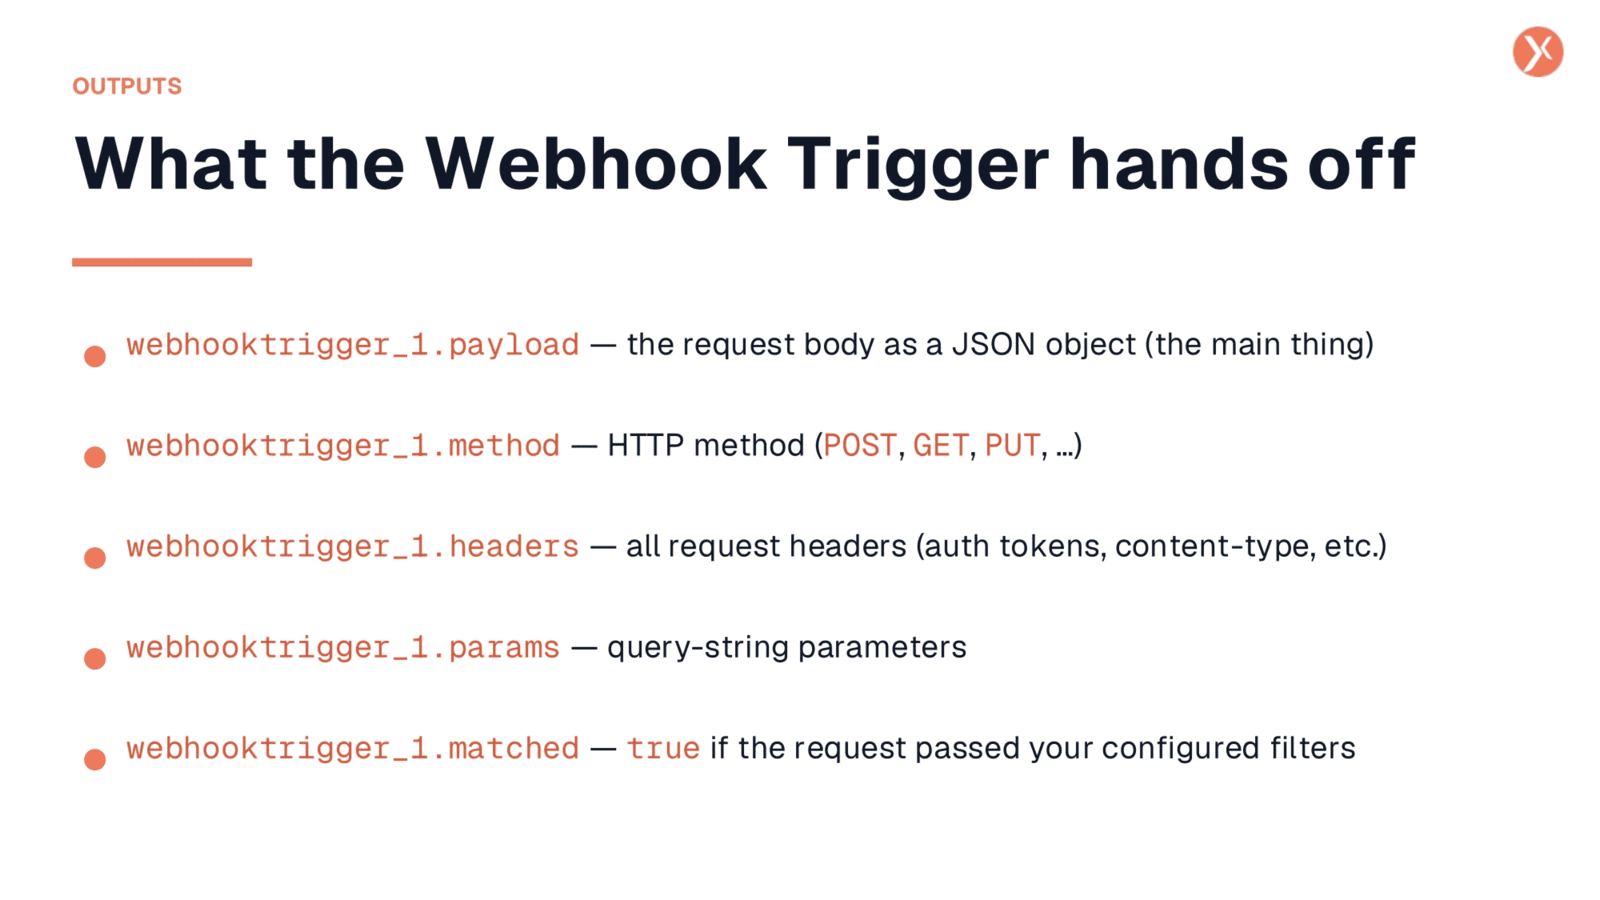
Understanding the outputs from the Webhook Trigger is crucial for building effective downstream workflows. The primary output is webhooktrigger_1.payload, which contains the full JSON body of the HTTP request, allowing access to all data sent by the external system using dot notation. Additionally, webhooktrigger_1.method provides the HTTP verb used, such as POST, GET, or PUT. Request headers, including authentication tokens, are available via webhooktrigger_1.headers, while webhooktrigger_1.params parses any query-string parameters. Finally, webhooktrigger_1.matched indicates whether the request successfully passed any configured filters, enabling intelligent branching in your automation.
Webhook Trigger Recap
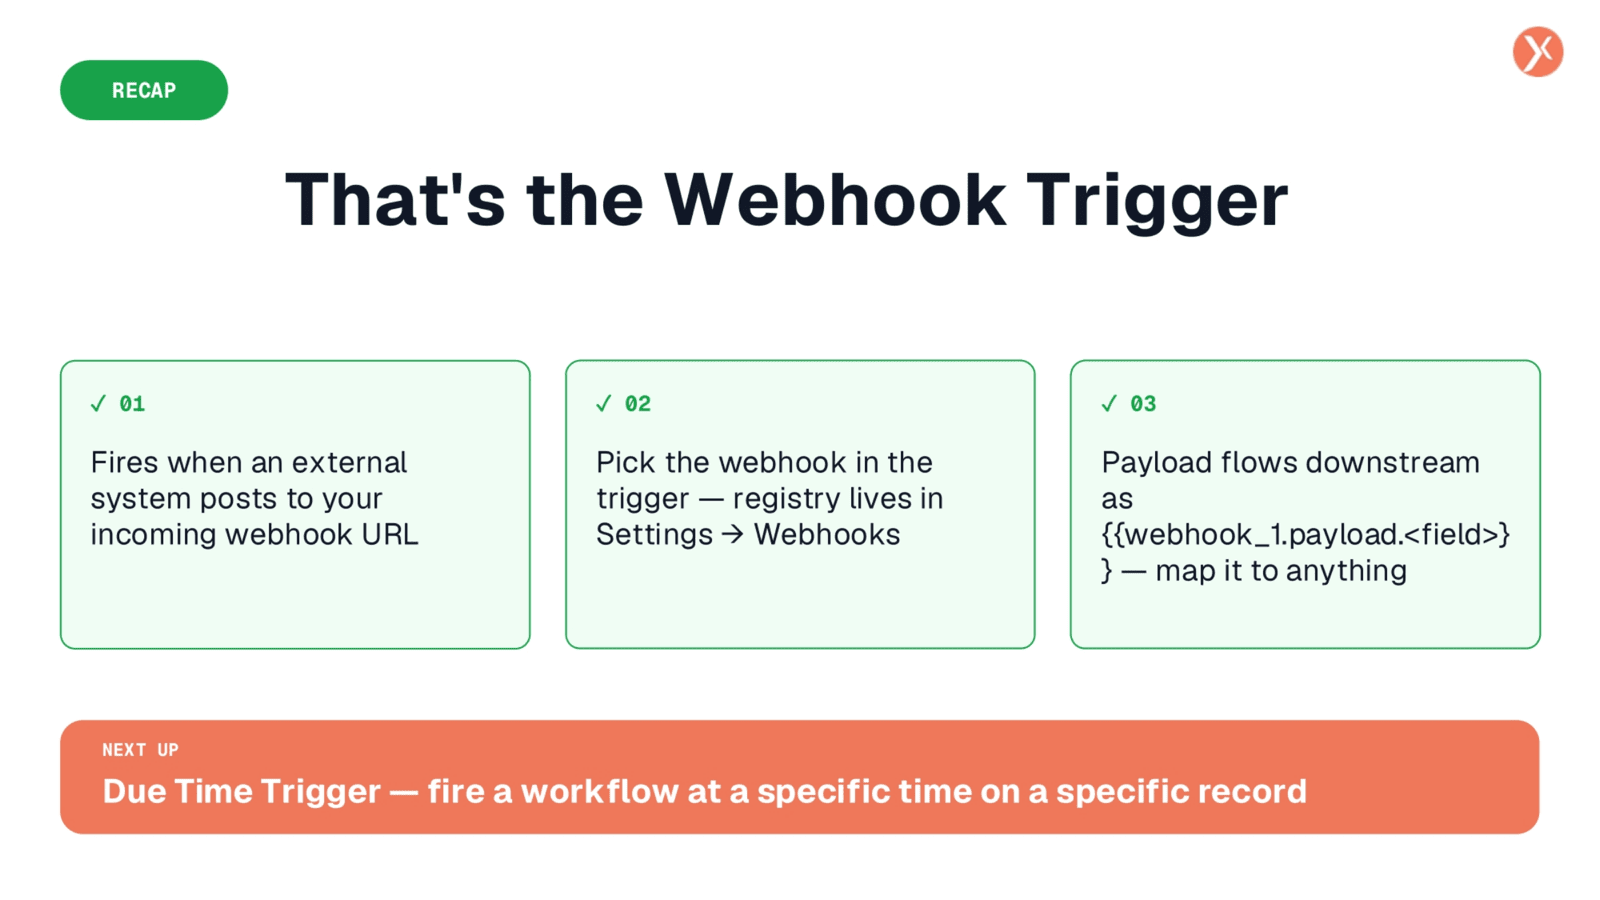
To recap, the Webhook Trigger acts as a crucial bridge, enabling external systems to initiate workflows within Expedify by posting to a unique URL. You select the specific webhook within the trigger, with the full registry managed under Settings. The incoming payload then flows downstream, allowing you to map its data to any desired fields in subsequent nodes. This powerful functionality allows for seamless integration and automation across your entire tech stack. Up next, we'll explore the Due Time Trigger, which fires workflows based on specific time and date conditions on a record.