WhatsApp Message Received
WhatsApp is often where customers connect with businesses, and the WhatsApp Input trigger allows every incoming message to kick off an automated workflow. In this lesson, we'll explore the simplest WhatsApp automation, examine the trigger's configuration options, and see how it integrates with an AI agent for enhanced functionality. We'll also cover the integration setup and the unified chat inbox.
WhatsApp Input Demo Overview
We begin with the core of our automation: a simple two-node workflow. On the left, the WhatsApp Context Input acts as our trigger, firing the moment a WhatsApp message arrives on your connected business number. On the right, the WhatsApp Output node sends a reply back to the same customer. Connecting these two nodes creates the world's simplest auto-reply, forming the basic structure before we add more intelligent features.
The Simplest WhatsApp Automation
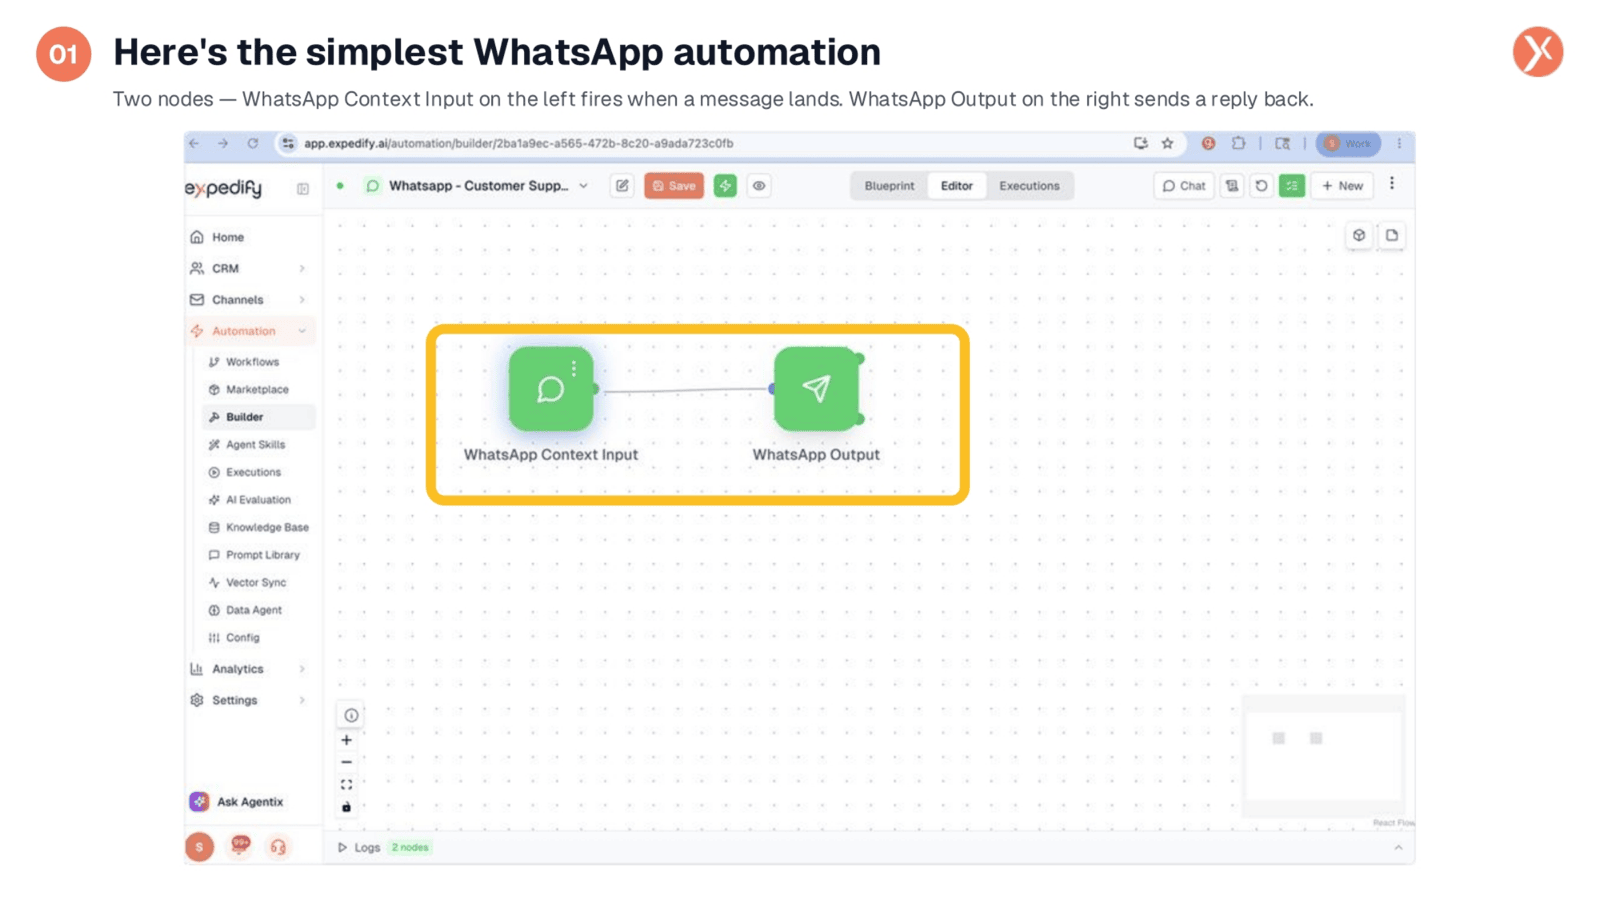
This visual demonstrates the fundamental two-node automation. The WhatsApp Context Input on the left initiates the workflow when a message is received. It then passes the message to the WhatsApp Output node on the right, which is responsible for sending a reply back to the customer. This basic setup allows for immediate, automated responses, providing a foundation for more complex interactions.
Configuring WhatsApp Context Input
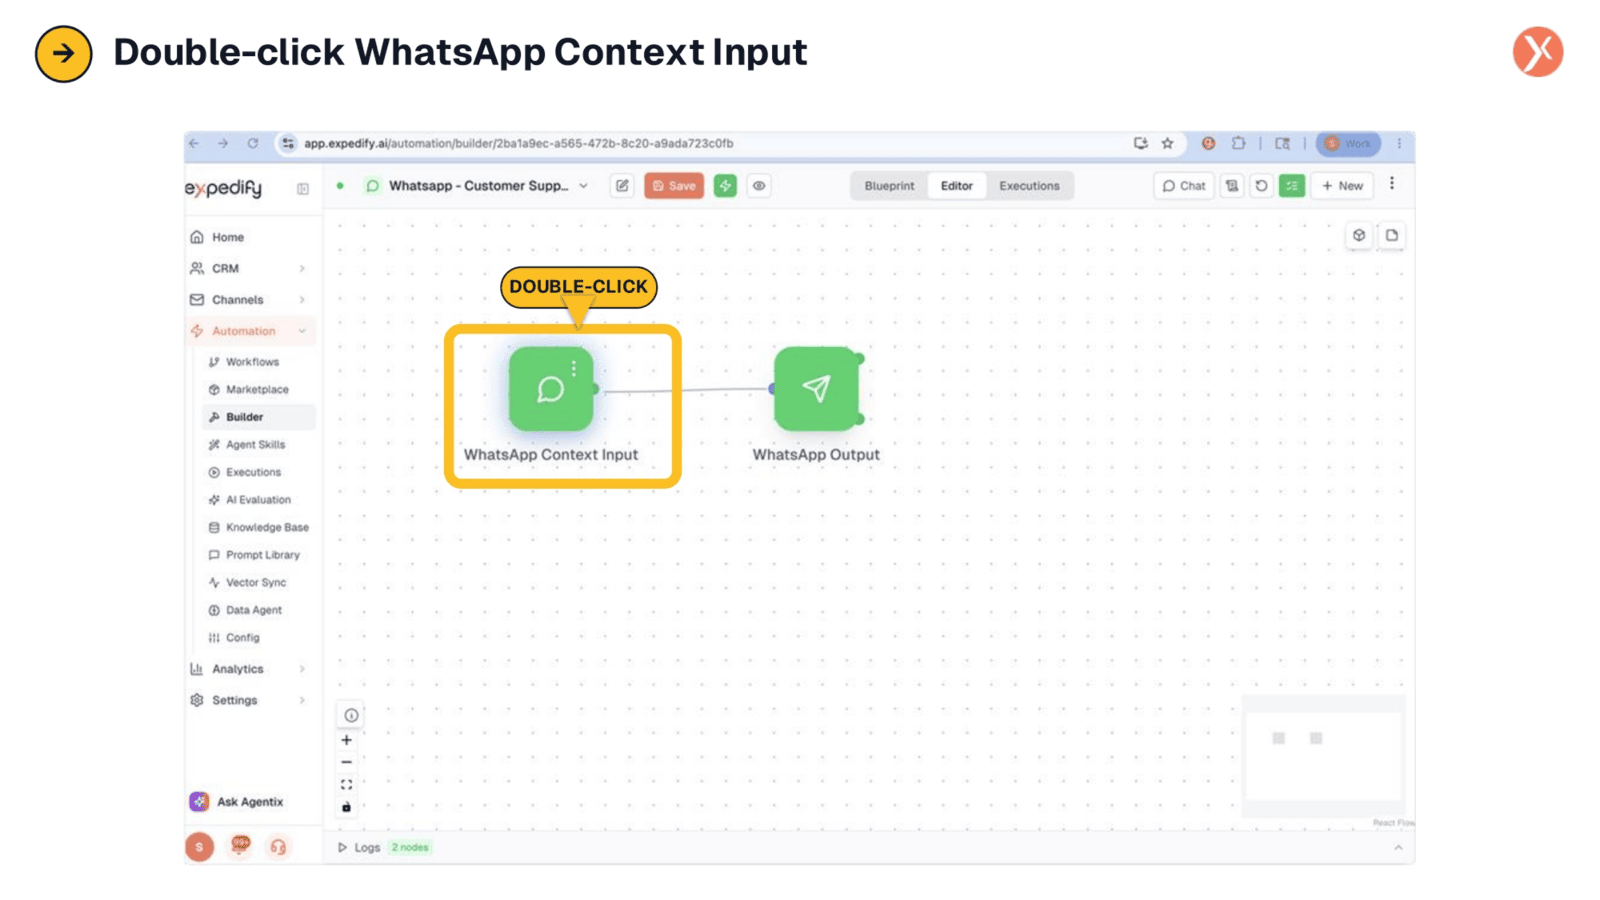
To configure our automation, we simply double-click the WhatsApp Context Input node. This action opens its configuration panel, allowing us to customize how the trigger behaves and what data it captures. This step is crucial for tailoring the workflow to specific business needs and ensuring the automation functions as intended.
Trigger Configuration and Output Variables
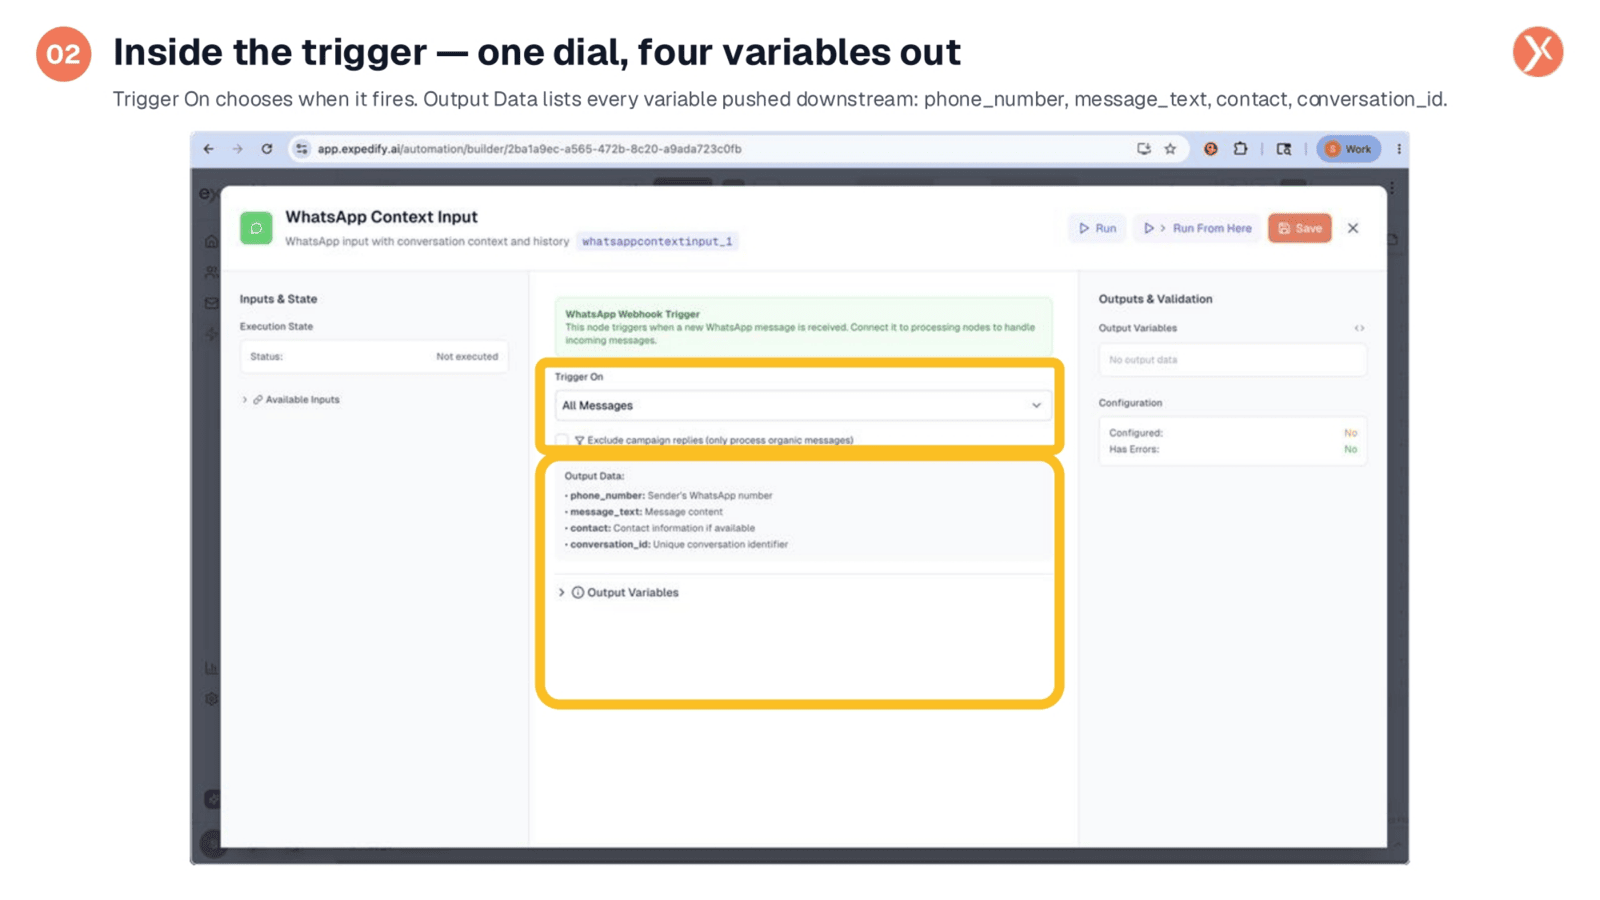
Within the trigger's configuration, two key areas stand out. The 'Trigger On' dial at the top controls when the workflow activates, offering flexibility in message handling. Below, the 'Output Data' section lists four essential variables passed downstream: the sender's phone number, the message text, contact information if available, and a unique conversation ID. These variables are vital for processing messages and personalizing responses.
Accessing Trigger On Options
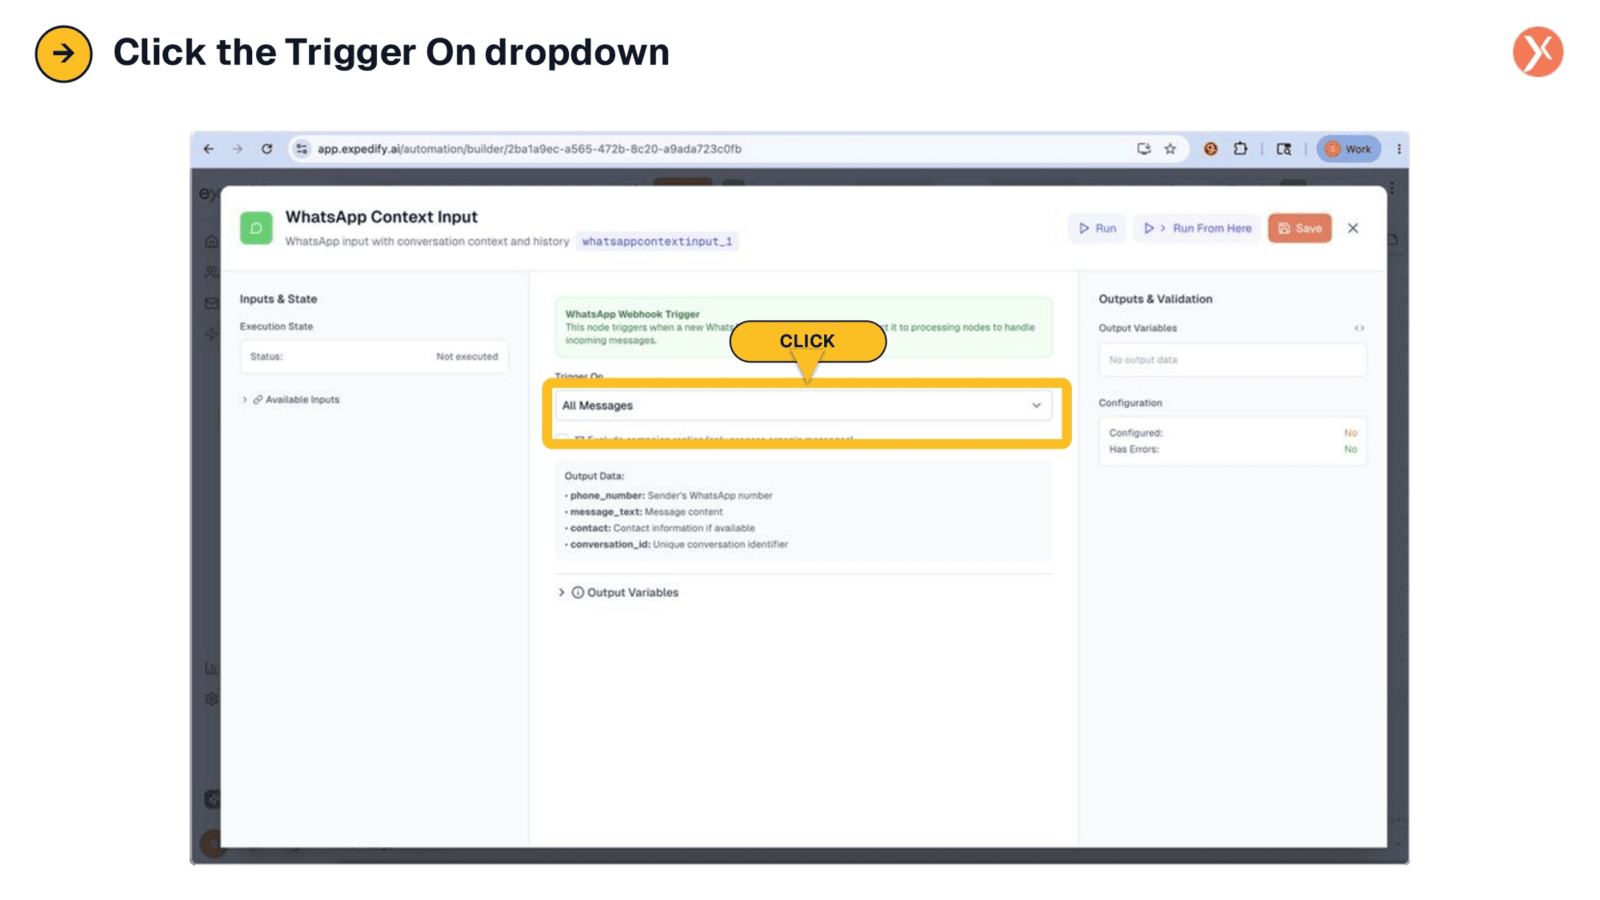
To explore the various ways this trigger can listen for messages, we click into the 'Trigger On' dropdown menu. This action reveals the different modes available for initiating the workflow. Understanding these options is key to designing precise and effective WhatsApp automations that align with specific communication strategies.
Three Trigger Listening Modes
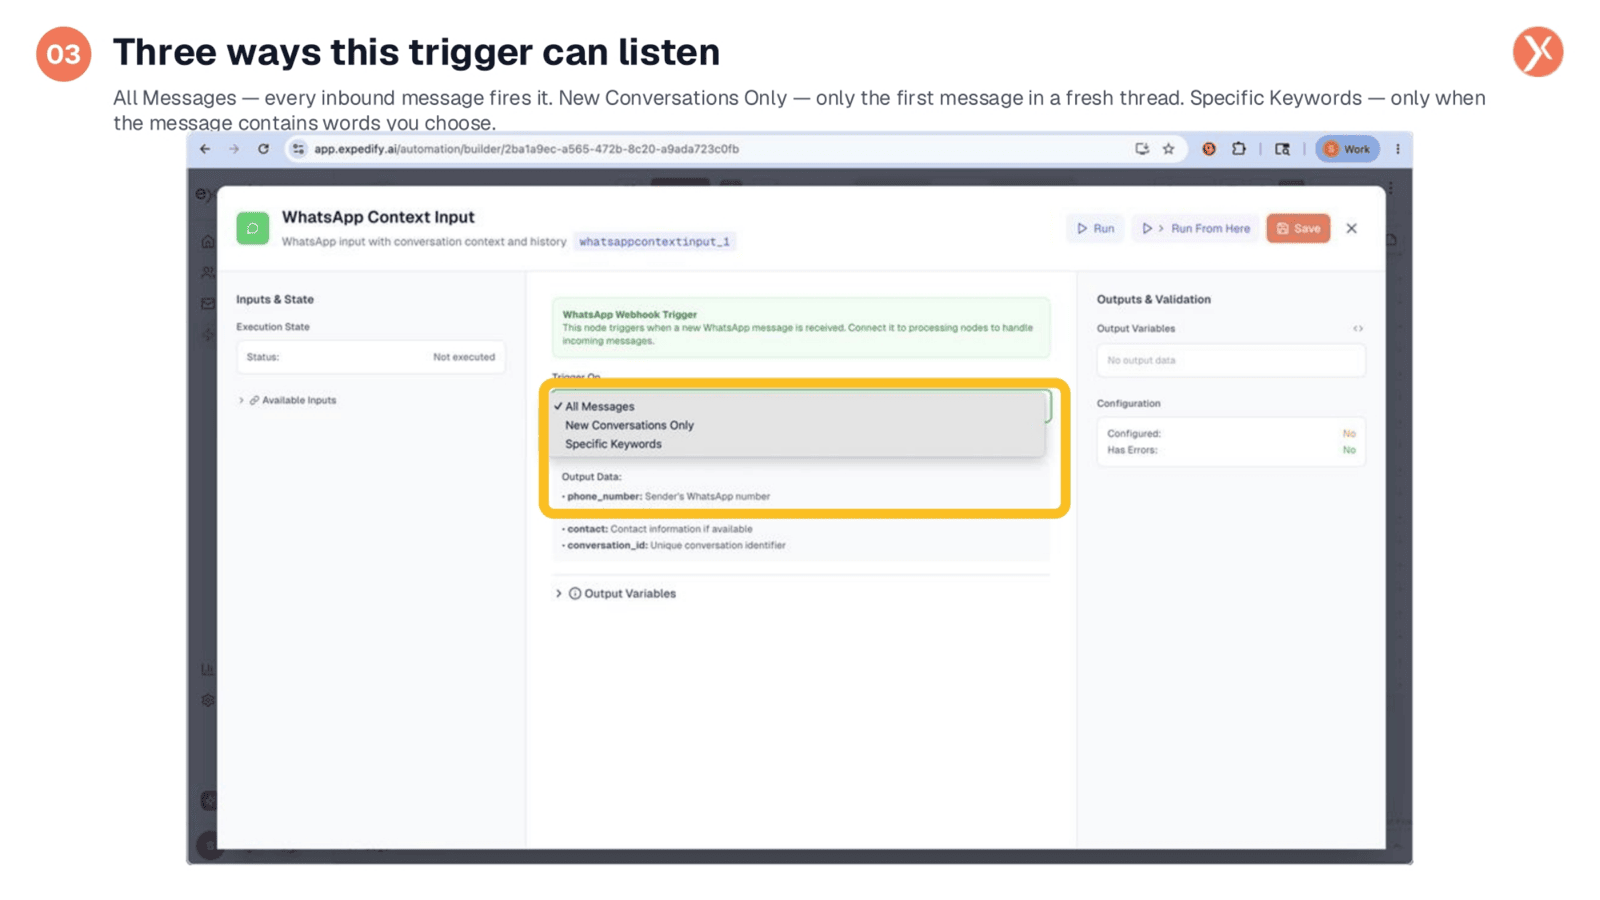
The 'Trigger On' dial offers three distinct modes for listening to incoming messages. 'All Messages' fires the workflow for every inbound WhatsApp message, ideal for continuous AI assistant interactions. 'New Conversations Only' activates solely for the first message of a new chat, perfect for welcome flows. Lastly, 'Specific Keywords' triggers the workflow only when predefined words like 'PRICING' or 'SUPPORT' are detected, enabling intent-driven responses. For our demo, 'All Messages' is selected.
Sending Replies with the Output Node
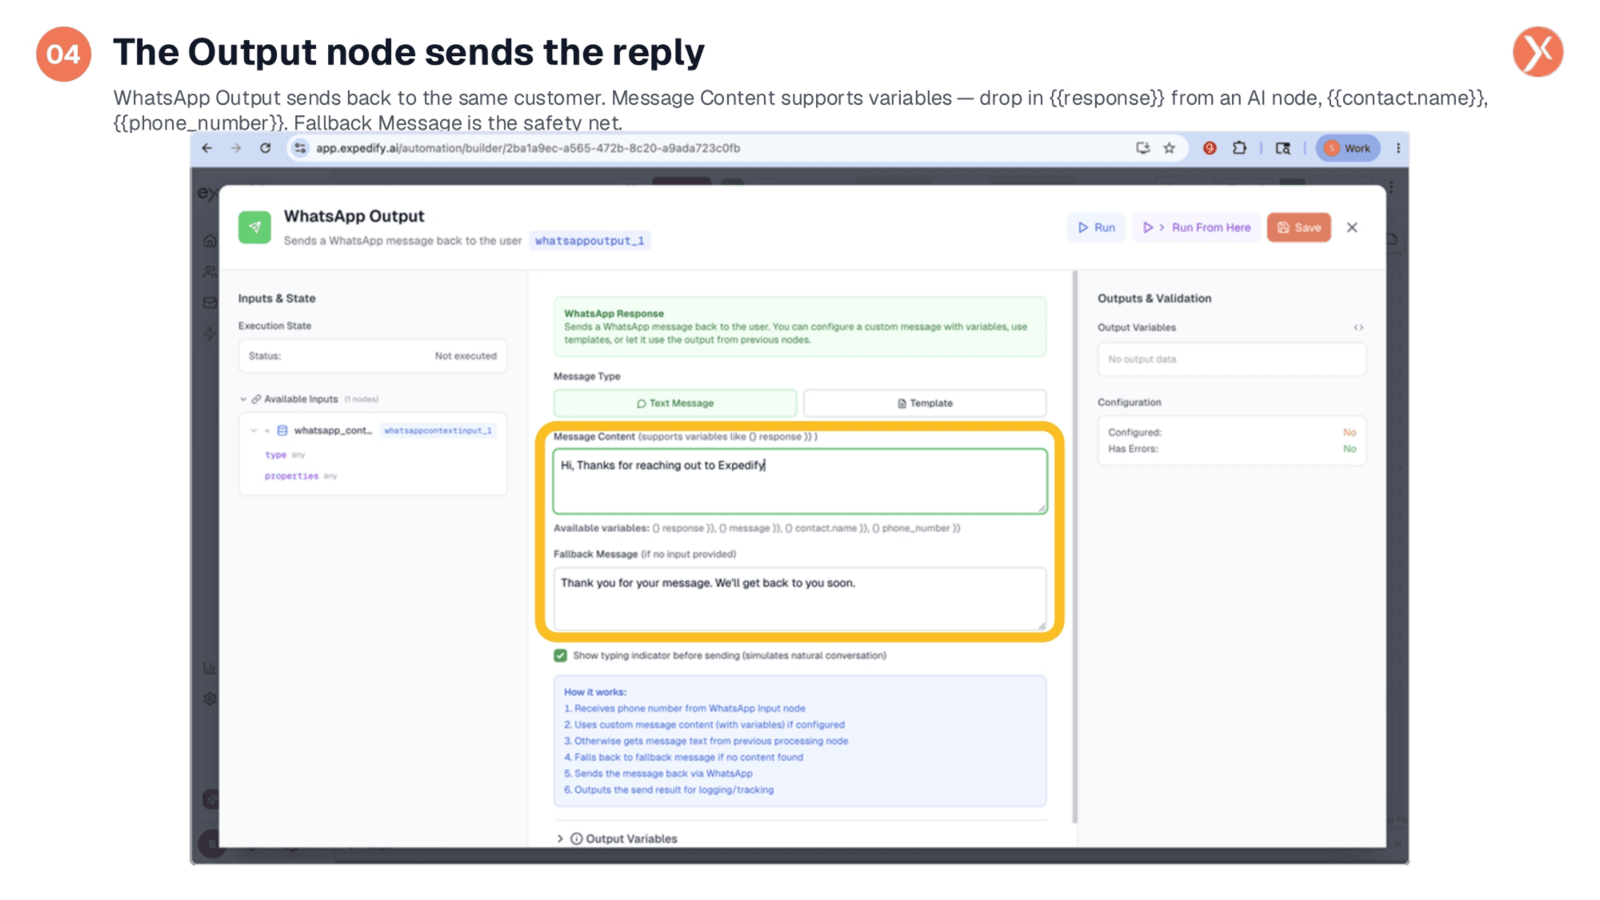
The WhatsApp Output node, our automation's partner, is responsible for sending replies. Its 'Message Content' field allows for custom messages, supporting variables like the contact's name or an AI agent's response using double-brace syntax. A 'Fallback Message' acts as a safety net, ensuring a response is always sent even if the main content isn't populated. This flexibility ensures personalized and reliable communication back to the customer.
Integrating an AI Agent for Advanced Workflows
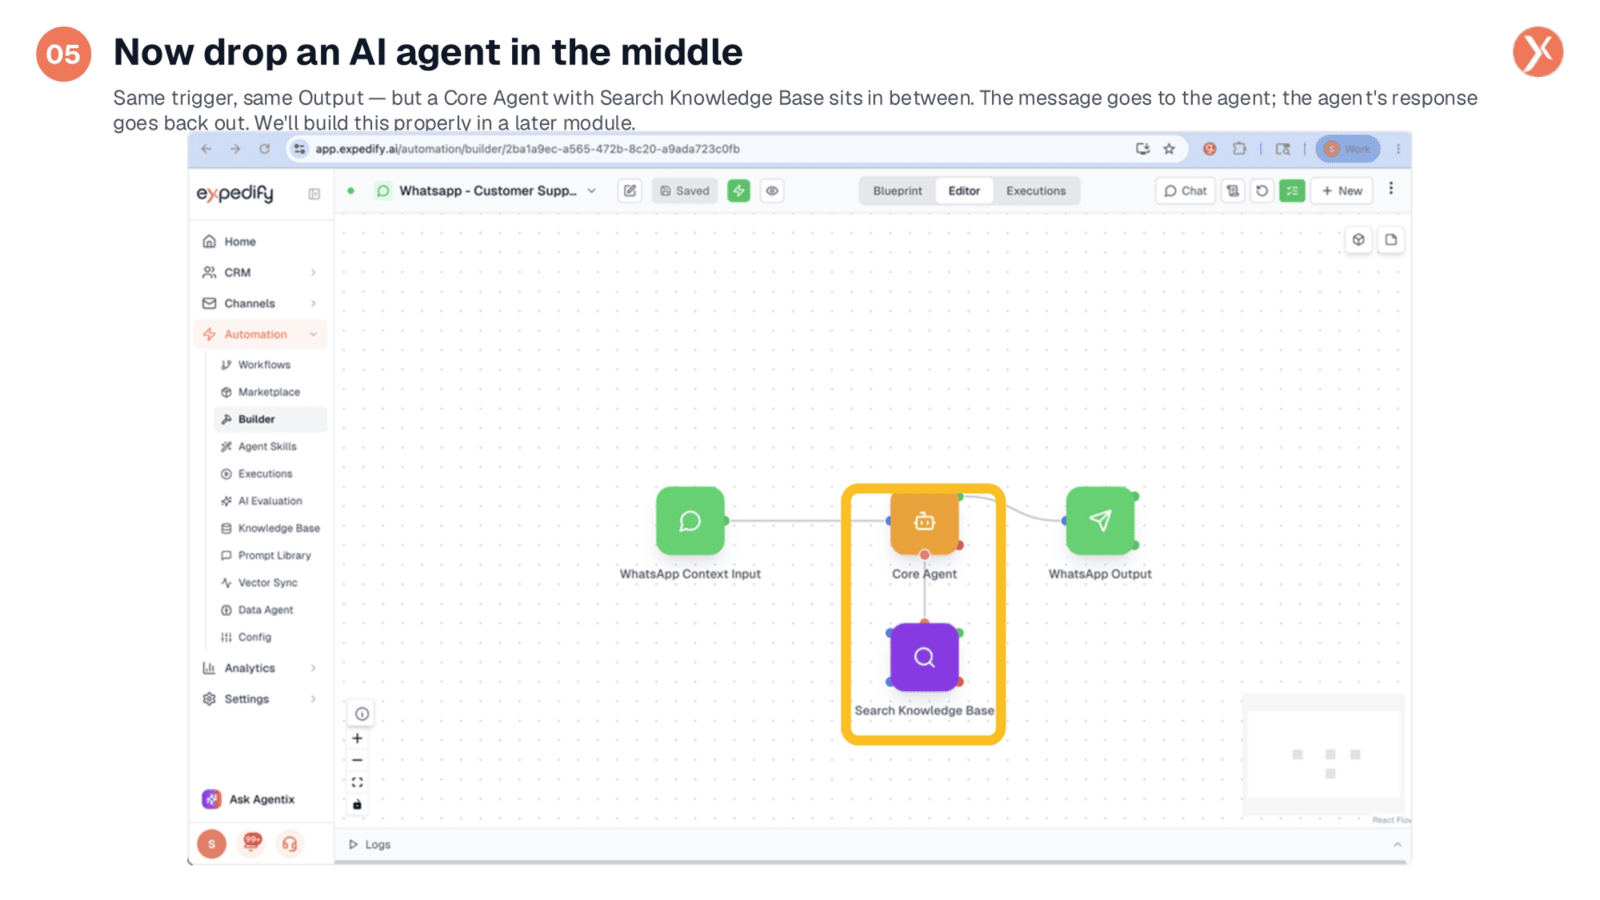
This is where the automation truly becomes powerful. By inserting a Core Agent with a Search Knowledge Base between the WhatsApp Input and Output nodes, we transform a simple auto-reply into an intelligent customer support bot. The agent processes customer inquiries, searches your knowledge base for relevant information, and crafts a real-time answer. This setup demonstrates how the core trigger and output remain consistent, while the 'brains' in the middle evolve for advanced functionality.
Connecting WhatsApp to Expedify
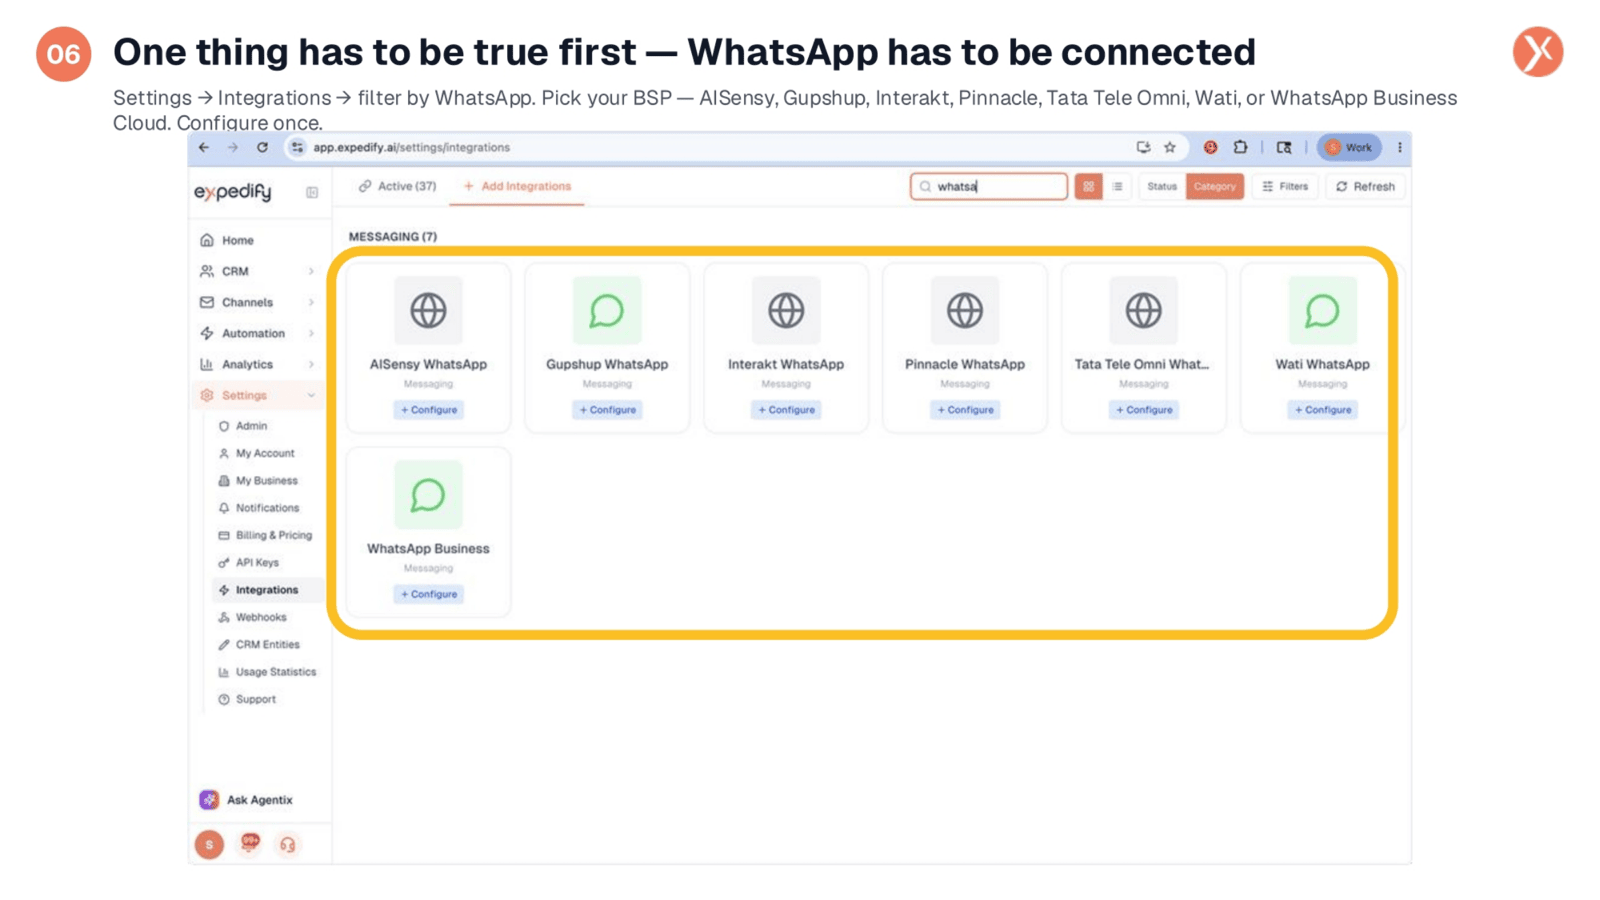
Before any WhatsApp automation can function, your WhatsApp business number must be integrated with Expedify. This is done through the 'Settings' and 'Integrations' sections, where you can filter by WhatsApp. Expedify supports all major Business Solution Providers, including AISensy, Gupshup, and WhatsApp Business Cloud. A one-time configuration, involving pasting your credentials, establishes the connection, allowing the trigger to listen for incoming messages.
Unified Chat Inbox for All Conversations
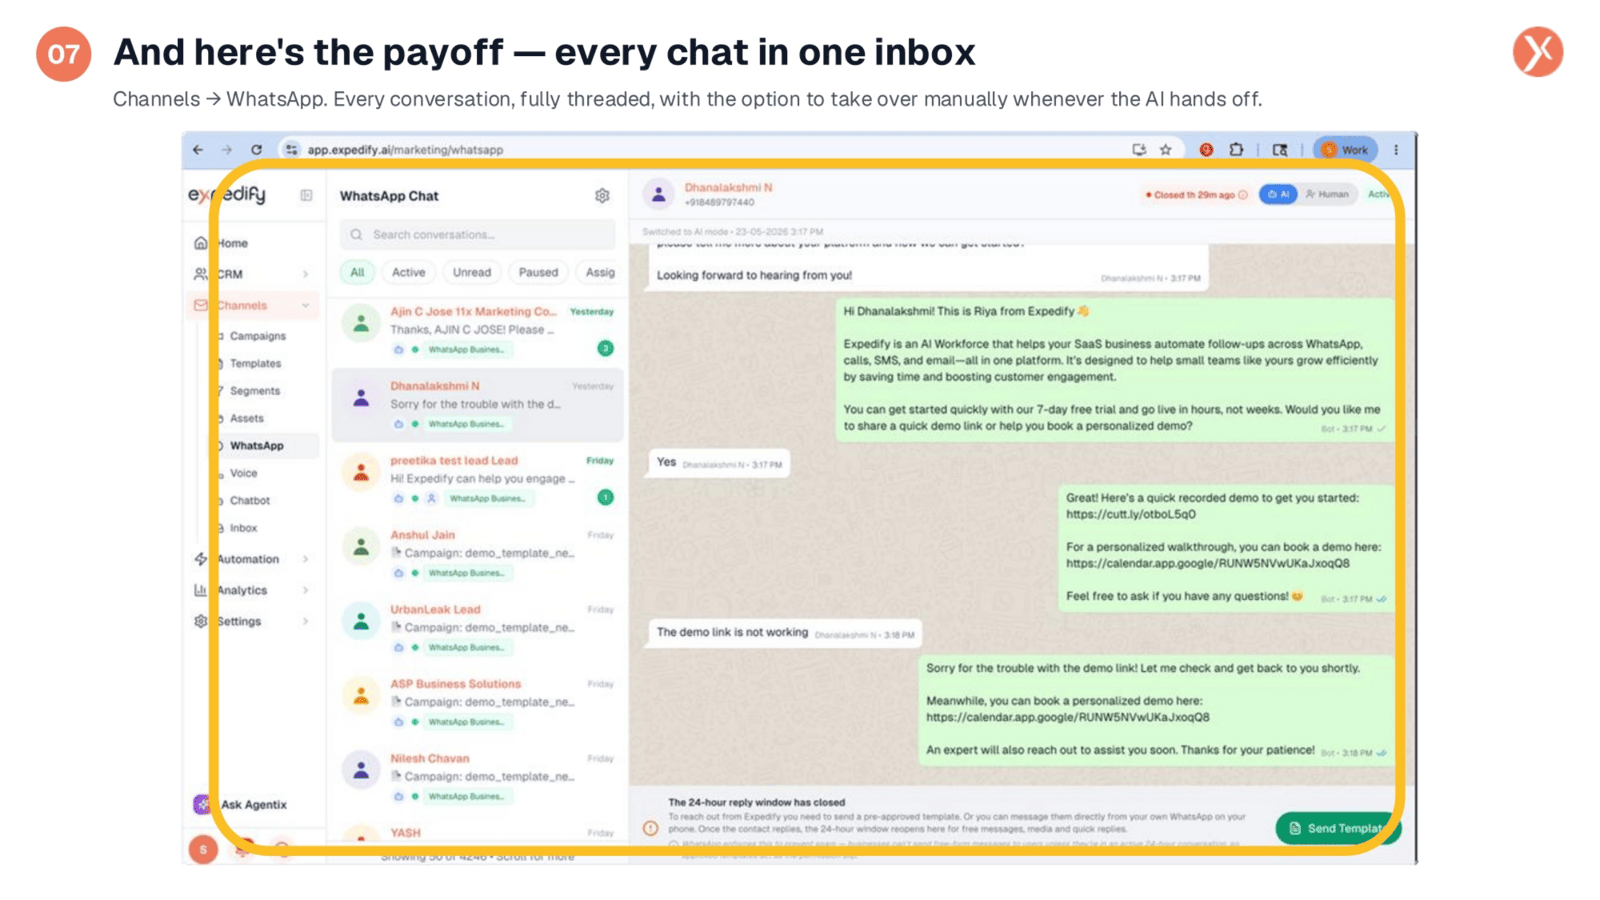
The ultimate benefit of this system is the unified chat inbox, accessible via 'Channels' and 'WhatsApp'. Here, every conversation your workflows have had with customers is organized, threaded, and searchable, providing a complete message history. While AI agents handle routine inquiries, human agents can seamlessly take over any conversation when needed, ensuring a smooth and efficient customer experience. This centralized inbox combines automation efficiency with human oversight.
WhatsApp Message Trigger Output Variables
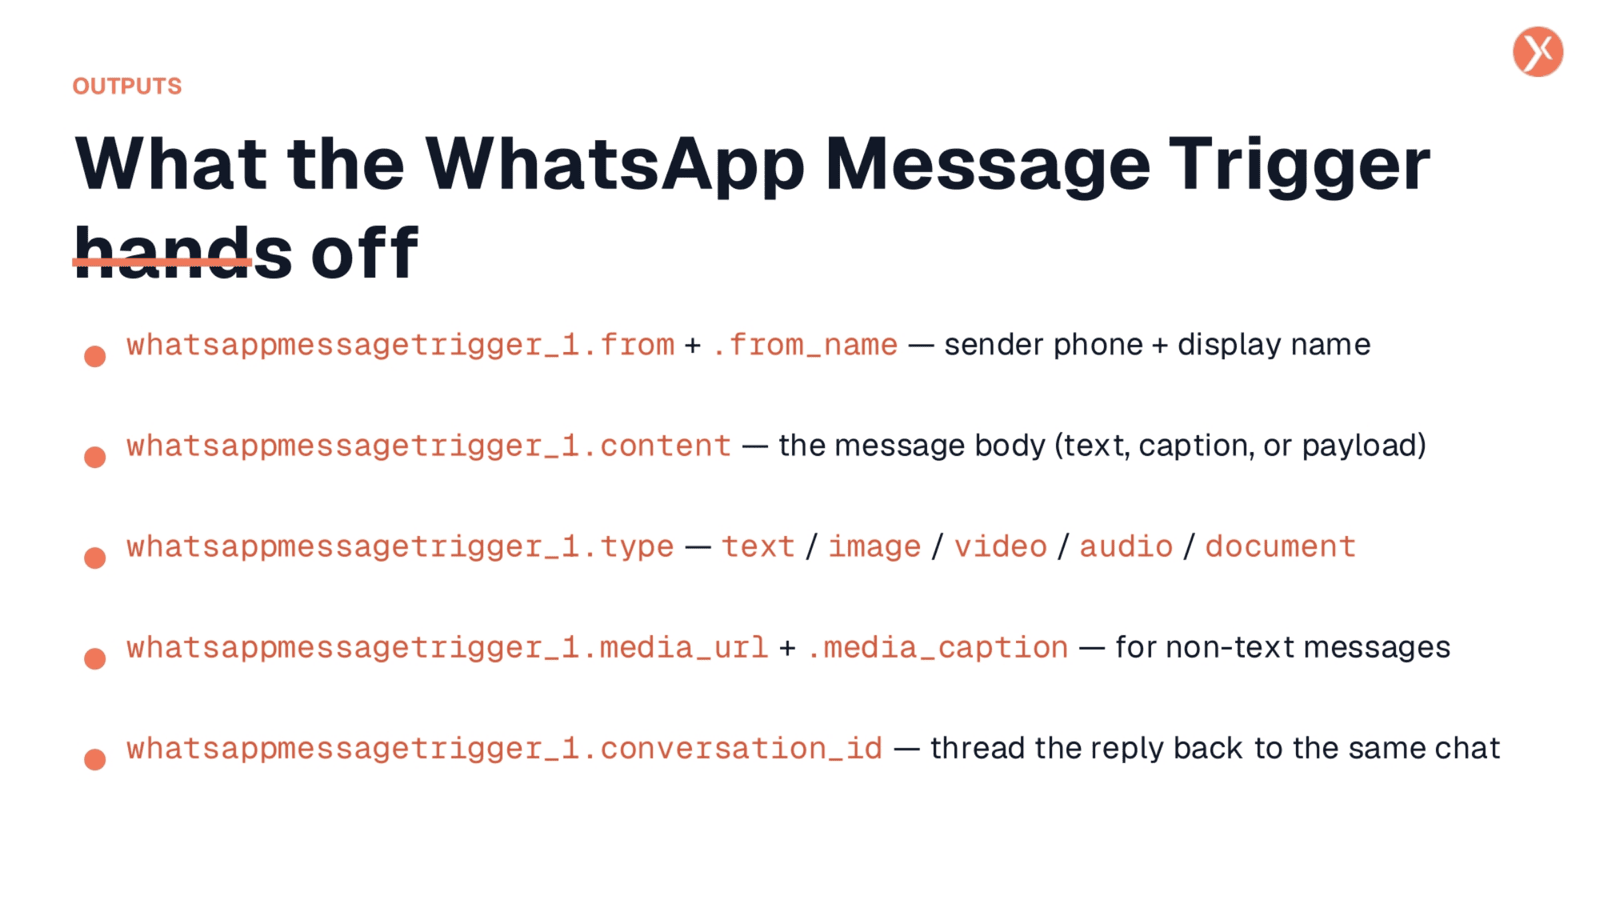
The WhatsApp Message Trigger provides several key variables to downstream nodes. whatsappmessagetrigger_1.from and .from_name identify the sender. whatsappmessagetrigger_1.content holds the message body, while .type specifies if it's text, image, video, audio, or a document. For non-text messages, .media_url and .media_caption are available. Crucially, whatsappmessagetrigger_1.conversation_id ensures replies are threaded back into the correct chat, maintaining conversational context.
Recap: WhatsApp Input Trigger
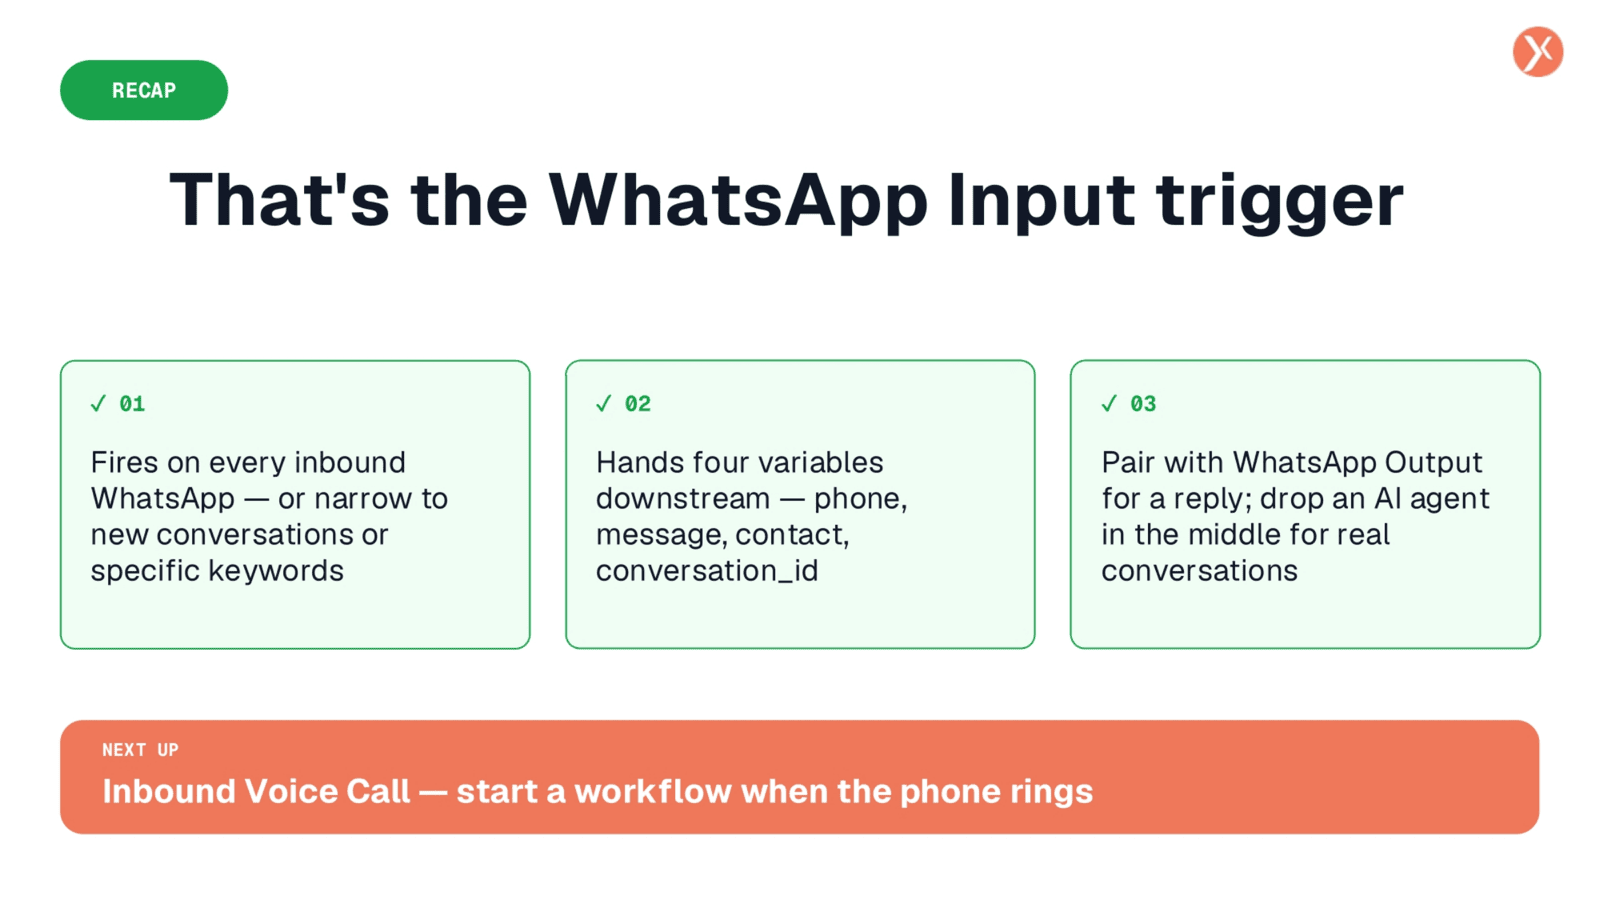
That concludes our look at the WhatsApp Input trigger. It features a flexible 'Trigger On' dial and provides four essential variables. You can pair it with WhatsApp Output for auto-replies or integrate an AI agent for advanced customer support. All conversations are managed in the Channels inbox. Next, we'll explore the Inbound Voice Call trigger.