API Request
Welcome to our session on the API Request node, a universal escape hatch for your Expedify workflows. This powerful node allows you to call any API, using any method, and connect to any service, extending Expedify's capabilities to virtually any third-party system. We'll explore its comprehensive features today.
API Request Node Walkthrough

We're about to begin a detailed walkthrough of the API Request node. First, we'll introduce the node itself, then delve into its three main tabs: Basic, Auth, and Advanced. The Basic tab covers essential settings like the URL, HTTP method, headers, query parameters, and the request body. Next, the Auth tab guides you through various authentication types, including None, Basic, Bearer Token, and API Key. Finally, the Advanced tab offers operational controls such as timeouts, retries, redirects, and output mapping. We'll conclude by examining the outputs available for downstream nodes.
API Request as a Workflow Node
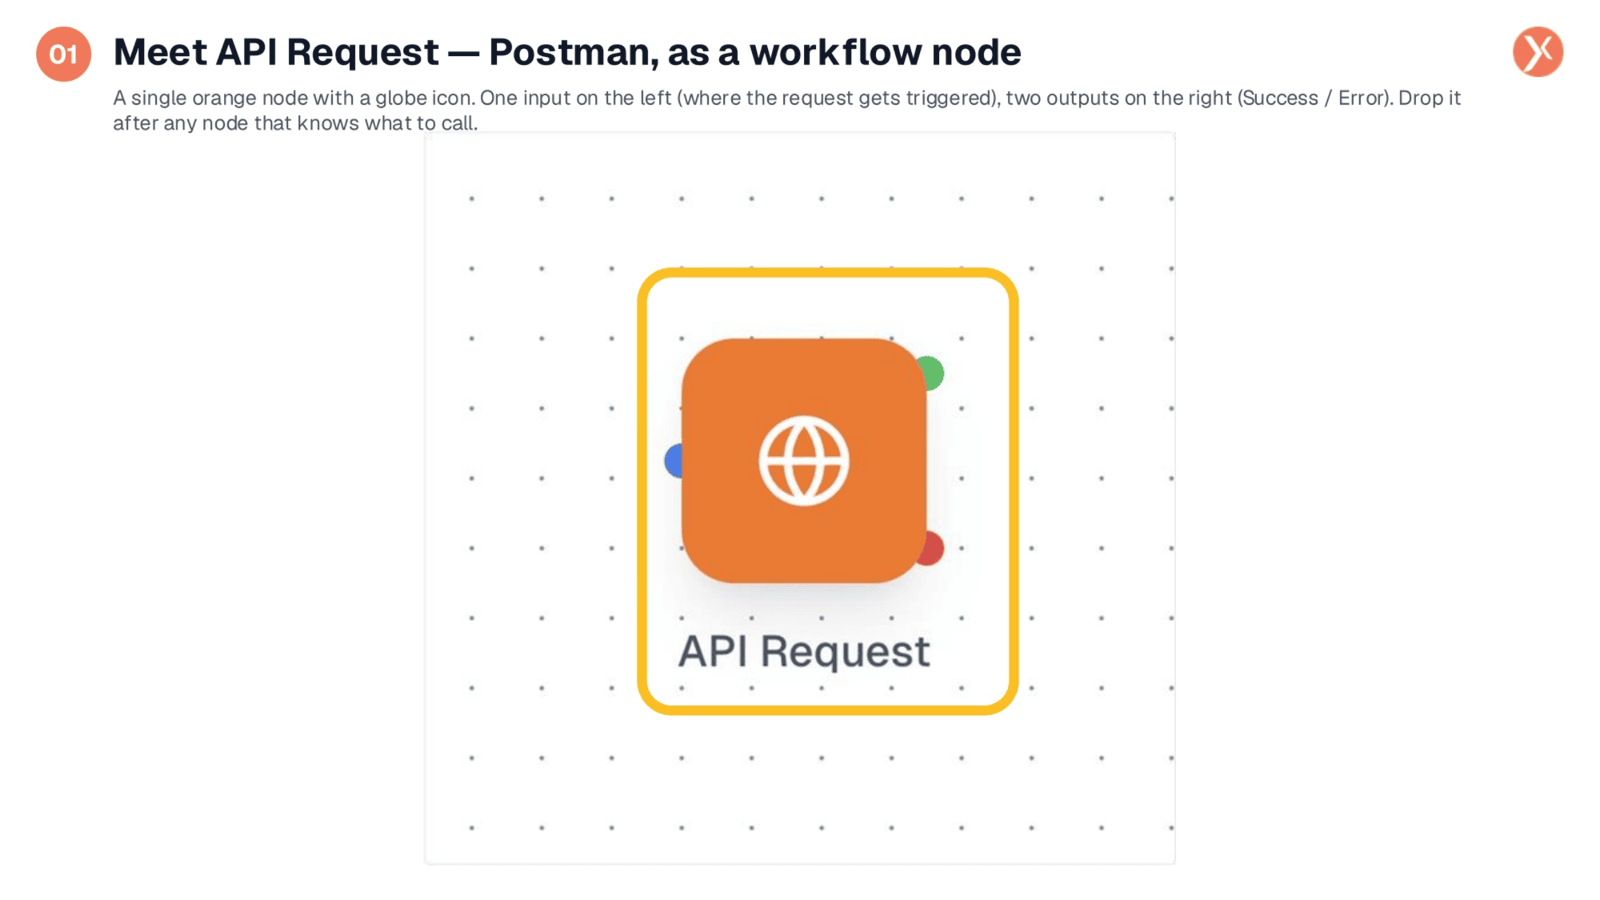
The API Request node functions as a workflow component, visually represented by an orange node with a globe icon. Its orange color signifies an action that interacts with external services. It features a single input port on the left, where upstream nodes can trigger an API call, and two output ports on the right: Success and Error. These distinct outputs enable you to define separate downstream paths for successful and failed API calls, ensuring robust workflow management. This node effectively extends your workflow to the public internet, retrieving data from external APIs.
Comprehensive HTTP Options Across Three Tabs
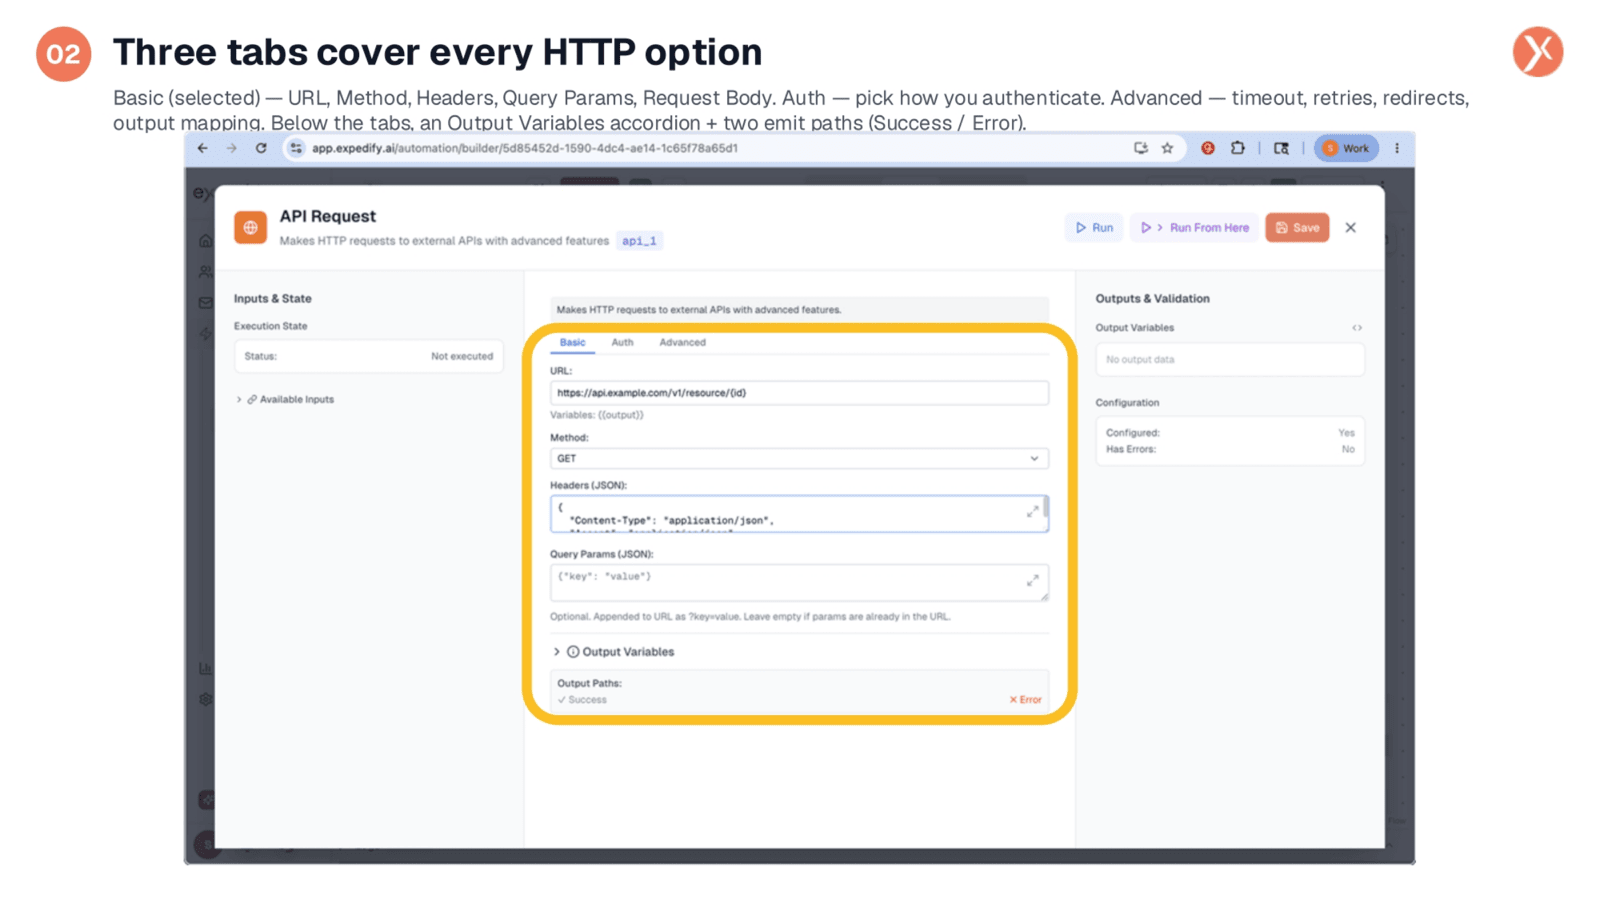
The API Request node organizes all its functionalities across three distinct tabs: Basic, Auth, and Advanced. The Basic tab, which is currently selected, is where you'll configure the core elements of your request, including the URL, HTTP method, headers, query parameters, and the request body. The Auth tab is dedicated to defining how your API call will authenticate with the external service. Lastly, the Advanced tab provides crucial operational controls like timeouts, retries, and redirect handling. Below these tabs, you'll find an Output Variables accordion and two emit paths for Success and Error, allowing for clear workflow branching.
Standard HTTP Methods Available
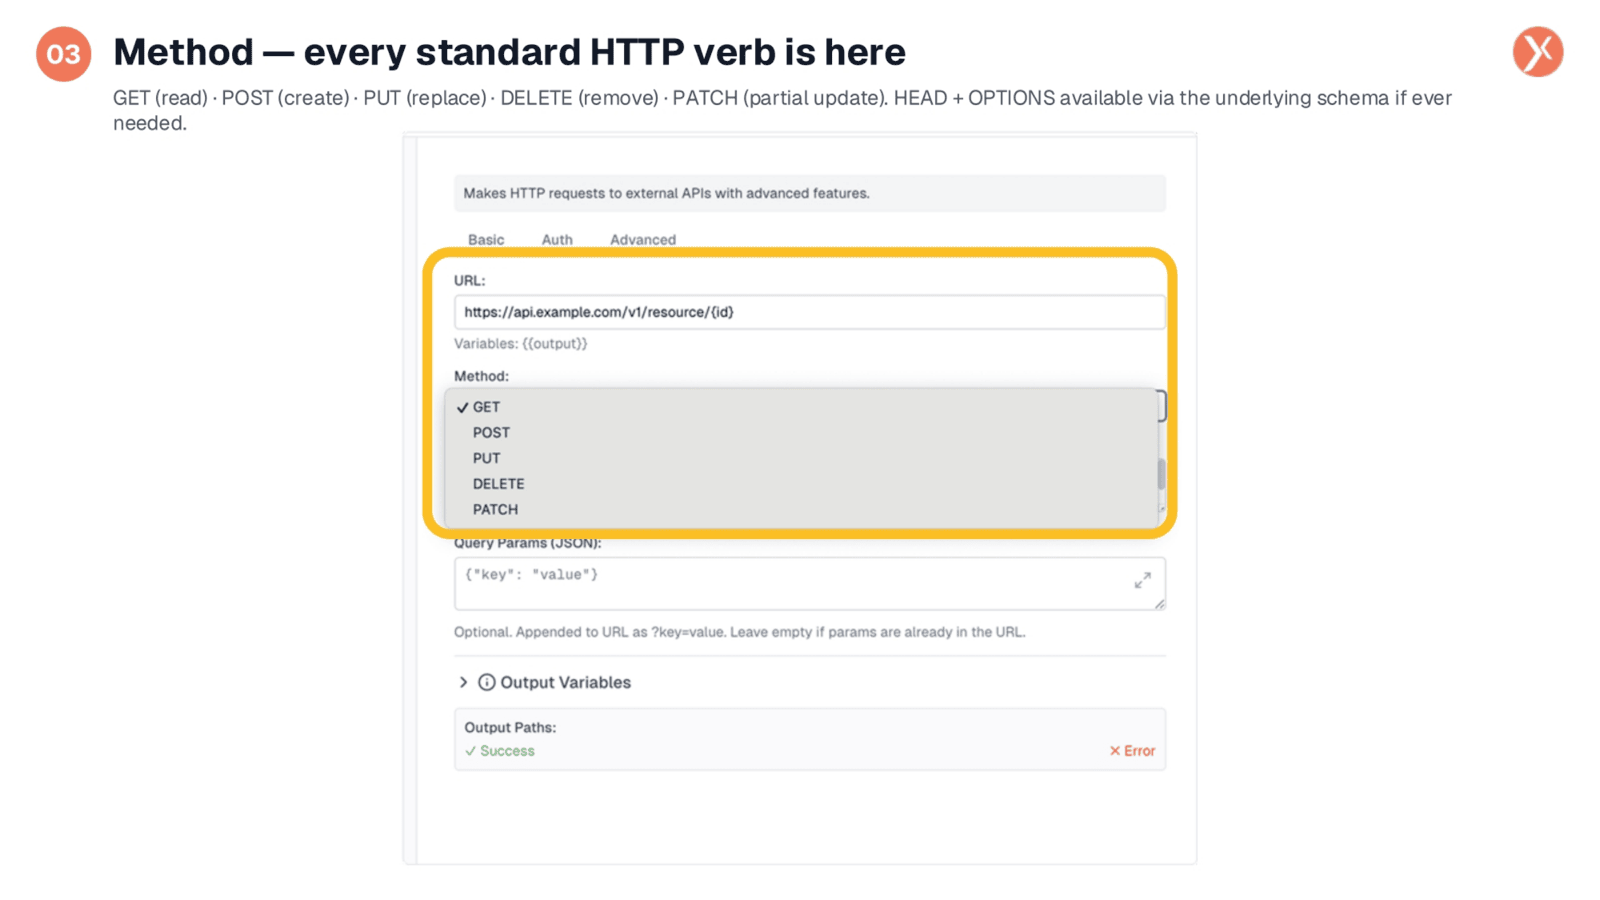
The Method dropdown provides access to every standard HTTP verb essential for interacting with APIs. You can select GET to retrieve data, POST to create new resources, PUT to replace existing records, DELETE to remove entries, or PATCH for partial updates. The choice of method should always align with the third-party API's documentation for each specific endpoint. Notably, selecting GET will hide the request body field, while choosing POST, PUT, or PATCH will make it visible, adapting the form dynamically to the chosen verb. This ensures a streamlined and intuitive configuration process.
JSON Inputs for Headers and Query Parameters
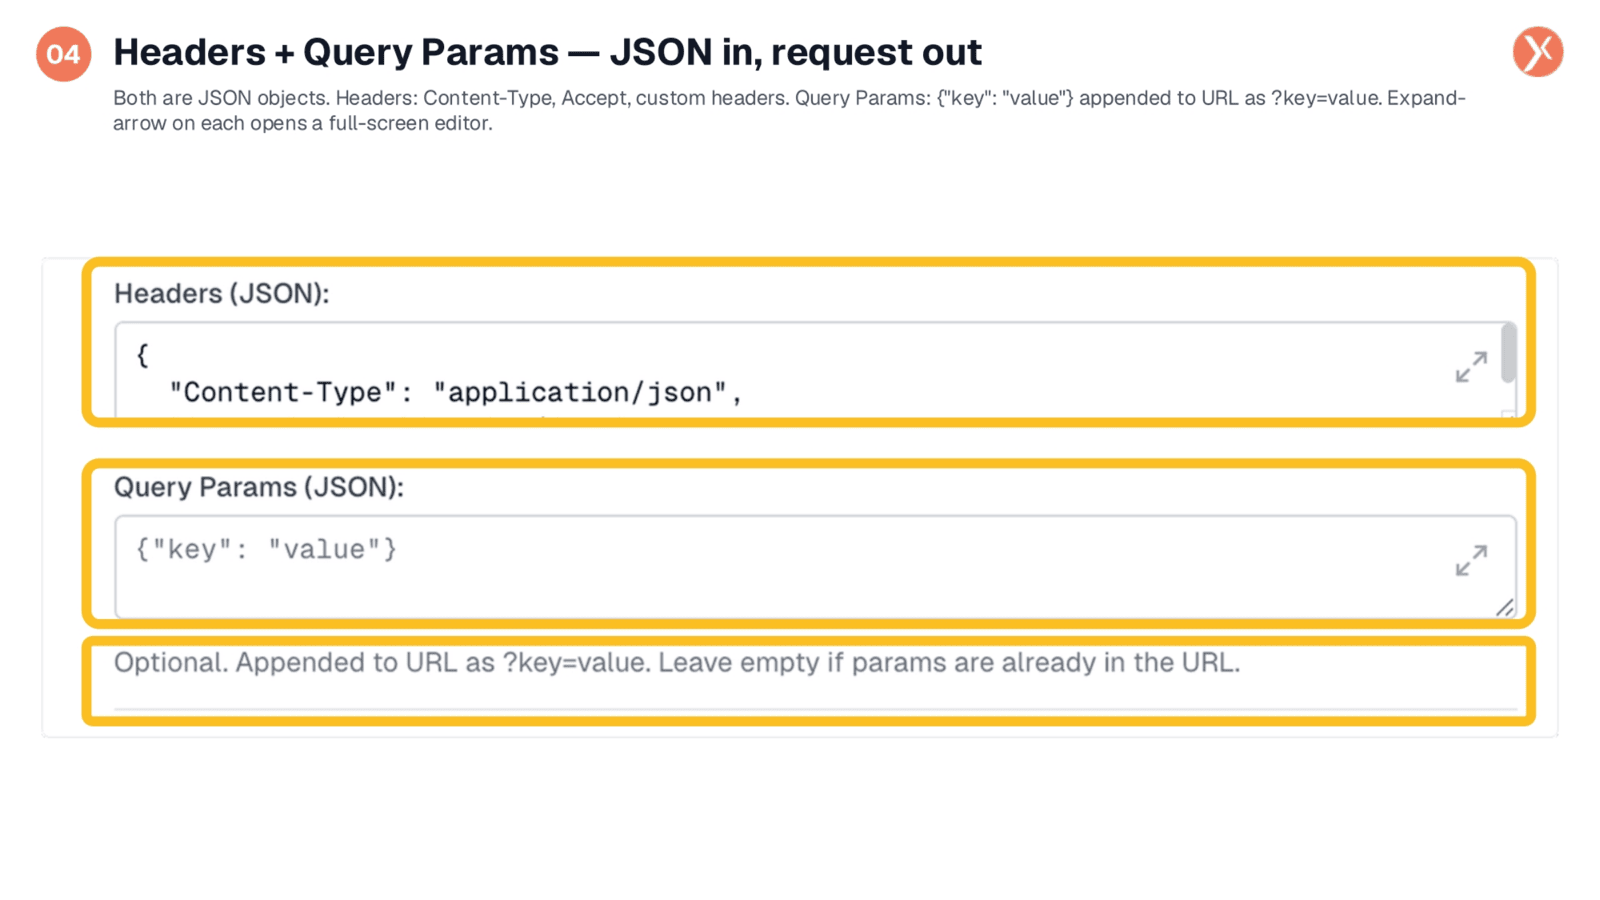
The Headers and Query Parameters fields both accept JSON inputs, streamlining how you define request components. For Headers, you can specify Content-Type for JSON bodies, Accept for desired response formats, and any custom headers required by the API. Query Parameters allow you to define key-value pairs in JSON, which Expedify automatically appends to your URL. It's important to leave this field empty if your parameters are already embedded in the URL. Each of these JSON fields also features an expand arrow, which opens a full-screen editor for easier input and variable insertion.
Full-Screen Editor with Variable Insertion
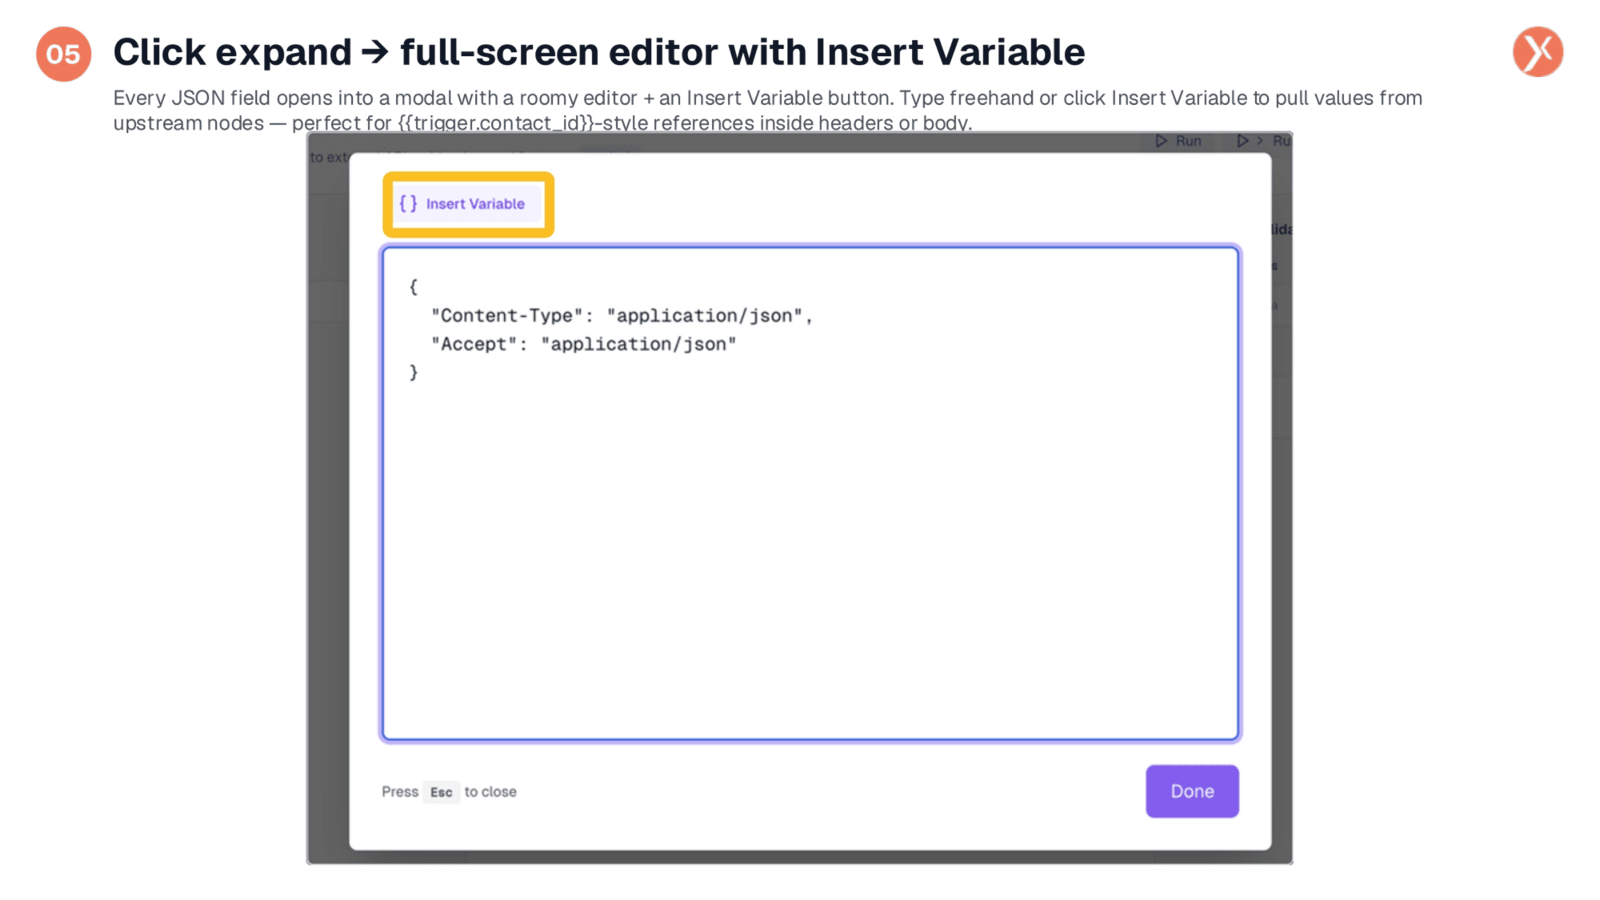
Clicking the expand arrow on any JSON field opens a dedicated full-screen editor, significantly enhancing readability and ease of editing compared to the inline box. This spacious modal also includes an 'Insert Variable' button at the top. This feature allows you to seamlessly pull values from upstream nodes and splice them directly into your JSON, whether for an Authorization header or a request body field. This capability is perfect for dynamic values, such as a contact ID from a trigger payload. You can close the editor by pressing 'Esc' or clicking 'Done' to save your changes.
Request Body Appears for Data-Carrying Methods
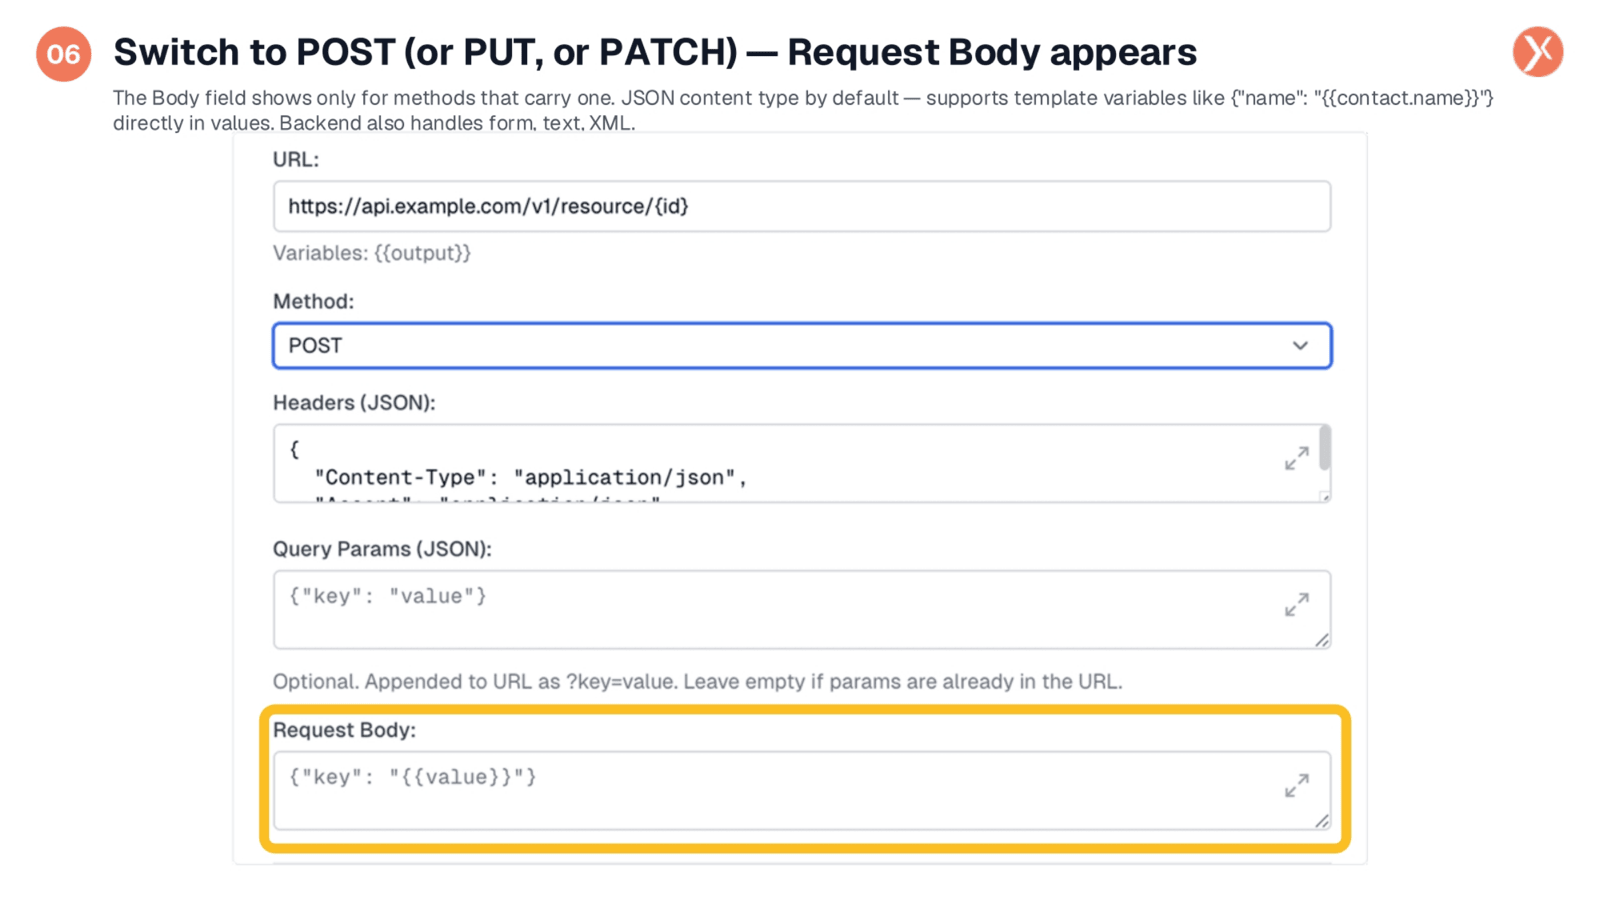
When you switch the HTTP method to POST, PUT, or PATCH, a Request Body field becomes visible at the bottom of the form. These methods are designed to carry data, and the Request Body is where you define that payload. By default, the content type is JSON, which is the standard for most modern APIs. You can construct the body as a JSON object, and importantly, embed template variables directly into the values. This allows the body to act as a dynamic template, populated at runtime with data from upstream nodes. While JSON is the primary format, the backend also supports form-encoded data, XML, and plain text.
Authentication Type Selection
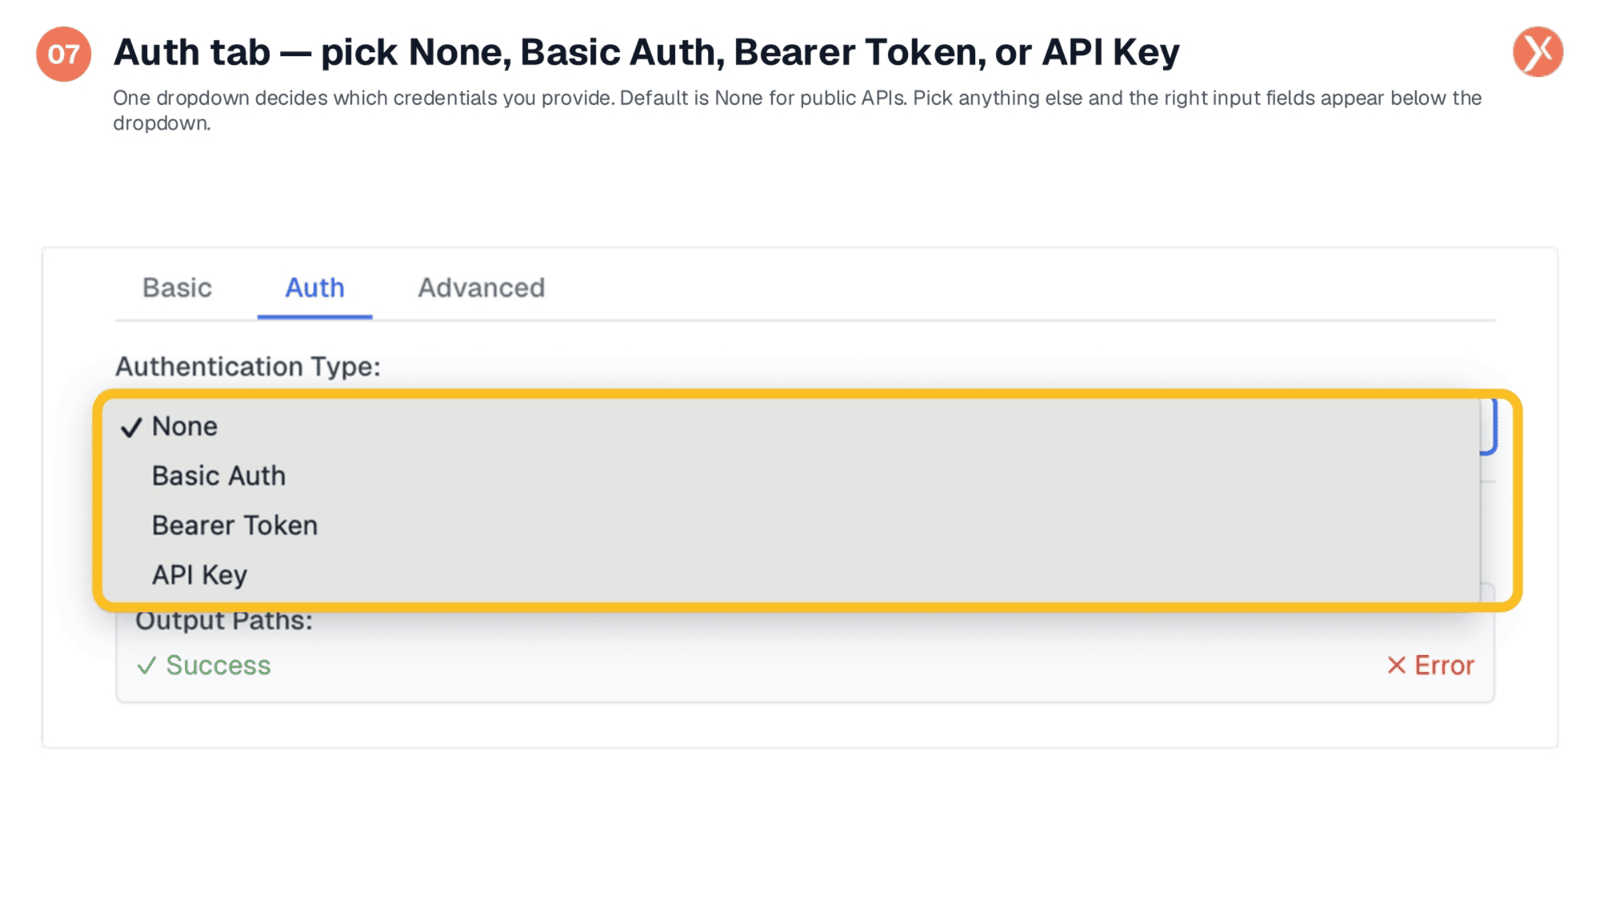
The Auth tab features a single dropdown menu, 'Authentication Type,' which controls all credential-related settings. This dropdown allows you to choose from several options: 'None' for public endpoints that don't require authentication, 'Basic Auth' for traditional username and password patterns, 'Bearer Token' for modern token-based authentication, and 'API Key' for custom header-based keys. Selecting any option other than 'None' will reveal the appropriate input fields below the dropdown, guiding you to provide the necessary credentials for your API calls. This streamlined approach simplifies the authentication configuration process.
Basic Authentication with Username and Password
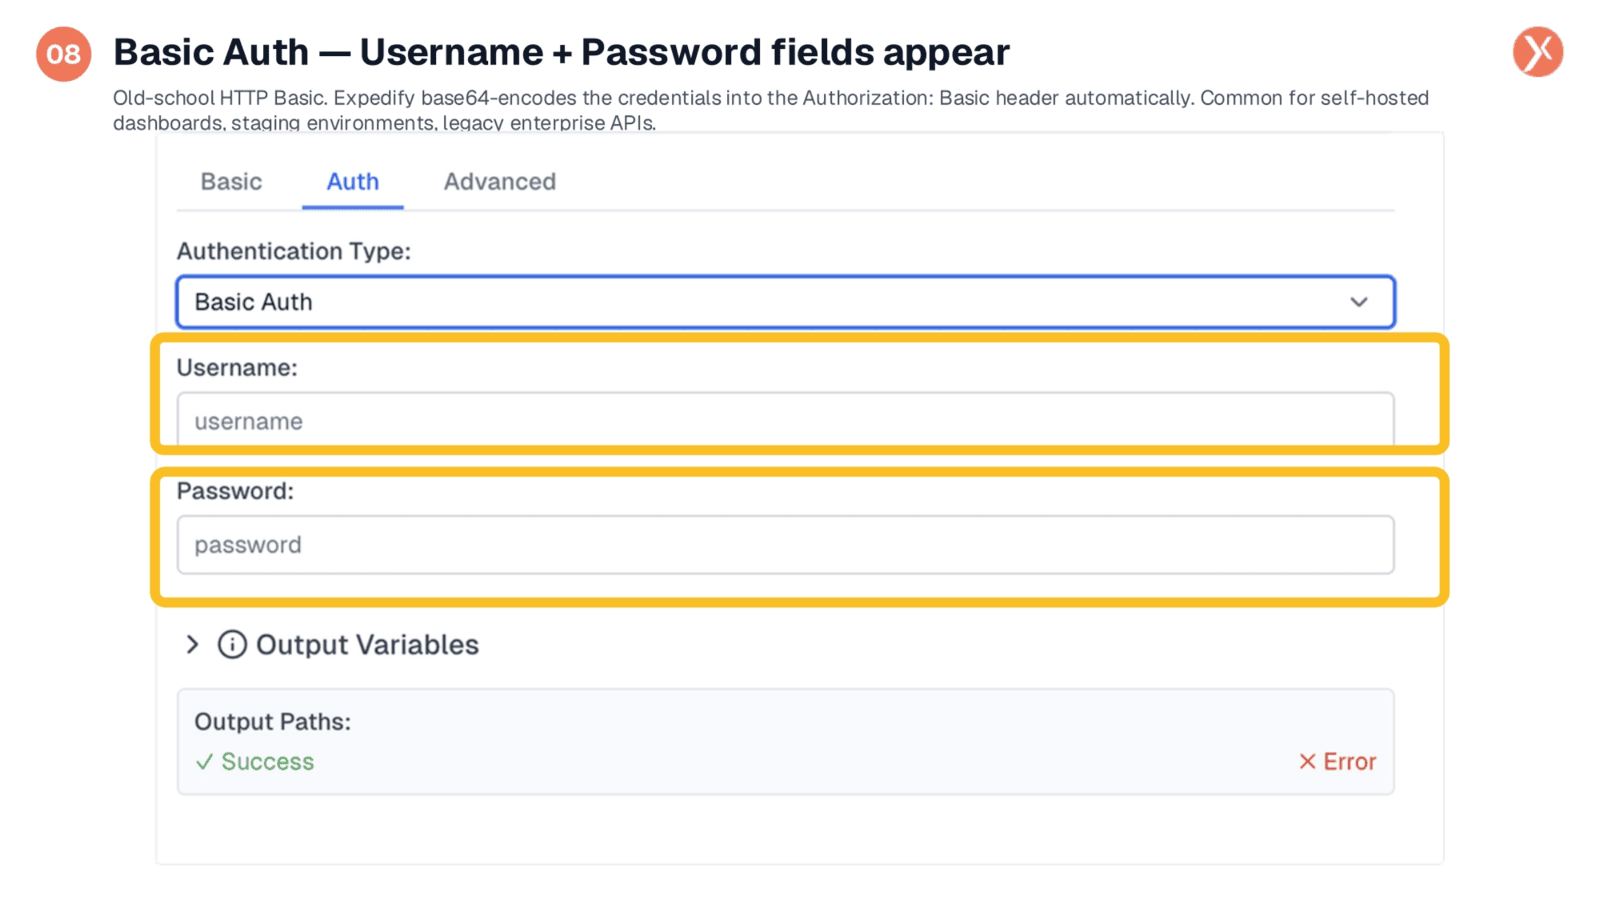
Selecting 'Basic Auth' from the Authentication Type dropdown reveals two dedicated fields: 'Username' and 'Password.' This option implements the traditional HTTP basic authentication pattern. When you input your credentials, Expedify automatically base64-encodes them and inserts them into an 'Authorization: Basic' header for every request, eliminating the need for manual header formatting. This method is commonly used for self-hosted dashboards, internal administration tools, staging environments, and various legacy enterprise APIs. It's the go-to choice when a third-party API provides a username and password for access.
Bearer Token Authentication
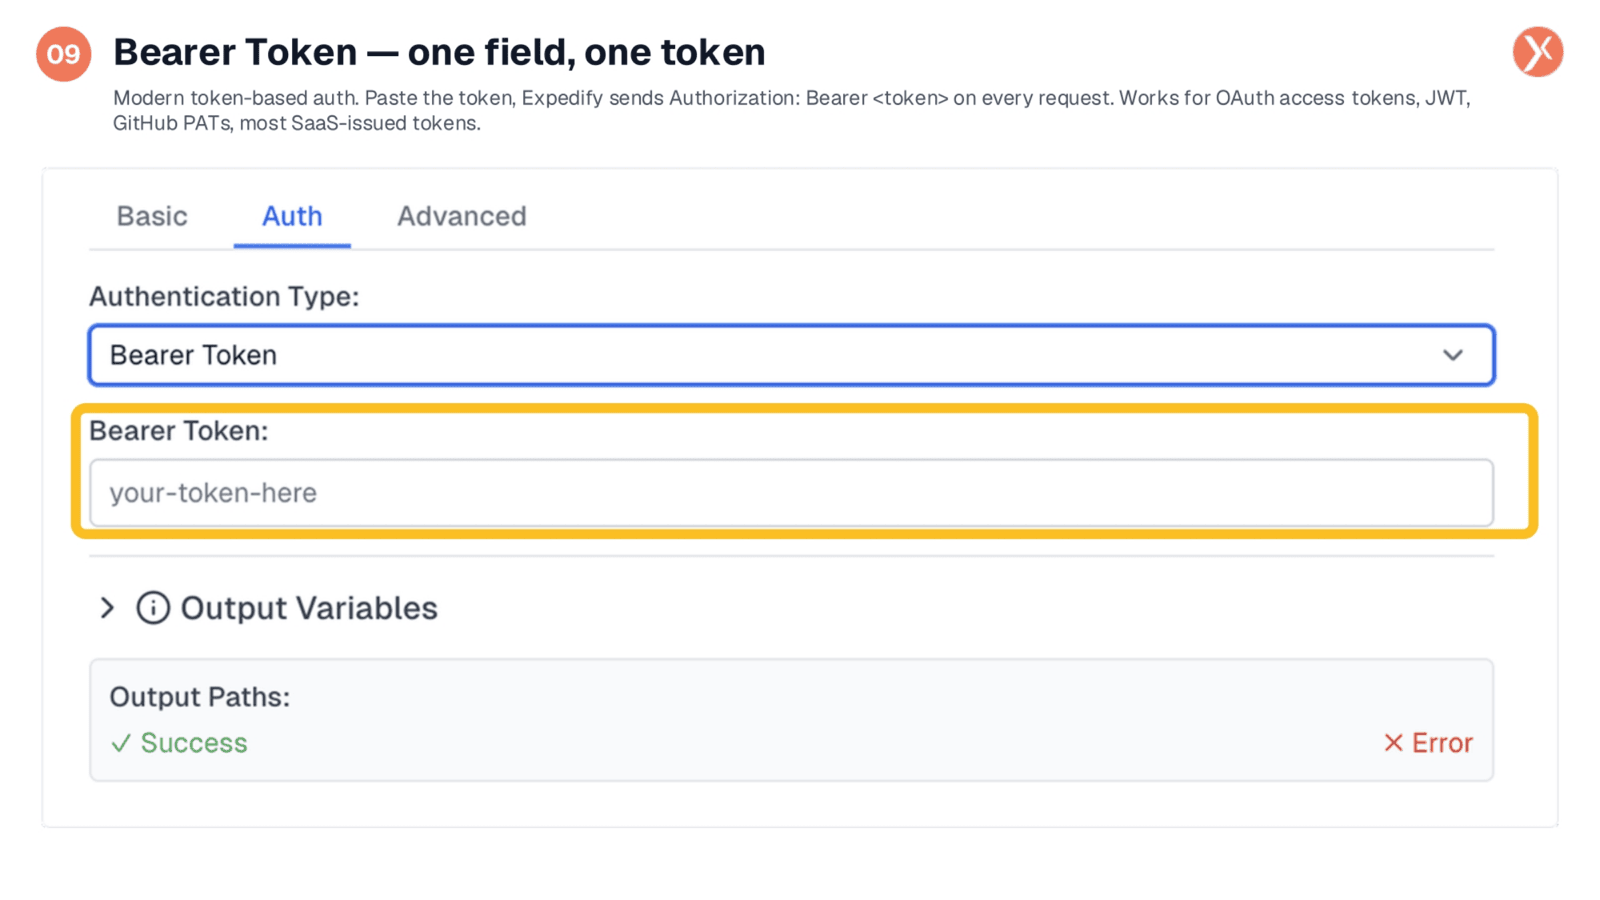
For modern token-based authentication, the 'Bearer Token' option is ideal. When selected, a single 'Bearer Token' field appears. You simply paste your access token into this field, and Expedify automatically includes an 'Authorization: Bearer ' header with every request. This method is widely adopted for OAuth access tokens, JWT tokens, GitHub personal access tokens, OpenAI API keys, and Stripe secret keys, covering most modern SaaS-issued tokens. You can also dynamically pipe in a token from an earlier node using a template variable, providing flexibility for dynamic token management.
API Key Authentication
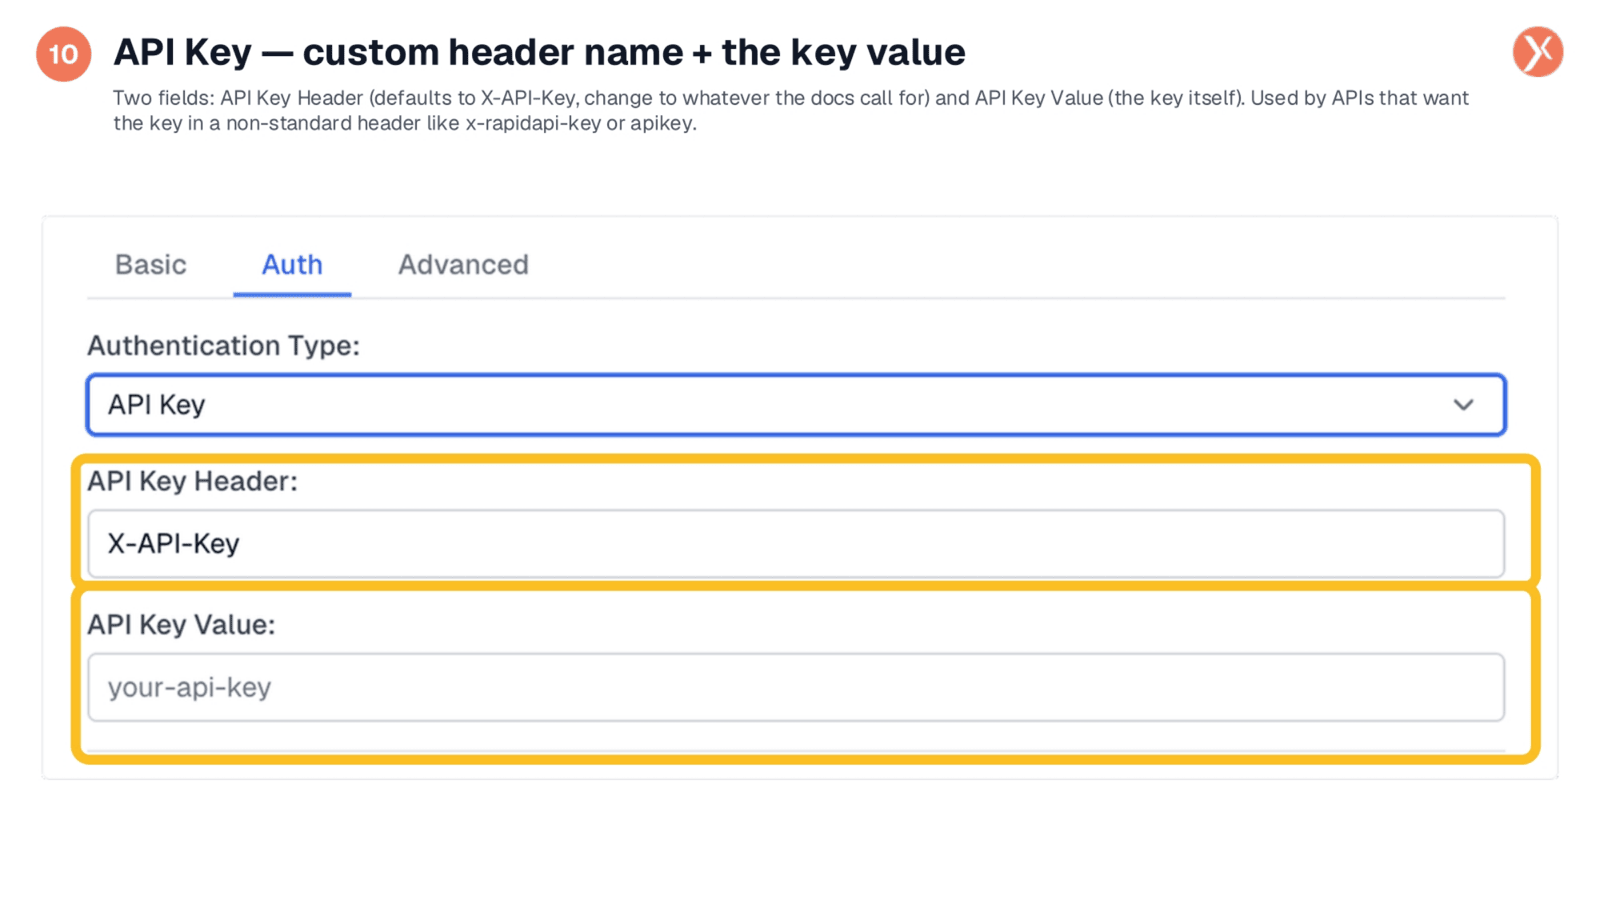
The 'API Key' authentication type provides two fields for custom header-based keys. The 'API Key Header' field defaults to 'X-API-Key,' which is a common convention, but you should adjust it to match the exact header name specified in the API's documentation, such as 'x-rapidapi-key' or 'apikey.' The 'API Key Value' field is where you paste the actual key itself. Expedify then sends this key as a custom header with every request. This option is used when an API requires a key within a specific header, rather than using Bearer tokens or basic authentication.
Advanced Operational Settings
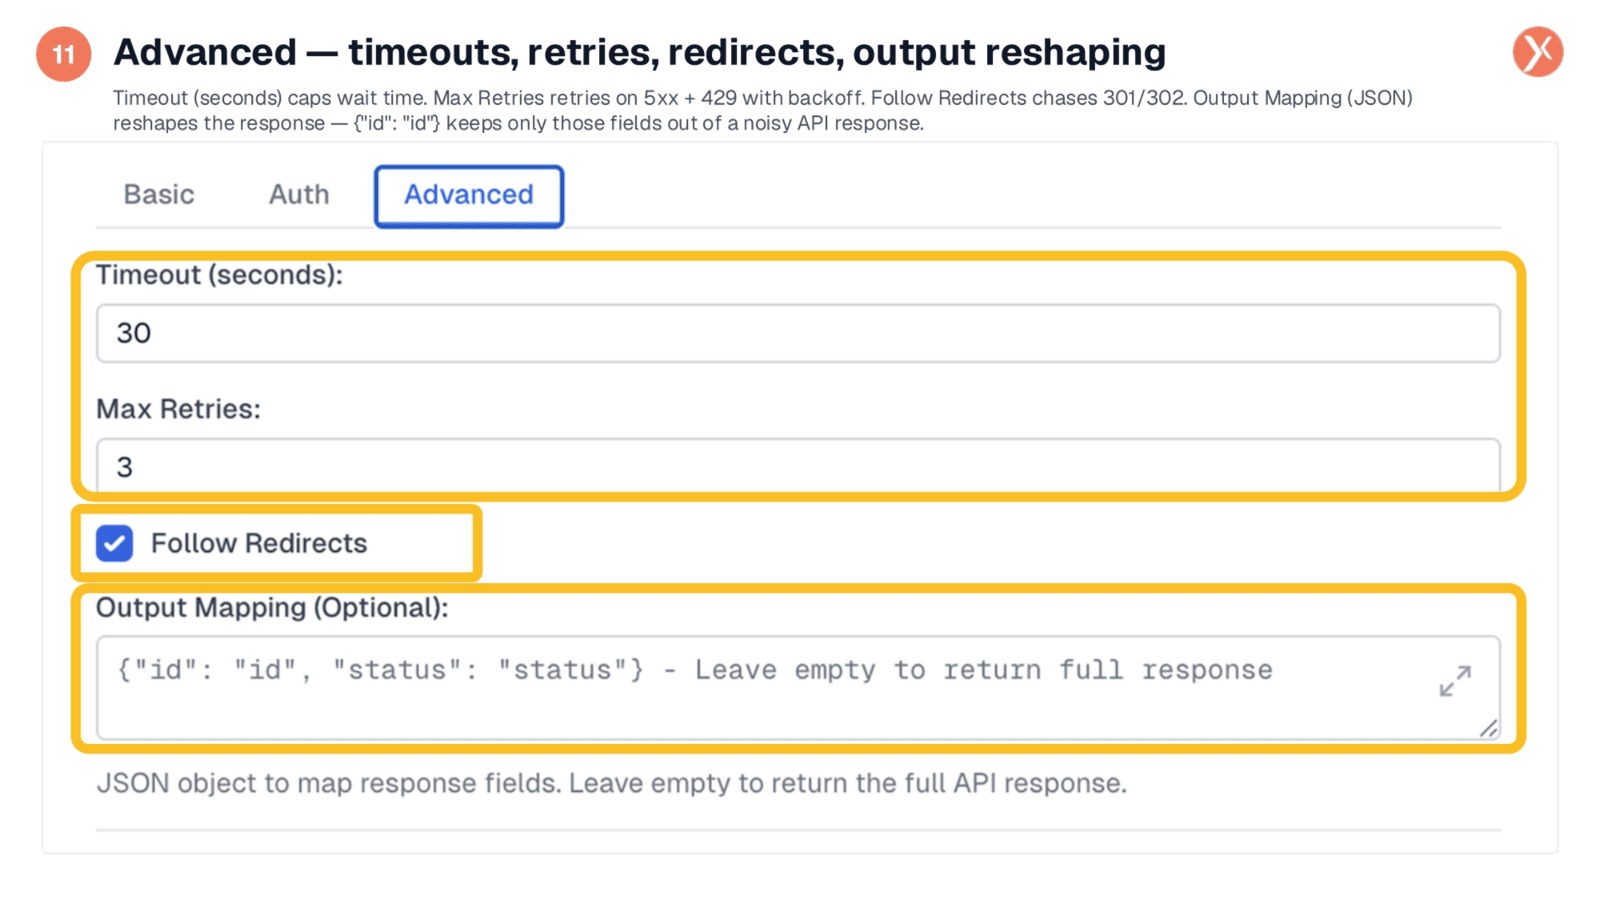
The Advanced tab offers crucial operational settings to fine-tune your API requests. The 'Timeout (seconds)' field sets the maximum wait time for a response, with a default of 30 seconds, adjustable for varying API speeds. 'Max Retries,' defaulting to three, automatically reattempts requests on 5xx server errors and 429 rate-limit responses, incorporating exponential backoff. The 'Follow Redirects' option, enabled by default, ensures that 301 and 302 redirects are automatically handled. Finally, 'Output Mapping' allows you to reshape the API response by specifying a JSON object, returning only desired fields and reducing noise. Leaving it empty returns the full response.
API Request Node Outputs
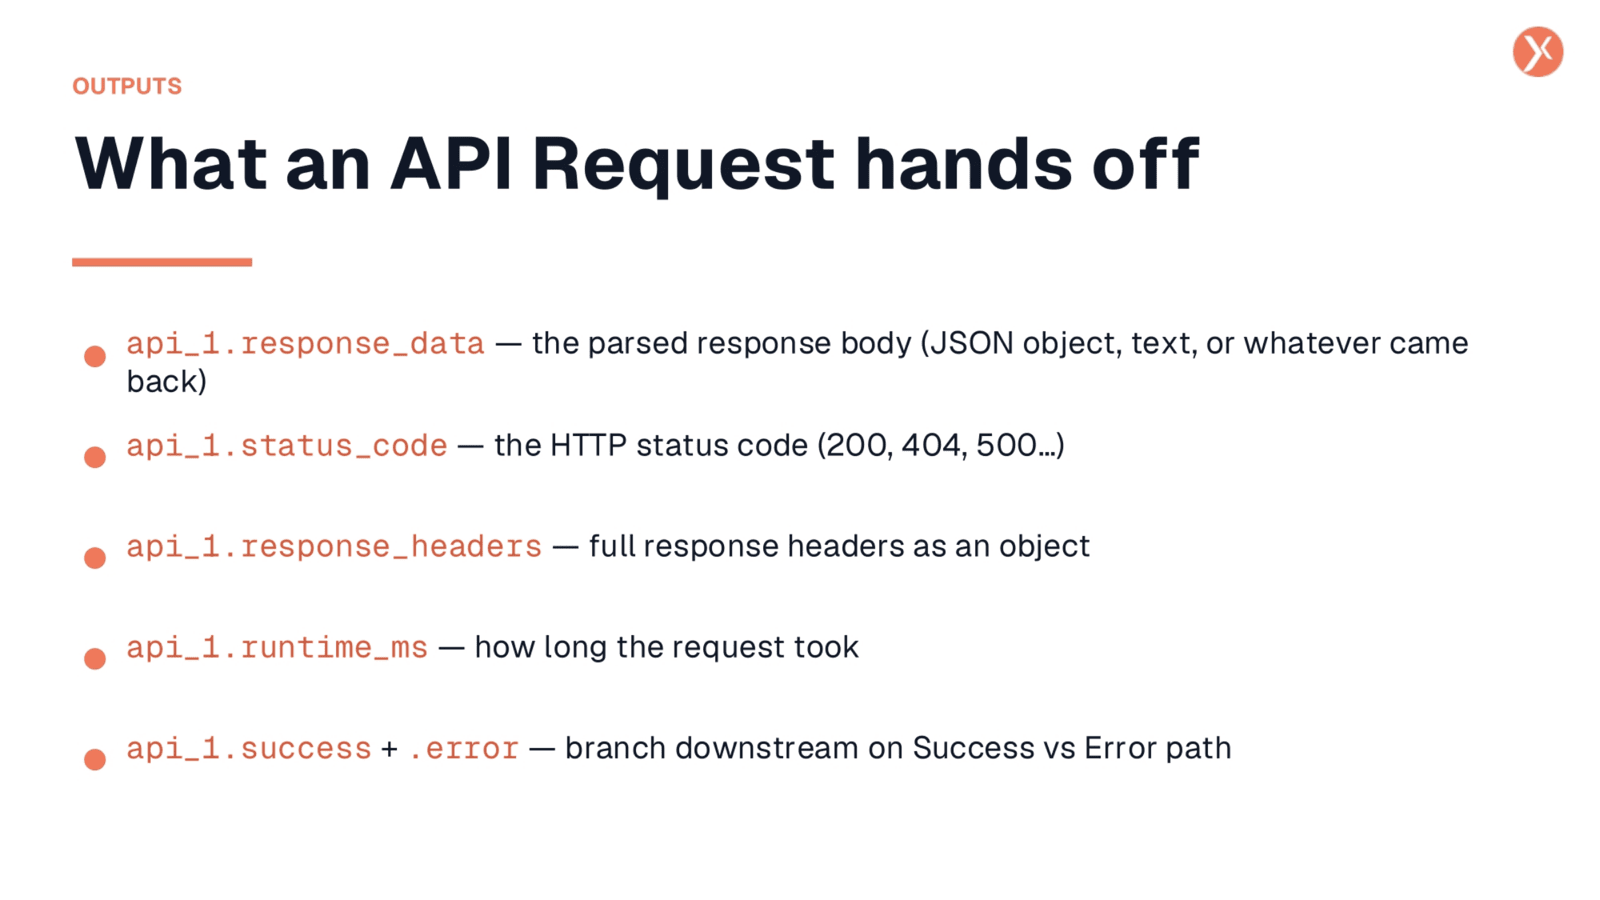
The API Request node provides several valuable outputs for downstream nodes to utilize. api_1.response_data delivers the parsed response body; this will be a JSON object if the API returned JSON, or a string for text responses. api_1.status_code provides the HTTP status code, indicating success (like 200) or various errors (such as 404 or 500). api_1.response_headers offers the full set of response headers. api_1.runtime_ms shows the duration of the API call, useful for performance monitoring. Lastly, api_1.success and api_1.error differentiate the two output paths, allowing you to branch your workflow based on the request's outcome.
Recap: The API Request Node
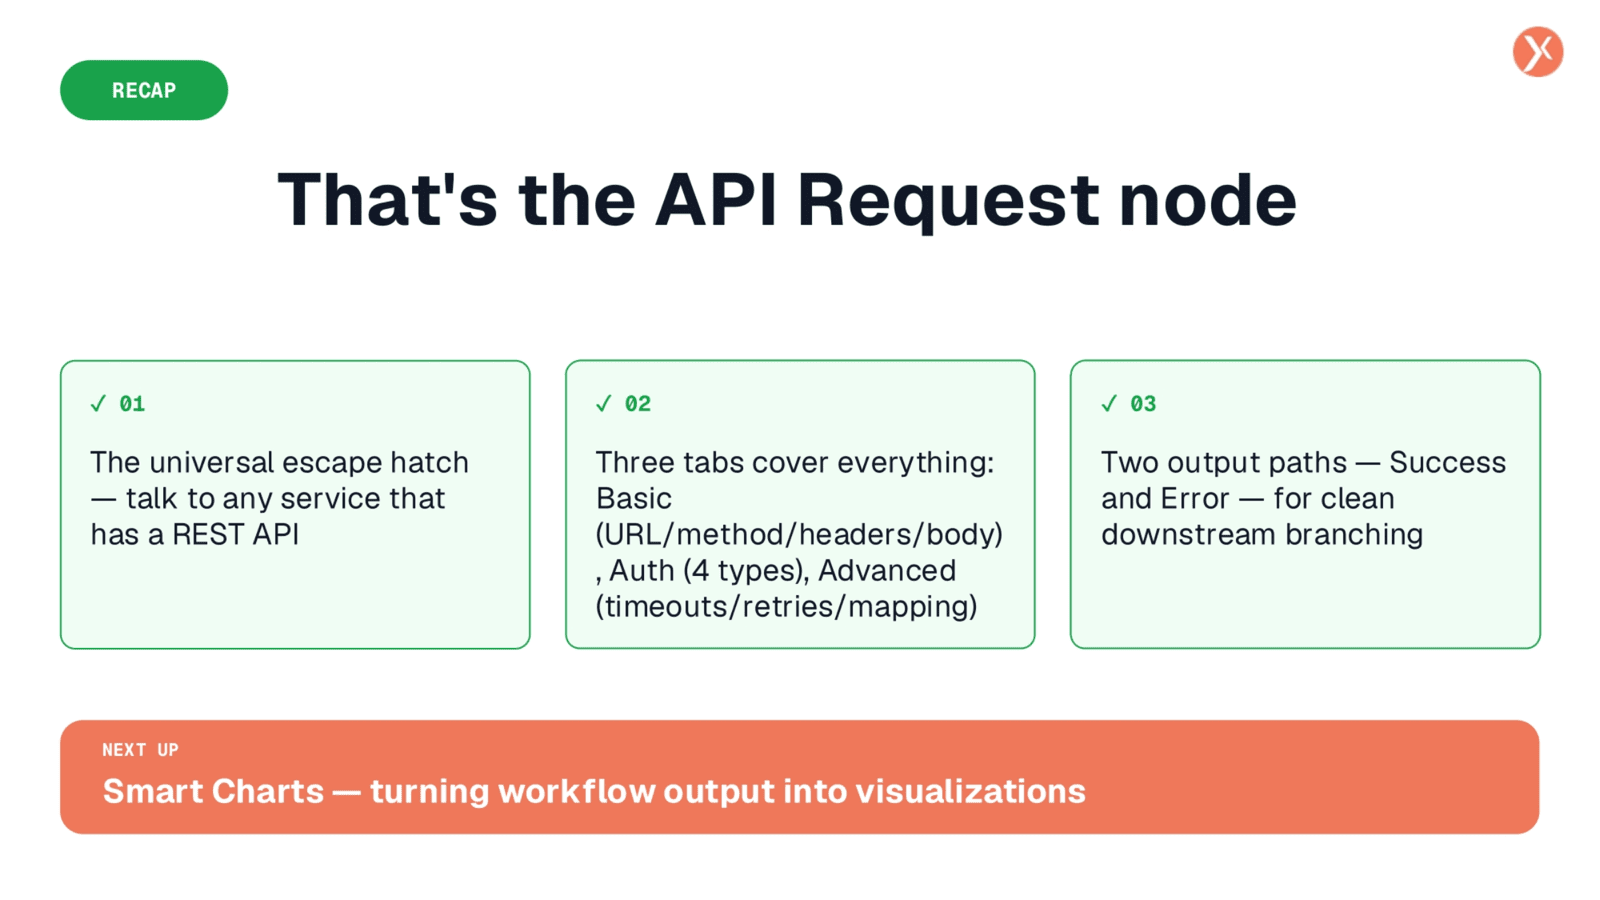
In summary, the API Request node serves as Expedify's universal escape hatch, enabling communication with any service that offers a REST API. It provides comprehensive control through its three tabs: Basic for URL, method, headers, and body; Auth for four distinct authentication types; and Advanced for managing timeouts, retries, and output mapping. The node also offers two clear output paths, Success and Error, facilitating clean downstream branching in your workflows. Next, we'll explore Smart Charts, a node designed to transform workflow output into insightful visualizations.