Voice Outbound Action
Expedify's Voice Outbound Call action is the other half of our calling capabilities, focusing on placing calls. This powerful feature allows you to automate outbound calls using AI Voice Agents, seamlessly integrating into any workflow. It can dial a contact, hand the conversation to your AI Voice Agent, and pause the workflow until the call concludes, supporting both single calls and batch campaigns.
Voice Outbound Call Demo
Let's begin our demo of the Voice Outbound Call feature.
Workflow Integration of Voice Outbound Call
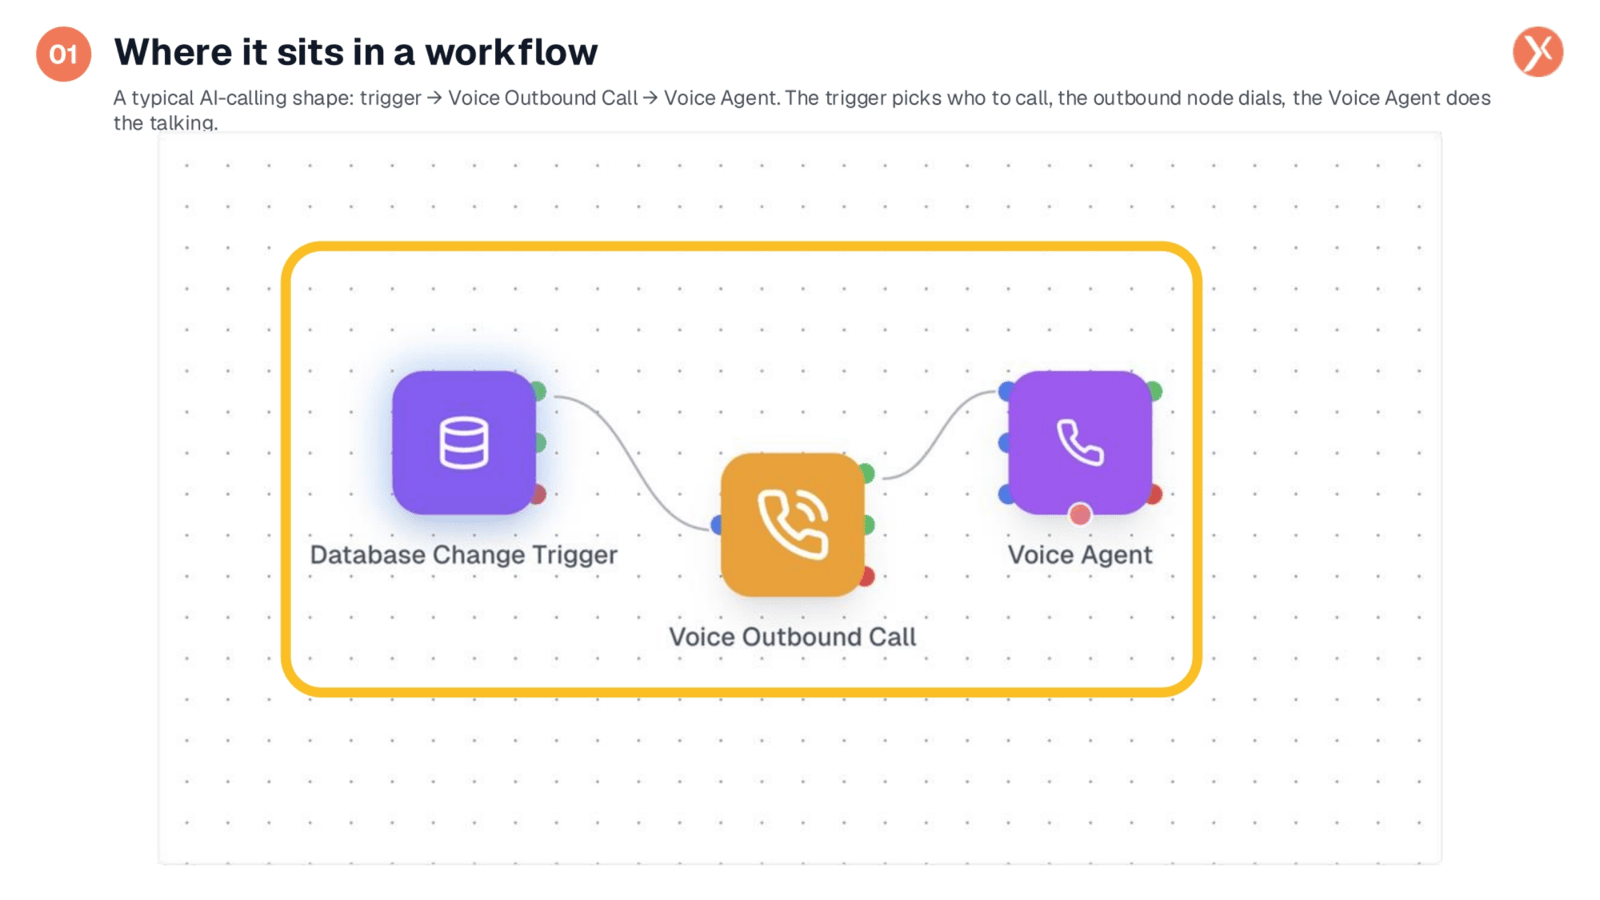
The Voice Outbound Call node typically sits within a workflow, connecting a trigger to a Voice Agent. For instance, a Database Change Trigger might fire when a new lead enters your CRM. The orange Voice Outbound Call node then acts as the bridge, taking the contact's phone number from the trigger and connecting them to your AI Voice Agent, which handles the conversation. This setup ensures a smooth, automated calling process.
Accessing Voice Outbound Call Configuration
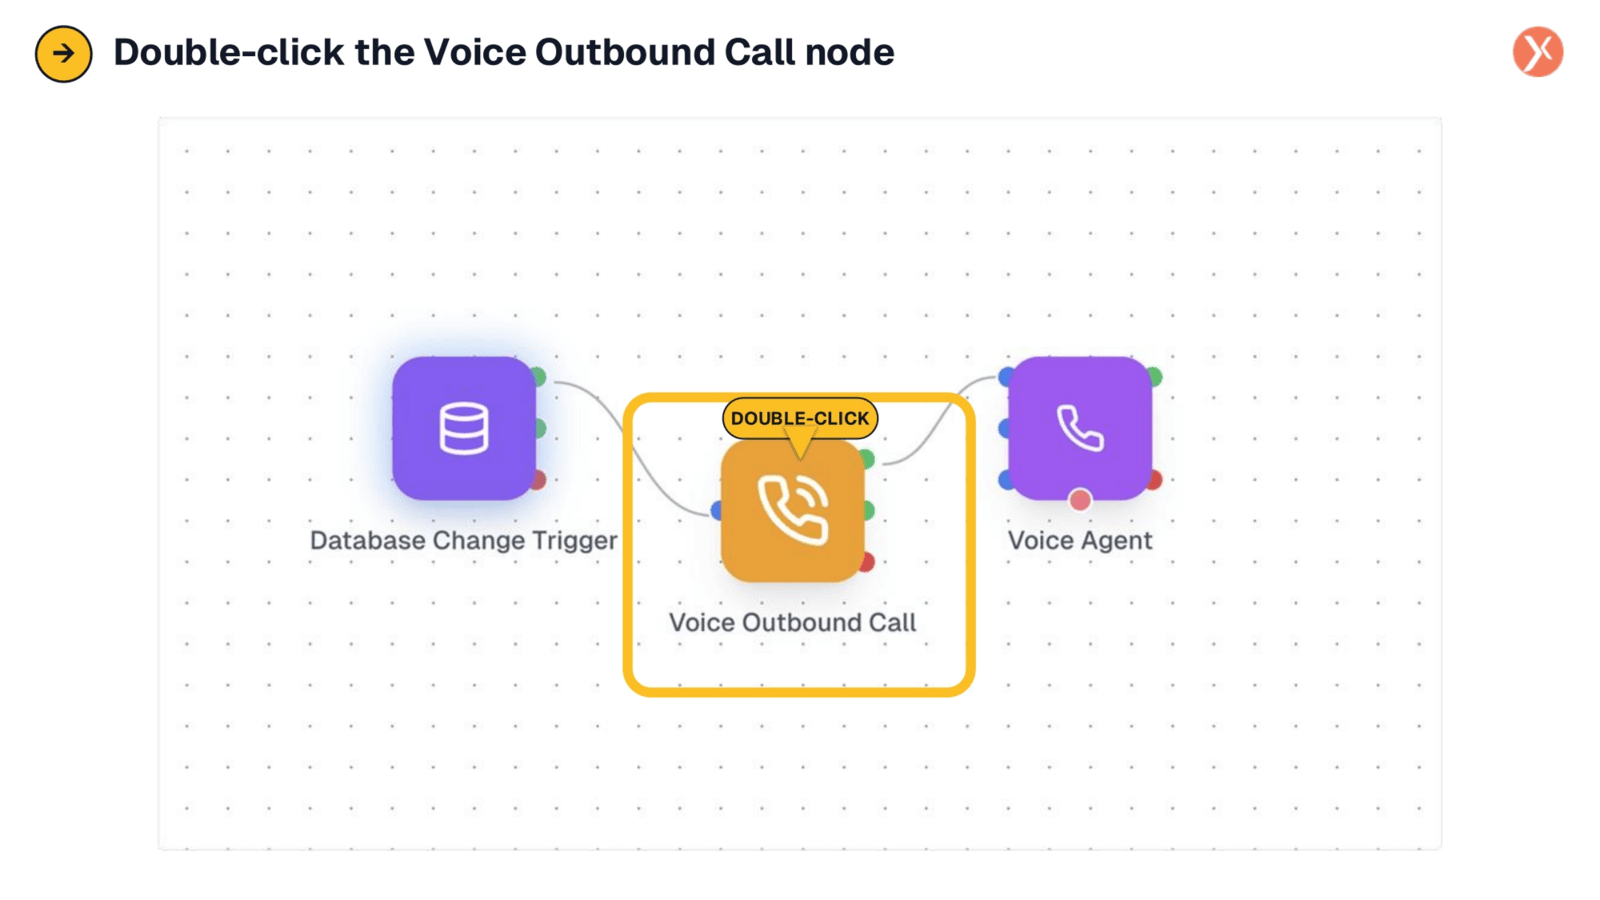
To configure the Voice Outbound Call node, simply double-click the orange node within your workflow. This action will open its configuration panel, allowing you to customize its settings.
Overview of Voice Outbound Call Configuration Tabs
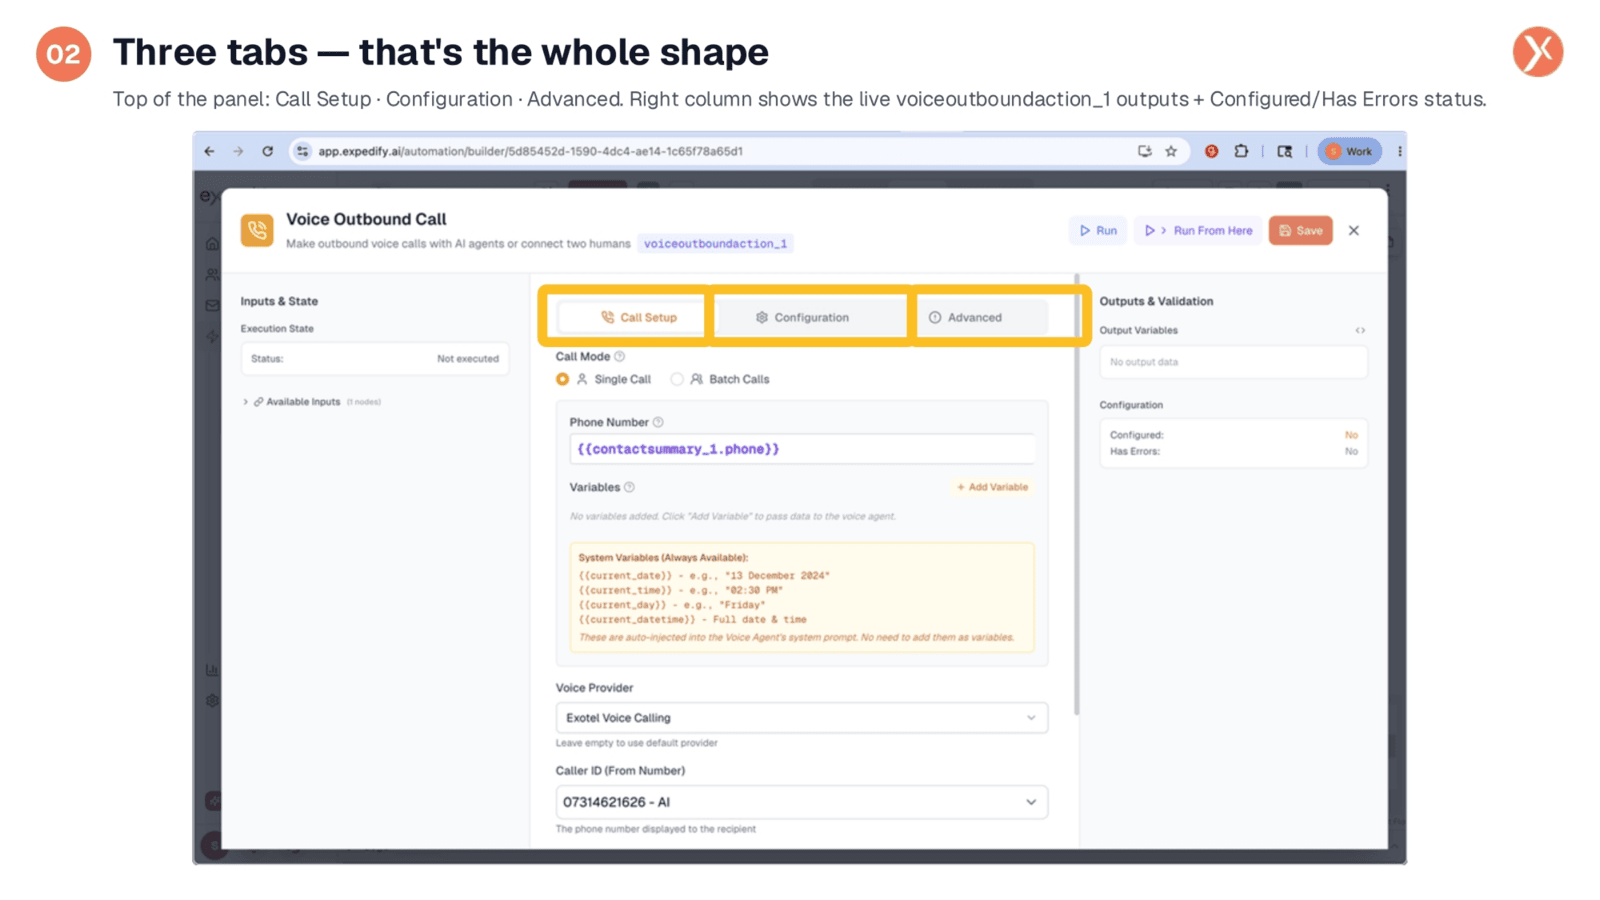
The configuration panel for Voice Outbound Call is organized into three main tabs: Call Setup, Configuration, and Advanced. Call Setup handles who you're calling and from which number. The Configuration tab is where you select the Voice Agent and manage recording options. Advanced settings cover compliance, timeouts, and retries. The panel also displays the variable namespace, voiceoutboundaction_1, for downstream nodes to read outputs, along with a live view of output variables and configuration status.
Call Mode: Single Call or Batch Campaigns
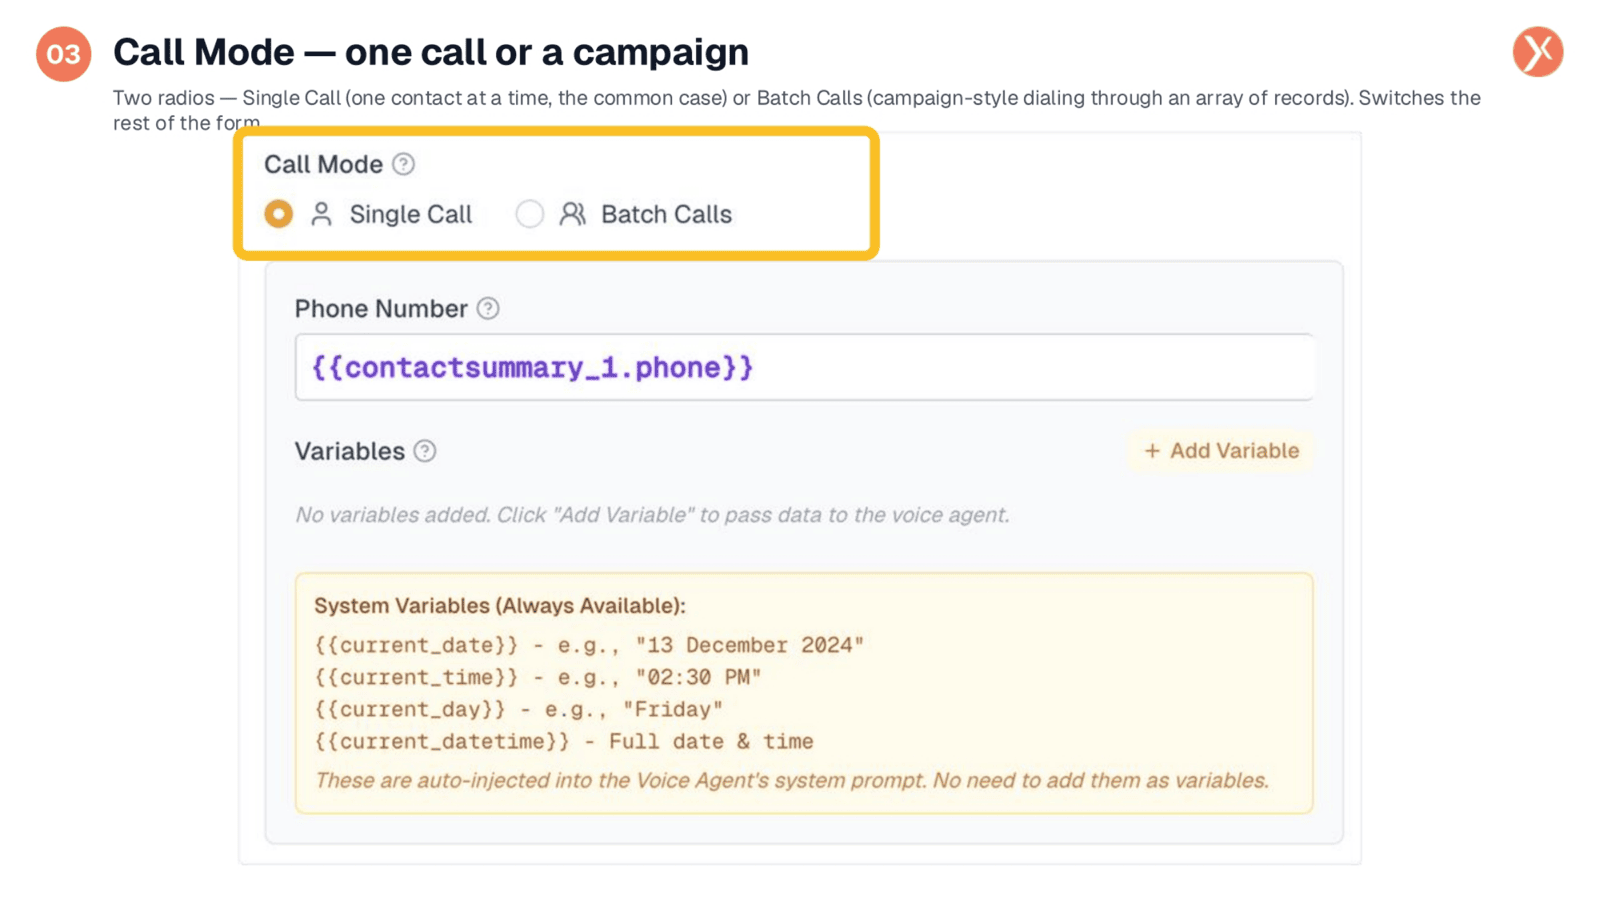
The first decision in Call Setup is selecting the Call Mode. Single Call is the most common option, where one trigger initiates one call to a single contact. Alternatively, Batch Calls transforms the tab into campaign mode, allowing you to dial an array of records from a previous node, such as a CRM search or a Google Sheets pull. This flexibility means the same node can support vastly different calling strategies.
Dynamic Phone Number Assignment
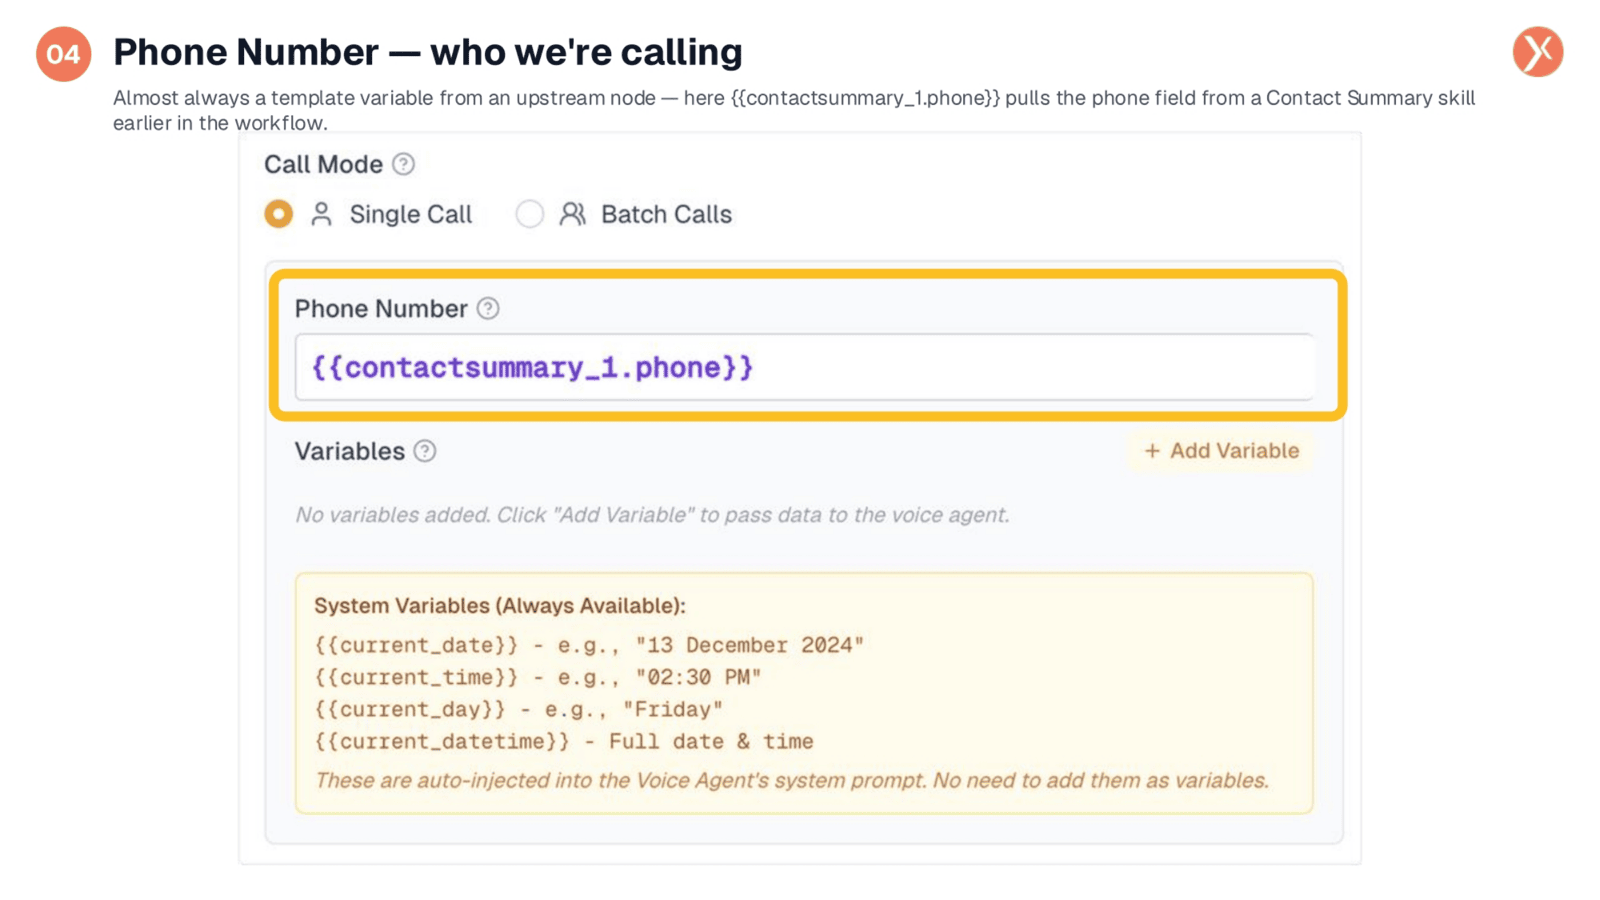
The Phone Number field specifies the target for the outbound call. In most production scenarios, this is a template variable, such as {{contactsummary_1.phone}}, which dynamically pulls the phone number from an upstream Contact Summary skill. While you can hardcode a number for testing purposes, using variables ensures that the workflow can adapt and call different contacts based on the trigger data.
Passing Context to the Voice Agent with Variables
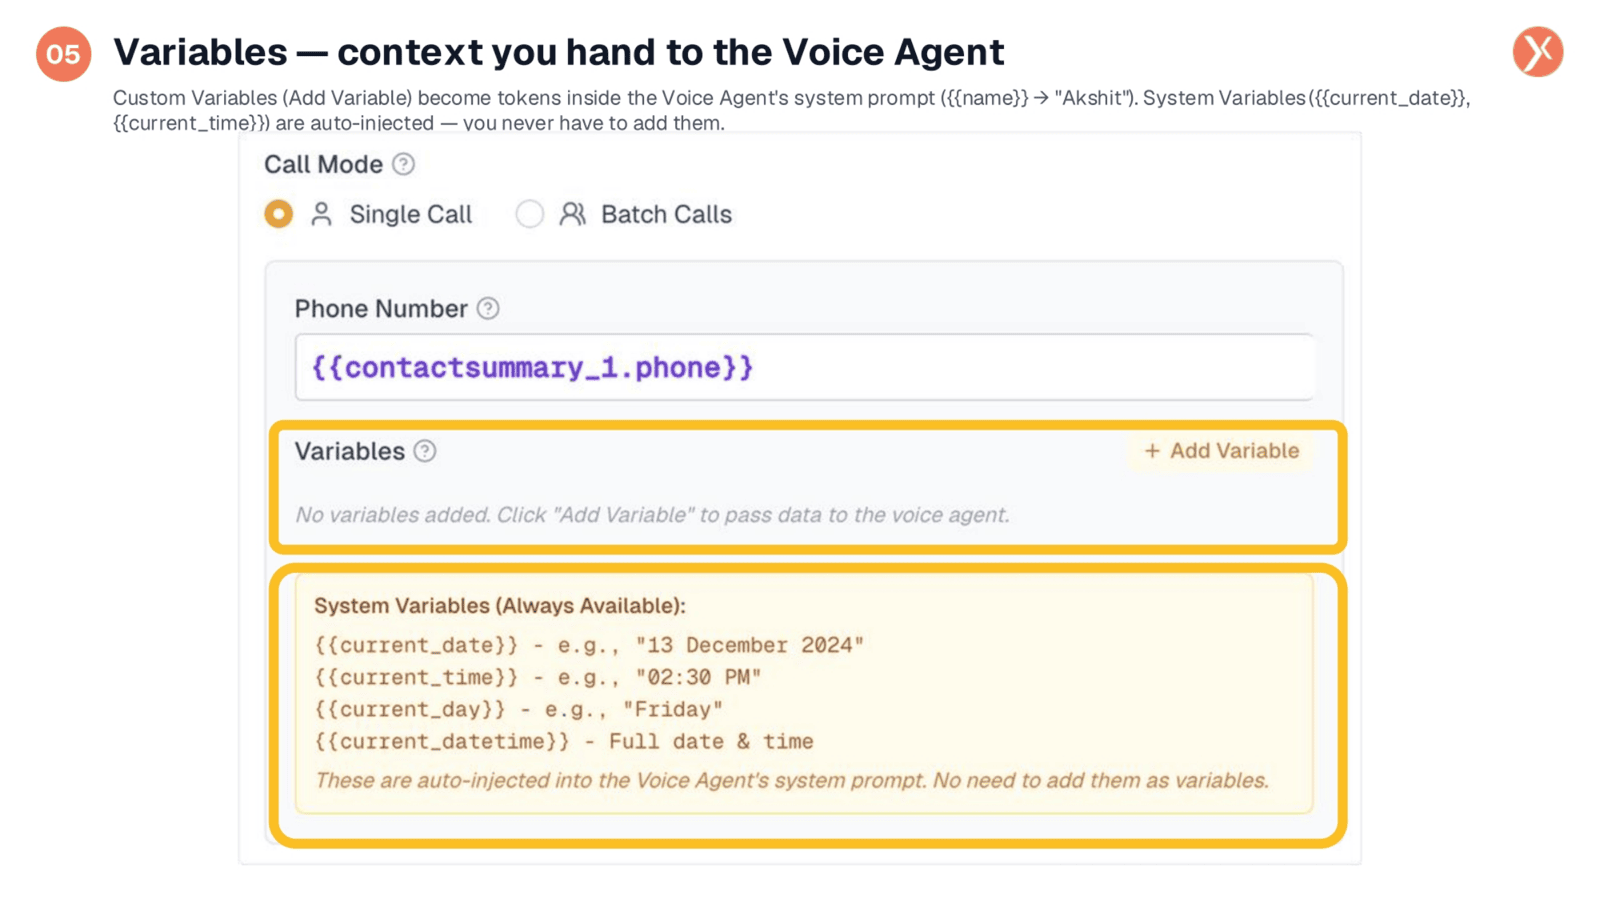
Variables are crucial for passing per-call context to your Voice Agent. By adding custom variables, you can define a key, like 'name', and assign a value, often from an upstream lookup. The Voice Agent then uses this information, for example, {{name}}, to personalize interactions. Additionally, system variables like current_date, current_time, current_day, and current_datetime are automatically injected into every Voice Agent's prompt, providing essential context without manual configuration.
Voice Provider and Caller ID Selection
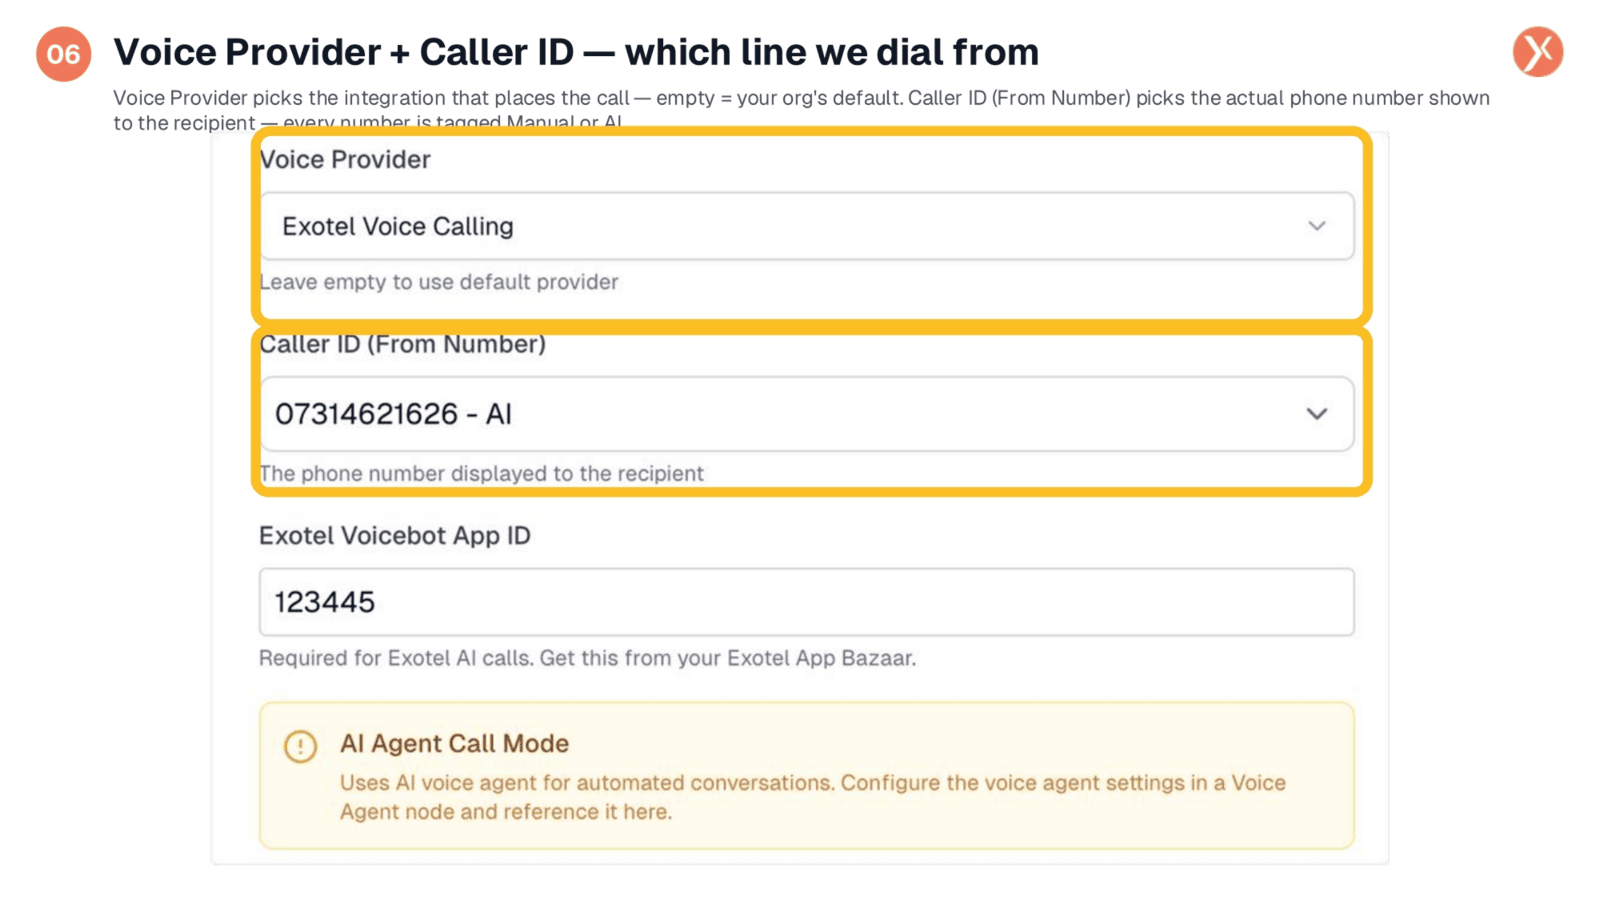
The Voice Provider field determines which integration places the call; leaving it empty defaults to your organization's primary provider. Caller ID specifies the phone number displayed to the recipient. It's critical to select the correct Caller ID, as numbers are tagged either 'Manual' for human-handled calls or 'AI' for voicebot calls. Choosing an AI-tagged number ensures the call is routed correctly through your Voice Agent.
Opening the Caller ID Dropdown
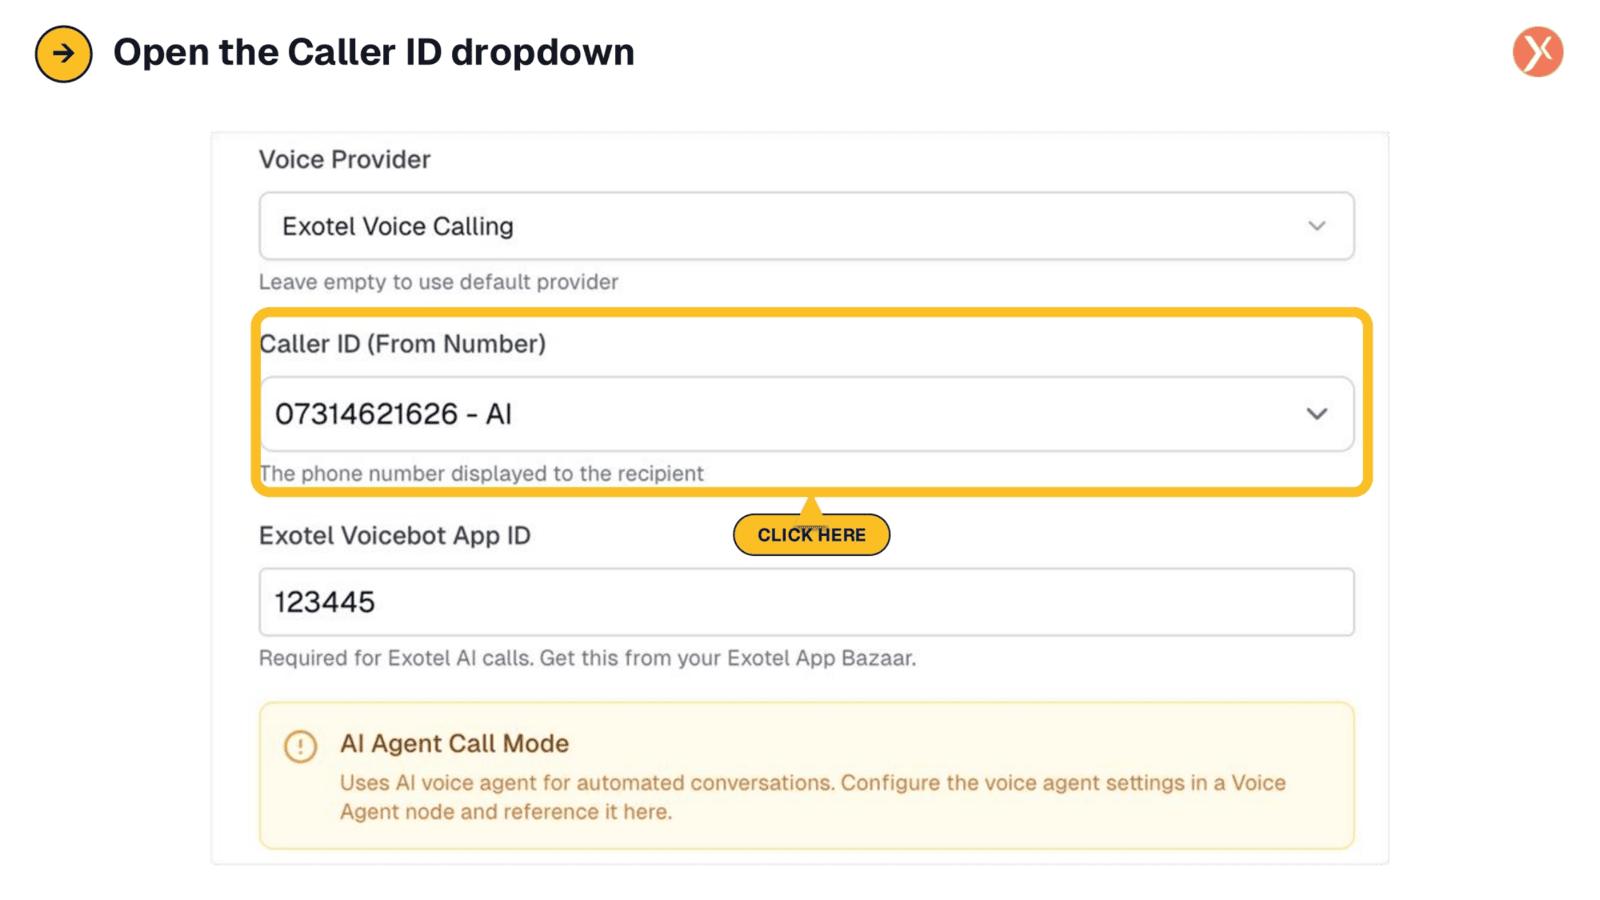
To view the available Caller ID options, simply click into the Caller ID field. This action will reveal a dropdown menu with various numbers and their associated tags.
Caller ID Options: Manual vs. AI Numbers
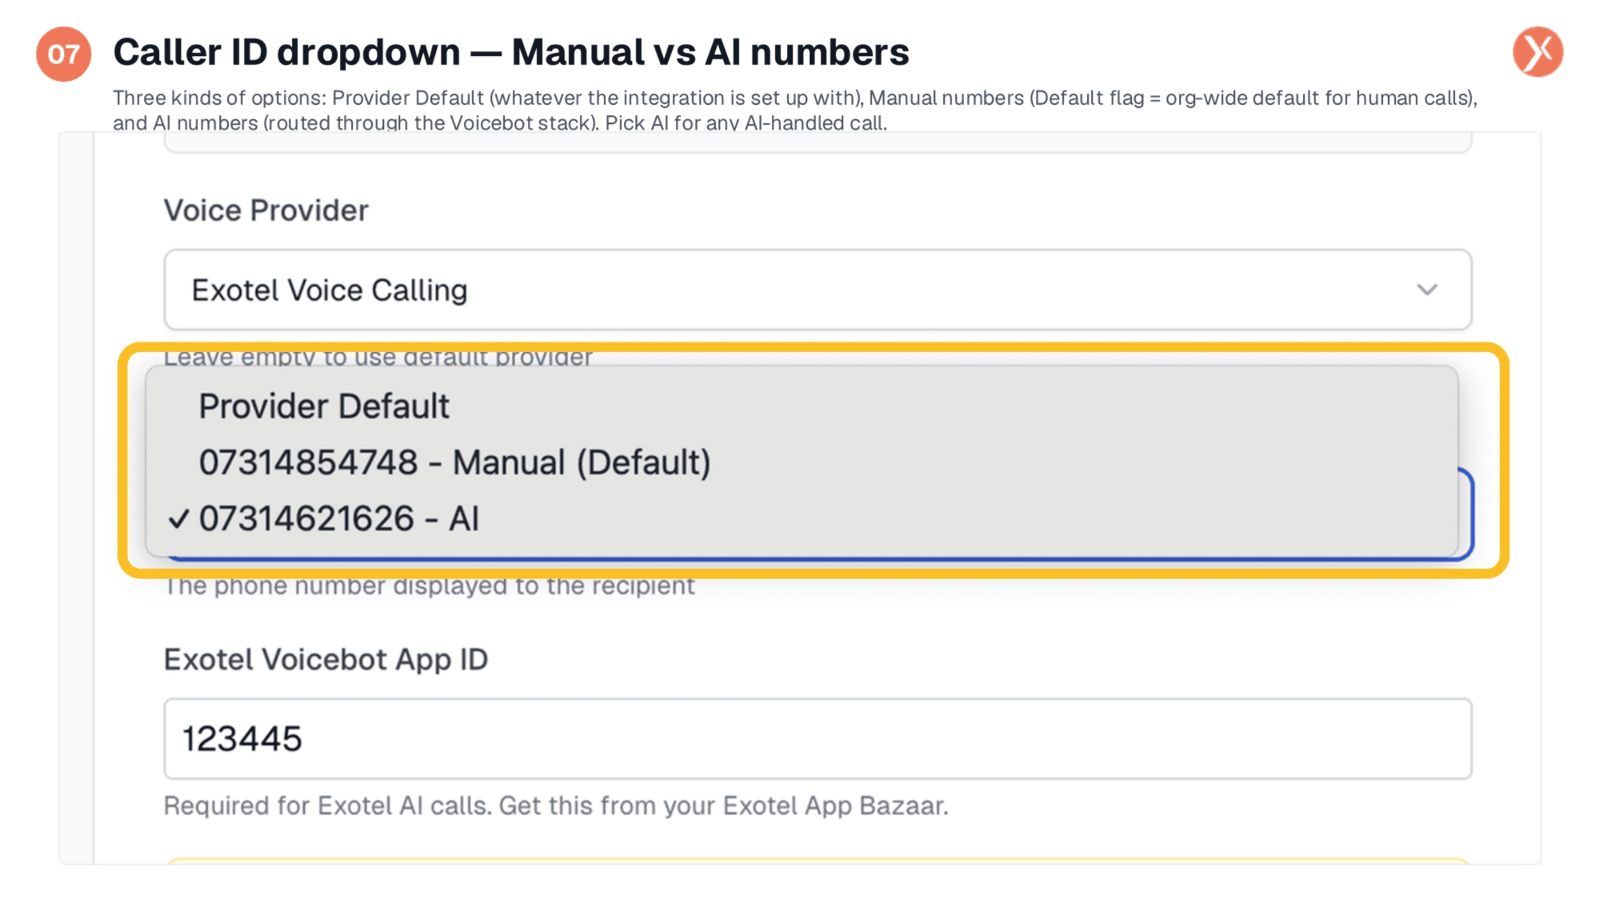
The Caller ID dropdown presents several options, including 'Provider Default', which defers to the integration's default setting. You'll also see numbers tagged 'Manual', typically the default for human-handled calls, and 'AI' numbers, specifically wired for voicebot applications. When using a Voice Agent in your workflow, it's essential to select an AI-tagged number to ensure the call is routed through the correct voicebot application, rather than a standard voice line.
Exotel Voicebot App ID for AI Calls
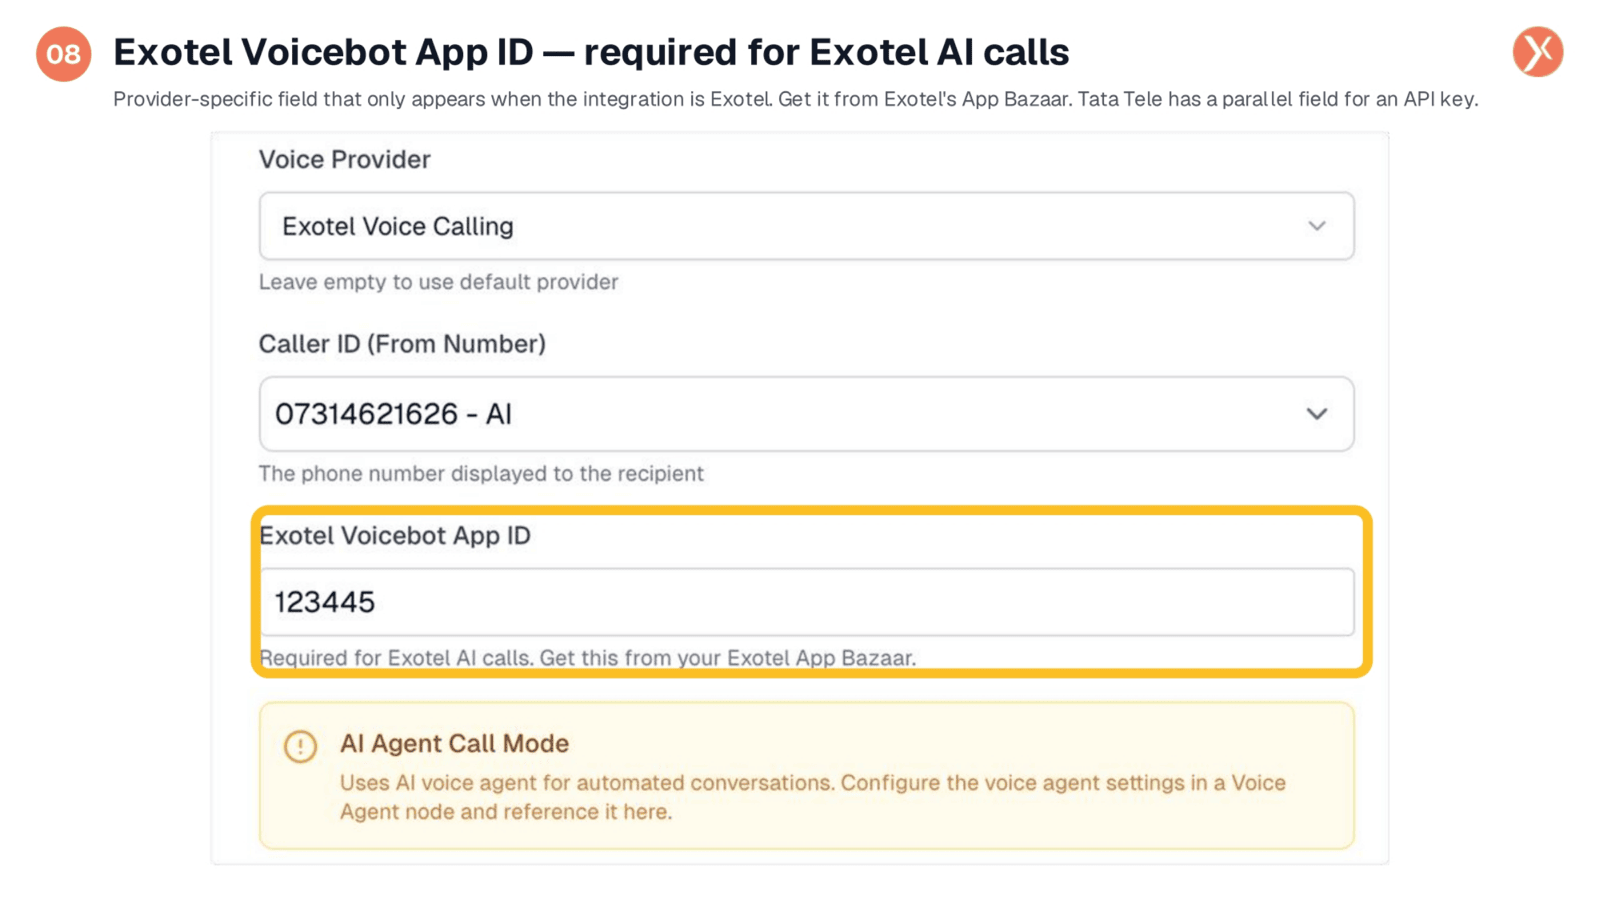
For Exotel integrations, the Voicebot App ID field is essential and only appears when Exotel is selected as the provider. This ID, obtained from your Exotel App Bazaar, links your AI calls to the specific voicebot pipeline configured on their platform. Other providers, such as Tata Tele, have similar API key fields. It's important to remember that AI Agent Call Mode always requires a configured Voice Agent node to function correctly.
Configuration Tab: Voice Agent and Recording Options
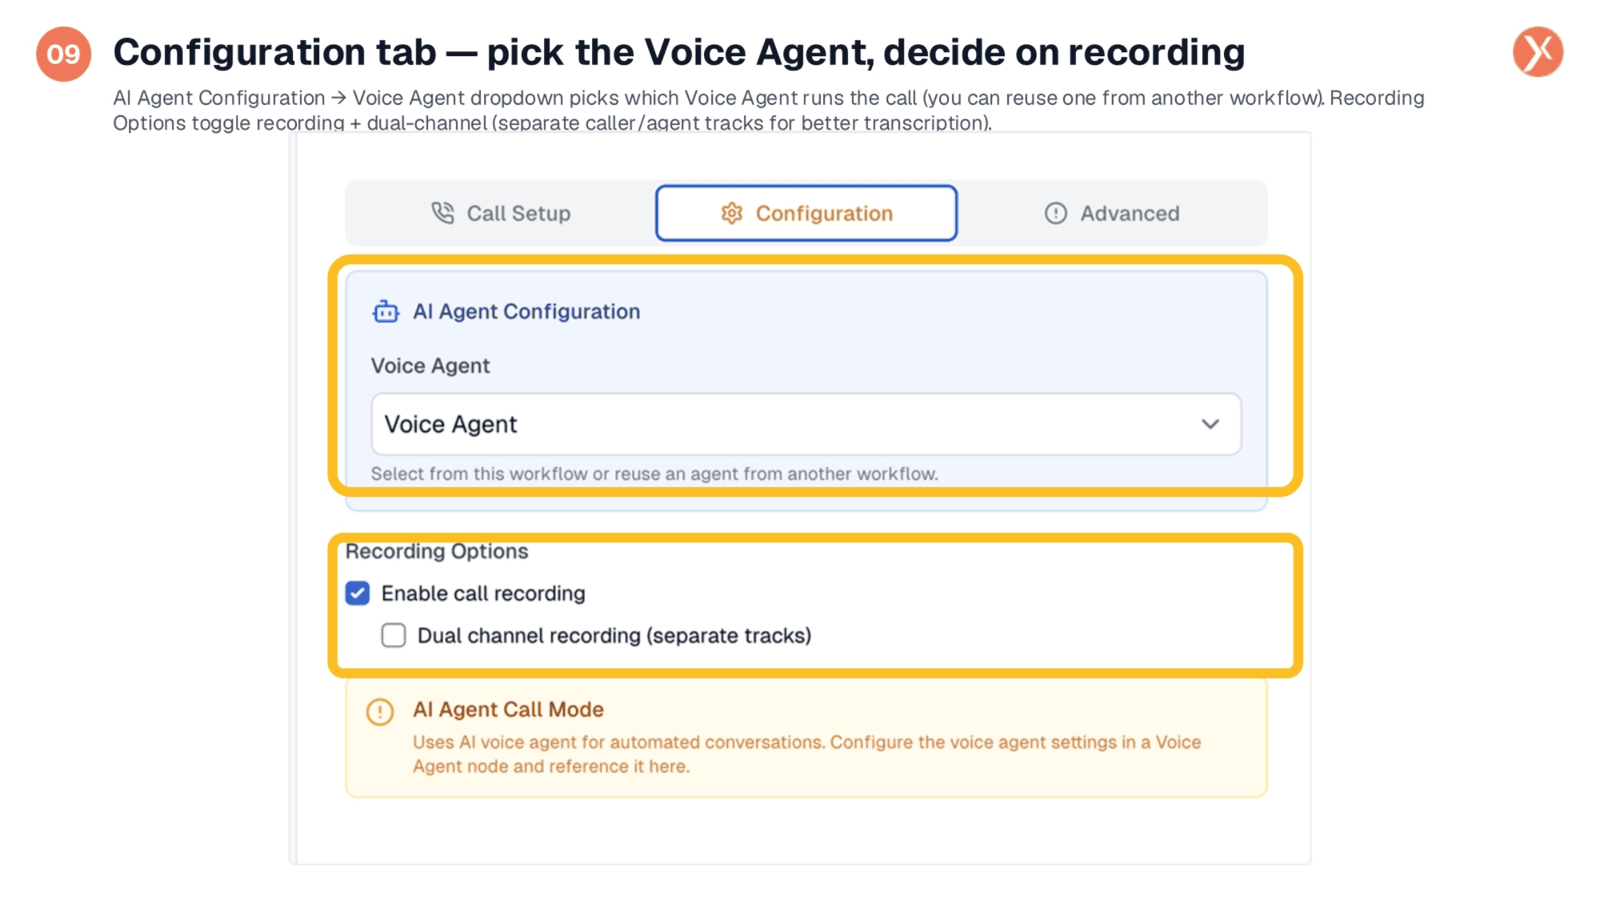
The Configuration tab allows you to select the Voice Agent that will handle the conversation. The dropdown lists all Voice Agents within the current workflow, as well as those from other workflows, promoting reuse. Additionally, this tab manages Recording Options. Enabling call recording, which is on by default, provides a recording and transcript. Dual-channel recording further enhances transcription quality by capturing the caller and agent on separate audio tracks, though it results in slightly larger files.
Advanced Tab: Compliance, Timeouts, and Retries
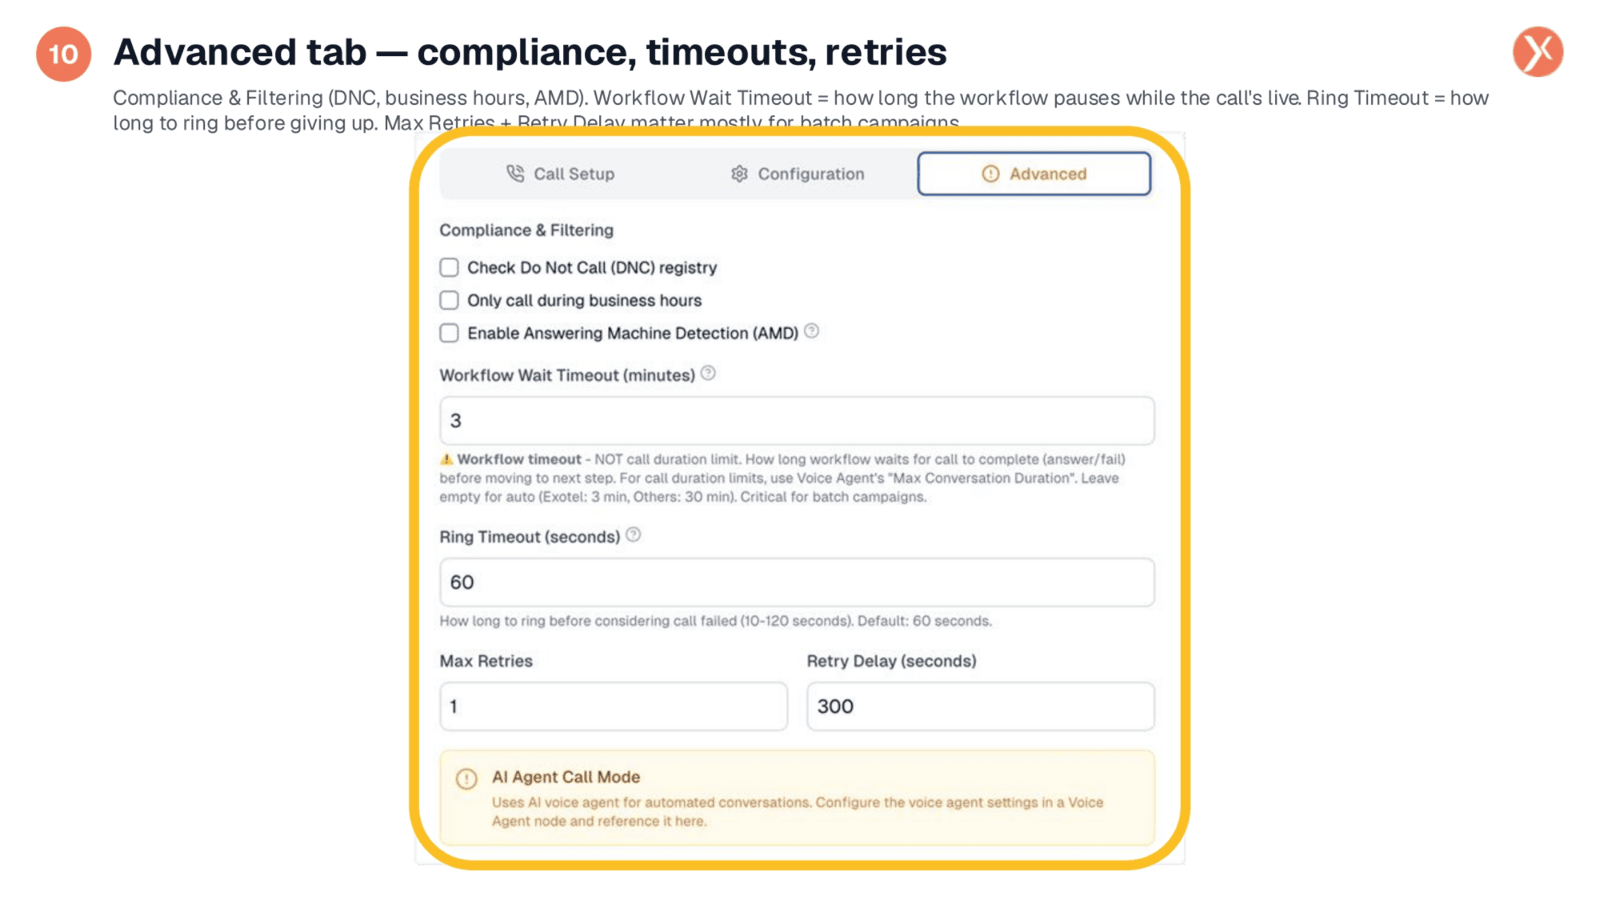
The Advanced tab contains critical settings for compliance and call management, typically configured once per workflow. Options include checking against the Do Not Call registry for regulated markets, restricting calls to business hours, and enabling Answering Machine Detection. Workflow Wait Timeout defines how long the workflow pauses during a live call, while Ring Timeout sets the duration before a call is considered failed. Max Retries and Retry Delay are primarily relevant for batch campaigns, ensuring robust outreach.
Voice Outbound Call Outputs
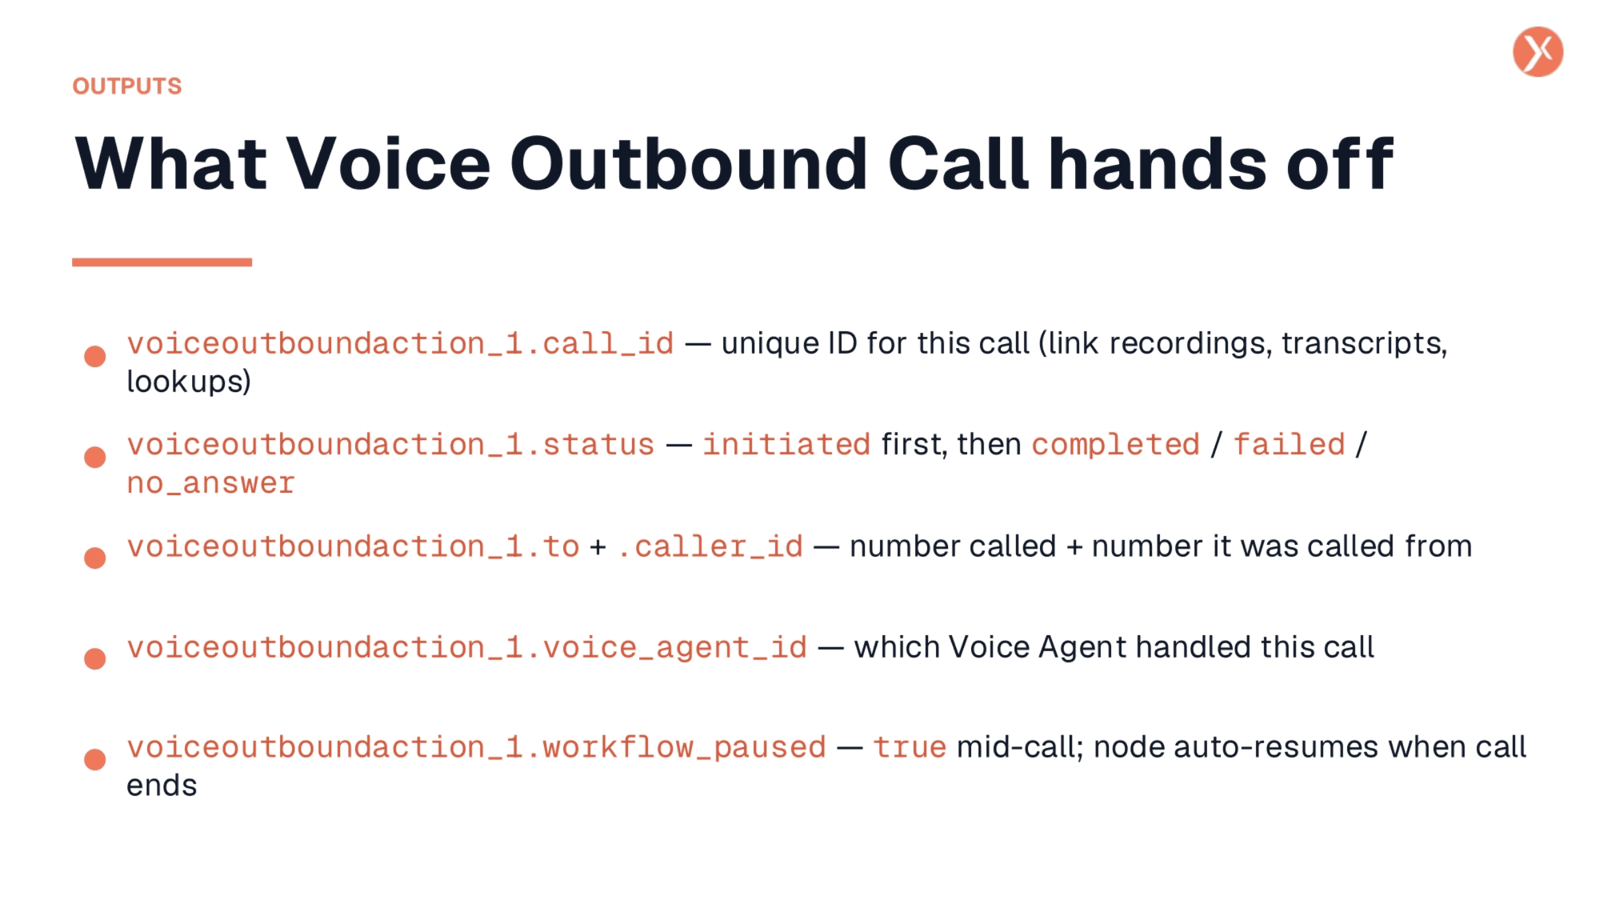
The Voice Outbound Call node provides five key outputs for downstream use. The call_id is a unique identifier for each call, useful for linking recordings, transcripts, or analytics. The status indicates the call's progression, moving from 'initiated' to 'completed', 'failed', or 'no_answer'. The to and caller_id fields provide the numbers involved in the call for logging. The voice_agent_id identifies which Voice Agent handled the conversation. Finally, workflow_paused signifies that the workflow pauses mid-call and auto-resumes once the call concludes, ensuring subsequent actions only run after the conversation is complete.
Recap of Voice Outbound Call Capabilities
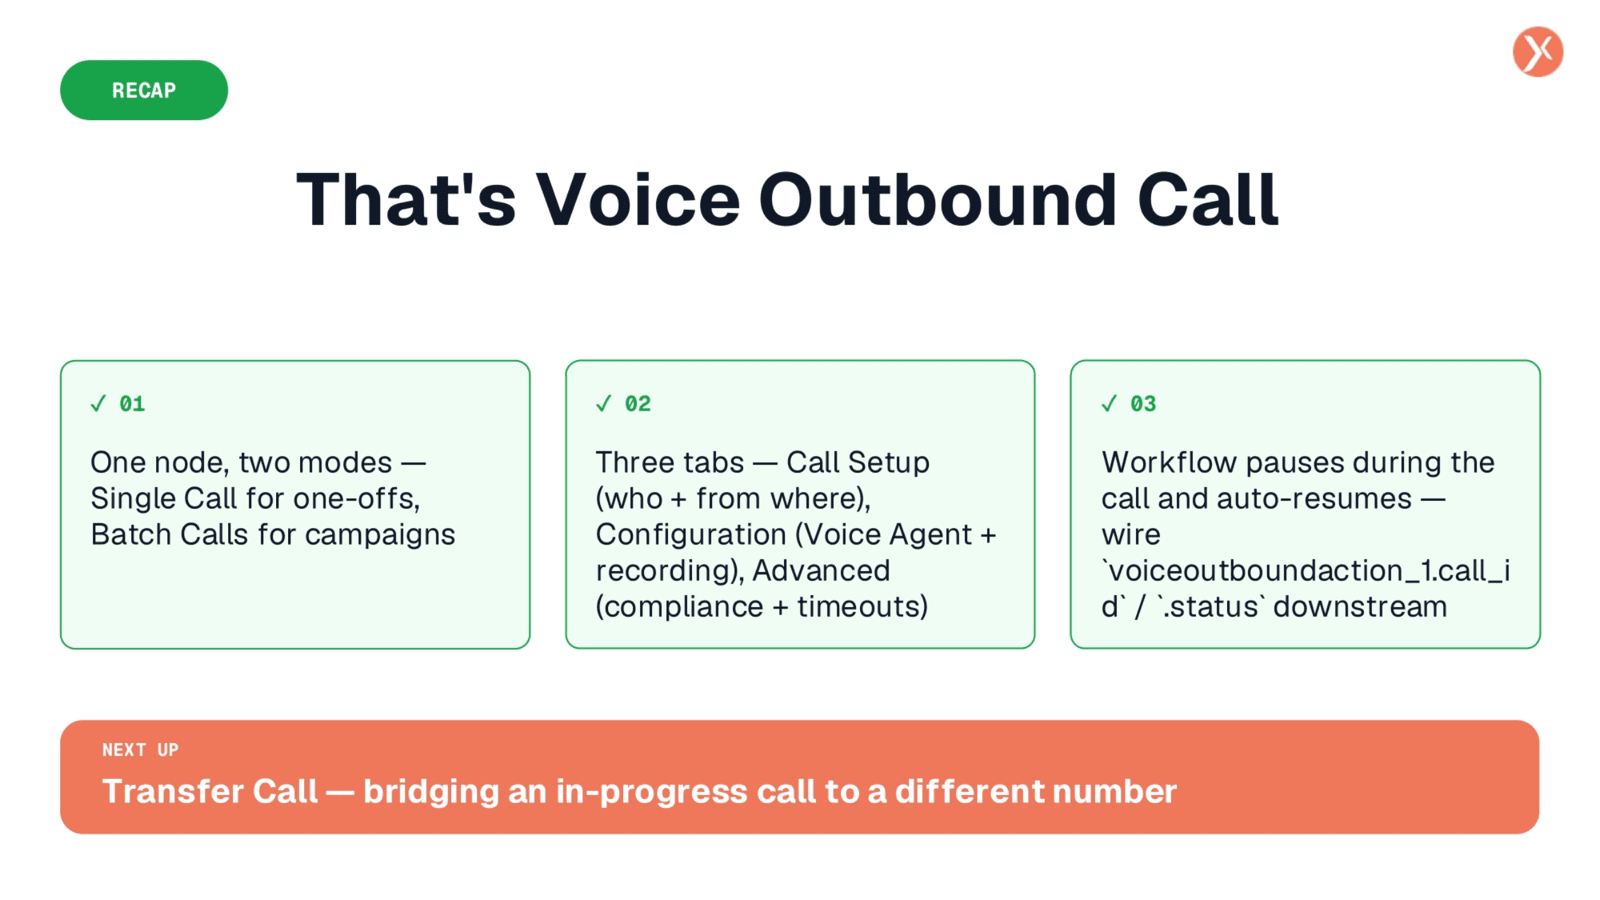
The Voice Outbound Call node serves as a vital bridge between your workflow and the phone network. It supports both single calls and batch campaigns, allowing you to specify the contact's phone number, select the appropriate AI Caller ID, and choose a Voice Agent. With robust compliance and timeout settings, the workflow pauses during the call and automatically resumes upon completion, ensuring seamless and effective automated outreach.