Document Parser
Today, we're diving into the Document Parser, a key component for transforming various file types into clean, usable text. We'll cover its six content sources, the OCR fallback for scanned PDFs, and demonstrate its integration with Agentix chat attachments.
Document Parser Demo Overview
The Document Parser is a versatile node, supporting eight file types and offering six distinct content sources. It also includes an advanced LLM-vision OCR fallback for scanned PDFs, ensuring comprehensive text extraction. Our primary focus today will be on the chat-attachment production pattern, which we'll demonstrate live. Let's now explore the node in more detail.
Introducing the Document Parser Node
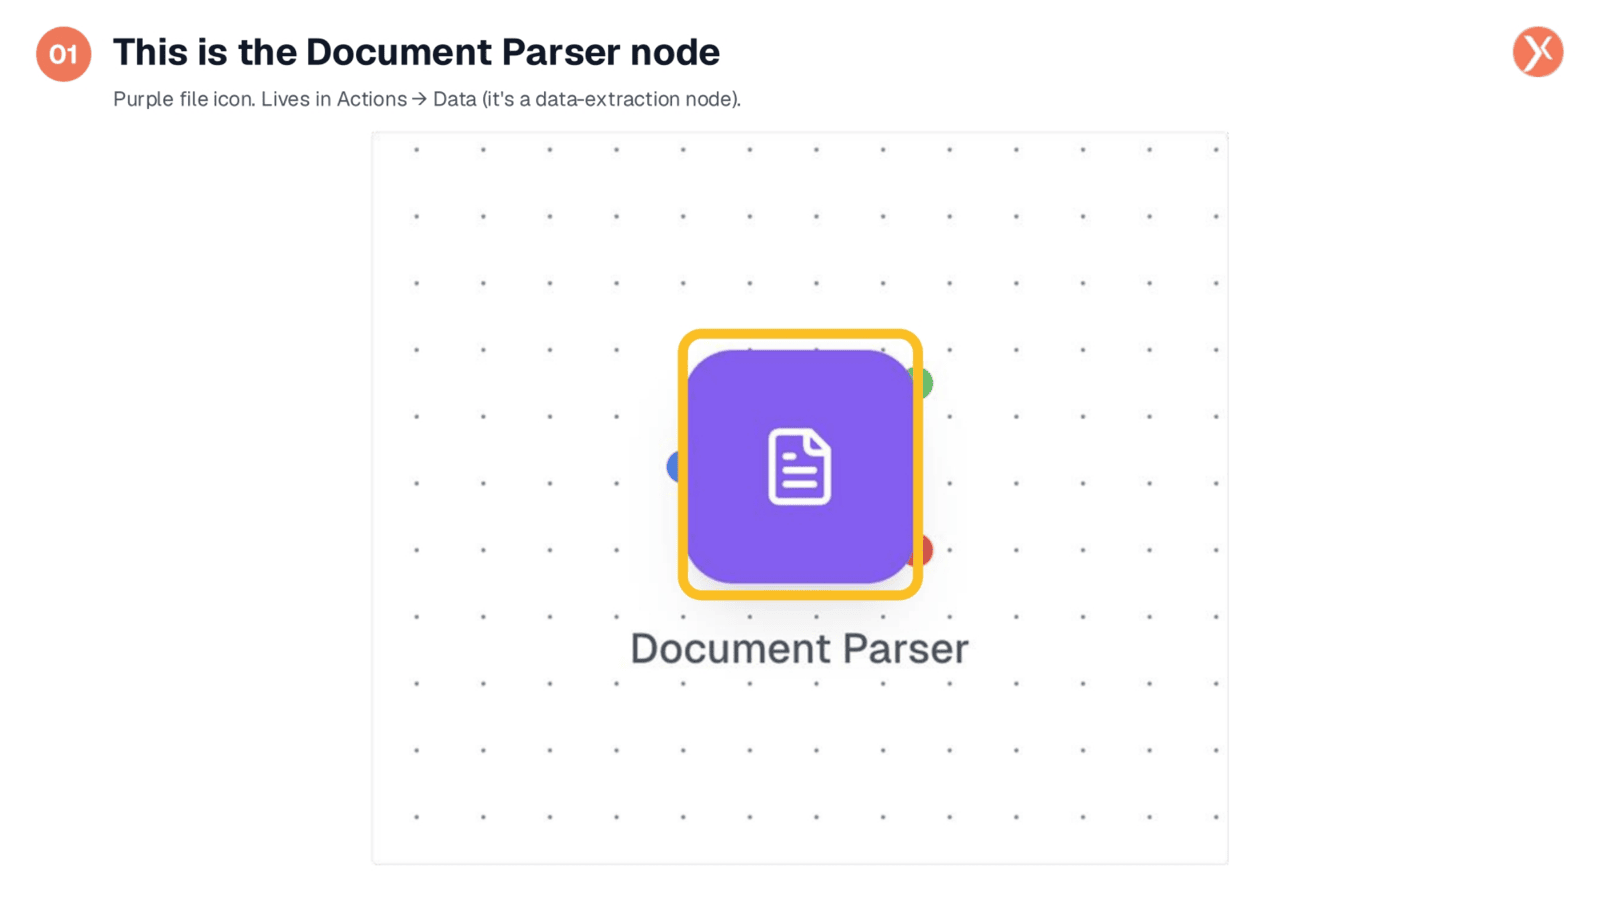
The Document Parser node, identified by its purple file icon, is found within the Actions and Data sections. It's designed for data extraction, allowing your workflows to read the content inside various files. You'll typically integrate this node after a User Message Trigger, a CRM Manager step providing a file ID, or an API Request that downloads a document. The output is always plain text, making it easily consumable by downstream nodes. Let's open the configuration panel.
Opening the Node Configuration
To access the Document Parser's settings and configure its behavior, simply double-click the node on your canvas. This action will open the configuration panel, where you can define how the node processes and extracts text from your documents. It's a straightforward step to begin customizing its powerful capabilities.
Document Parser Panel Overview
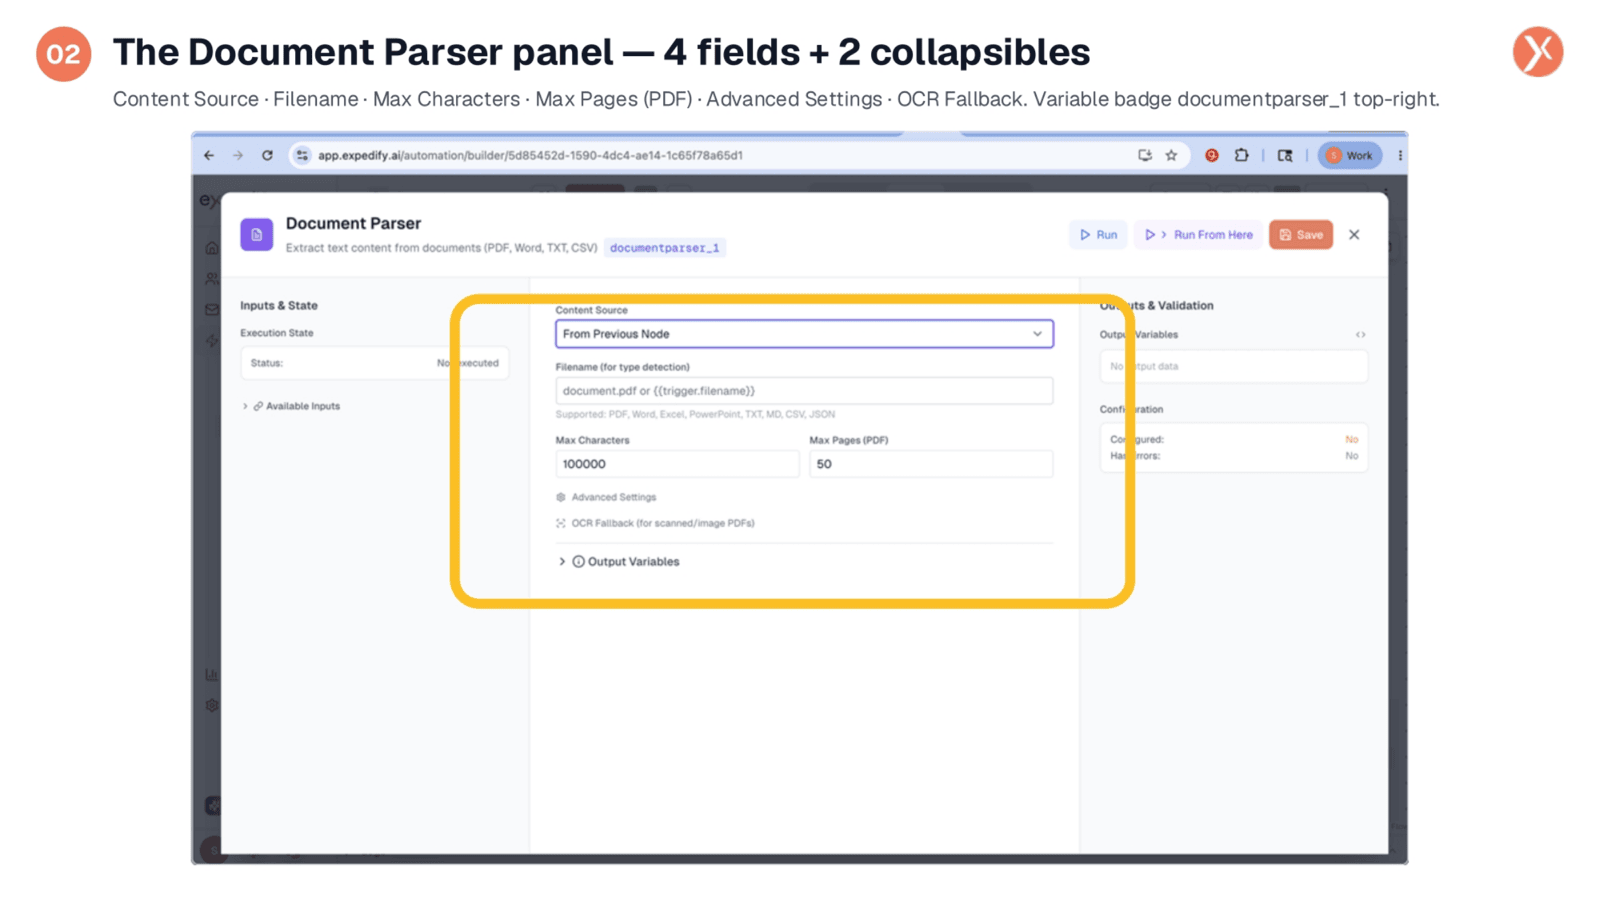
The Document Parser's configuration panel, identified by the documentparser_1 variable badge, features four core fields and two collapsible sections. The Content Source field determines where the file originates, while Filename is crucial for accurate type detection. You can also set limits on extracted content using Max Characters, defaulting to 100,000, and Max Pages for PDFs, with a default of 50. Additionally, there are Advanced Settings for less common configurations and an OCR Fallback section specifically for scanned documents. Let's begin by exploring the Content Source options.
Six Content Source Options
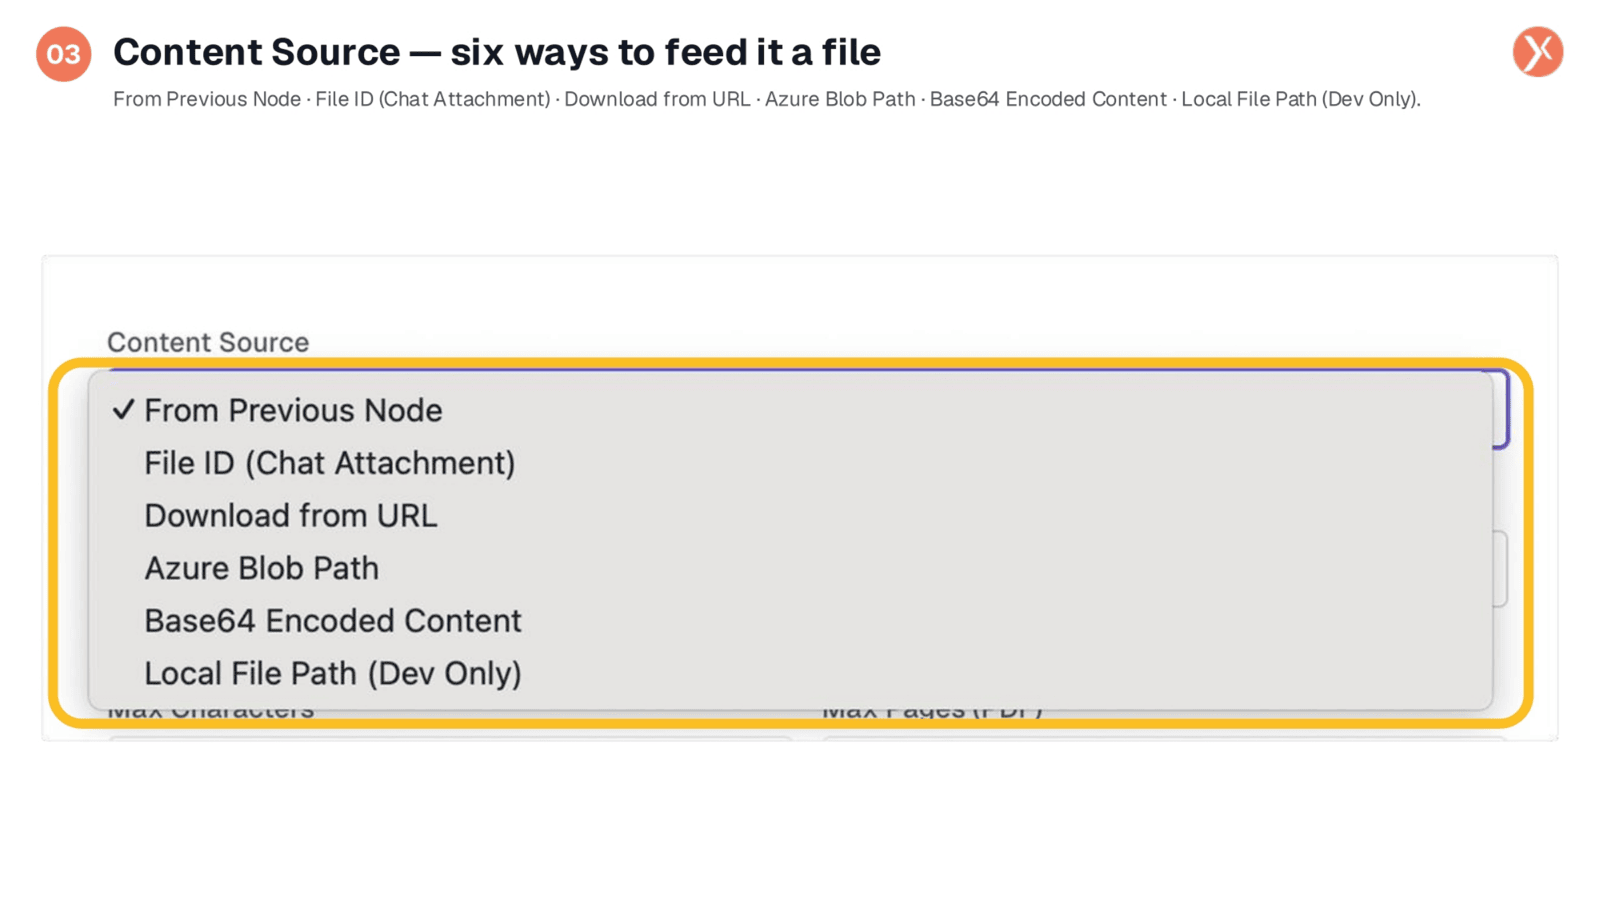
The Content Source dropdown provides six distinct methods for feeding a file to the Document Parser. 'From Previous Node' is the default, used when upstream nodes provide file content as a variable. 'File ID Chat Attachment' is ideal for production, allowing the node to retrieve files attached in Agentix chat. You can also 'Download from URL' for publicly accessible files, specify an 'Azure Blob Path' for cloud storage, or use 'Base64 Encoded Content' for inlined file data. 'Local File Path' is for development only. We'll demonstrate 'From Previous Node' and 'File ID Chat Attachment' today.
From Previous Node Configuration
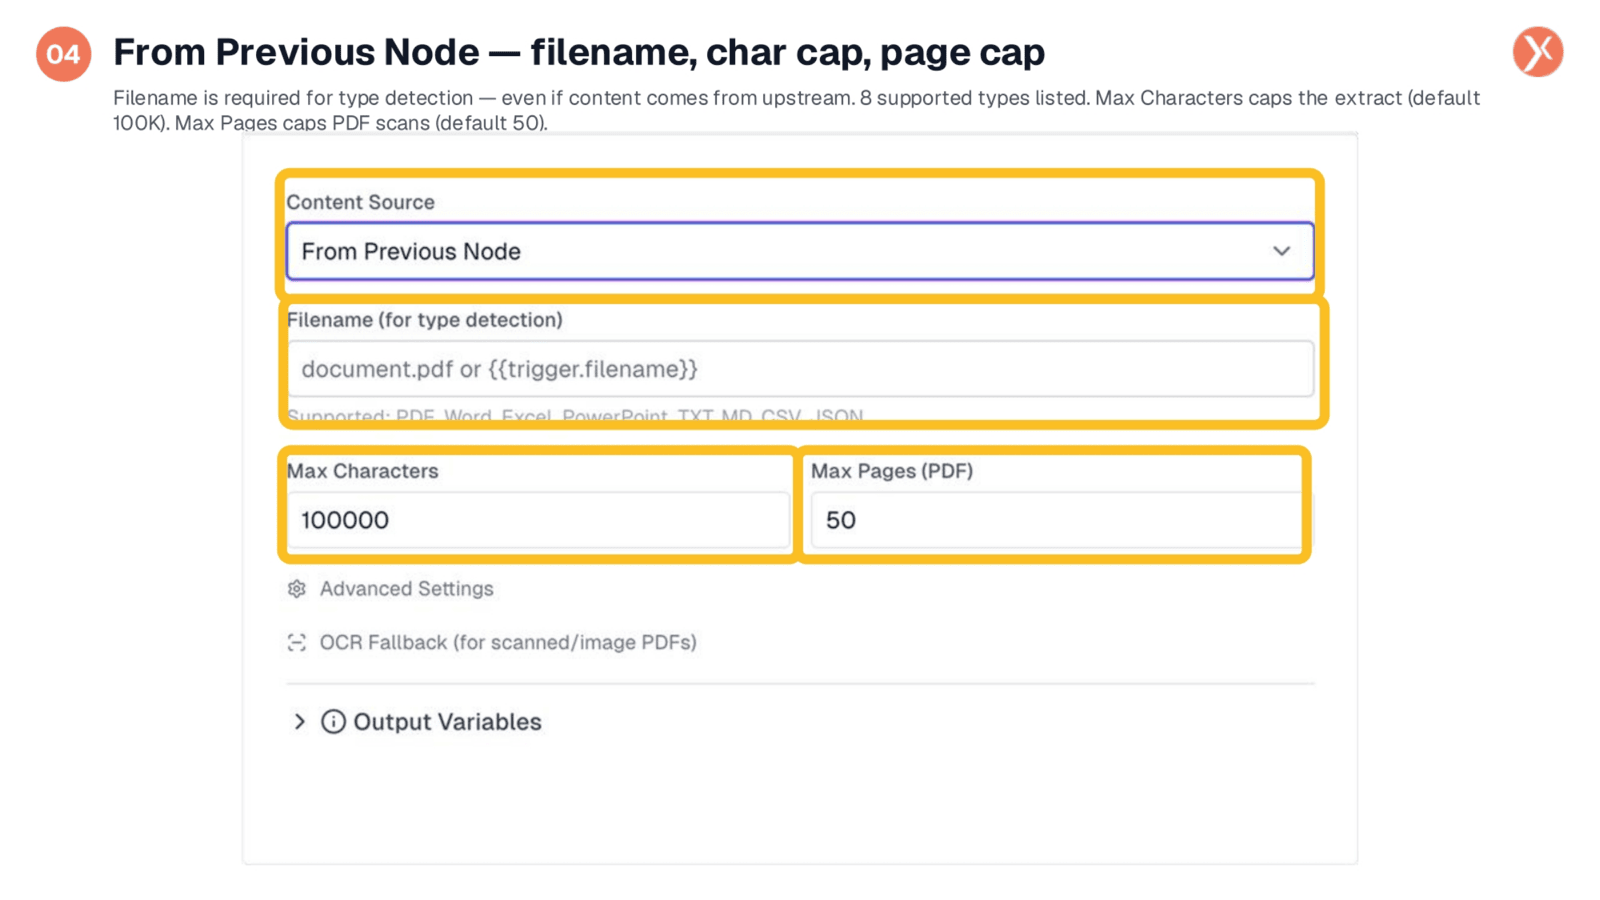
When using 'From Previous Node' as your content source, the Filename field remains essential for type detection, even if content is passed as a variable. You'd typically use trigger.filename to inform the parser whether the file is a PDF, Word document, CSV, or JSON. The Document Parser supports eight file types, including PDF, Word, Excel, PowerPoint, TXT, MD, CSV, and JSON. Max Characters, defaulting to 100,000, caps the extracted text, while Max Pages limits PDF scans to 50 pages by default. These settings are adjustable for larger documents.
File ID (Chat Attachment) Configuration
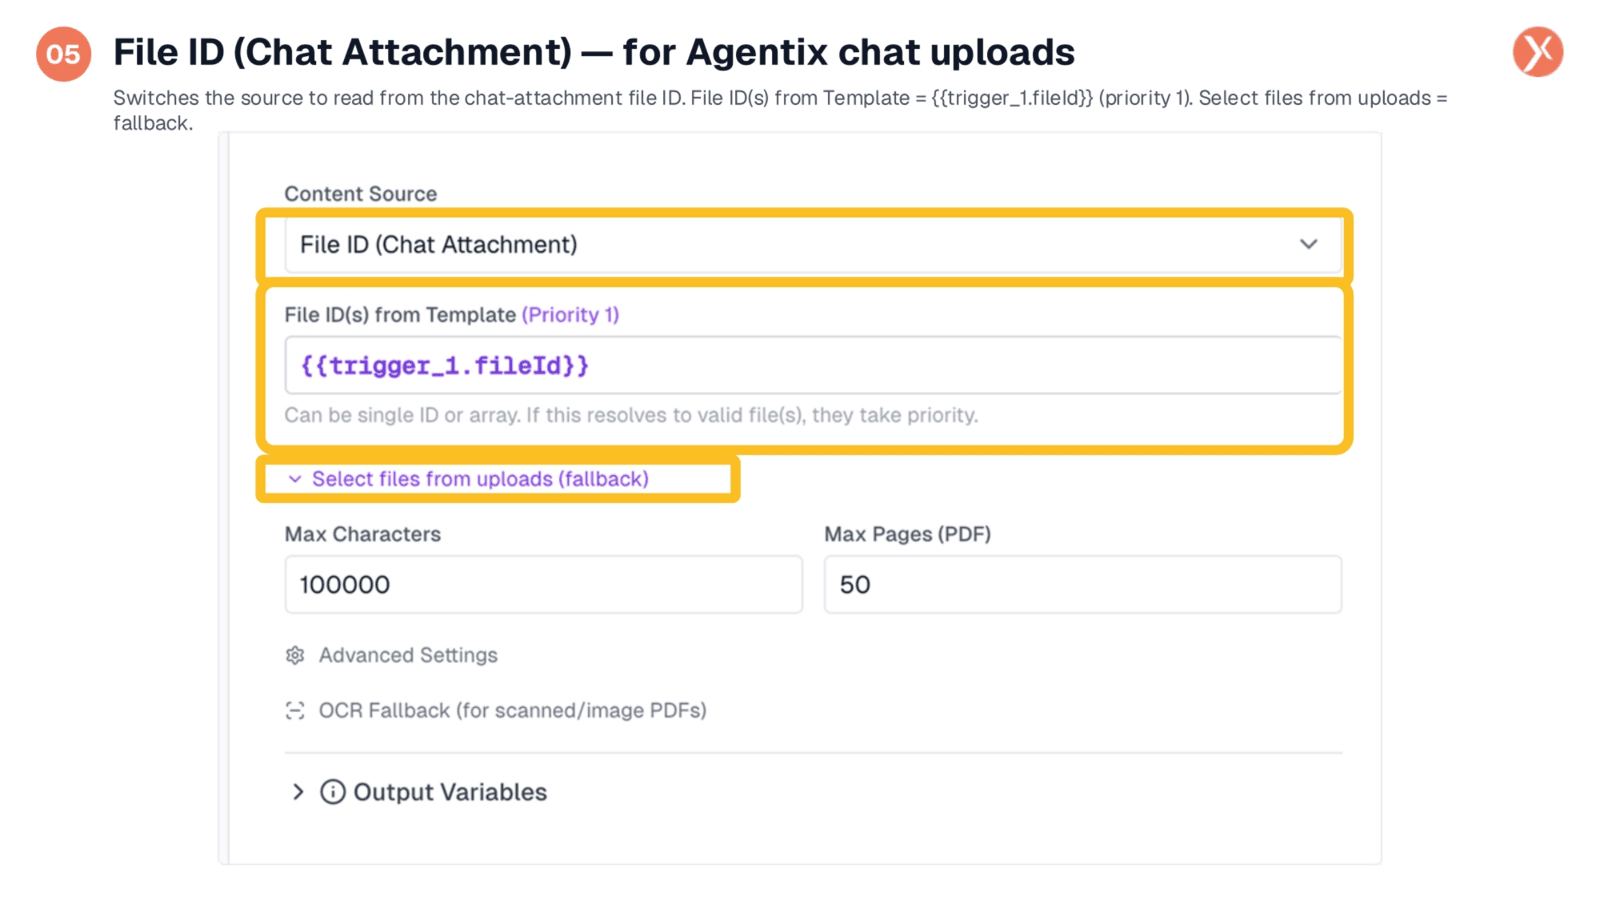
Selecting 'File ID Chat Attachment' as the content source transforms the configuration. A new 'File ID(s) from Template' field appears, where you'll input the file ID variable from your trigger, commonly trigger_1.fileId for chat attachments. This field accepts single IDs or arrays. A 'Select files from uploads' section acts as a fallback; if the template doesn't resolve at runtime, the node will use manually selected files. It's important to note that template-resolved files always take priority over manually selected ones, ensuring flexibility and robustness in your workflows.
OCR Fallback for Scanned PDFs
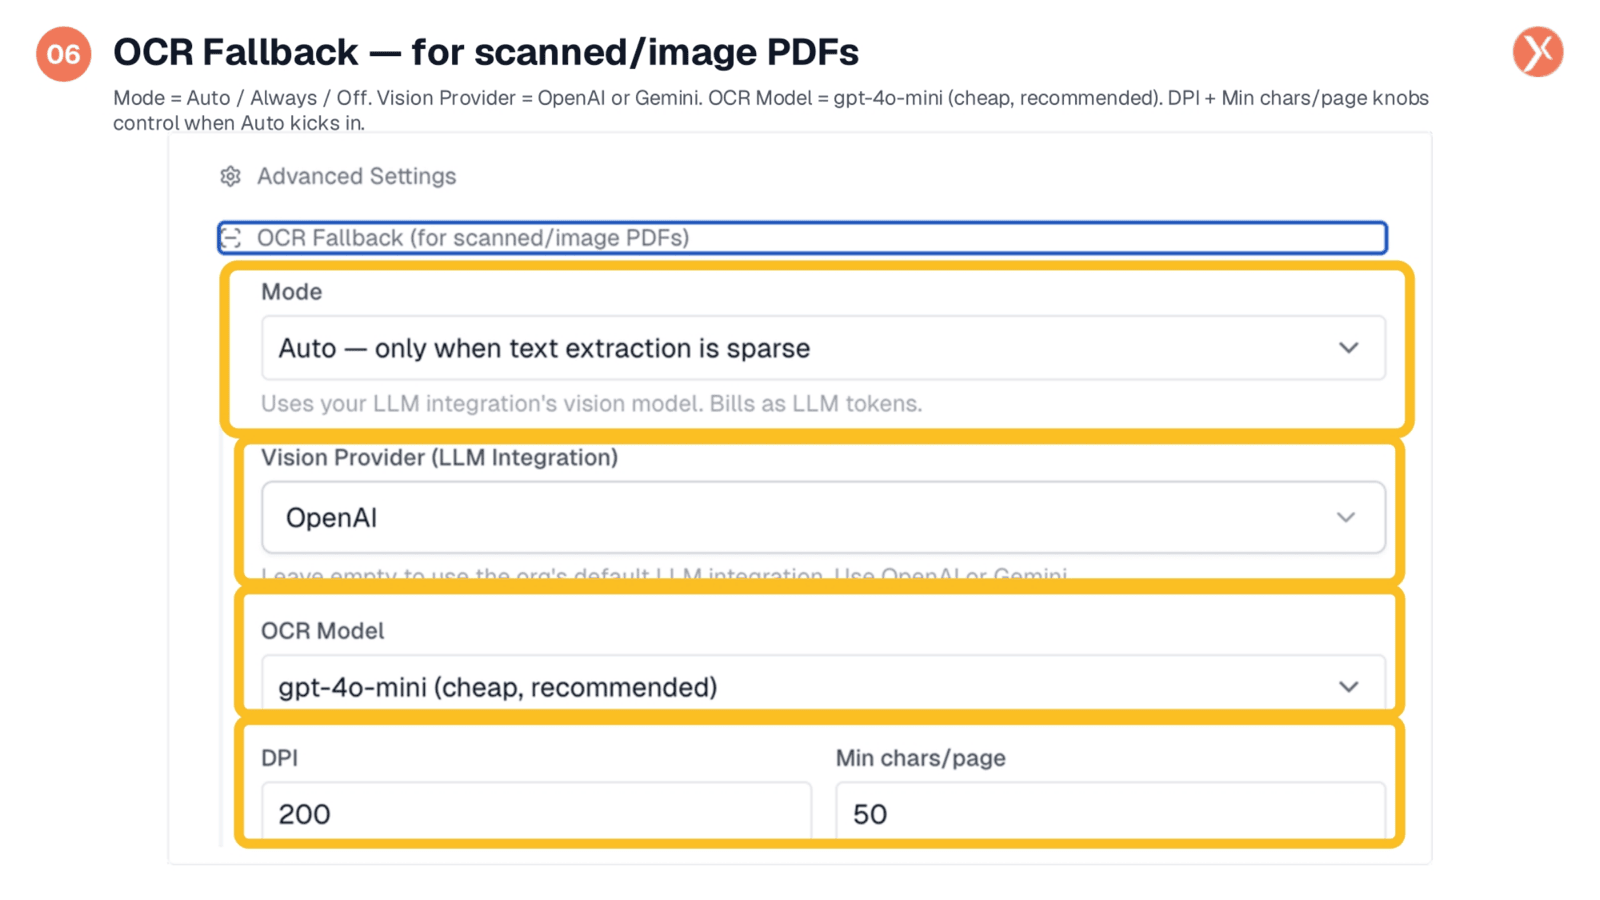
The OCR Fallback section addresses scanned or image-based PDFs, where standard text extraction is ineffective. OCR, or optical character recognition, converts these images into readable text. The 'Mode' setting allows you to choose 'Auto,' which is the default, activating OCR only when initial text extraction is sparse. Alternatively, you can set it to 'Always' or 'Off.' You can select your 'Vision Provider' between OpenAI or Gemini, and the 'OCR Model' defaults to gpt-4o-mini for efficiency. Remember, OCR processing incurs costs as LLM tokens, so 'Auto' mode is generally recommended.
Live Demo: Opening Agentix Chat
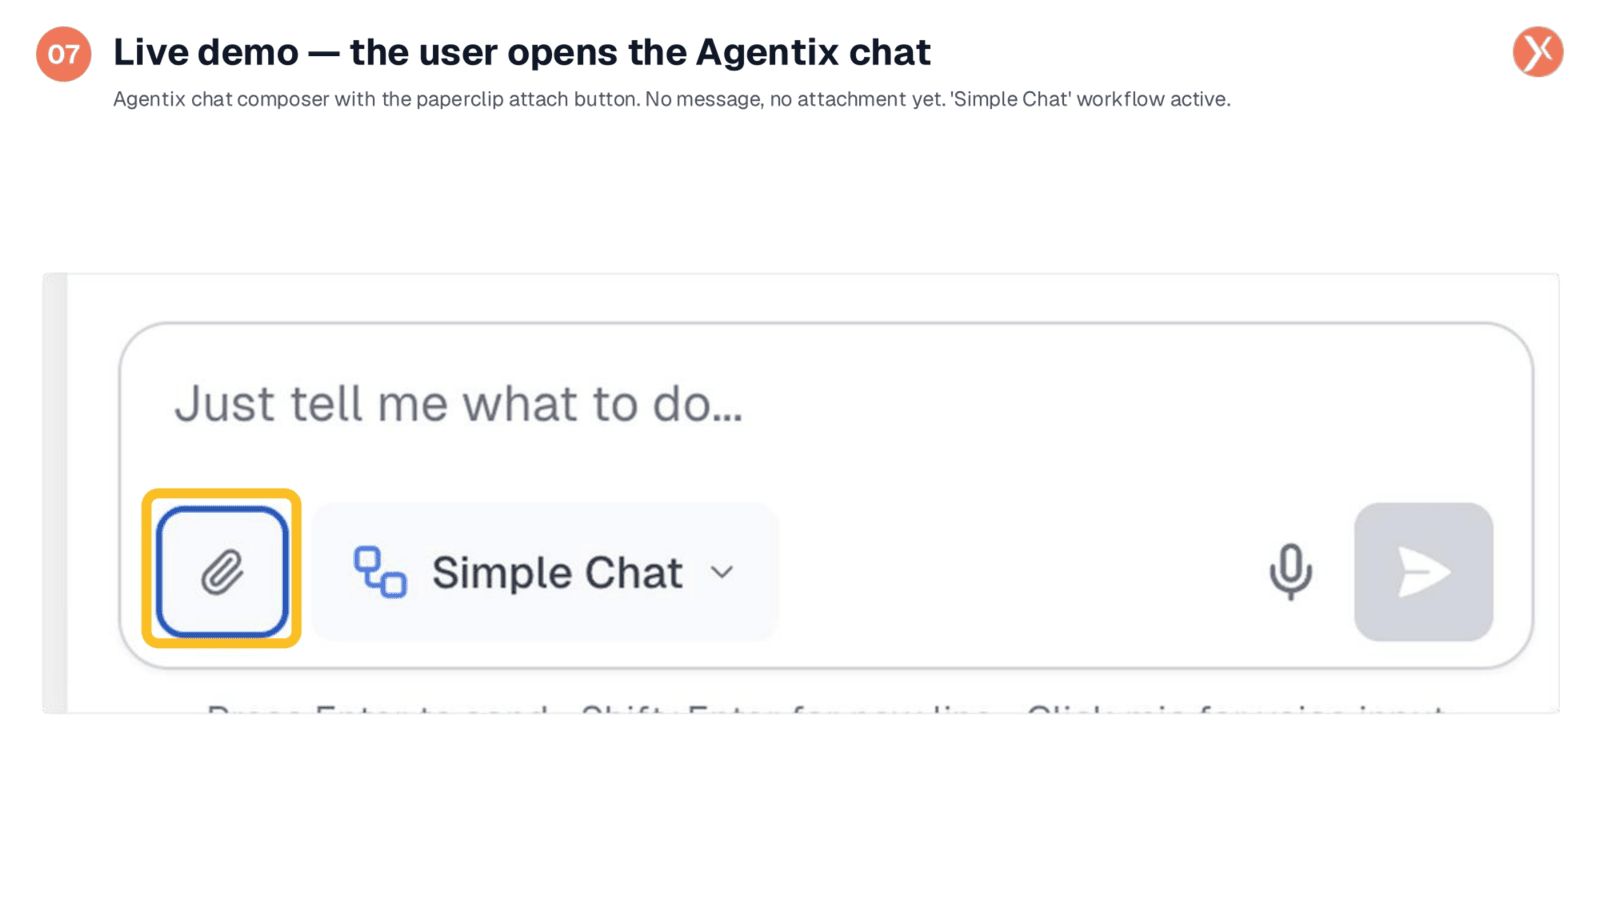
Let's see the Document Parser in action within the Agentix chat panel. Users can interact with the AI by attaching documents. The paperclip icon serves as the entry point for file uploads. When a file is attached, it's sent to file storage, assigned a unique file ID, and this ID is then captured by the trigger's fileId variable upon message submission. This mechanism ensures that the Document Parser can seamlessly access and process the attached document's content. We'll now observe the process of attaching a file.
Live Demo: File Attached and Message Sent
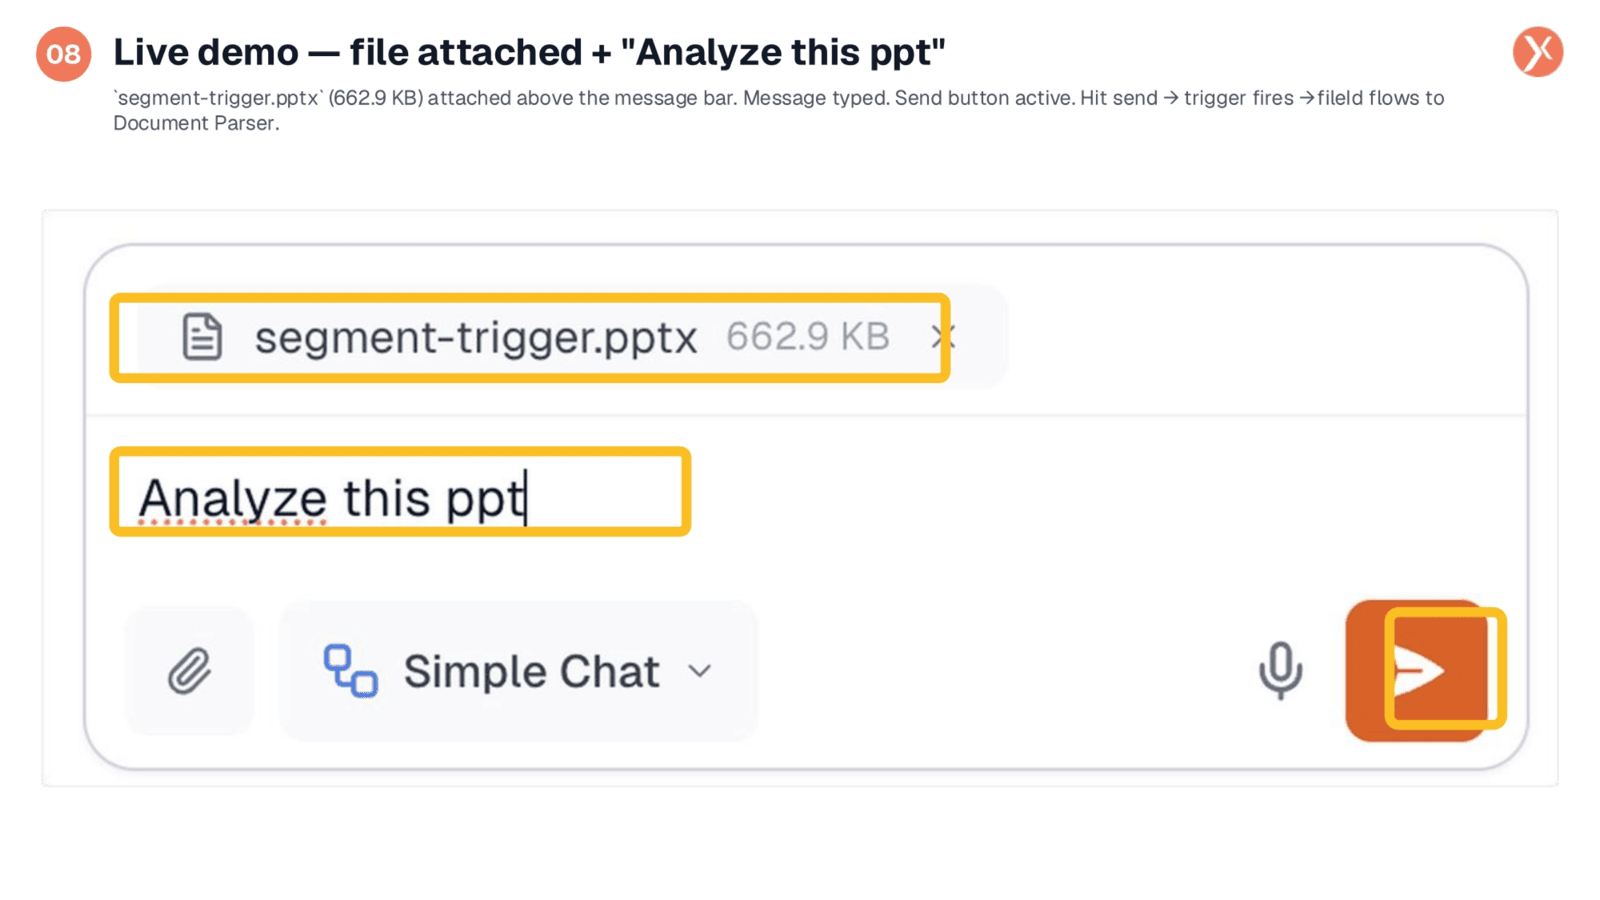
Once a file, such as segment-trigger.pptx, is attached, it appears above the message bar. The user then types their request, like 'Analyze this ppt,' and activates the Send button. Upon sending, the User Message Trigger initiates, passing the file ID to trigger_1.fileId. The downstream Document Parser node, configured for 'File ID Chat Attachment,' then extracts the text from the PowerPoint. This extracted content, available as documentparser_1.text, enables subsequent nodes, typically an LLM Integration, to process the document's substance and provide a meaningful response.
Document Parser Outputs
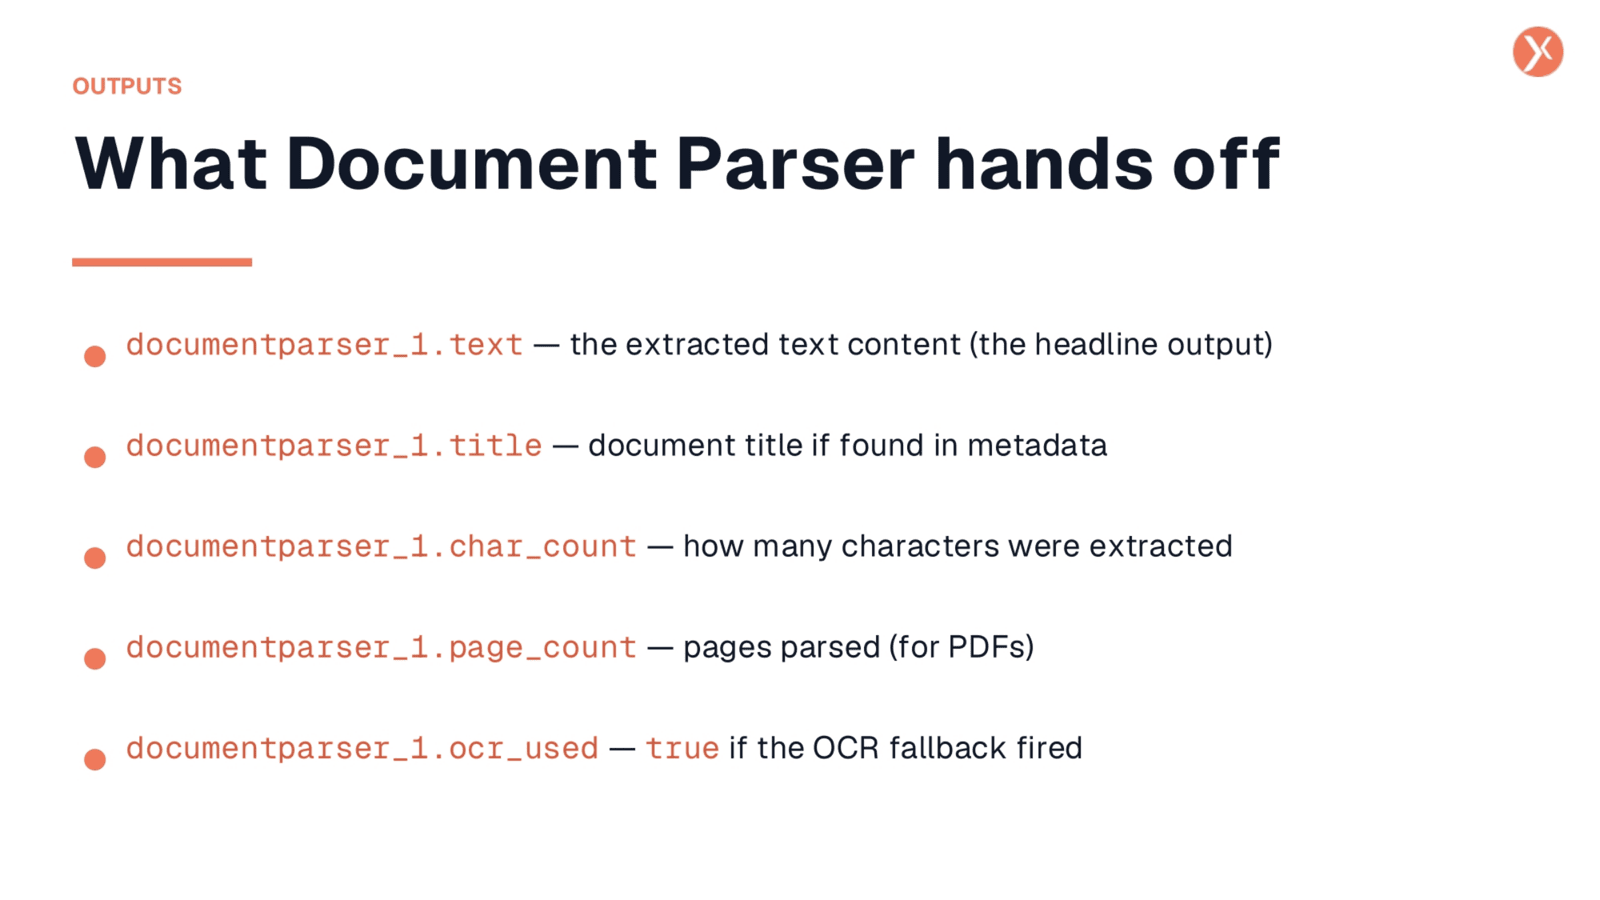
After the Document Parser processes a file, it provides several key outputs to downstream nodes. The primary output is documentparser_1.text, which contains the extracted content as a plain string, ready for use in LLM integrations or knowledge bases. Additionally, documentparser_1.title provides the document's title from its metadata. For validation, documentparser_1.char_count and documentparser_1.page_count offer insights into the extraction's completeness. Finally, documentparser_1.ocr_used indicates whether the OCR fallback was activated, which is useful for monitoring costs associated with scanned documents.
Document Parser Recap
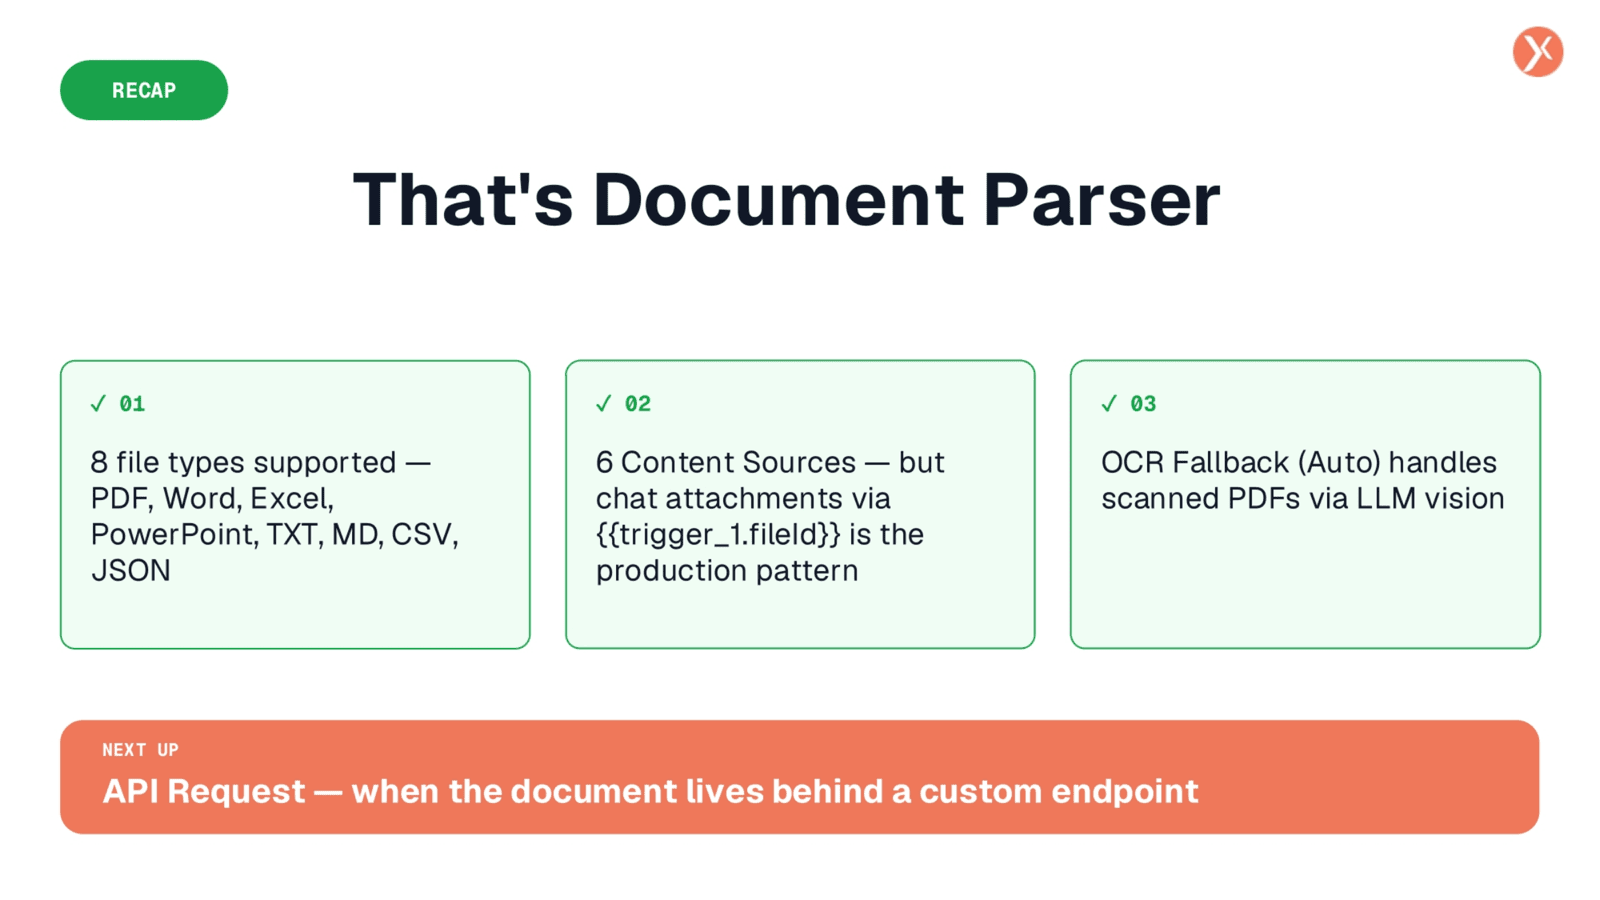
In summary, the Document Parser supports eight file types and six content sources, with OCR fallback for scanned PDFs. The key takeaway is its seamless integration with chat attachments, enabling powerful document analysis workflows. Thank you.