Knowledge Base
Welcome to our session on Expedify's Knowledge Base, a powerful tool designed to enhance your AI with your existing documents, FAQs, and data. We'll explore the four core actions you can perform: adding content, searching for information, updating existing documents, and deleting outdated entries. Let's begin by looking at these four capabilities together.
Knowledge Base — 4 nodes
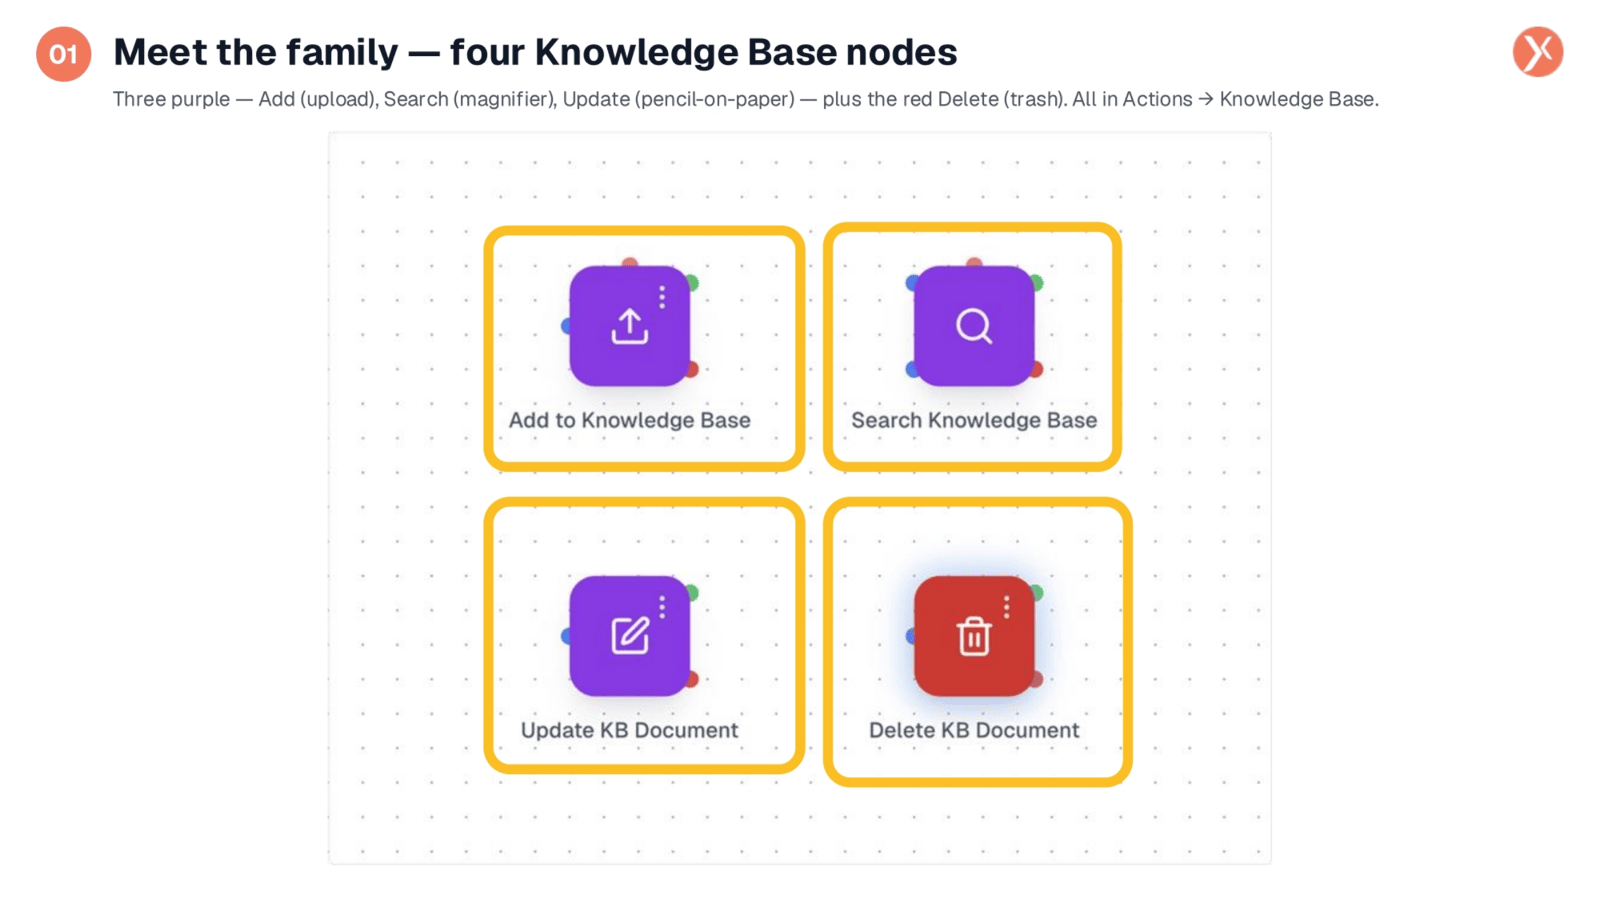
Here we see the four Knowledge Base nodes laid out on a canvas. The 'Add to Knowledge Base' node, represented by an upload icon, is in the top-left. The 'Search Knowledge Base' node, with its magnifier icon, is in the top-right. Below it, the 'Update KB Document' node features a pencil-on-paper icon. Finally, the 'Delete KB Document' node, marked by a trash icon, stands out in red. This color choice is deliberate; destructive actions in Expedify are always highlighted in red, indicating a permanent operation. Three of these nodes facilitate read-write operations, while one is purely destructive. Before diving into each node, let's see where Knowledge Bases reside within the product.
Meet the family — four Knowledge Base nodes
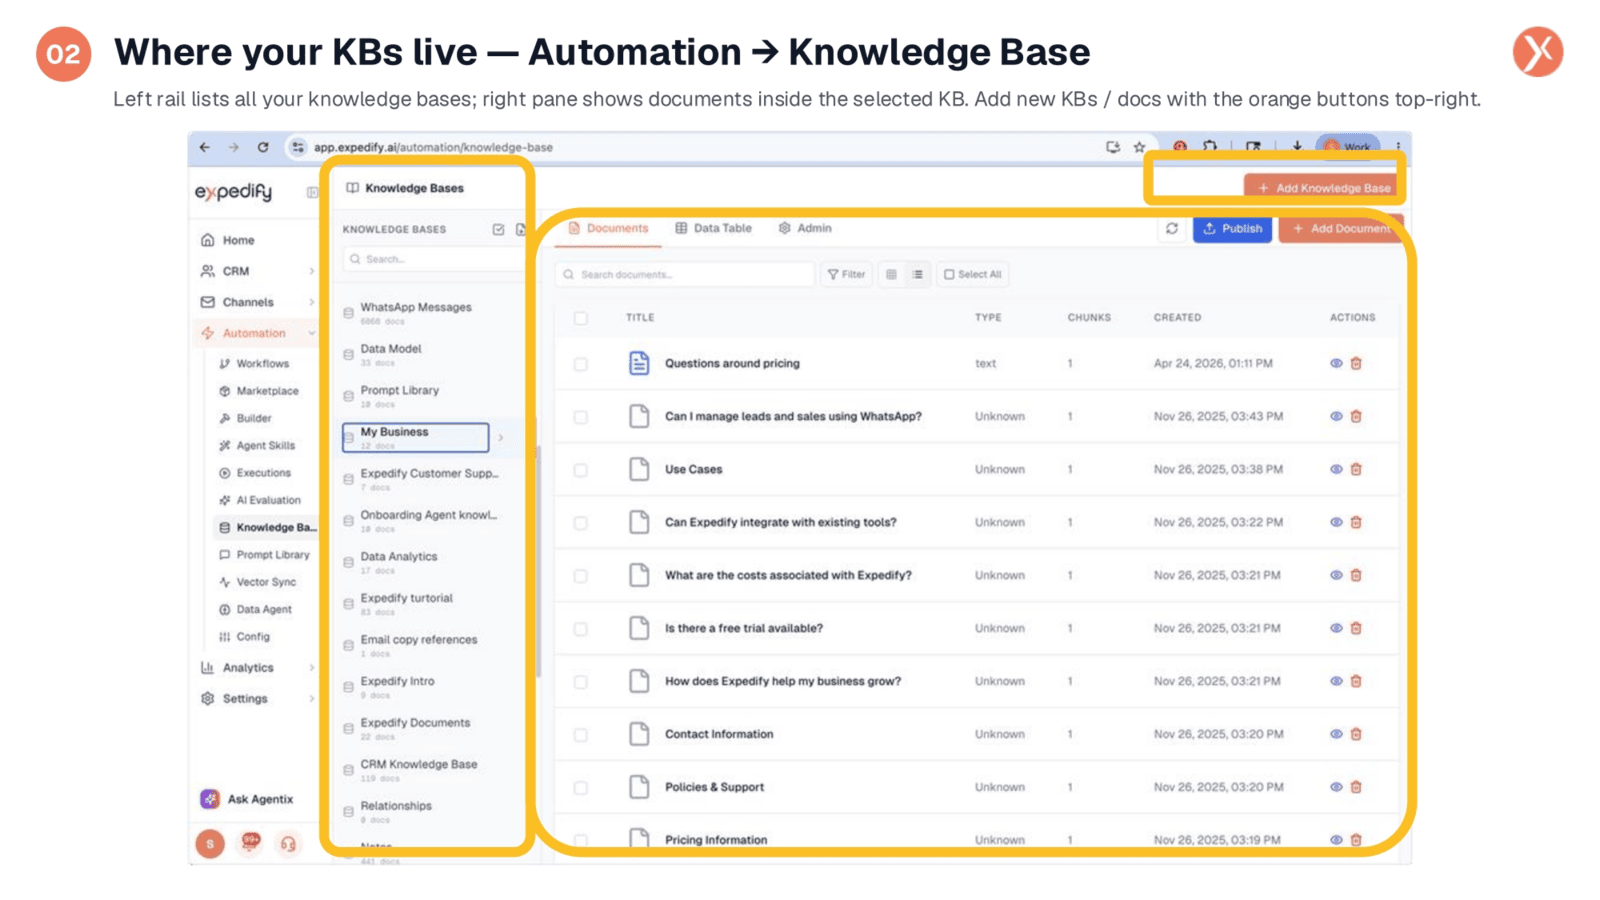
Before we delve into the workflow nodes, let's understand the Knowledge Base product page itself, accessible under 'Automation' in the left navigation. The left rail displays a list of all Knowledge Bases within your organization, such as 'WhatsApp Messages,' 'Data Model,' and 'My Business,' which is currently selected. The central pane shows the documents contained within the chosen Knowledge Base, detailing their title, type, chunk count, creation date, and available per-row actions like view, edit, and delete. The orange buttons in the top-right corner allow you to manually create a new Knowledge Base or add a document. The workflow nodes we're about to explore automate these very same functions.
Where your KBs live — Automation → Knowledge Base
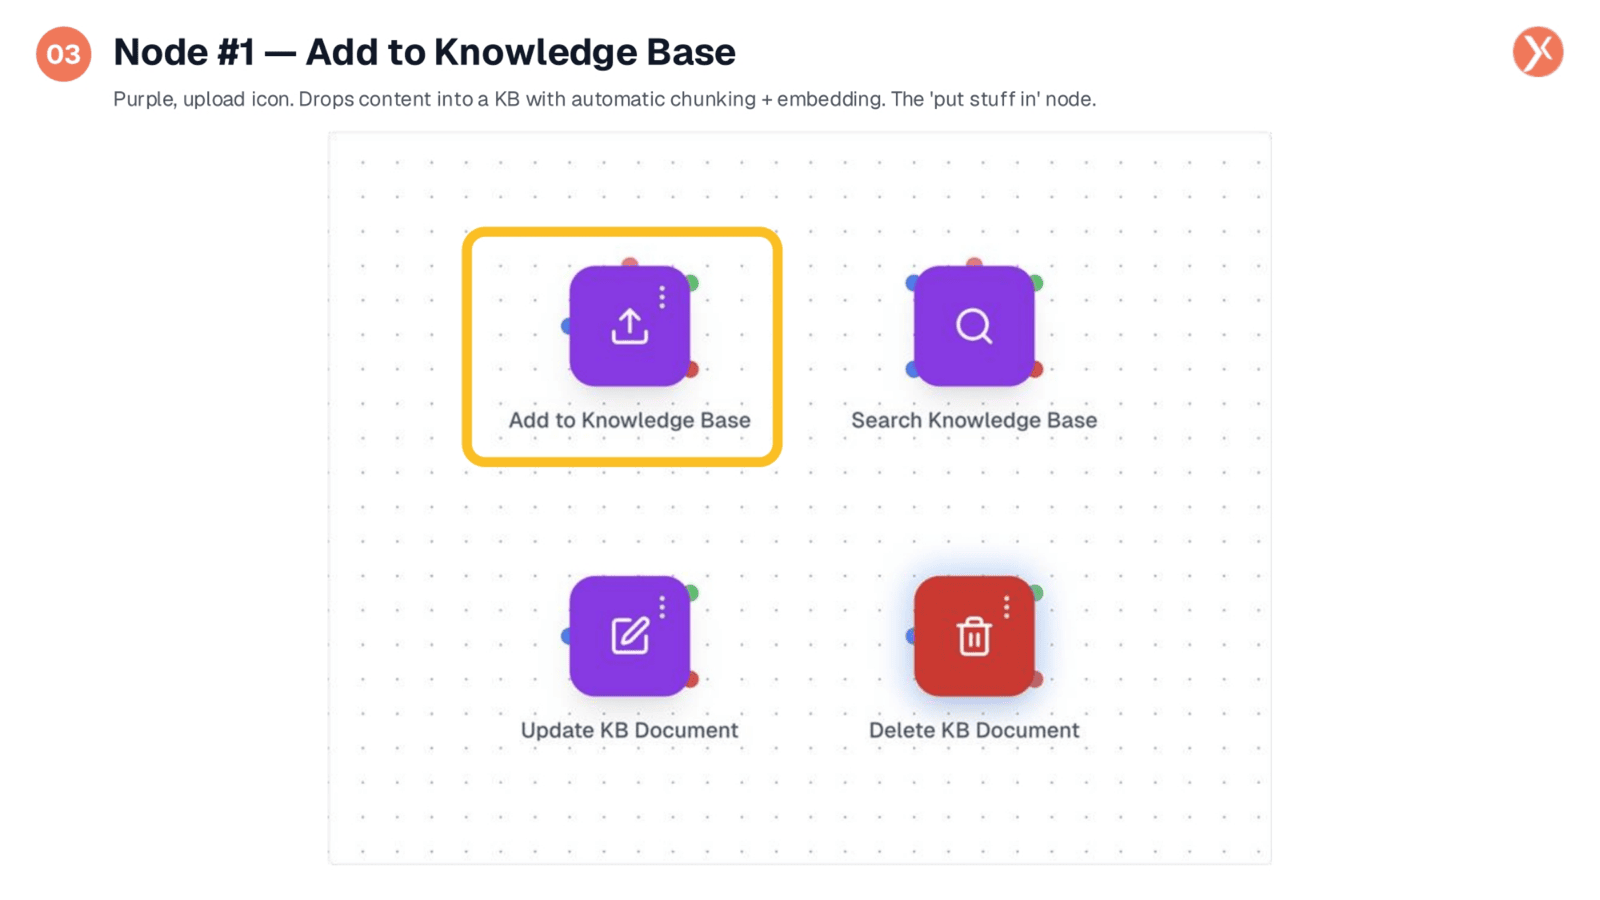
Our first node is 'Add to Knowledge Base,' identified by its purple upload icon. This node is responsible for ingesting content into a Knowledge Base. You can feed it a single string, a document, or an array of documents. Expedify then automatically chunks the content, embeds each chunk using the multi-qa-MiniLM-L6 model, and stores everything in the vector database, making it ready for search. This node is the foundational step for any Retrieval-Augmented Generation, or RAG, pipeline you build, ensuring your content is properly indexed before search nodes can access it. Let's open it up to see its configuration.
Node #1 — Add to Knowledge Base
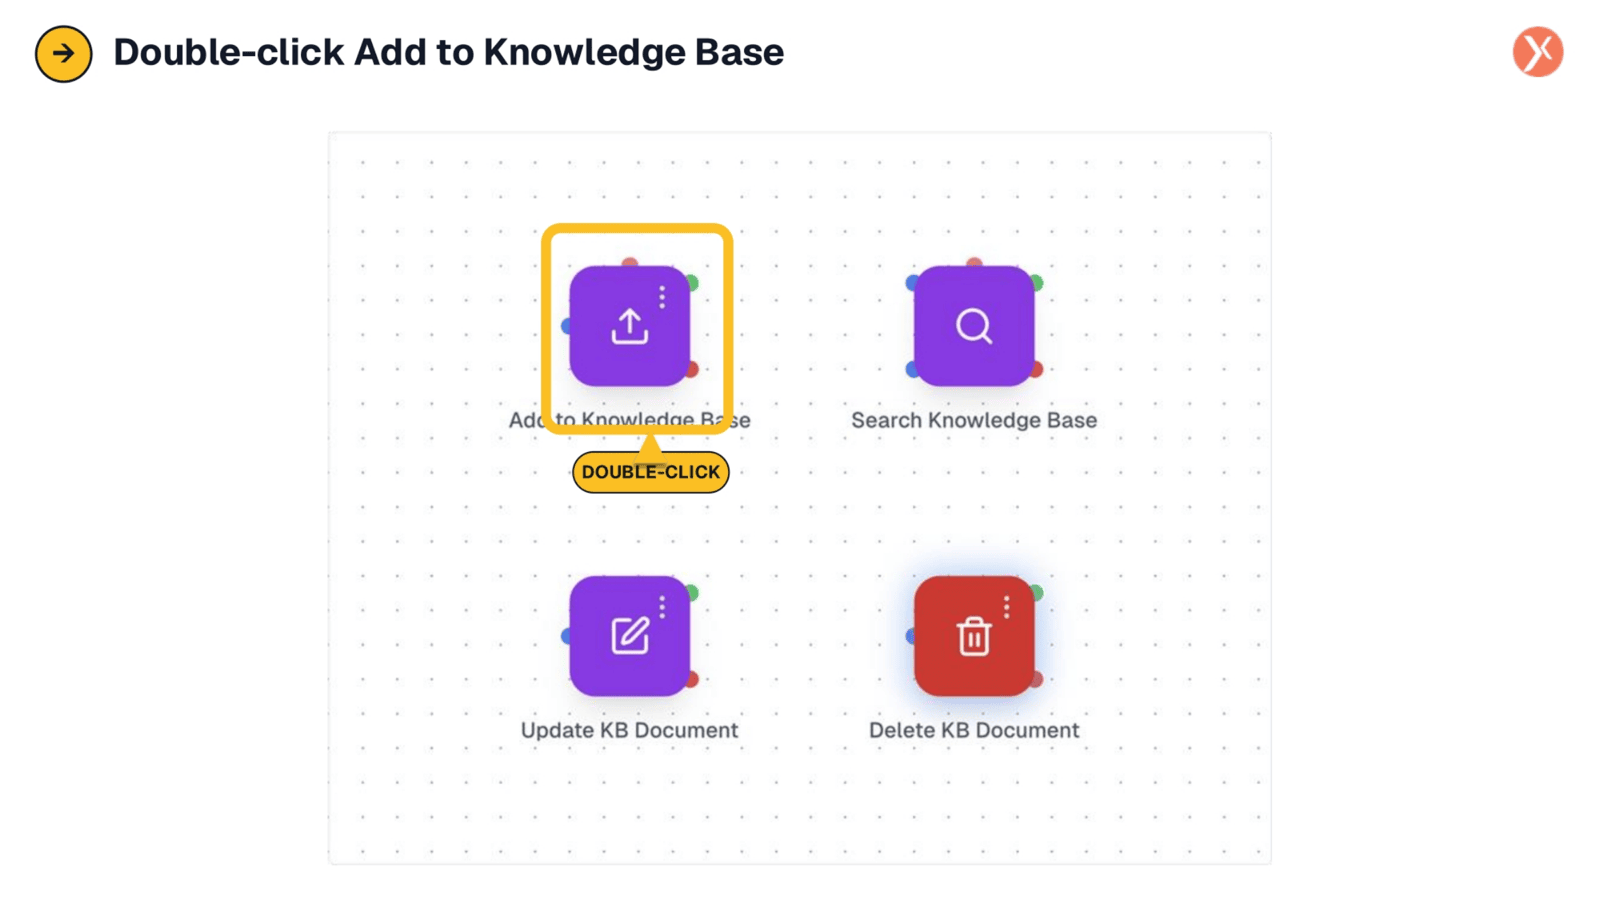
To access the configuration for the 'Add to Knowledge Base' node, simply double-click on its icon. This action will open the Node Configuration Panel, where you can define how content is ingested into your Knowledge Base.
Double-click Add to Knowledge Base
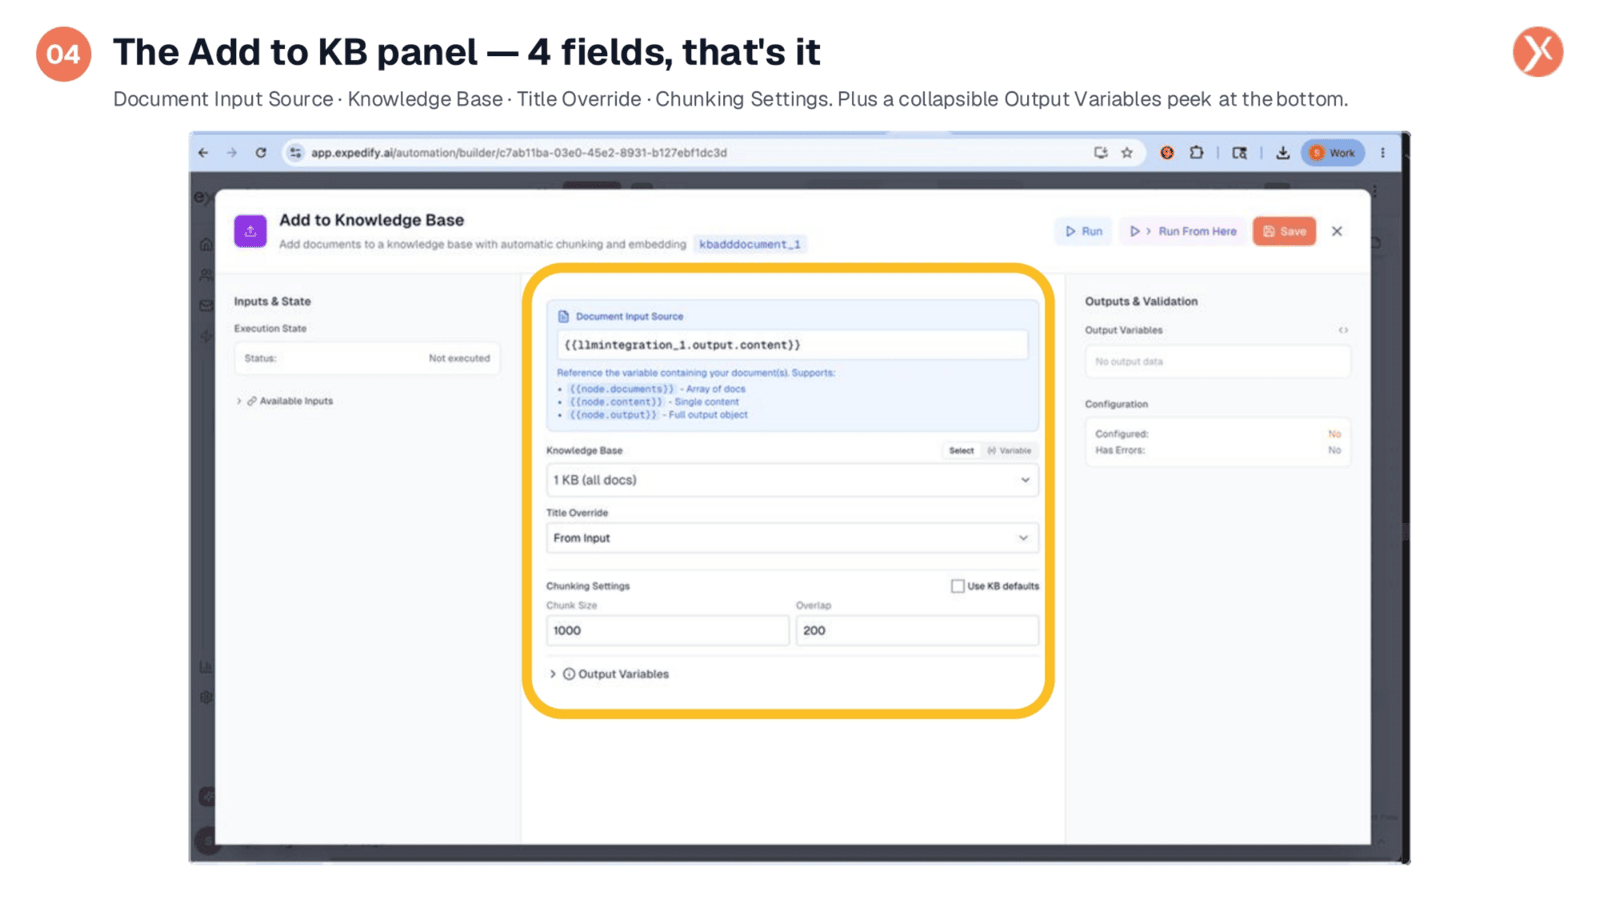
Upon double-clicking, you'll see the Node Configuration Panel, which maintains the familiar three-column layout: 'Inputs and State' on the left, the main configuration form in the middle, and 'Outputs and Validation' on the right. The variable badge at the top identifies this node as 'kbadddocument_1'. We'll explore four key fields: 'Document Input Source' in the blue helper box, the 'Knowledge Base' picker, 'Title Override,' and 'Chunking Settings' at the bottom. Once these are configured, this node efficiently processes and integrates your content into the Knowledge Base. Let's examine each field in detail.
The Add to KB panel — 4 fields, that's it
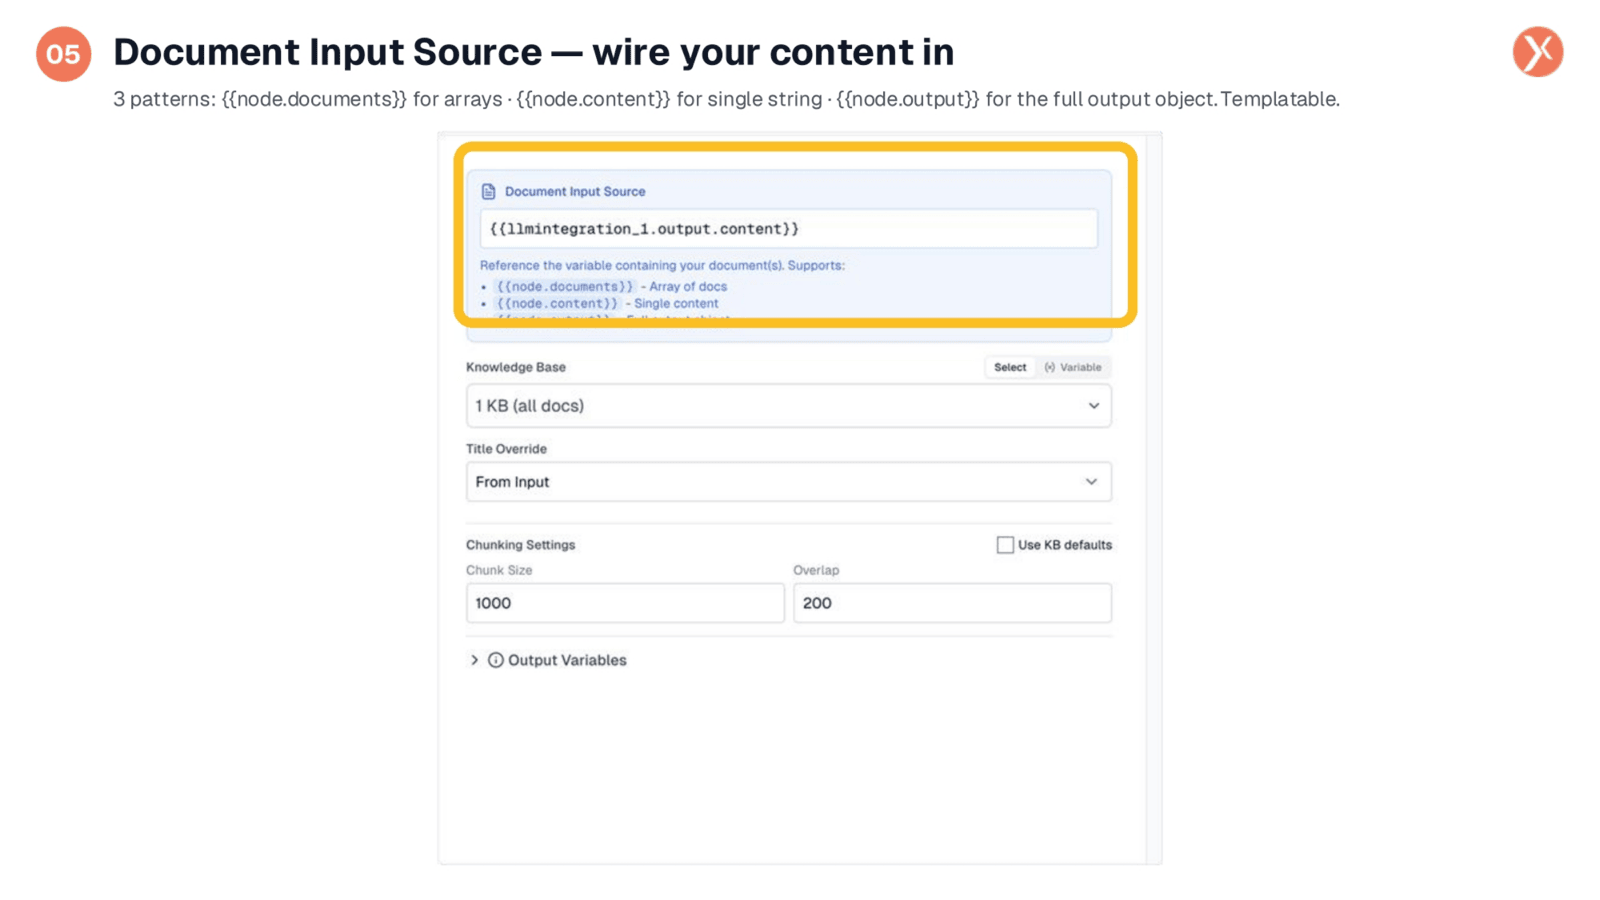
The first field we'll look at is 'Document Input Source.' This is where you specify the origin of the content you wish to ingest. It's a template-variable field that supports three distinct patterns. Use node.documents if your upstream process generates an array of multiple documents, which is common when scraping websites or splitting large files. For a single string of text, the simplest scenario, use node.content. Alternatively, node.output allows you to pass the entire output object, letting the node intelligently extract the content. As shown, llmintegration_1.output.content is a common pattern, representing text generated by an upstream LLM Integration node. Any text produced within your workflow can be fed into this field.
Document Input Source — wire your content in
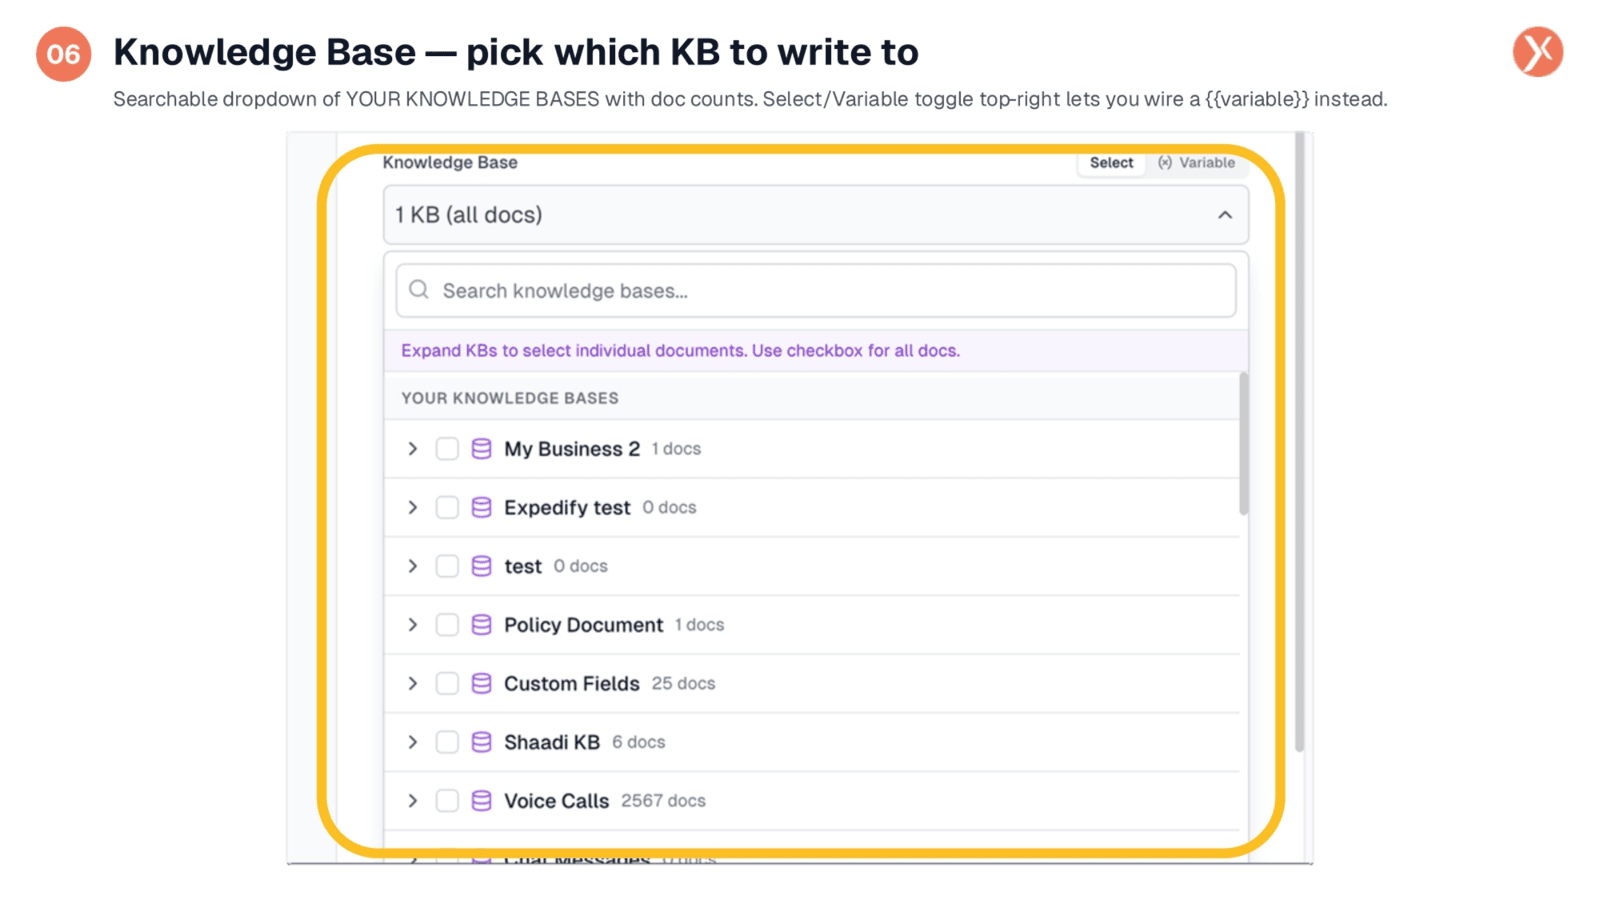
Moving on to the 'Knowledge Base' field, opening the dropdown reveals a list of all Knowledge Bases within your organization, along with their current document counts. You can use the search function to narrow down the list, expand a Knowledge Base to select individual documents, or simply tick the box next to a KB to write to it as a whole. Additionally, a 'Select-versus-Variable' toggle in the top-right allows you to switch to Variable mode. This enables you to dynamically provide a Knowledge Base ID from an upstream variable, which is particularly useful when a single workflow needs to route content to different KBs based on the data it's processing.
Knowledge Base — pick which KB to write to
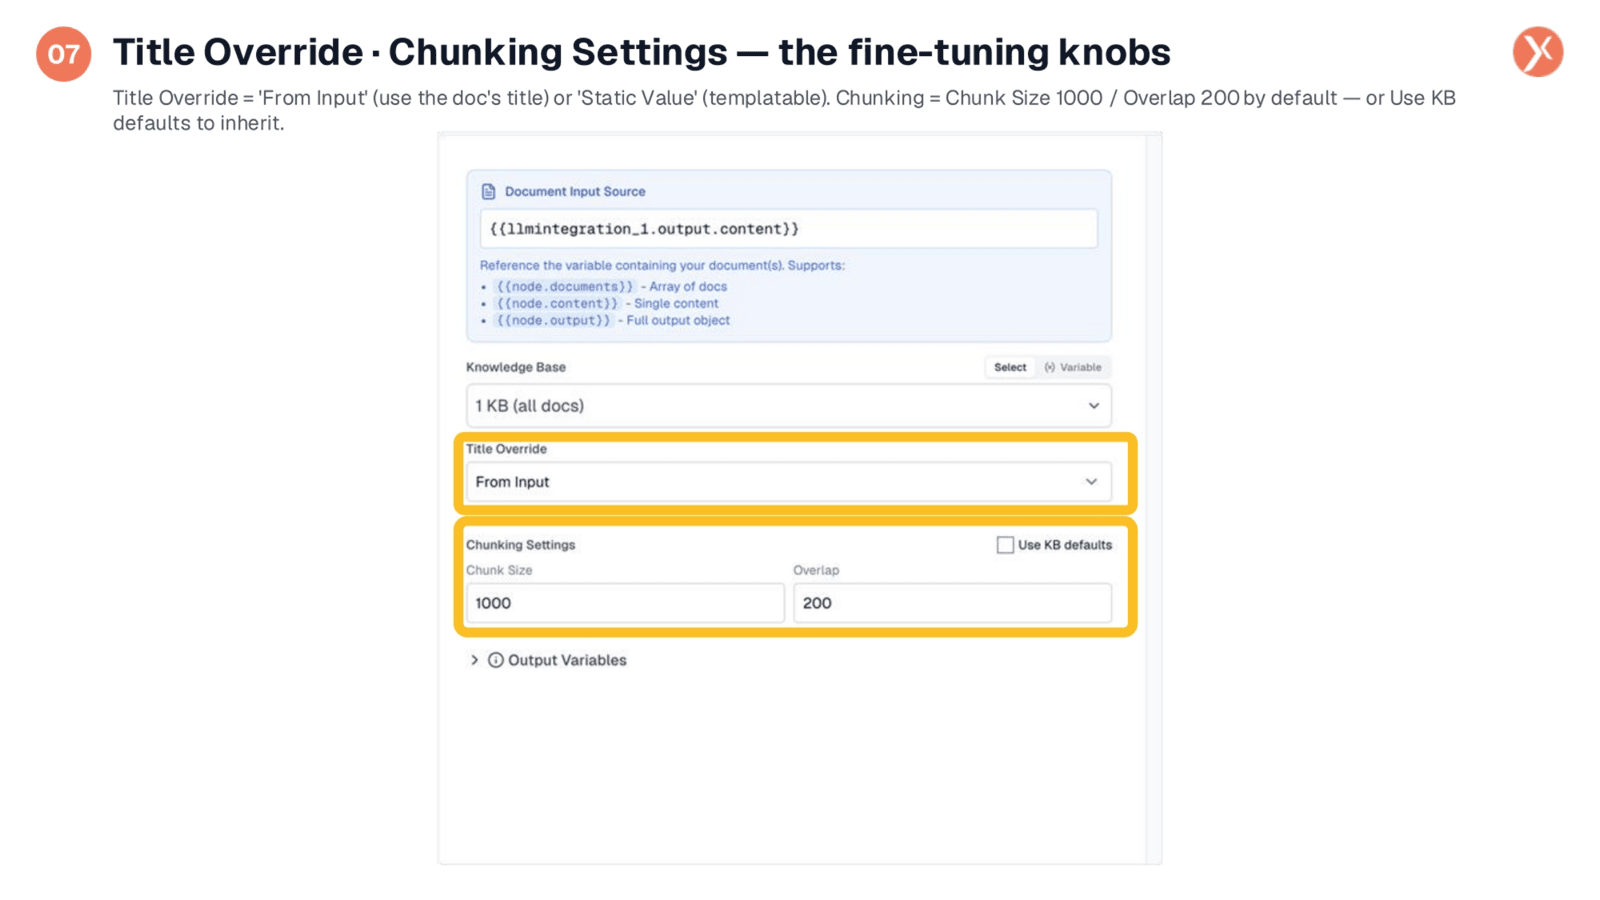
Next, we have two more crucial settings. 'Title Override' determines the title for your new document. 'From Input' uses the title provided by the upstream content, while 'Static Value' allows you to set a custom title, often incorporating template variables, for consistent naming. 'Chunking Settings' control how the text is divided before embedding. 'Chunk Size' specifies the number of characters per chunk, defaulting to 1000, and 'Overlap' defines how many characters the next chunk repeats from the previous one, typically 200, to maintain context across boundaries. Most often, you'll want 'Use KB defaults' checked to inherit the Knowledge Base's configured settings, overriding only for specific edge cases.
Title Override · Chunking Settings — the fine-tuning knobs
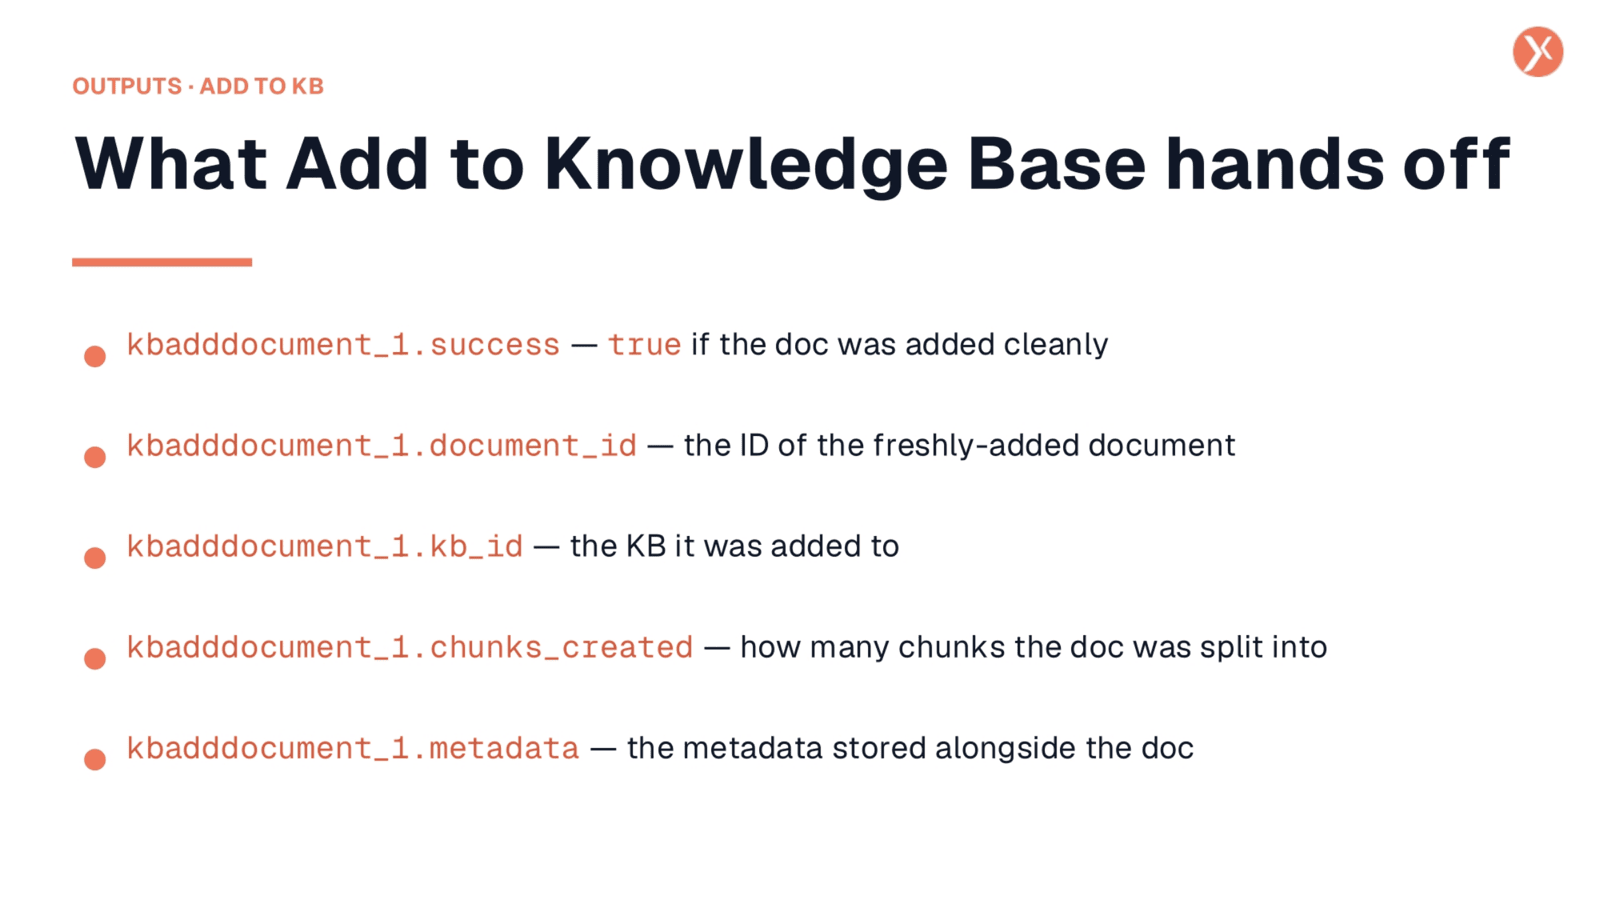
After the 'Add to KB' node successfully runs, several outputs become available for downstream nodes. kbadddocument_1.success indicates whether the operation was successful. kbadddocument_1.document_id provides the unique ID of the newly added document, which is essential if you plan to update or delete it later. kbadddocument_1.kb_id specifies which Knowledge Base the document was added to. kbadddocument_1.chunks_created shows the number of chunks the document was split into, useful for verifying your chunking settings. Finally, kbadddocument_1.metadata contains any associated metadata stored with the document.
What Add to Knowledge Base hands off
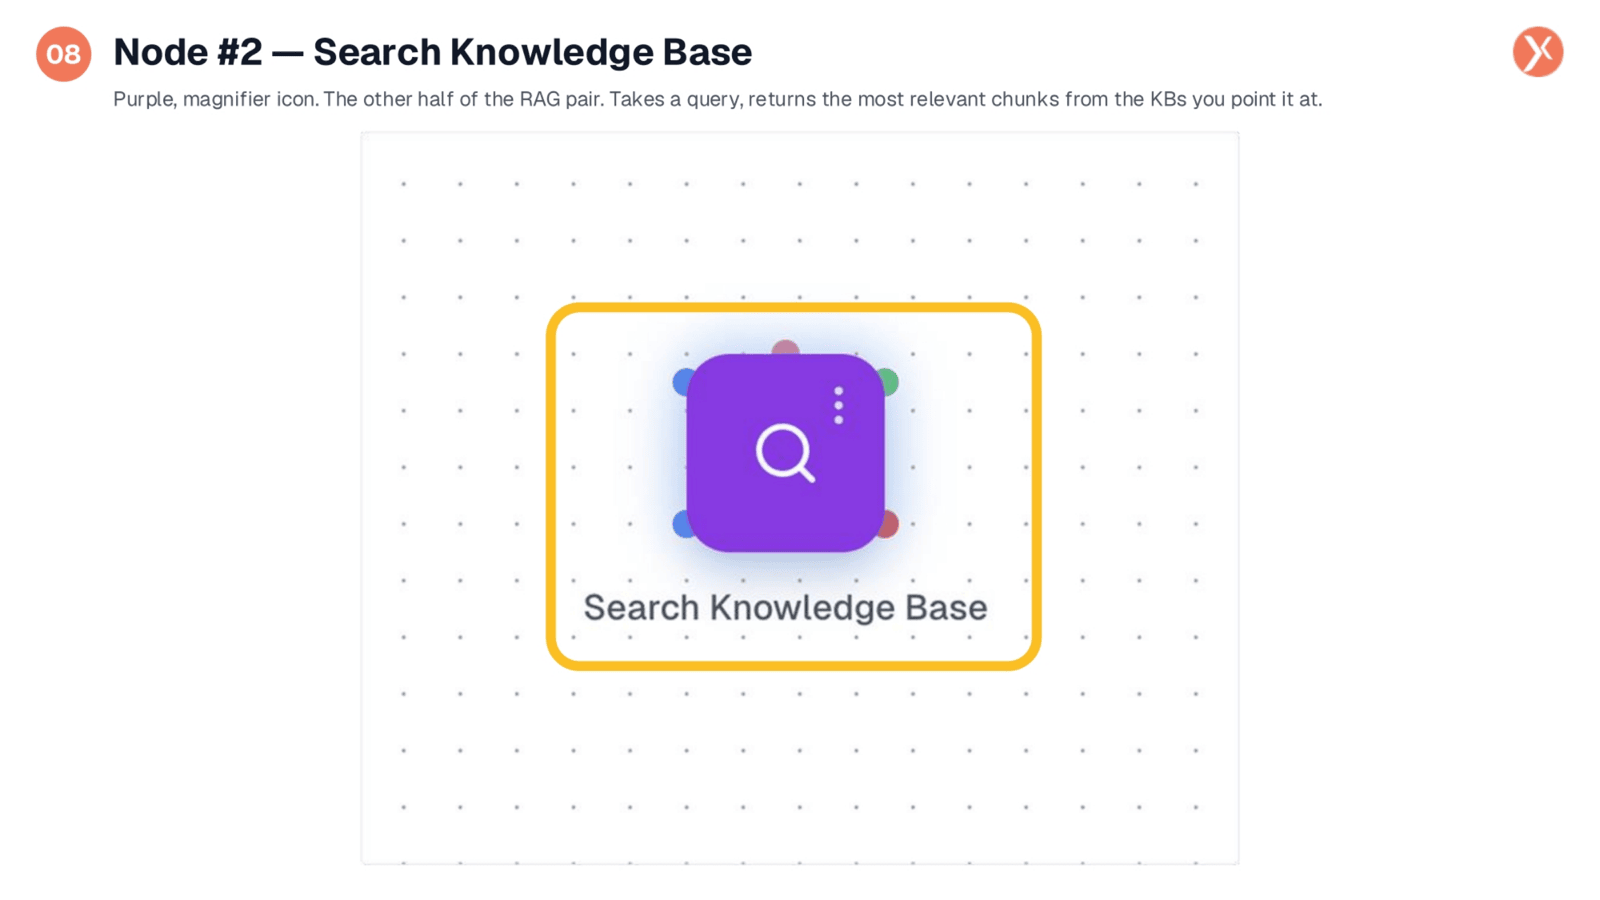
Our second node is 'Search Knowledge Base,' represented by a purple magnifier icon. This node performs the actual semantic search. You provide it with a query, typically a user's message, and it scans the embeddings in the specified Knowledge Bases. It then ranks the chunks by their similarity to your query and returns the most relevant matches. This node forms the core of any AI agent requiring grounded answers, and the Core Agent node, which we'll discuss later, can leverage this as a powerful tool. Let's open it up to explore its configuration.
Node #2 — Search Knowledge Base
To configure the 'Search Knowledge Base' node, simply double-click on its icon. This action will open the configuration panel, allowing you to define your search parameters.
Double-click Search Knowledge Base
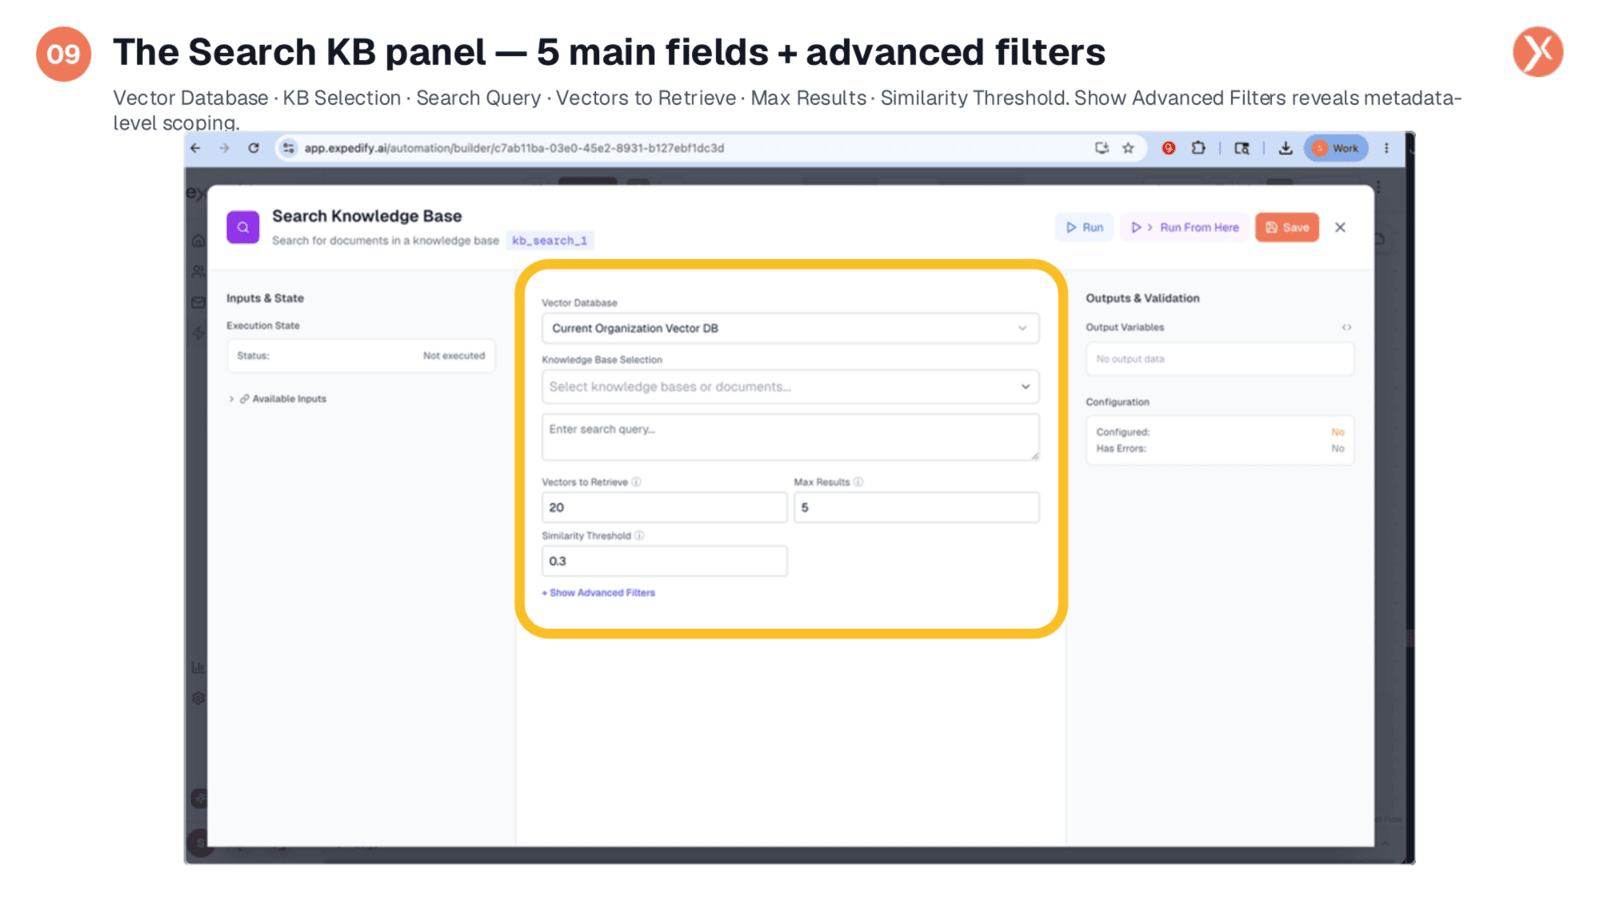
Upon opening the 'Search KB' configuration, you'll see the variable badge kb_search_1 at the top. The 'Vector Database' field will almost always be set to 'Current Organization Vector DB,' as each organization in Expedify typically has a single vector store. Below this, 'Knowledge Base Selection' is the same multi-select picker you encountered with the 'Add' node, but here it's used to specify which KBs to search. Then comes the 'Search Query' field, followed by three tuning knobs: 'Vectors to Retrieve,' 'Max Results,' and 'Similarity Threshold.' An additional 'Show Advanced Filters' link allows for metadata constraints. Let's walk through each of these settings.
The Search KB panel — 5 main fields + advanced filters
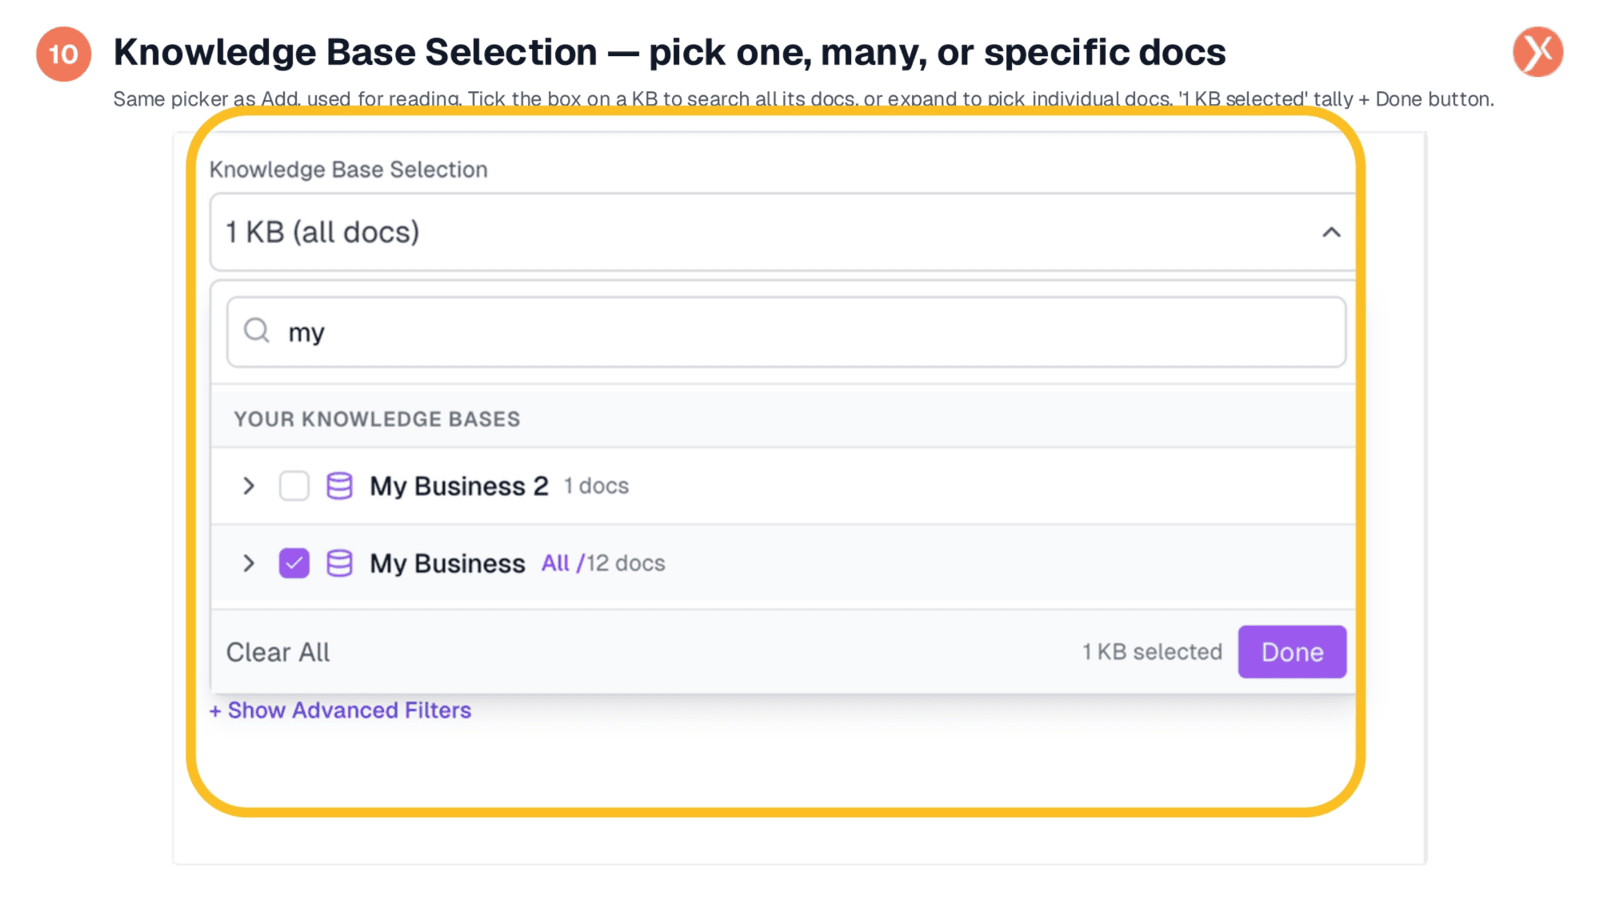
The Knowledge Base picker functions identically to the one in the 'Add' node, but here it's for selecting what to search. You can search across multiple Knowledge Bases simultaneously; for example, if you want to query both a 'Product Docs KB' and an 'FAQ KB,' simply check both and click 'Done.' You also have the option to expand a Knowledge Base and select specific documents if your search needs to be more granular. The bottom of the picker displays the number of KBs selected and a 'Done' button. A helpful tip: it's often beneficial to search across more KBs than you initially think necessary, as the similarity threshold will effectively filter out any irrelevant chunks, making breadth a low-cost strategy.
Knowledge Base Selection — pick one, many, or specific docs
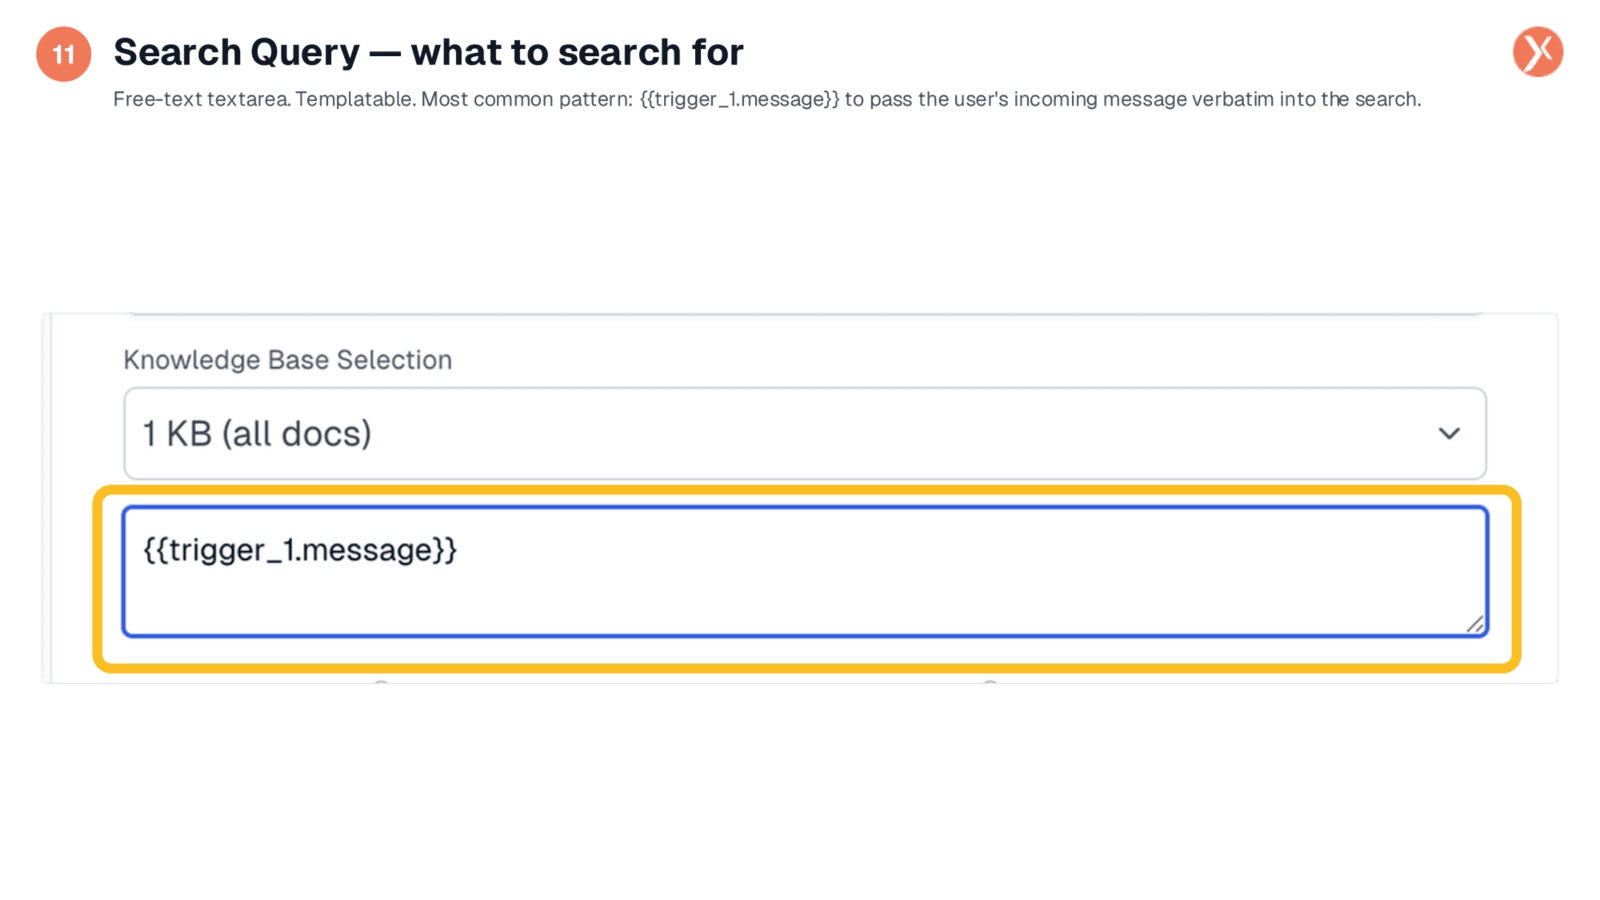
The 'Search Query' field is where you define the input that will be embedded and compared against the chunks in your Knowledge Base. While you can paste a literal string for testing purposes, in a live workflow, you'll typically wire in a variable. The most common pattern, as seen in the screenshot, is trigger_1.message. This feeds the user's incoming message directly into the search. For instance, if a user asks 'What's your refund policy?', that text becomes the search query, the Knowledge Base returns relevant chunks about refunds, and your downstream LLM then uses those chunks to formulate an accurate answer.
Search Query — what to search for
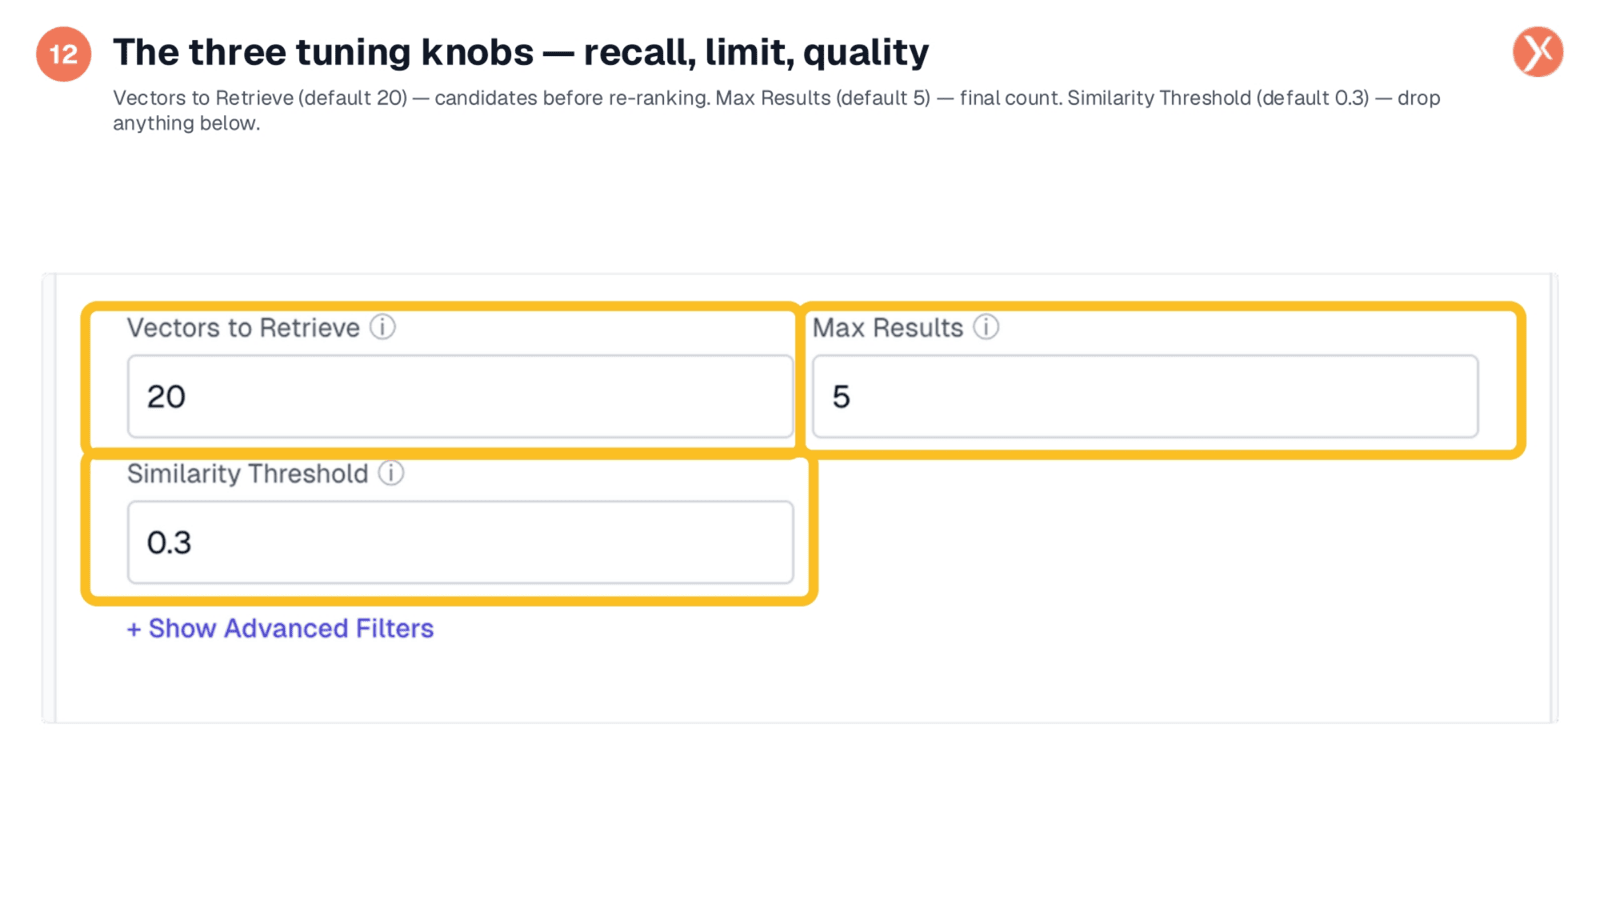
These three knobs allow you to fine-tune the search behavior. 'Vectors to Retrieve' determines the number of candidate chunks the vector database initially returns before any re-ranking occurs, with a default of 20. Increase this if you need more diversity in your candidate set. 'Max Results' sets the final number of chunks your workflow will actually receive, defaulting to 5, which is ideal for providing context to an LLM without overflowing its window. Lastly, 'Similarity Threshold' establishes a floor; any chunk scoring below this value on the similarity check will be dropped. The default of 0.3 is quite permissive; you might tighten it to 0.5 or 0.6 for highly confident matches, or loosen it to 0.2 if you're consistently getting too few results.
The three tuning knobs — recall, limit, quality
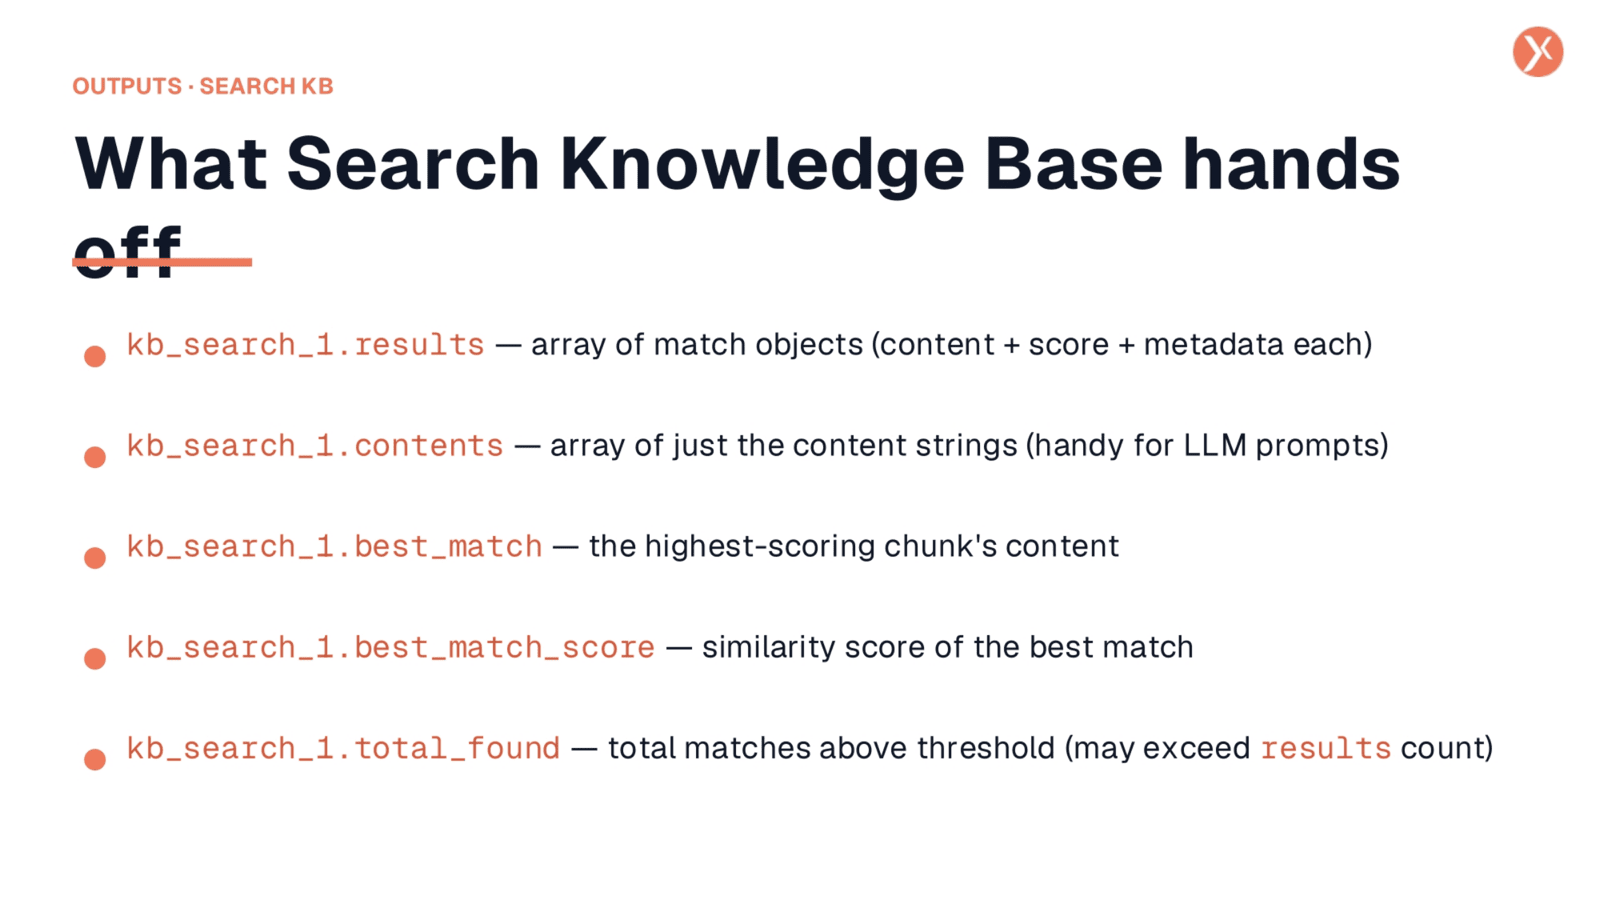
Once the 'Search KB' node completes its operation, its outputs are available for downstream nodes. kb_search_1.results provides a full, structured array, with each entry containing the chunk's content, its similarity score, and any associated metadata. kb_search_1.contents extracts just the content strings, which is perfect for direct insertion into an LLM prompt under a 'Context:' heading. kb_search_1.best_match gives you the single top result if you only need one. kb_search_1.best_match_score allows you to implement conditional logic, such as 'if the score is below 0.4, fall back to a human handoff.' Finally, kb_search_1.total_found indicates the total number of matches found above the specified threshold.
What Search Knowledge Base hands off
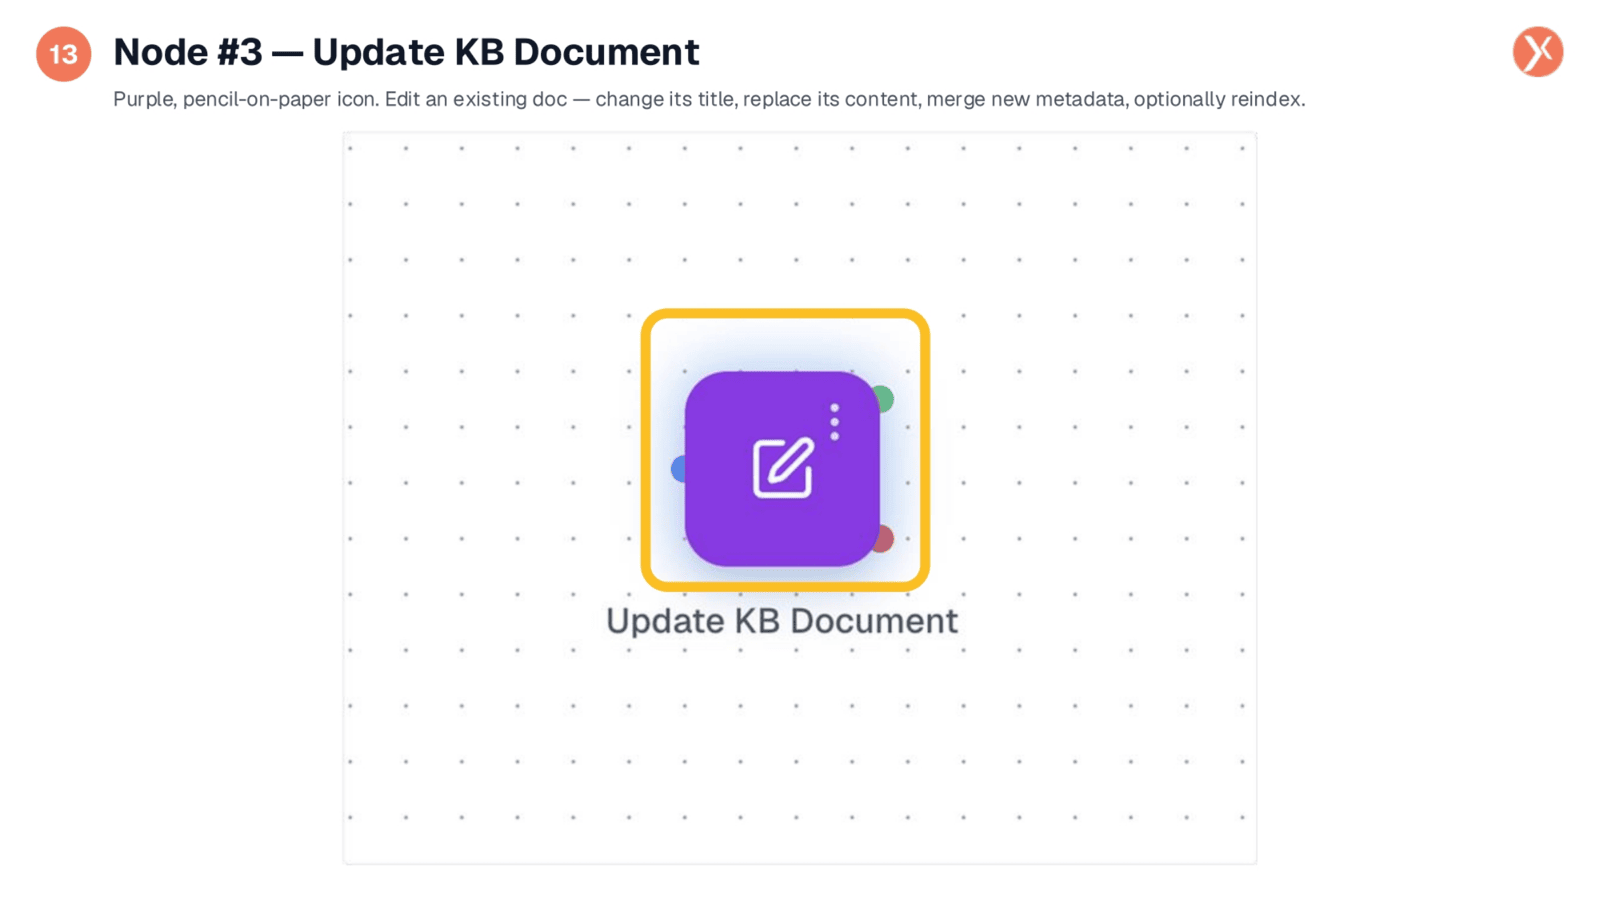
Our third node is 'Update KB Document,' represented by a purple pencil-on-paper icon. This node is designed to modify an existing document within a Knowledge Base. This could be necessary if an LLM has rewritten a policy, a web scraper has found a newer version of a page, or a simple typo needs correction. You simply point the node to the existing document and then overwrite the specific fields you wish to change. Let's take a look inside its configuration panel.
Node #3 — Update KB Document
To access the configuration for the 'Update KB Document' node, simply double-click on its icon. This action will open the configuration panel, allowing you to define the updates you wish to make to an existing document.